Halloween TBT with… Shari from Ain’t that Artsy Fartsy
I am thrilled to introduce Shari of Ain’t That Artsy Fartsy. She has agreed to host our TBT’s (Throw Back Thursdays)! If you can’t wait to see all her wonderful projects make sure to check out her blog. —Raya

Hello, my name is Shari and my Happy Place in blog-land is called,
I’ve been a crafter, in one way or another, since about 1998 after helping someone make their own, home-made, hand-stamped, wedding invitations – I was hooked and have been creating cards ever since! I don’t subscribe to any one particular style – I Love It All! As you peruse my work, you’ll find examples of Clean & Simple, Grungy, Vintage…I’m all over the place and I love to experiment with new techniques.
I am married to my hubbie Don, and we have 3 dogs and 2 cats all nestled together on 12 acres of land located on the gorgeous Pend Oreille River – a place that we call Heaven on Earth.
I hope you come back often and find your own Artsy Fartsy inspiration in the creations that I share! So, it being Halloween we thought that this would be a good place to start…..
We all know what Tim’s Tag looks like–
Perfectly patriotic for our July 4th holiday earlier this month here in the U.S.! I don’t have any of those fun images, but I do have some other seasonal Mini-Blueprints stamps, so I did a 3 month fast forward to Halloween instead🙂

We had Fall-like weather this weekend with stormy skies, thunder & lightning and sporadic downpours of rain–It was fun and put me in the mood for Halloween!
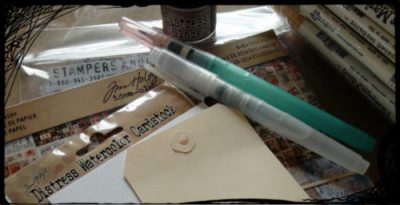
I gathered up some of my supplies to make this month’s tag.

I’m using a jumbo tag for my version that I covered with a piece of this seasonal collage paper stash.

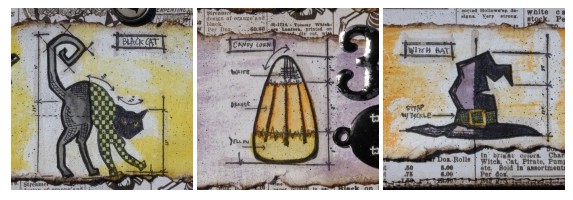
These Halloween images are in the Mini Blueprints #7 set and just like Tim, I stamped them onto Distress WC paper with Jet Black Archival. These images are a bit tall, so that’s why I’m using a jumbo tag. I did a quickie placement of the stamps onto a #8 manila tag and realized they wouldn’t all fit.

I water colored my images with Distress Markers, then rubbed the Distress Micro Glaze over the images and buffed away. I used Ripe Persimmon, Mustard Seed & Dusty Concord as my background colors.

I inked the ripped edges of the images with Walnut Stain DI and adhered onto the tag. I then snipped off any extra paper and ran through my sewing machine to add that rough stitched border. I distressed the edges with my paper distresser and inked the edges with more Walnut Stain DI and my ink blending tool.

I’m using Spiced Marmalade & Dusty Concord DMs to ink my seam binding. This is a great technique for creating a two-toned ribbon! I LOVE this technique!!

I don’t have the vial labels that Tim used on his tag, but I improvised with one of his enameled tags that I painted with Black Soot DP. Now, I also ran out of my sheet of black remnant rubs from the Apothecary set and only have the sheet of white rubs left–That’s why I painted the tag black. Otherwise, you wouldn’t be able to see the words on the white background
I spritzed Black Soot DM over the entire tag with my air art tool (like Tim’s Distress Marker Spritzer) and heat set thoroughly.

I had to get a close-up of this mirrored star. I love the matte areas where the Black Soot DP settled.

I topped my tag with my colored seam binding, which blended wonderfully when spritzed with water and heat set. I also stained some cheesecloth with Black Soot DSS and ran that through with the seam binding. I added a type charm with the letter ‘H’ for Halloween.

I’m headed over to Tim’s blog right now and get this entered, before the clock strikes midnight on the 31st! Hey–that’s still 3 days away!! I’m ‘early’ for once, not sliding in right under the wire! WHEW, that feels good!!
Thanks so much for coming by today! I have a plan to be back before the end of the week with one last July challenge project (due on the 31st), so I hope you come back for that! Gosh, I hope I can make that!!🙂
Until next time–Stay Artsy Fartsy!!
SUPPLIES I USED:
- PAPER: Jumbo Manila Tag ; Distress Watercolor Paper (Tim Holtz/Ranger); Seasonal Collage Paper Stash 8×8 (Tim Holtz/Idea-ology)
- MEDIUMS: Distress Inks, Markers, Paint, Micro Glaze, Spray Stain (Tim Holtz/Ranger); Archival Ink (Ranger)
- EMBELLISHMENTS: Mirrored Star, Type Charm, Enameled Tag & Mini Numerals (Tim Holtz/Idea-ology); Seam Binding ; Cheesecloth
- TOOLS: Craft Sheet (Ranger); Heat Tool; Sewing Machine (Kenmore); Craft Scissors; Glue Stick; Air Art Tool (Artworx)
Halloween TBT with… Shari from Ain’t that Artsy Fartsy Read More »


