Scratch-N-Stamp
Search

Checkout

Keep up with Sales, New Products and other events at Scrap `n Stamp. Sign up for our newsletter now!

What's New

Hot Deals


DT Laurie

Blooms Fill-In with Laurie!!

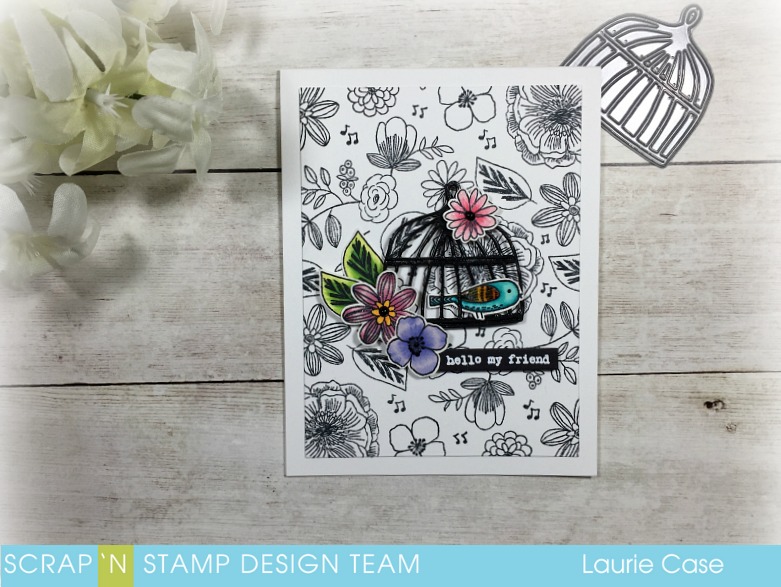
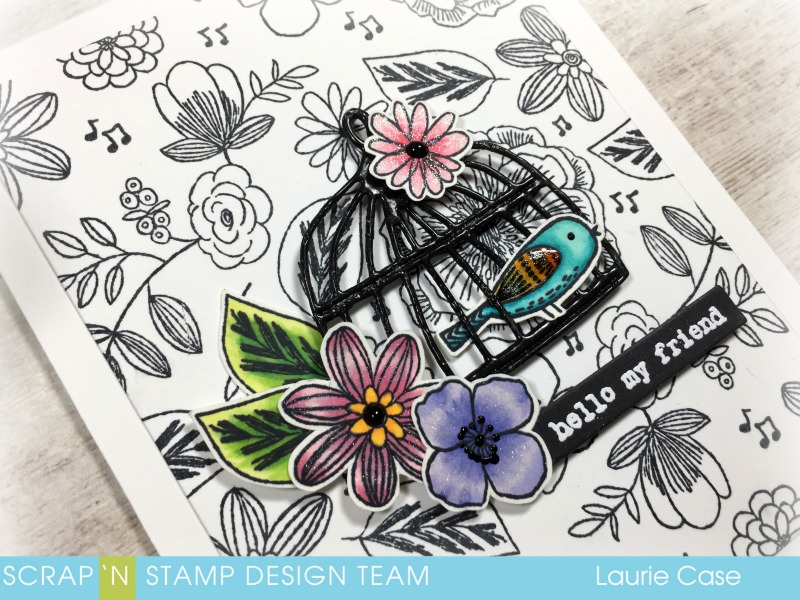
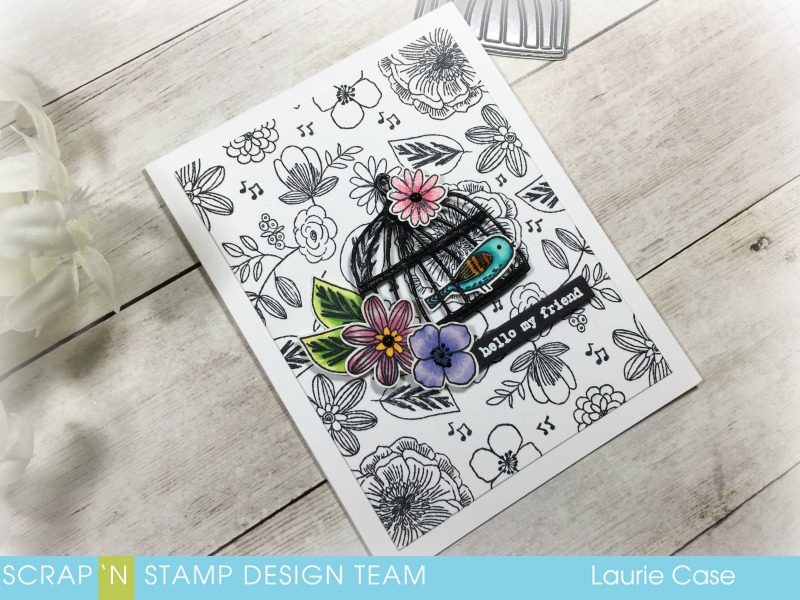
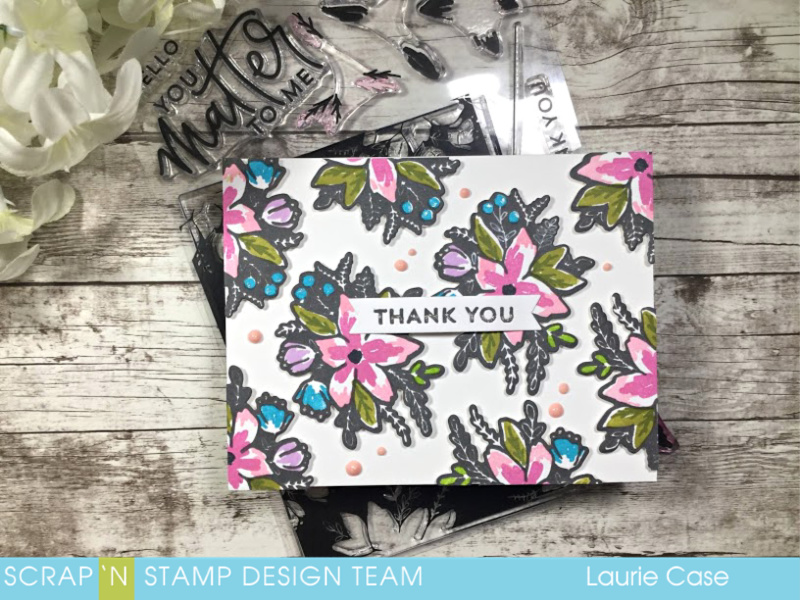
Good morning, friends and welcome back!! I’m here to share a thank you card made using the Blooms Fill-In Stamp Set along with its co-ordinating dies.  This set is new to me and all I can say is “I’m in love!!”.

This set is full of possibilities. It is, in one word, genius. And because of the style of florals, it can be used for any season!! Just change up the colours and voila, a spring, summer, fall or winter card!!

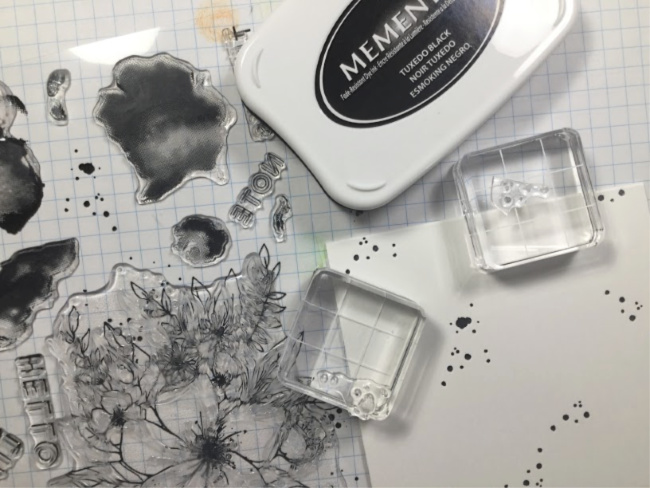
I’m not sure  what season my card would fit into as I used a dark colour to stamp the background. I used the Versafine Clair Ink in Morning Mist. Because this is a new and large stamp, I used my Misti and stamped it 3 times to get good coverage.  TIP: I think I actually put too much muscle into the stamping because I lost quite a bit of the foliage detail.

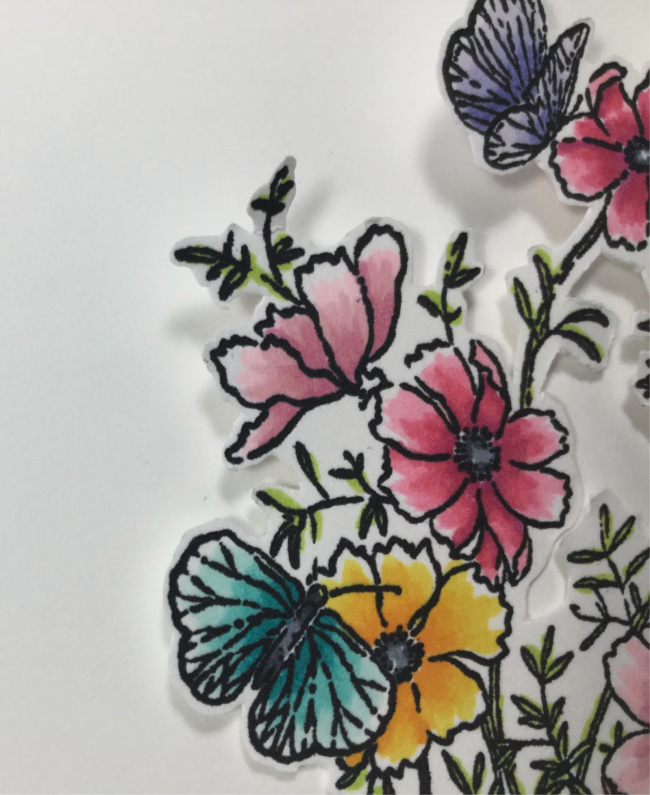
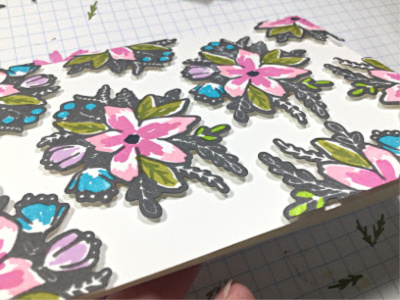
After I stamped the background, I used various inks to fill in the blooms :).  I took the coordinating die and cut each floral cluster out.

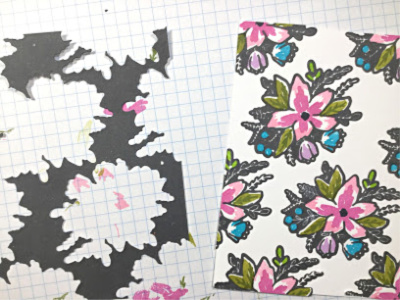
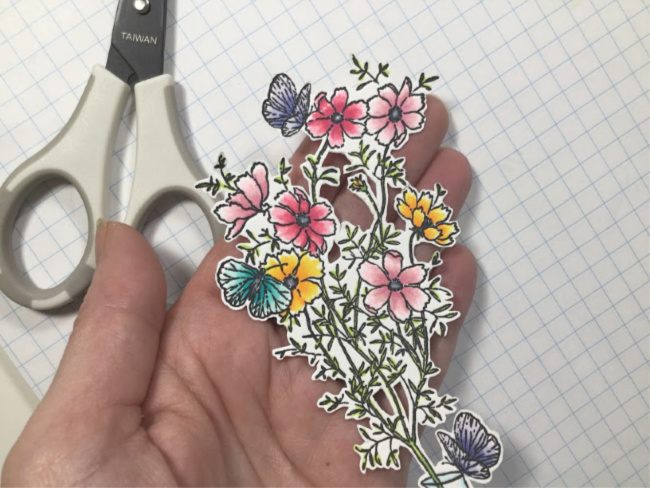
I wanted these bold clusters on a white background along with some dimension.  I placed all the images roughly in the same spots that they were on the stamp itself.  The actual stamp is slightly larger than an A2 card so they ended up being closer together. I adhered them all with foam adhesive.

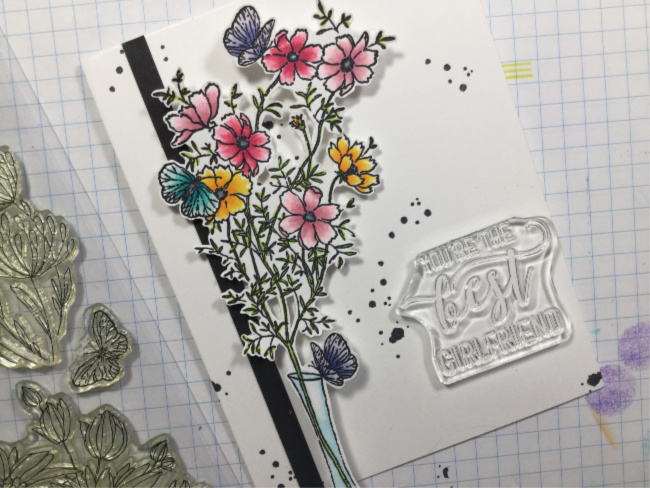
I wanted this bold background to be the star of the show so I kept the sentiment very simple.  I stamped the “thanks” onto a fishtail banner and adhered it to the centre of the card.

To give the banner some dimension, I manipulated the card stock to give it a bit of a bend.  Then used Nuvo Deluxe Adhesive on the ends. This worked great!

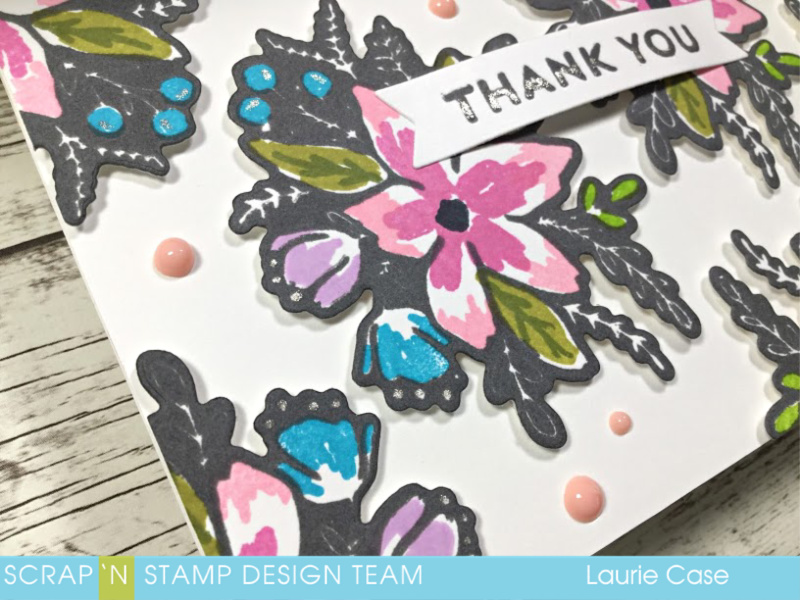
For a little bit of a finishing touch, I used Nuvo Crystal Drops in a light shade of pink. This filled in some of the white space without being overly distracting.

I LOVE how this card turned out. Just imagine all the different looks you can get by just changing the colours!!

Thank you so much for stopping by today!! I hope you found a little inspiration here today!!

Until next time…stay crafty!!

Laurie

Blooms Fill-In with Laurie!! Read More »

You’re The Best with Penny Black Stamps!

Hello and welcome back!! It’s Laurie and I’m here to share a rather clean and simple card using products from Penny Black. I also incorporate on small stamp from Concord and 9th but we’ll get to that later!

I love Penny Black products. They are so beautiful but also run the range from elegant to cutesy. Today, I used the Sunny Wishes stamp set.  This is a gorgeous set that includes 3 large, different floral images.  I had yet to use this set because I was fairly intimidated by it.  The images are VERY fine-lined.  Which, if you are anything like me, gets a little nerve wracking because chances are, you’ll colour outside the lines!! Colouring outside the lines can look amazing. I just can’t seem to let go of what I was taught in elementary school, hahaha!

Anyway, I stamped the largest image onto some white cardstock with Memento Tuxedo Black Ink. This has always been my preferred ink when I use my alcohol markers.  I coloured in the flowers and the butterflies INSIDE the lines but left a little white space on each to act as a highlight as well as to make it look “messy”. I have no idea if I achieved that look at all.

Next, came the labour of love. I decided to fussy cut this image out. Cutting around the entire thing was simple, but I decided to cut some of the inner portions away, as well.  Ugh.  It was tricky but if I made this card again, I would do it the same way because I love the look!

I wanted to create some “controlled splatter” on the front of the card base.  I love the look of black paint splatters on cards but have issues with achieving a good mix of paint…plus the mess.  I took a small stamp from the Hello Lovely stamp set from Concord and 9th and stamped it randomly onto the card front. I did do some minor stamp surgery to be able to get more mileage out of the stamp.

I did a test run on how I wanted my image and sentiment to look and decided that the card front was missing something. I added a 1/4″ strip on black cardstock to the left side and it seemed to balance everything nicely.

It was here that I decided to stamp, colour and fussy cut an extra butterfly. I also partially stamped the sentiment to read “You’re the Best”.  This comes from the Penny Black set, Choose Happy.

I adhered the floral image and butterfly with foam squares for a bit of dimension and used the Memento Ink to stamp the sentiment.


I added a bit of Clear Wink of Stella to the butterflies and some Nuvo Crystal Glaze to the flower centres and vase to finish off this card!!

Thanks for stopping by!!  I hope you found a bit of inspiration here today!!

See you soon!!

Laurie

You’re The Best with Penny Black Stamps! Read More »

Friendship Card with Flora & Fauna

Hello, crafty friends and welcome back!! Laurie here to share a card with you that uses products from Flora and Fauna.  If you like whimsical, hand drawn images, this stamp company may just be for you!  They also have their very own unique dies as well.

I used only one stamp set to make this card. I love mixing and matching sets but it just so happens that everything I could possibly need/want was on this set.

I started by stamping a bunch of the images from the Floral Aviary stamp set onto a piece of white cardstock using Memento Tuxedo Black Ink. NOTE: it took two tries with this panel. The first time I used a pigment ink to stamp. Pigment ink is slower drying which resulted in a lot of smudges.

This really reminded me of wallpaper…I love it!!  I coloured the little bird as well as a few flowers and leaves and fussy cut them. I kind of wish there were co-ordinating dies!  I cut the Bird Cage Die (also Flora&Fauna) out of black cardstock.  I really wanted to add a bit of dimension but it’s a fairy delicate die, which would have been a slight nightmare to layer.  Instead, I slathered it with Versamark Ink and applied Clear Embossing Powder. I repeated that step twice to give added dimension and shine.

I added all the coloured pieces around the birdcage using foam adhesive. And of course, this card just HAD to have a white on black sentiment strip!!  I added a bit of sparkle using a Clear Wink of Stella pen.

I think this turned out really sweet. But just think of all the colouring options you have with this ONE stamp set!! It’s full of beautiful florals!!

Thank you for stopping by today!! I hope you found a little inspiration here today!!

Until next time…

Laurie

Friendship Card with Flora & Fauna Read More »

Free Shipping Anywhere In Canada