Pattern Stamping with Lawn Fawn
Good morning and happy Friday!! Laurie here to share a few tips when stamping your own patterned background! This is a great technique for using those smaller sized images in your stamp sets as well as creating your own unique patterned paper!
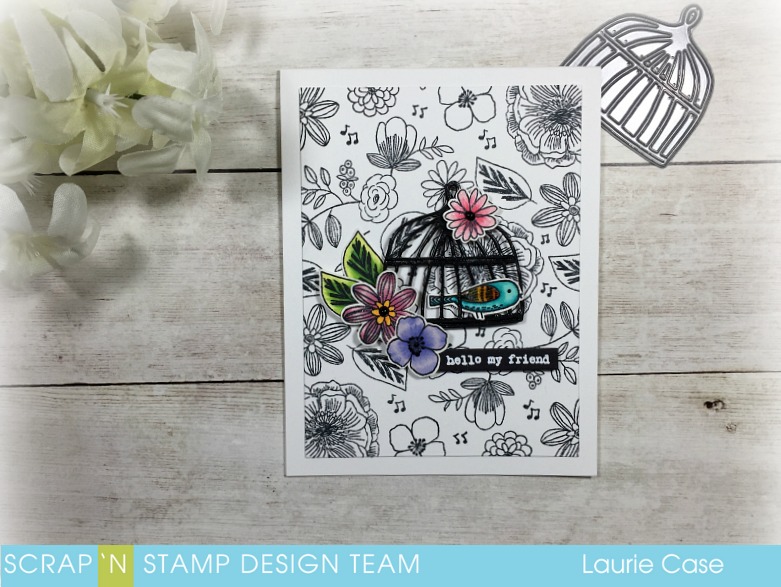
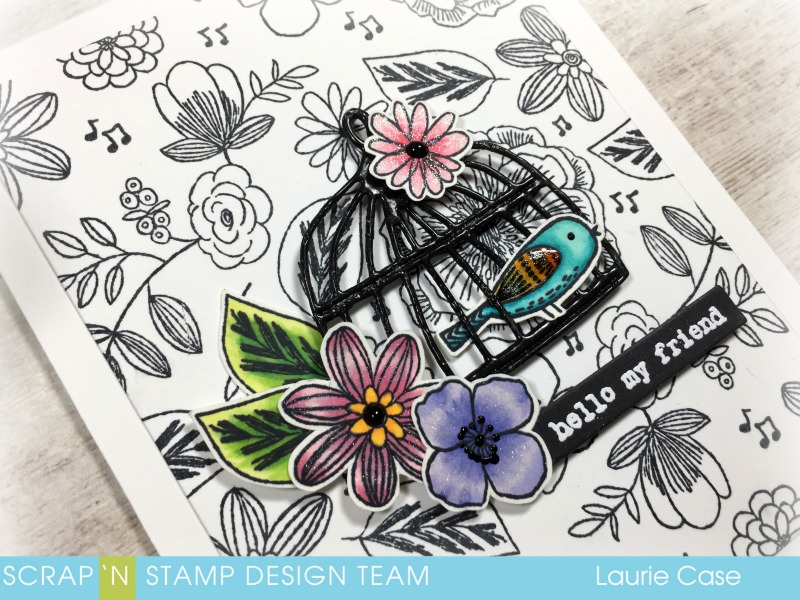
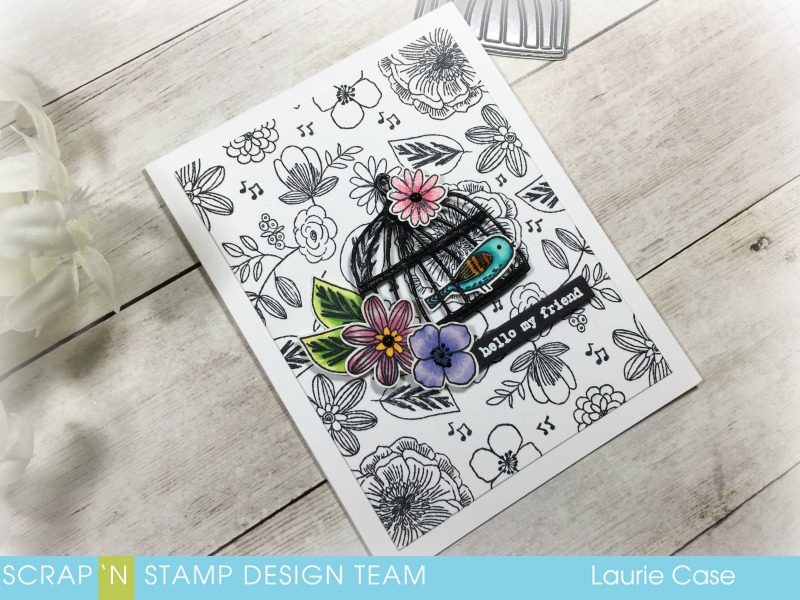
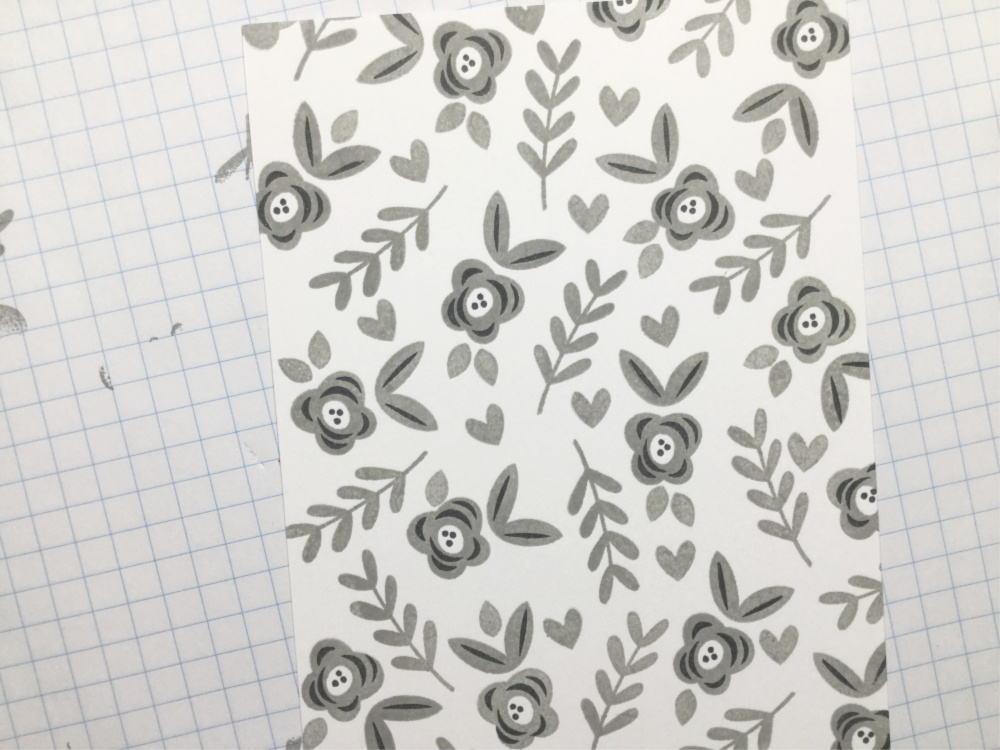
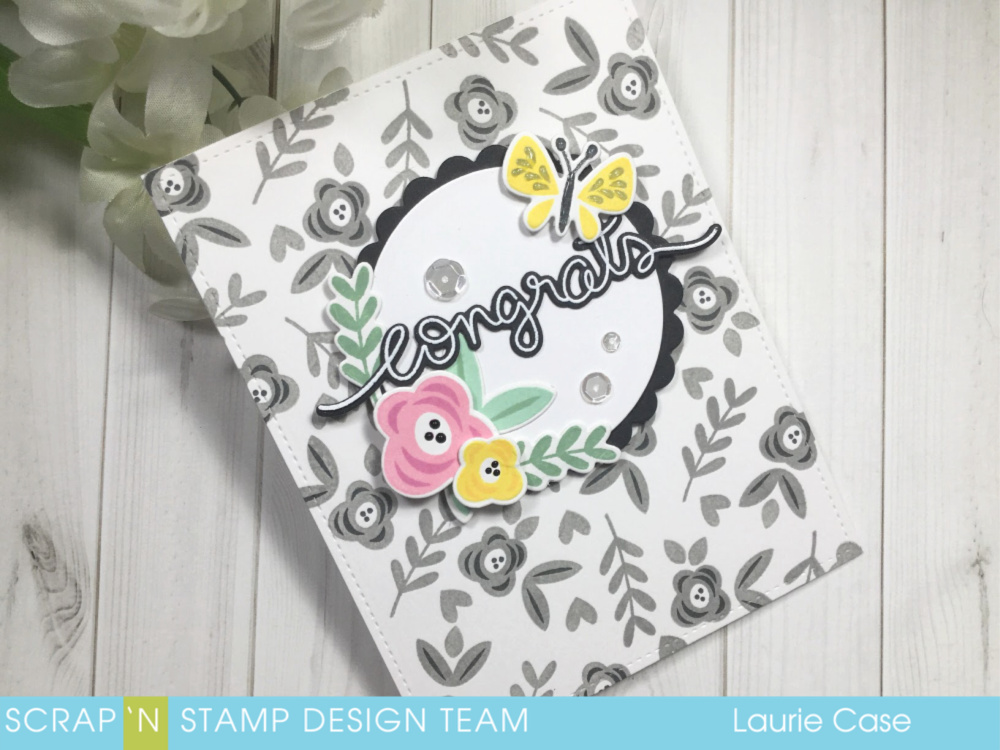
I pulled out one of my all time favourite Lawn Fawn sets, Fab Flowers. This is a super easy layering set that results in, well, fab flowers:)!! With every Lawn Fawn release, I’m always hoping they bring out another set like this one.
Before starting a background like this, it’s a good idea to do some sort of practice stamping. This way you can decide on what images you’d like to use as well as it gives you an idea for placement. I always start with the largest image or grouping of images. In this case, I used one of the smaller flower stamps along with a leaves stamp to create a cluster. I stamped the flower randomly onto the cardstock first.
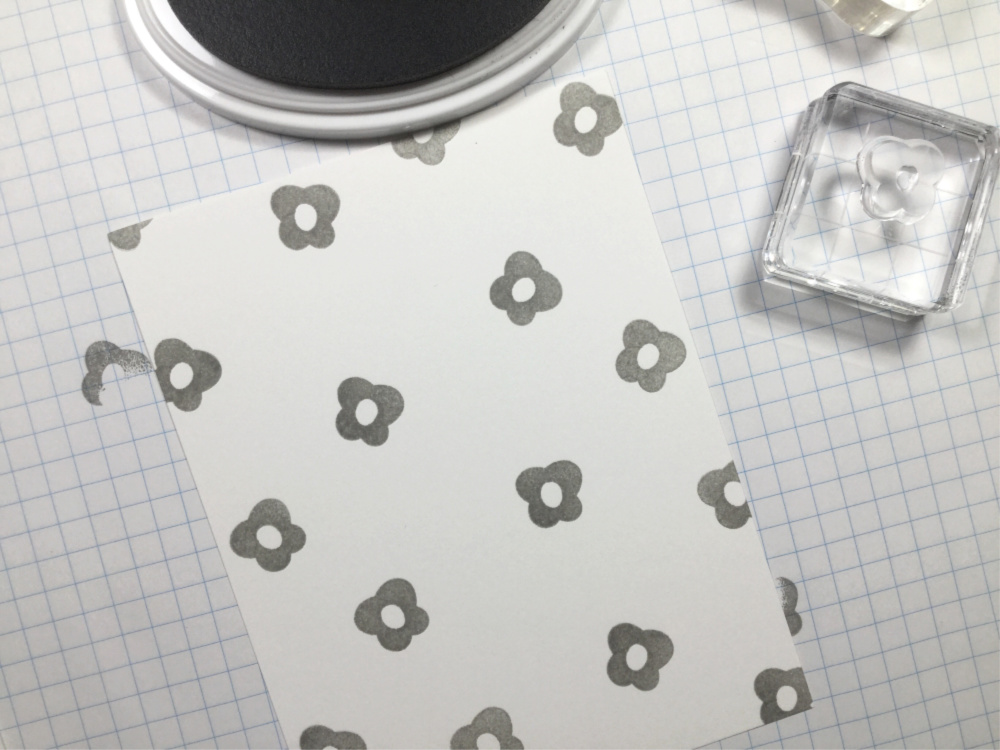
I chose a medium grey shade of ink for the first layer. I wanted the background to be monochromatic. I then stamped the leaves image to create the “cluster.
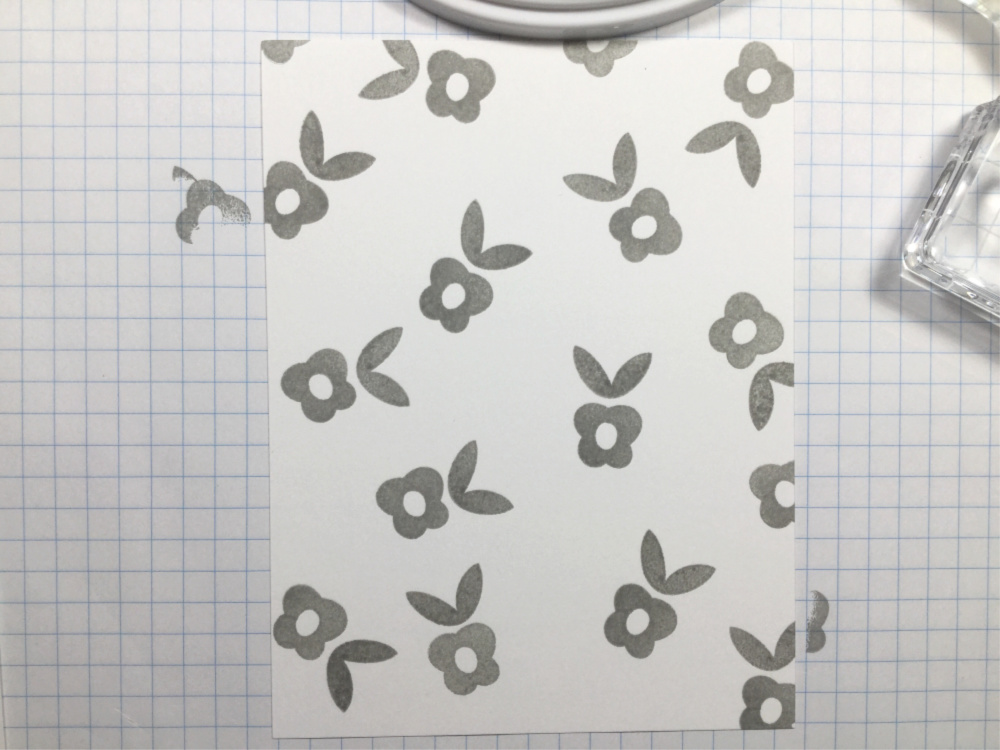
There’s lots of blank space but don’t worry! Take your next image, which should be slightly smaller, and fill in the larger gaps. I used a leafy branch image for this and used the same colour.
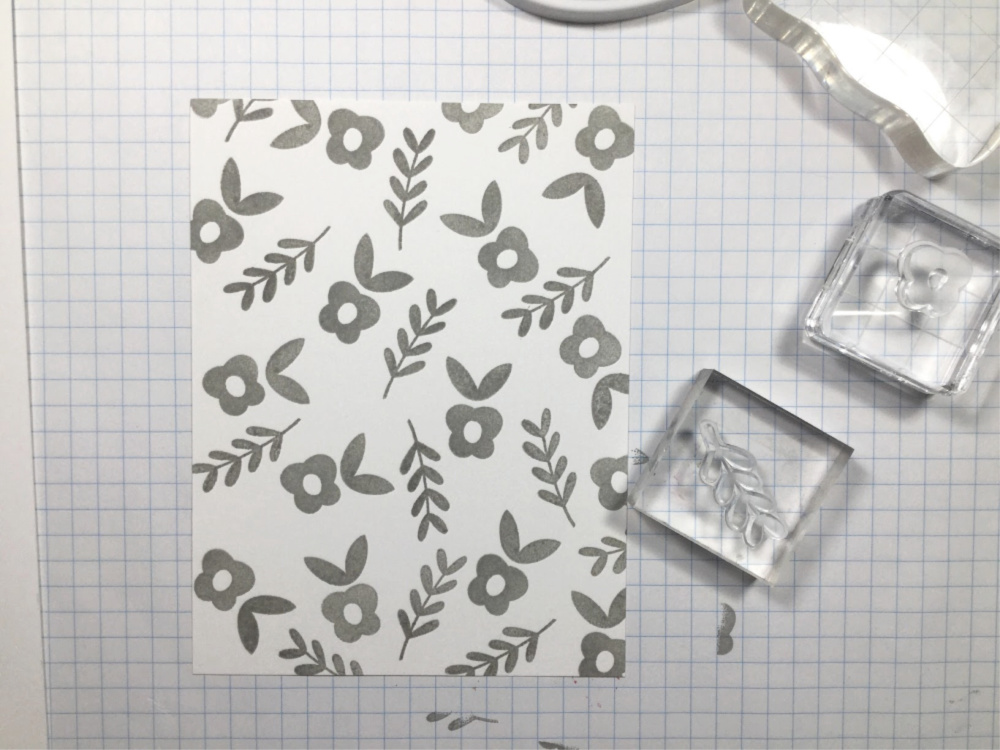
I ran into a little bit of a problem here. The rest of the stamps in this set are too big to fill in the remaining spaces. So, I dug through my stash and found a smaller leaf image from the Lawn Fawn set Hang in There and a heart image from the older Our Friendship Grows stamp set.
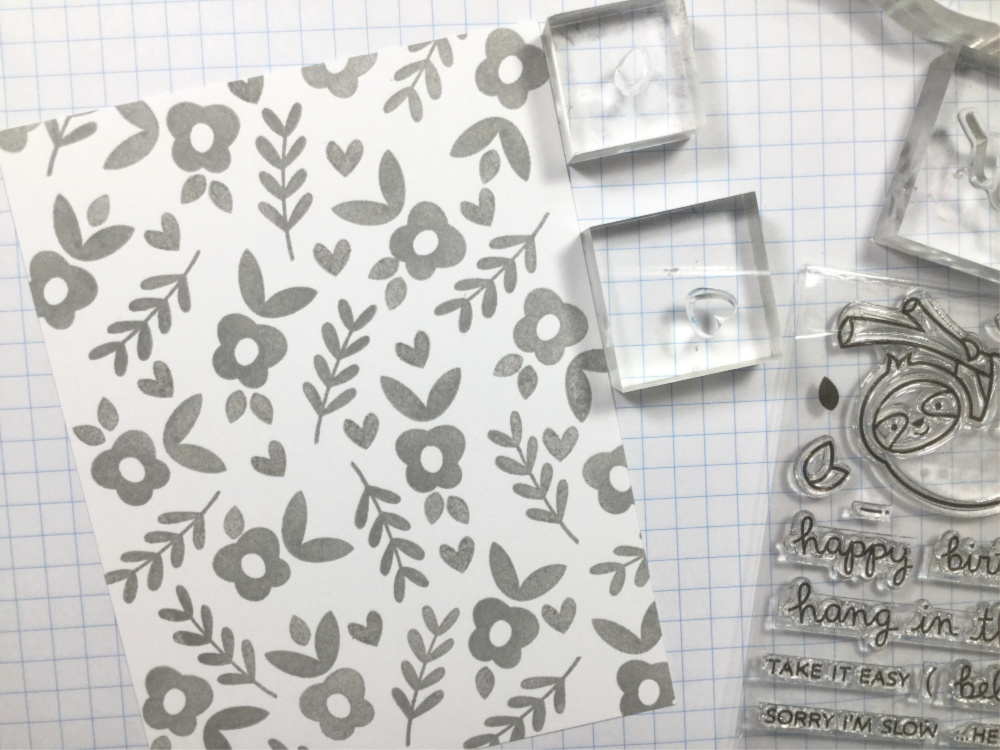
These two little stamps filled in the spaces nicely. You could carry on from here but I decided to leave it as it was. What really takes this up a notch is the second layer of the flowers and leaves. I stamped this in a darker shade of grey and it really made everything pop!!
I stamped some of the same images as well as a couple others from the Fab Flowers set in bright colours and used the co-ordinating dies to cut them out. I also die cut a white circle and a scalloped circle out of black cardstock.
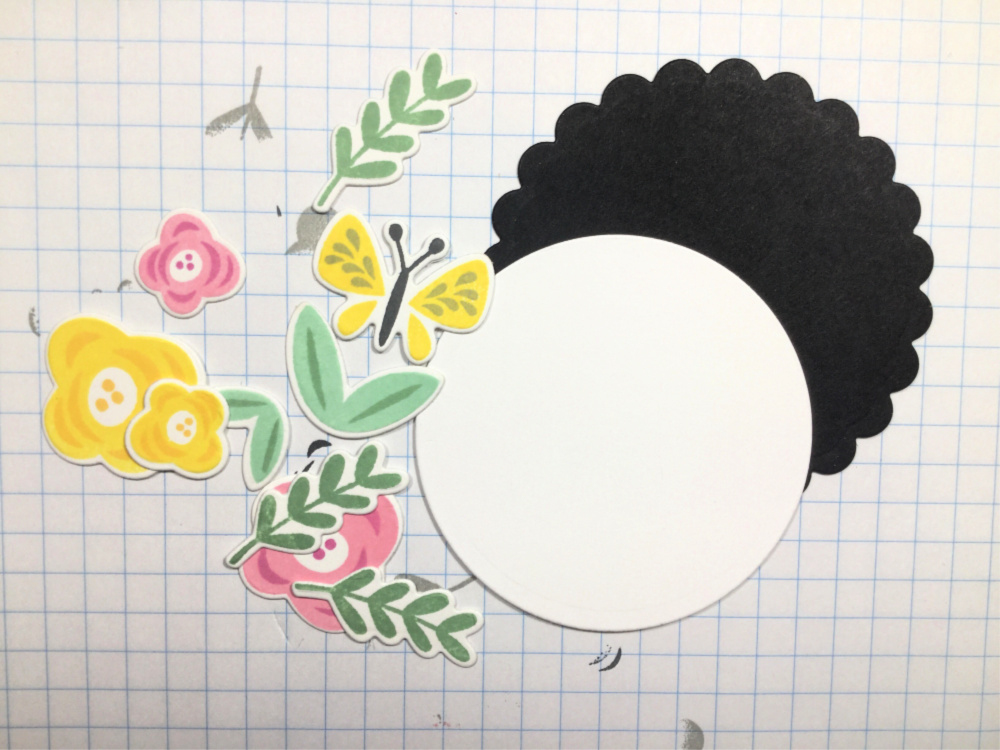
Now it was just a matter of assembling everything together and adding a sentiment. I used a combination of foam adhesive and liquid glue to adhere the flowers, leaves and butterfly to the white circle.
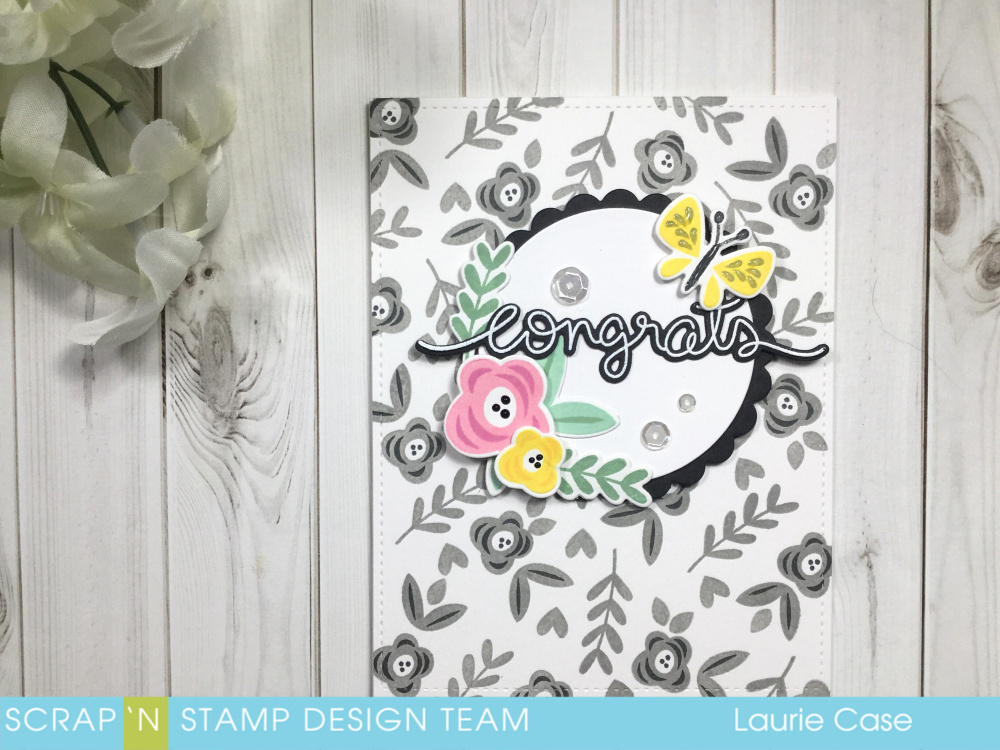
I decided to make this into a “congratulations” card. I think this would be suitable for almost any occasion! The congrats comes from the Big Scripty Words Stamp Set as well as the Big Scripty Words Die Set.
I love the way those bright colours stand out against the grey background. It’s almost like a photo filter effect!
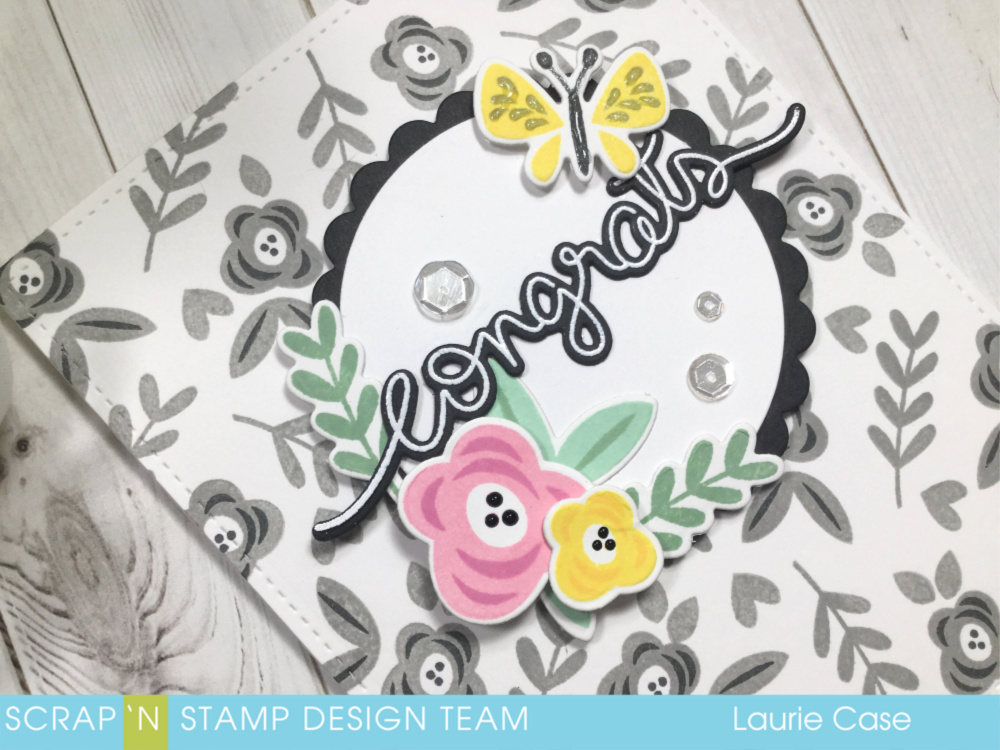
I added a bit of Clear Wink of Stella to the butterfly as well as Glossy Accents. And some Black Nuvo Drops to the centres of the flowers.
I hope you enjoyed todays project and will give this super fun technique a try!!
Until next time…have a great weekend!
Laurie
Pattern Stamping with Lawn Fawn Read More »