Scratch-N-Stamp
Search

Checkout

Keep up with Sales, New Products and other events at Scrap `n Stamp. Sign up for our newsletter now!

What's New

Hot Deals


spellbinders nestabilities

Designer Showcase: Peel Off Outline Stickers – Tulips
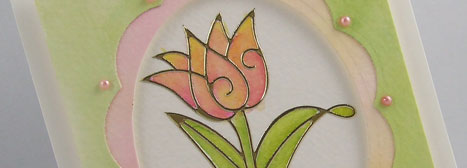
I just couldn’t stay away from the watercolors and Peel Off Outline Stickers this week. There’s something so relaxing about watercoloring – once I start I don’t want to stop.

Sometimes I like to just create whole sheets of watercolored paper in different colors that I can use later. Doing washes of color with watercolor crayons, pencils or dye inks can be a lot of fun and is a great project for those times when you are creatively challenged. I often find that my finished papers are the creative inspiration for projects later on. And that’s just what happened here.

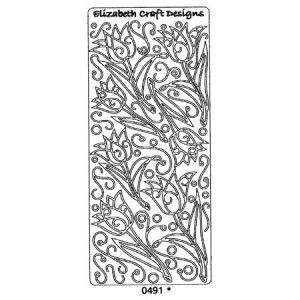
I already had a sheet of watercolor paper that I had washed in green and a sheet that was done in pink and yellow so I decided to see if there were any outline stickers that would work with them. As soon as I saw the Tulips I knew they were perfect for these papers. The sheet contains seven individual tulips in two sizes and lots of little swirls & flourishes for accents. And…if you use the background pieces from the tulips after you remove the outline you could get 14 images from this one sheet. Pretty good bang for your buck if you ask me!

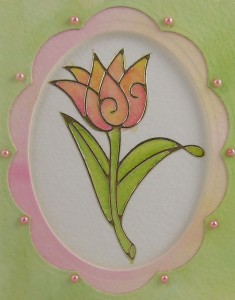
To create the tulip accent I placed one of the large tulip outline stickers on a piece of watercolor paper and then colored it with Stsedtler Watercolor Pencils applied directly to the paper and then blended with water. The pigments in these watercolor pencils are wonderful – rich and intense – so a little color applied dry goes a long way.

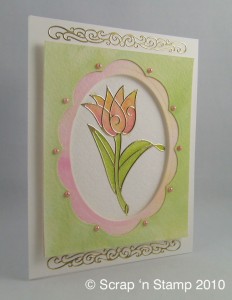
Rather than matting the tulip I decided to frame it with two layers that I cut out from the sheets I had already watercolored. From the pink/yellow piece I cut the largest oval from  Spellbinders Nestabilities Small Classic Ovals (S4-112) and then used the Nestabilities Big Scalloped Ovals – Small (S4-252) to cut the green top layer. All the layers were trimmed to 3 3/4″ x 4 1/2″ so that there was room on the card front to add the Peel Off Border Scrolls as accents. Finally, I added pearls to the scallops on the frame for that finishing touch.

One of the things I love most about this kind of project is that you don’t have to worry about having the right color of paper because you make everything yourself so it’s easy to get it all to coordinate. And, watercolor paper die cuts and embosses beautifully so it’s a natural choice for working with  Spellbinders Nestabilities. Add all that together with the convenience of using Peel Off Outline Stickers to get that embossed look and you have the perfect recipe for creating lots of gorgeous cards and paper projects.

Thanks for dropping by. I’ll be back soon with more inspiration.

© Scrap ‘n Stamp Canada 2010

Designer Showcase: Peel Off Outline Stickers – Tulips Read More »

Designer Showcase: Quick & Easy Christmas Cards Using 3D Precut Prints

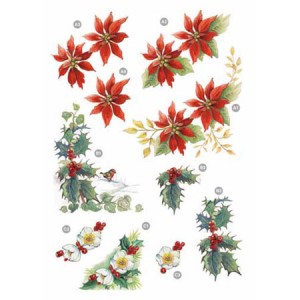
Hi everyone! Today I would like to share with you some quick and easy Christmas cards that were made using the Poinsettia, Holly & Christmas Rose 3D Die Cut sheet. These Die Cut sheets are so easy to use! All you do is pop out the pieces and layer them with foam dots to create gorgeous elements for your cards, gift tags or scrapbook pages. You can use them as they are or add a little glitter, some rhinestones or pearls for a little extra pizzaz.

This sheet will make three separate elements and each element has several layers so you add a lot of dimension to your project when you use them. It is so easy to put them together because each of the pieces is numbered so you know what order to layer them in. Absolutely foolproof!

Here are six different cards all made with this terrific precut sheet and a few extra supplies.

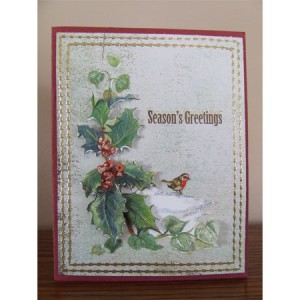
This Holly die cut works beautifully on an A2 card front. Subtle touches of glitter were added to the snow and berries just to highlight them and Decorative Lines Outline stickers were used to frame the card front. Simple & pretty.

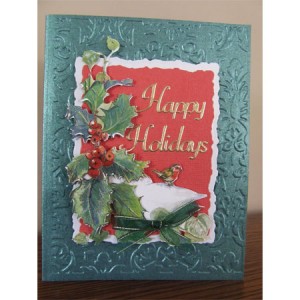
For this next card I used the same image but glammed it up a bit. First I embossed the card front with the Cuttlebug Kassie’s Brocade embossing folder and then I layered the Holly & Bird onto cardstock that had been cut out with Spellbinders Nestabilities Deckled Rectangles. A little bow and an Outline sticker sentiment and it was done.

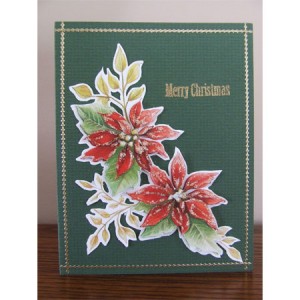
Nothing says Christmas like Poinsettias and these were so easy to use. A simple Outline sticker border and a little bit of Crystal Rainbow glitter was all that was added to this classic card.

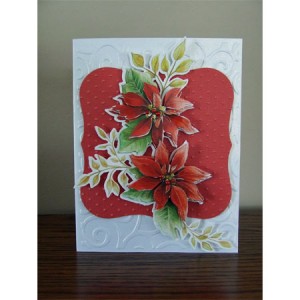
Two embossed elements give this card a completely different look. Cuttlebug D’vine Swirl was used to emboss the card front and then the red cardstock was cut out with Spellbinders Labels One and embossed with Cuttlebug  Swiss Dot. Just by changing the colors and the angle of the Poinsettia die cut we were able to get a whole new look.

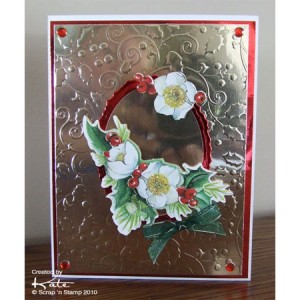
This card was originally featured in our Tuesday Tutorial showing how you can emboss using Dreamweaver Stencils and your Big Shot. The mirrored cardstock  adds an elegant touch.

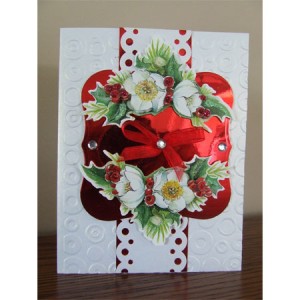
Our last card has it all! Glitter, rhinestones, mirror paper. Everything you need for that wow factor! The card front was embossed with Cuttlebug Spots & Dots and then an EK Success Slim Edger punch with a dotted design was used to create another element that mirrored the circles in the embossing. I love how easy it is to create your own paper ‘lace’ with these border punches. Spellbinders Labels One was used to cut out the large center element from red mirror cardstock and a little Crystal Rainbow glitter was added to the holly and berries for some sparkle. Instead of the little bow you could use an outline sticker sentiment in the center and get a different look.

We have lots of 3D Prints & Precuts in the store so be sure to check them out. They are so easy to work with and as you can see they are very versatile.

Thanks for dropping by today. Have a wonderful week.

© Scrap ‘n Stamp Canada

Designer Showcase: Quick & Easy Christmas Cards Using 3D Precut Prints Read More »

Free Shipping Anywhere In Canada