
Hello All… Nancy E here today to share a card I created this past week using a great stamp set from My Favorite Things as well as a couple of colours of Tim Holtz Distress Inks. As always, I have tried to keep with my Clean and Simple style although I think this one pushes the boundaries in some sense of the idea of clean and simple.
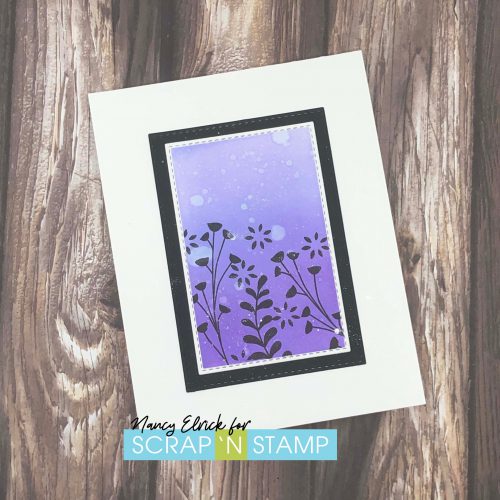
I started out this card by cutting out a piece of white cardstock using one of the dies from the MFT Stitched Rectangles die set. I then used Post It tape to mask off the edges as I wanted the stitching to be a break between my blended background and white. I then used my Tim Holtz Blending Tool and Wilted Violet and Shaded Lilac inks to create my background. I started with the lighter colour on one end, the darker colour on the other end and then slowly got them joined up in the centre. I layered up extra colour along the bottom to create a deep dark colour, trying to do a gradient of colour towards the top.
I took this coloured piece and placed it in my stamp positioner using the strips of Post It tape that I left in place to keep the piece in place. I then used VersaFine Clair ink in Nocturne to stamp up some of the images of the MFT In Bloom Stamp set. I used my stamp positioner so that I could double or triple stamp as needed to ensure I got a good deep black stamped image each time.
Before I removed the Post It Tape, I used a paint brush and water to make spatters on the piece. The Distress Ink reacts with the water to leave a distressed look. I then did the same thing with my Nuvo Glimmer Pen to add just a hint of sparkle.
To finish off the card, I cut another rectangle using the MFT Stitched Rectangles and layered my decorated piece on top of it, then centred it on the front of a white card.
I encourage you to get out your Tim Holtz Distress Inks and some solid image stamps to create your own Silhouette scene.

Really striking how those silhouette stamps stand out so beautifully against the pretty inked background.