Scratch-N-Stamp
Search

Checkout

Keep up with Sales, New Products and other events at Scrap `n Stamp. Sign up for our newsletter now!

What's New

Hot Deals


Author name: Deb Smart

You’re Totally Claw-some!

Hello there! It’s Deb here on a Saturday, posting for the Scrap ‘N Stamp blog. Today I have a fun shaker card to share with you – because you’re totally claw-some! You may have guessed that I’m using the Lawn Fawn ‘You’re Claw-some’ stamp set with the matching dies. You may have heard the good news – the new Lawn Fawn release should be in the Scrap ‘N Stamp store this coming week! Yippee!! So I thought I’d use one of my favourite ‘old’ sets to celebrate the upcoming new goodies.

YOU’RE TOTALLY CLAW-SOME!

The mix & match pieces for the sentiments in this set are fun to play with. You can create just the right sentiment for whatever the celebration. 

You're Totally Claw-some!

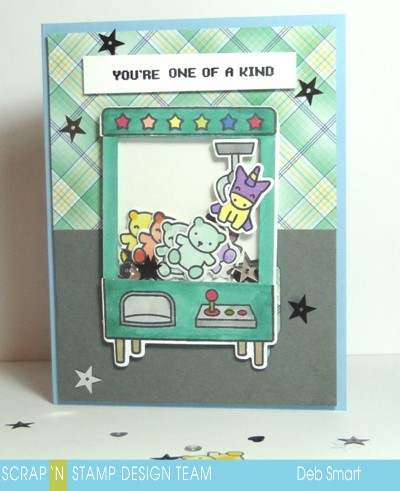
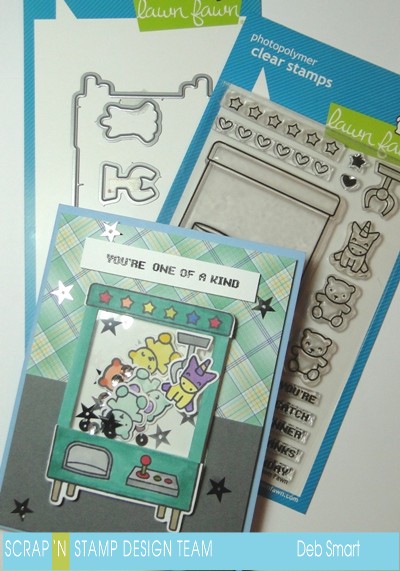
I went with the ‘You’re One of a Kind’ sentiment, and paired it with the unique unicorn being the prize won by the game! (Does anyone else automatically think of the first Toy Story movie, when they see one of these games? I always do!)

CARD DETAILS

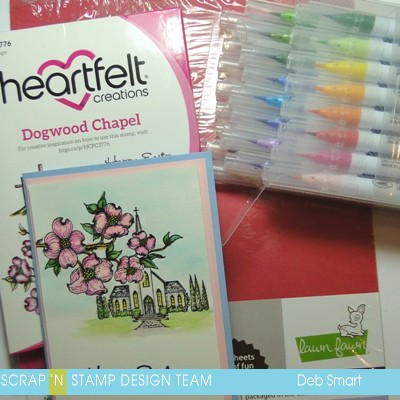
Using the matching dies makes creating this shaker card easy! I always purchase the stamp set & bundle together, because I know I’ll regret it if I don’t.  First, start by stamping the image of the game, the claw, the unicorn and at least 6-7 of the 2 kinds of bears from the You’re Claw-some stamp set. I knew I was going to colour with alcohol markers, so I used Memento Tuxedo Black ink for stamping onto white cardstock. Stamp the row of stars in the top portion of the machine.

Colour in all of the images, and then use your die cutting machine with the You’re Claw-some matching dies.  Use scissors to hand cut apart the game machine – save the bottom portion with the legs & controls, and the top portion with the stars. Next, use 2 1/2″ and 2 1/4″ square dies to create a frame for your shaker, from white cardstock. Colour the frame the same colour as you used for the machine. 

Next, you’ll want to die cut a 2 1/2″ square of white cardstock and a 2 1/2″ square of acetate, for your shaker.

BUILD YOUR SHAKER

To put together the shaker portion, apply adhesive tape to the back of the 2 1/2″ square frame that you made. Remove the tape backing, and attach the acetate. Now, apply foam tape to the edges of the acetate square. This will be the part that holds your shaker elements. Before adding the shaker elements, use your anti-static tool to de-static the edges of the foam tape. Also apply the anti-static to your die cut bears, front & back. This will reduce the likelihood of the bears from sticking to the inside edges of the shaker. 

Now you can place your die cut bears, and some extra sequins, into the shaker element  – place the bears face-down, so that they’ll be looking out from the shaker when you’re done. Now, you can remove the backing from the foam tape, and attach the 2 1/2″ white cardstock square, to close up the shaker element.

PUT YOUR CARD TOGETHER

Now that your shaker element is complete, attach the bottom and top portions of the claw game to it, with more double-sided adhesive tape. Attach the claw to the top portion of the game, and tuck the unicorn into the claw, holding it in place with more tape. 

Complete your card front by attaching a panel of patterned paper to a card base of Lawn Fawn Moonstone cardstock. Using the claw game die, die cut a panel of gray cardstock for the floor, with the bottom of the machine to fit into the floor. Attach it to the paper with Tombow liquid glue. Now you can attach your claw game to the front panel.

Stamp the sentiment onto a strip of white cardstock with Versafine Clair-Nocturne ink, and set it with Clear embossing powder & a heat tool. Attach it with foam tape across the top of the game. 

To finish off the card, I added a few of the same star sequins to the card front, that I had added to the shaker. There’s so much movement and dimension in this card – anyone would love to receive it! Trust me – you just don’t want to stop shaking it! 
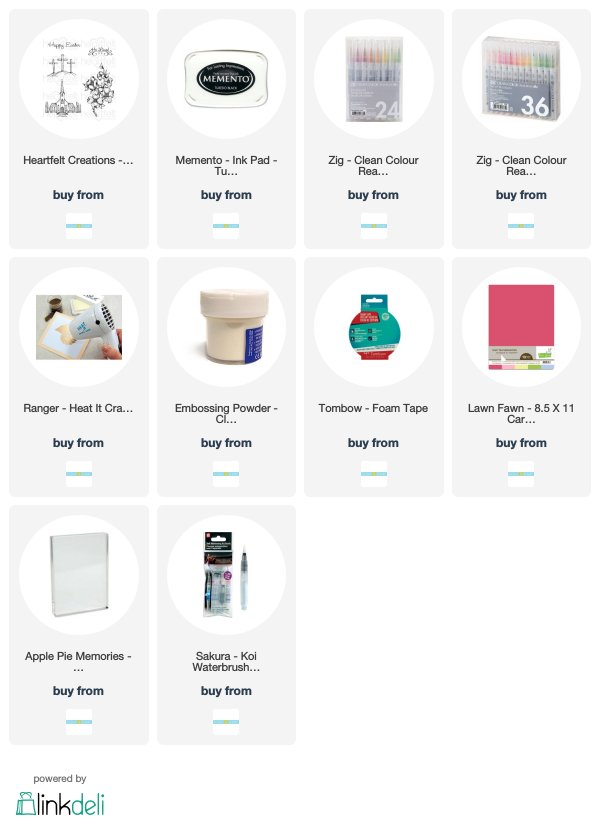
NEED SUPPLIES? 

Everything you need to create your own shaker card can be found in the Scrap ‘N Stamp online store. And it’s such fun waiting for that speedy delivery, direct to your front door! I’ve included links in the descriptions, for  your shopping convenience. *you’re welcome*!

You're Totally Claw-some!

Compensated affiliate links are provided where available, at no cost to you. Your purchase through these links provides me with a small percentage, which helps keep my blog going, and purchasing new supplies, to share with you! Thank you in advance!

You’re Totally Claw-some! Read More »

Tags:

Easter Sunday With Scrap ‘N Stamp

Hello stamping friend, and Happy Easter! However you celebrate, or even if you don’t, I hope you’re enjoying your day. It’s Deb here today with a special Easter Sunday with Scrap ‘N Stamp Design Team post. It’s my turn to share, so of course I had to include the celebration of the day. I’m using a brand new stamp set that I just ordered, called Dogwood Chapel, by Heartfelt Creations. This is also my first time using any stamps from Heartfelt Creations, and I must say, I’ve had a good first impression!

DOGWOOD CHAPEL

This stamp set is deeply etched red rubber, ready to use with your clear blocks and stamping platform. They give a nice, clear image, and the details are easily visible.

Easter Sunday With Scrap 'N Stamp

I used two of the 5 stamps from the Dogwood Chapel stamp set; the chapel and the dogwood branch. I wanted to create a scene as if the chapel is in the background, and you’re looking past a lovely flowering dogwood branch.

CARD DETAILS

I knew I wanted to watercolour these lovely images, so I stamped in Memento Tuxedo Black in onto watercolour paper. Just to be sure there would be no ink bleeding, I heat set the outline images with clear embossing powder. To get the effect of the chapel being in the background, I first stamped the dogwood branch, and then stamped it again onto a piece of masking paper. I hand cut the image from the masking paper, and placed it over the stamped image. Next, I stamped the chapel image with the mask in place, so that the chapel is placed behind the branch.

The dogwood is actually the provincial flower of British Columbia, where I live. Here, we most typically see the white flower species, but I thought that may be a bit boring, so I decided to colour the pink variety.  I used my Zig Clean Color Real Brush Markers, first applying the lightest pink over each entire flower. I wanted the colour to be kept very light, so I first scribbled with the marker onto a large clear block, and then picked up the ink with my water brush. Then, I applied the colour to the image with the water brush.

Easter Sunday With Scrap 'N Stamp

I did this for each of the colours, to keep the application light. It’s always easy to go back and add more colour – but you can’t easily take it away! The photo above shows how I scribbled onto the clear block; you can also use any slick surface, like a piece of acetate, or a water mat, if you have one.

CLOSE UP OF COLOURS

This photo is a close up, so you can see the colours and shading. For the petals/bracts, I used 2 different shades of pink, and added bright green and yellow to the middle. The leaves, as well as the bushes & trees near the chapel are in a multitude of greens – I was even mixing the greens on the block, before colouring! It’s such fun to do – creating your own blend. The chapel was shaded in a light gray, and yellow added to the windows, to give the illusion of it being lit from inside.

close up of colours

The path is coloured in a light brown, and then I added a wash of greens for the grass. To ensure a light blue sky, first wet the paper with your water brush, and then add lots of water to  your brush when picking up the ink from your block. Finally, stamp the sentiment from the Dogwood Chapel stamp set in Memento Tuxedo Black ink, and again heat set it with clear embossing powder.

LAYER PANELS FOR YOUR FINAL CARD

Once you’ve finished watercolouring your image and allowed it to dry, attach it to a panel of light pink cardstock, with foam tape.

layering panels

Next, attach those panels to a light blue card base, again with foam tape. I was tempted to add some ribbon or embellishments to the card front, but I liked the simplicity of the image, and so left it plain.

GIVE WATERCOLOURING & HEARTFELT CREATIONS A TRY!

Don’t let the thought of watercolouring put you off! You do not have to be a top level artist; starting with colouring in a stamped image is a perfect way to build up your confidence. And using markers or pencils is also a great way to start, if the thought of buying actual paints puts you in a panic! You’ll find links below to the products I used to create this card – all available in a one-stop-shop at Scrap ‘N Stamp. I hope that this Easter Sunday with me of the Scrap ‘N Stamp Design Team has inspired you to get creative, no matter what medium you choose to use!

Easter Sunday With Scrap 'N Stamp

Compensated affiliate links are provided where available, at no cost to you. Your purchase through these links provides me with a small percentage, which helps keep my blog going, and purchasing new supplies, to share with you! Thank you in advance!


Easter Sunday With Scrap ‘N Stamp Read More »

Try Adding Foiling Fun Without Extra Tools!

TRY ADDING FOILING FUN WITHOUT EXTRA TOOLS!

Hello crafting friend! It’s Deb here today, with something new for you to try. Have you been wanting to add foiling to your projects, but you’re not sure about committing to a foiling tool? Well, I  have a great way for you to try adding foiling fun without extra tools! I ordered some of the fun Ranger Shiny Transfer Foil sheets from the Scrap ‘N Stamp online store. All  you need to use them is your cardstock base, some adhesives and a bit of elbow grease.

APPLYING THE FOIL – TAPE METHOD

When I say that these Shiny Transfer Foil Sheets are easy to use, I’m not kidding! First, cut your panel of cardstock. Any colour you want to work with! I started with a white panel, but in the end changed to black. Next, add your adhesive. I used two different widths of Be Creative (Sookwang) Tape; the 1/8″ and 1/4″. I lay them in alternating strips across the panel. Remove the backing from the adhesive strips one at a time, and lay the foil over top of the tape. Rub firmly with your fingers, or use your bone folder, to press the foil onto the tape. Gently peel the foil sheet off of the adhesive; pull slowly in one direction. As you’re pulling off the foil sheet, look at your panel to make sure that the foil has transferred. If you notice that it hasn’t, simply lay the foil back down on top of the tap, and rub more firmly.  If you accidentally lift off the tape and find that an area is without foil, simply lay the foil back down on the tape, and repeat the process – u

sing a piece of the foil that hasn’t already been transferred. The photo below shows how the foil looks once transferred onto the cardstock, and the blank space left on the foil sheet, where the colour once was! I chose the ‘Celebrate’ package of foils to use, as it has a variety of patterned colours.

Try Adding Foiling Fun Without Extra Tools!

CREATE YOUR CARD

When I finished the foiling on the white panel, I like it, but it wasn’t quite the ‘wow’ that I had in mind. So, I repeated the whole process, this time on a black cardstock panel! Don’t worry – I saved the white one to use in another project.  Since this was my 2nd panel, I thought I’d try & be more quick about it – and I lay the entire foil sheet (you get 2 of each colour/pattern per package) onto the taped panel. Well, it did work out, but I can’t say it was much quicker! Because I had my tape beginning and ending in different directions, I had to take more time to burnish the foil onto the tape, as I was peeling off the foil backing. I also had to go back in more places & add the foil onto places where it didn’t stick. So – the lesson in this is – don’t rush! Just have fun and enjoy the process!

Try Adding Foiling Fun Without Extra Tools!

To create the sentiment piece, I stamped the sentiment from the Dylusions Laugh Til You Leak stamp set in Versamark ink and heat set it with gold embossing powder.  Cut banner tails at the bottom, and add it on top of your foiled panel with foam squares. Next, I layered the panel onto a panel of bright yellow cardstock, and then onto a light orange card base. These were from my stash, and unfortunately I don’t remember the names of the colours! I think they were from the Lawn Fawn Rainbow pack of cardstock. Pop them up with foam tape, for extra dimension. To finish off my card, I used some embellishments from my personal stash (we all  have one of these, right? goodies we’ve had for ages, and don’t remember from where we got them?).

GET FOILING NOW!

I hope that you’ve enjoyed this project, which shows you how easy it is to use the Ranger Shiny Transfer Foil Sheets. Be sure to check out the store – there are lots of different colours available! If you’d like to see another technique using these foil sheets and Ranger Sticky Embossing Powder, you can head over to my blog to see it!

Try Adding Foiling Fun Without Extra Tools!

Try Adding Foiling Fun Without Extra Tools! Read More »

Free Shipping Anywhere In Canada