Scratch-N-Stamp
Search

Checkout

Keep up with Sales, New Products and other events at Scrap `n Stamp. Sign up for our newsletter now!

What's New

Hot Deals


Lawn Fawn

A Lawn Fawn Halloween

A Lawn Fawn Hallowe’en

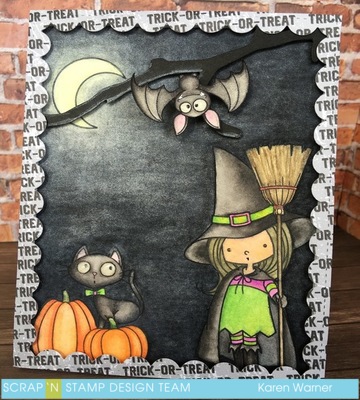
Hallowe’en is right around the corner.  Lawn Fawn’s most recent   release  embraces the upcoming  festive occasion  with   die sets  called “Add-Ons”.

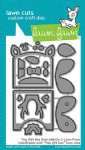
Add-On’s are designed by adding new pieces  or themes to encourage different  or novel uses of existing dies.

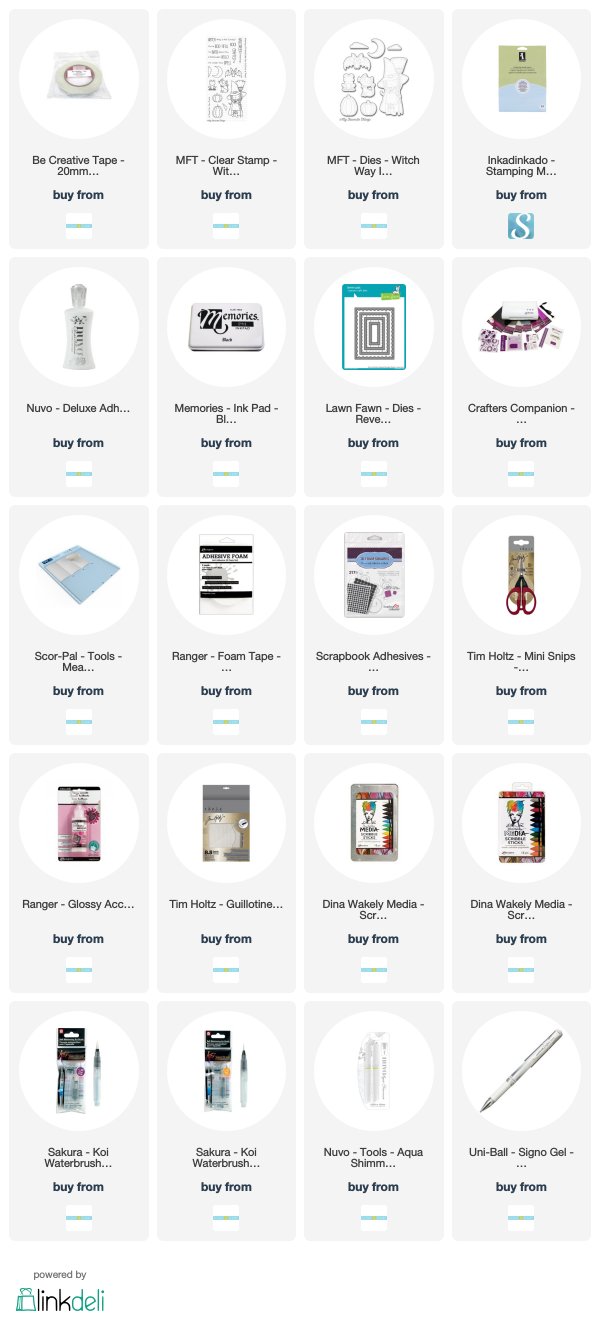
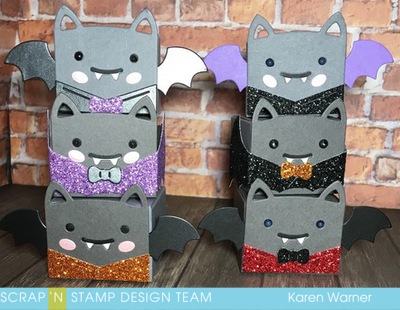
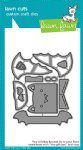
This project uses Lawn Fawn Tiny Gift Box with  the newly released Tiny Gift Box Bat Add-On and Tiny Gift Box Deer Add-On. Although only  a bow tie die was used from the latter Lawn Fawn Add-On Set. Both were used with the existing Tiny Gift Box Die Set.

Bazzill Premium Card Stock in two grey   shades,  black ,white,  pink,  and a  purple texturized  sheet  were  used in this project . Tonic  Glitter card  in red, purple , and black and  scrap of orange  from my stash added to the required colours and textures to complete six tiny bat boxes. 

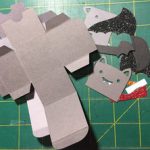
Lawn Fawn Tiny Gift Box scores as well as cuts. The score marks were burnished well.   Be Creative Tape was applied to the back side of four flaps. The flaps are located on either side of the long centre piece ( box body).

The flaps are adhered to  the inside of the notched rectangle sandwiched between   the two forward flaps. The sides of the rectangle sandwiched between  the final two flaps are brought forward , adhering  the flaps to  the inside of each side of the rectangle.  The box is now assembled.

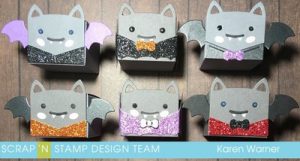
Working on the bat from the back to front applying the eye, mouth and teeth coverings on to the back. The black piece first and then the white to the bottom of the black piece paying attention to the notches.. Flip the bat over and add, the checks, tuxedo and wings as desired. The finished bat is now attached to the box front with Be Creative Tape. Ranger Glossy Accents was added to the eyes of three Bats.

This project is now complete. Until next time – xo – Karen


A Lawn Fawn Halloween Read More »

Witch Way is the Candy ?

Witch Way is the Candy ?

Hello Everyone. My new project for  ScrapnStamp.ca/ blog  is a Hallowe’en Card.  My Favorite Things Witch Way is the Candy ?  Stamp Set and co-ordinating dies  are the stars of todays entry.

Witch Way is the Candy  ? Stamp Set and co-ordinating dies are an  older set   that’s been released  last year after a hiatus.  It is a set that should be in everyone’s stash.

Ink to Paper:

Memories Black Dye Ink Pad was used to  stamp the two pumpkins onto masking paper and  then all stamps required  in the desired placement onto watercolour paper  to build a scene using  MISTI to ensure a crisp image.

Masking works by stamping the images to be placed in the forefront first and working back from there. This meant the smallest pumpkin stamp had to be stamped first in the bottom left to centre  on the  watercolour panel.

After both pumpkins were stamped and masks placed onto both, the cat was stamped to look as though it was sitting on the smaller pumpkin.  The masks were removed. The crescent  moon was stamped next, the witch   fit nicely in the right bottom edge ,  with the bat stamped out of the scene.

Watercolour with Scribble Sticks:

Dina Wakley’s Scribble sticks set 1 and set 2 were used to  watercolour  this card. Elephant, Sedona, Blushing, Cheddar, Evergreen, Marine, Olive, white, black, Umber, Lime, Tangerine, Magenta and  Night Scribble Sticks were used. Daniel Smith Watercolor Stick ( Cadmium Yellow Pale for the moon, Sodalite Genuine and Lunar Black  was added to darken the sides and bottom.

Die Cuts Using Gemini:

Hallowe’en themed pattern paper  – from my stash –  was cut to 4-1/4 x 5-1/2 ” ( 10.8 x 14 cm). Lawn Fawn’s Reverse Stitched Scalloped Rectangle Windows largest die was used to cut a window from the panel. The bat was cut and trimmed.  A tree branch die – from my stash- was cut with  black card stock.

Card Assembly:

Black  3 D Foam Squares were cut into four pieces  and placed onto the back of the tree branch. The branch was placed over the watercolour card  front panel ( from the top right hand corner to just above the bottom of the moon).   The bat was adhered to the branch was  an acetate braided dimensional strip and attached on both ends – to the bat and the branch – with micro glue dots. The Hallowe’en themed window was popped up with Ranger Foam Strips and  placed over the front card panel. The branch was trimmed  from the back of the panel.

A top fold portrait card  base was cut  11-1/2 x 4-1/4 ” (29.1 x 10.8 cm) and   scored at 5-1/2 ” (14 cm). Be Creative  was  applied to the card front.  Black Fun Foam was cut to 4-1/4 x 5-1/2 ” ( 10.8 x 14 cm) and placed over the card front.  Be Creative Tape was applied to the top of the  fun foam.  Finally to complete  the card front, Be Creative Tape was applied in the opposite direction onto the back of the watercolour panel. The release backing was removed from the watercolour paper panel and placed onto the fun foam, burnishing the panel as requires.

Finishing the Card:

White Card Stock  was  trimmed to 4-1/8 x 5-3/8 ” (10.5 x 13.2 cm). A  4-1/8 x 1/2″ ( 10.5 x 1.9 cm)  strip of Hallowe’en pattern paper from the front was  attached to the bottom of the inside card panel.Memories Black Dye Ink Pad  and a sentiment stamp”Hallowe’en Greetings”  from  Witch Way is the Candy ? Stamp Set was  centred vertically but not horizontally. Three small bats – from my stash- were stamped above the sentiment. Nuvo Deluxe Adhesive adhered the card inside panel to the inside card base. Glossy Accents were added to the cat and bats eyes. Nuvo Aqua Shimmer Glitter Gloss to the bats wings and a white Uni-Ball Signo Gel Pen to the bats teeth.

Witch Way is the Candy Hallowe’en  card is now complete. Until next time. xo Karen

Witch Way is the Candy ? Read More »

Nancy’s Got the Scoop

I am back with this fun card for Scrap’N Stamp. I couldn’t be happier but  I have to be honest my mojo had taken a hit big time.

So I apologize for not having the usual step by step instructions and or photos,

I was so focused on getting my idea out that I totally blanked on taking pictures along the way.

I hope you find inspiration with this card.

I used numerous Lawn fawn products for this card all of which can be found at Scrap’n Stamp and are linked below.

I had the Here’s the scoop stamp set in my stash for some time  and had not used it ever, so when I purchased the add on to the reveal wheel I knew I wanted to use it together to create a fun card, then I thought how cool would it be to do a double interactive card, not only the outside being playful but the inside too.

So to start off the card I pulled out my Tim Holtz water color paper and my versa fine black onyx ink and started stamping out the images.  I used my misti as the paper is textured and I wanted to make sure I got a good impression.  I decided stamp out two panels, one of which I could practice on.

Once I had everything stamped I decided to do all my die cutting for the card, from the reveal wheel to the pivot pop up, this way I wasn’t going back and forth from my desk to my die cutting machine.  I die cut all the reveal wheel portions from the water color paper, as well as the ice cream cones. Once that was done I die cut the pivot pop up from the same color of card stock that I would end up using for the card base, which was Robins blue from bazzill.

The card base it self is a standard top folding A2  4¼ x 5½

I used numerous different types of water colors from my stash to paint in the main panel of the card.  I just kept it very loose and fun not worrying about shading or anything like that. For the wheel and for the ice cream cone images I used my Ken Oliver color burst to add some quick and vibrant color. I loved how it turned out and how vibrant they are.

I popped up the reveal wheel on to some Yellow paper to make everything pop. I adhered everything together with strong adhesive to make sure everything held because this card has a LOT of dimension. ( so much so I had a hard time getting good pictures-especially for the inside)

To finish off the card I stamped out the Here’s the scoop sentiment on to a tiny die cut banner, and for the inside I found a sentiment from a old sticker collection I had in my stash, it just worked so well.

Thank you for stopping and I do hope you found some inspiration from this card.

All products are linked on my blog and stay tuned as I will be doing a giveaway shortly to thank everyone for their patience.

Have a wonderful Weekend.

Nancy’s Got the Scoop Read More »

Tags:
Free Shipping Anywhere In Canada