
Getting Messy with Mixed Media ( Art Journalling)
Hello and Happy Monday,
I am back already with a new blog post forScrap’n Stamp Canada, but its not a card.. Whaaat…
That’s right I am sharing something different today, I am sharing my new found love of Art journalling and getting really messy.
I hope you enjoy.

So I happened to take a class a few weeks ago with the one and onlyDina Wakley. She is amazing, funny, passionate and has the best way of encouraging you to just GO FOR IT.
Since that Class I have been hooked on all things art journaling and mixed media. I mean I always loved and love playing with different mediums but this just sent me on down a big never ending rabbit whole of fun.
I have to admit I have been binge watching all the youtube videos I can on art journaling and mixed media techniques I can find.
I don’t know about you but as a card maker it has been a bit of a challenge to get out of my head and just “DO” and “Create” I sometimes find myself with that great old condition of paralysis by analysis, always needing a plan. But with art journaling its just about slapping something on the page and going from there.
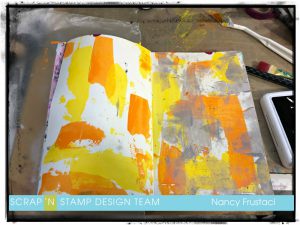
So here it is me just slapping some paint on to the page and having some fun. I started in my Dylsuions and added Gesso to the pages . Once that was dry I pulled out some random colours I felt drawn to. I added tangerine, elephant gray and Lemon Yellow, to the page with a pallet knife, just randomly going to town. eek here you can see what one of the pages looks like a “hot mess” but that’s me trying to control the out come lol. So I let it be, and I have to be honest I came back and forth to this page over a few days to get it to where I really liked it.
I did go back and for with more paint added layers as they dried, even added more gesso.
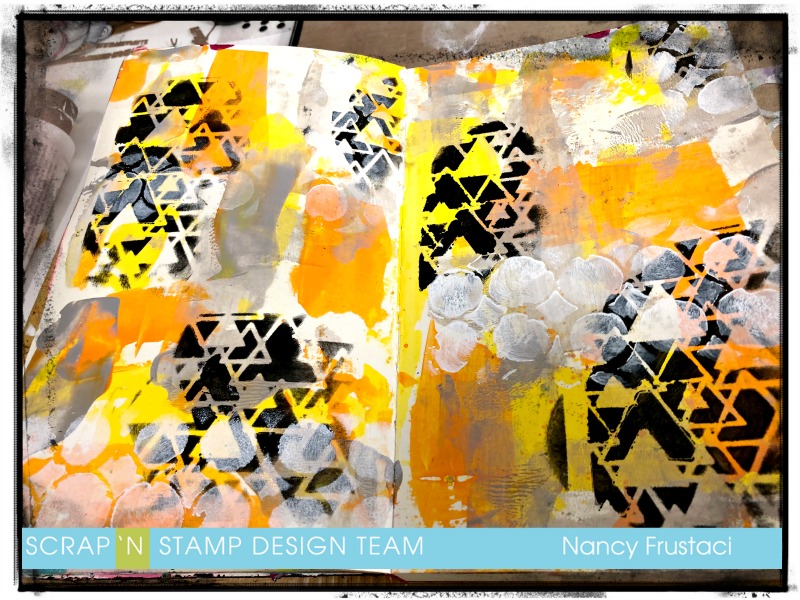
I pulled out some stencils from my stash that I had not actually ever used. Love this type of art as I will be able to use up a lot of products just collecting dust! Who is like me and has a stash or two or three of things they haven’t touched in a long time or every even opened. Lol Inquiring minds want to know 🙂
Anyhow, I added some black acrylic paint to the stencil using a blending tool, as you can see with my lovely hands. I just stenciled with no rhyme or reason, just adding in places I thought would look good.
I cleaned off the stencil by pressing it on to the other pages of the book seeing if I could get some imprints on it. (I did but you will see in another post that it total gets covered up) Once the black was dry I pulled out a circle stencil from Tim holts and used some white gesso and stenciled it on. Too be honest after this step I didn’t have a flying clue as to What I was going to do next..
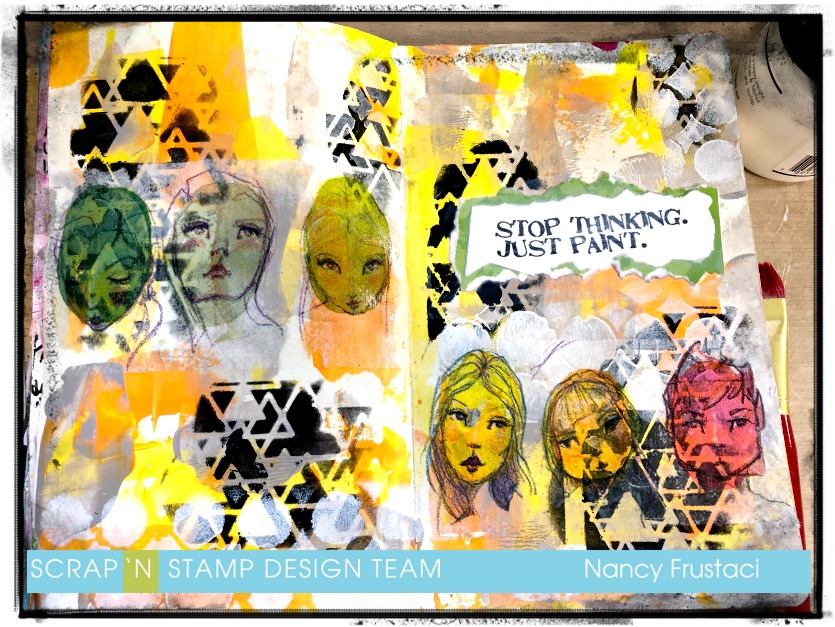
So I looked into my stash from the class I took and I had some stamped sentiments left so I layered it on to some green cardstock from her mixed media book (Its linked below) I felt it needed so much more, so I pulled out these face tissues from Jane Davenport, and cut apart faces and collaged it on to the page. I really like how this turned out.
For the sentiment I went with what I was thinking, CREATE, DO, BE. This was a reminder to me to get out of my own way and just slap paint to paper and not worry. I used some leftover Sparkley alpha chipboard from my stash to create those words. I used Arleens thick tack glue for this as I needed something strong.
I know its not my usual how to step by step card blog but I do hope you find some inspiration to just CREATE.
Don’t forget to come over and check out our “This Puns for you”blog hop
Have. Beautiful week a head.
Nancy
Getting Messy with Mixed Media ( Art Journalling) Read More »
")
")
