Scratch-N-Stamp
Search

Checkout

Keep up with Sales, New Products and other events at Scrap `n Stamp. Sign up for our newsletter now!

What's New

Hot Deals


Canada

Getting Ready for Canada Day!

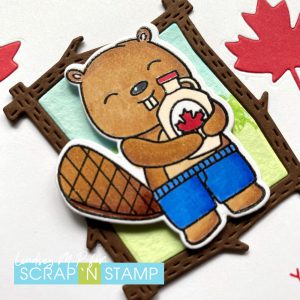
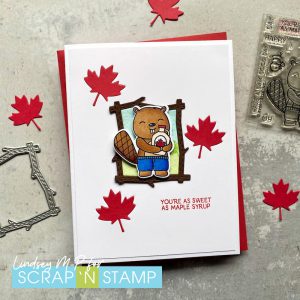
Happy Monday! We’ve got Canada Day coming up this week, and so here’s my Canadian card!


This cute little Avery Elle stamp and die set is designed by Canadian Elena Roussakis! I stamped and embossed the adorable beaver and coloured him with Copics before die cutting. The larger of the two Whittle Wood Picture Frame dies seemed a perfect way to highlight him. For the background, I added a tiny panel of watercolour paper, that I first dipped in mermaid lagoon and mowed lawn distress ink, then when when dry added a few trees at the horizon. It still needed a little something, so I inlaid a few die cut Paper Smooches maple leaves using a scrap of red cardstock. (Do you still miss Paper Smooches, too? Scrap ‘n Stamp has a few stamp and die sets left if you want to add to your collection!) Finally, I tucked one of the sentiments from the stamp set under the corner of the twig frame.


Hope you’re looking forward to a great week! If you decide to do some shopping, remember to use 10Lindsey for 10% off your order!

Getting Ready for Canada Day! Read More »

Canada, Eh! Blog Hop

Happy Canada Day and welcome to the Scrap ‘N Stamp July 2020 Canada, Eh! Blog Hop!  We are excited to be hopping a few days early this month so we can properly celebrate Canada Day with all of you!

Be sure to leave comments along the way as you hop- you’ll have a chance to win one of 3 Canadian prize packs this month (there will also be opportunities to win on Facebook & Instagram)!

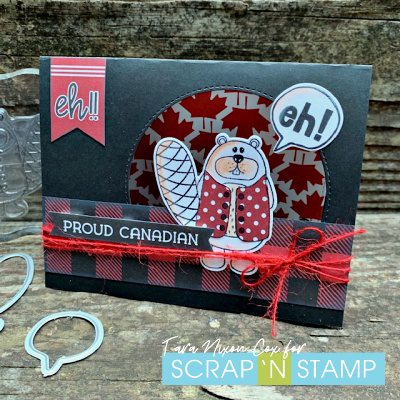
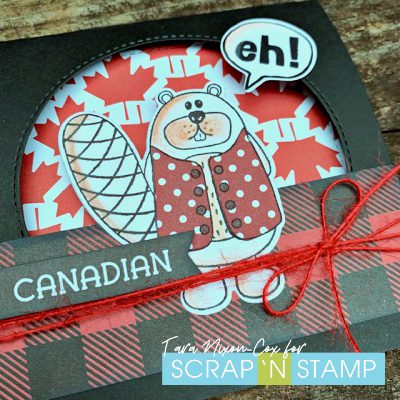
Today I’m kicking things off using stamps, dies, ephemera & paper O Canada collection designed by Becky Fleck for Photo Play.   It’s got a lot of fun elements, though I have to admit I was a bit creatively challenged this time… probably because it’s been too long since I’ve been back in my “home & native land.”  It looks like future travels from my current home in the south back to British Columbia are probably in the distant future, so I decided to embrace the ‘eh’ factor, which I tend to do when I feel a bit home-sick for Canada.

Since colouring a beaver (we’re calling him Rocky.  Do you recognize him from the hop graphic above?) was one of my many challenges, I chose to stick to some simple brown shading on white and added a paper pieced vest.  As I played around with patterned papers & ephemera pieces to decide on a layout, I thought a window opening would give some fun dimension.  I used a strip of plaid paper to give Rocky something to stand on and added my die cut speech bubble and ephemera around him.  A bit of red twine tied around the bottom of the card adds some fun texture.

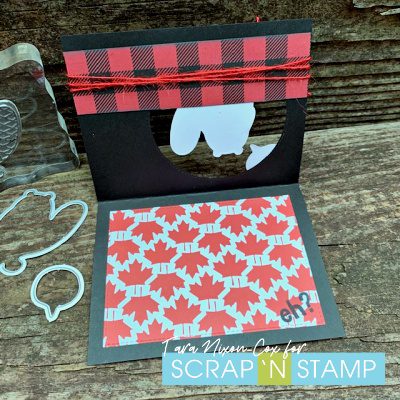
Inside the card I added a die cut rectangle of maple leaf paper and added a second die cut of Rocky & strip of plaid paper to stabilize the ‘floating’ elements in my window.  I stamped one more ‘eh?’ to tie it all together…

Here’s a closer look:

It turned out not too bad for a creative slump, eh?  Trust me… you’re in for a treat when you see what the rest of the team has come up with!

Here’s the full list of links for today’s blog hop:

Enjoy, and Happy Canada Day, Eh!

Inky hugs,

Tara

Canada, Eh! Blog Hop Read More »

Cards Made with the New Cuttlebug A2 Embossing Folders

We just received some of the new Cuttlebug A2 embossing folders, borders and cardmaking combos and couldn’t wait to share some of the cards I made with them. These new embossing folders are absolutely irresistible! I love how you can mix & match from the embossing border sets and the cardmaking combos. It makes them so versatile.

Hope these cards give you some ideas and inspiration.

card using cuttlebug A2 embossing folder leafy branch

I made this card in soft colors using Bazzill cardstock in aloe vera, horizon & white. First I embossed the white cardstock with the leafy branch embossing folder and then I used a sponge tip applicator to add sage VersaMagic chalk ink to the leaves. This chalk ink blends beautifully and I found that I could create shading on the leaves just by going over some of the areas a second time. The key here is to use very little ink and go lightly.

The border and corner embellisment were punched from horizon cardstock using the Paper Shapers Corner Adorner punch, Square Steps. It’s really easy to do and I hope I can describe it here so that it makes sense. Just cut a 1-2″ strip of cardstock the length you want your border. Carefully remove the ‘wings’ from your punch and turn it upside down so you can see the bottom. Line up the edge of the punch with the outer edge of your paper and make sure that the long edge of the cardstock is against the bottom of the punch, then squeeze. Now, move the punch along and line it up again with the side of the area you just punched and squeeze. Continue moving along until you have punched your border. To make the corern piece I just punched a corner slot with the wings on the punch and then trimmed it detach it from the rest of the cardstock. Just for fun I added a latte self-adhesive pearl in the corner.

The ovals were cut using the Big Shot and Spellbinder Nestabilities S4-112 Classic Ovals, Small and S4-113 Scalloped Ovals, Small and stamped with a saying from the Melissa Frances clear stamp set ‘Simply Said’ using aegean blue VersaMagic chalk ink. And for a little more pizzaz I added pearls instead of brads.

A little ribbon from on the side to finish it off and you have a simple, elegant card that would work for many different occasions.

________________________________________________________

card made with cuttlebug a2 embossing folder argyle

The second card was made with a whimsical stamp set from Amy Smyth called The Flourish Pack. I love this set! It’s got lots of little birds, butterflies, flowers and flourishes that are great for watercoloring. I cut the scalloped circle first from Bazzill white cardstock with Spellbinders Nestabilities S4-124 Classic Scallop Circles, Large and then stamped the bird with black StazOn ink and then watercolored the bird. The pink frame was cut with Nesties set S4-114 Standard Circles, Large from petalsoft cardsstock. If you need help with cutting frames using your Nesties check out my post about Nestabilities and chocolate. Are you just a little bit curious?

To make this card background I embossed white cardstock with the argyle embossing folder and then used pixie dust VersaMagic chalk ink applied direct to paper from the pad to highlight the raised areas. Again, a light touch is best otherwise you’ll get ink where you don’t want it.

A little ribbon and some layering and this card was done. It would be an easy one to adapt to a baby theme, get well or thank you. Flowers, die cuts or more embellishments could be added to give it a whole new look.

There are more card and scrapbooking projects on the way so check back soon!
Cards Made with the New Cuttlebug A2 Embossing Folders Read More »

Free Shipping Anywhere In Canada