Scratch-N-Stamp
Search

Checkout

Keep up with Sales, New Products and other events at Scrap `n Stamp. Sign up for our newsletter now!

What's New

Hot Deals


rubber stamping

Let’s Celebrate!

I don’t know about  you, but one of the things I most celebrated with vaccinations in place, and infections going down was giving and getting hugs!!  Gosh, it felt so great to have that personal connection again ♥  Fist bumps and elbow taps are fine, but nothing can beat a big ol’ hug from someone you love! Whatever the reason, let’s celebrate and enjoy our weekend.

LET’S CELEBRATE

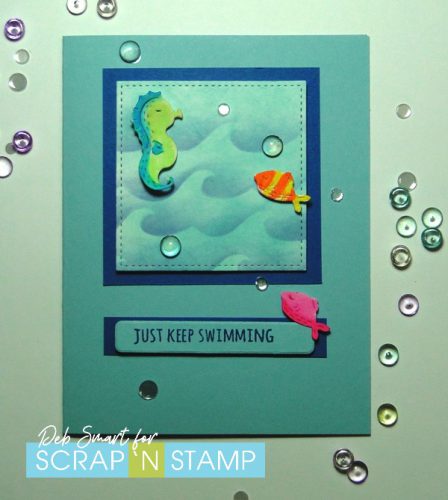
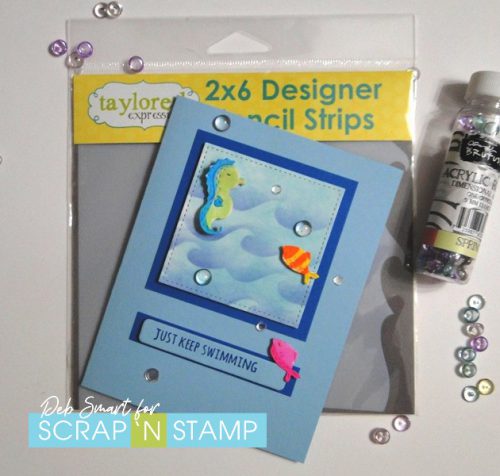
Honestly, I thought that I had my busy week in hand, but alas – not quite! I was supposed to share this project with you on Thursday, for my Scrap ‘N Stamp word prompt of ‘celebrate’. Which would have been fitting, as my hubby’s birthday was the day before. But I got my dates mixed up, and so here I am today.

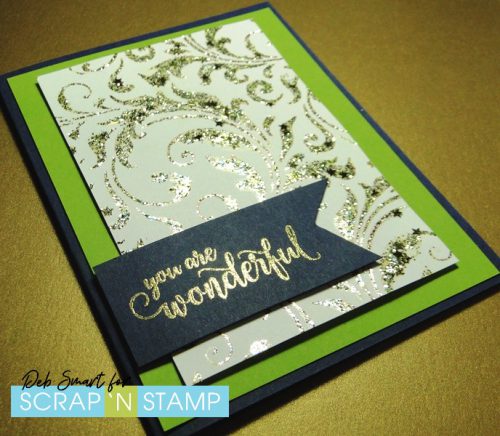
I decided that hugs are definitely worth celebrating, as I said earlier. So I pulled out my Hero Arts Big Hugs Stamp & Die Cut set and glitter!

Let's Celebrate!

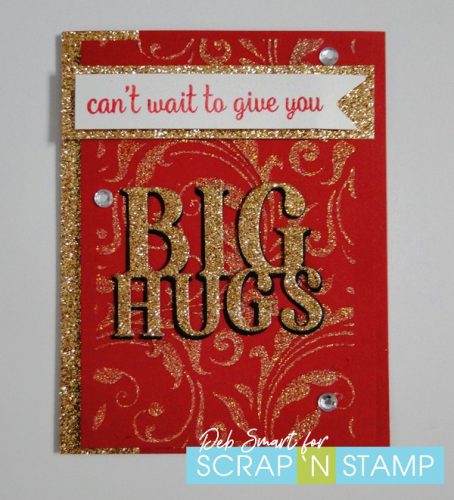
The red and gold are so rich looking together, aren’t they?

CARD DETAILS

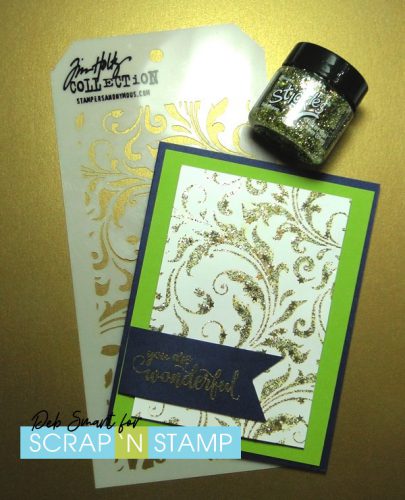
Start with a panel of red cardstock, and the Tim Holtz Flourish Stencil. Use Purple Tape to hold the stencil in place, and then apply Nuvo Glimmer Paste ‘Moonstone’ through the stencil, with a palette knife.  Be sure to immediately clean off your stencil & knife, for easiest clean up. Now, set this aside to dry while you work on the rest of the card.

Stamp the sentiment from the Big Hugs set in Versamark ink, and cover with red embossing powder. Set with a heat tool, and then snip banner tails on the right end. Next, use the dies included with this set, and die cut the words once from gold glitter cardstock, and 3 more times in black cardstock.  Use liquid glue to stack the layers together, with the gold glitter on top. This layering really makes the letters stand out! I offset the black layers under the gold, for a drop shadow.

Create a red card base, and glue a strip of the gold glitter paper to the left hand side. Pop up your glitter embossed panel on top, using foam tape or squares.  Next, glue a strip of the gold glitter under the sentiment, then pop it up on top with more foam tape.  Glue the ‘Big Hug’s die cut directly to the card front.

Let's Celebrate

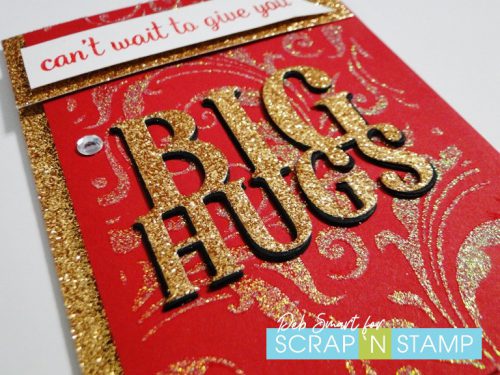
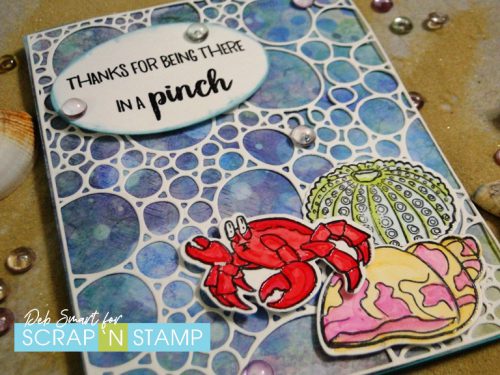
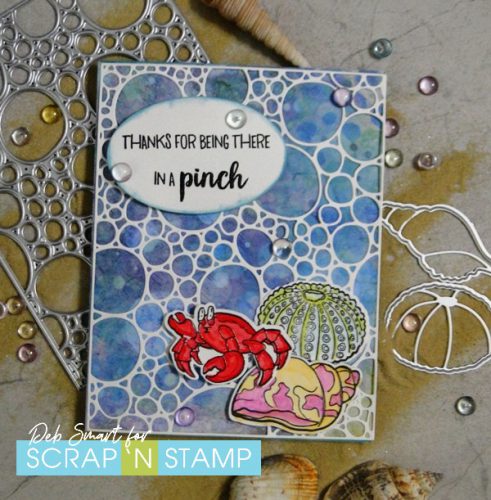
Isn’t this gorgeous?!  I added a few rhinestones from my stash for some extra shine.

PLAY ALONG WITH THE CHALLENGE!

Come play along with the challenge, and let’s celebrate!  You’ll find the Scrap ‘N Stamp Facebook challenge page HERE. Just create your project, and share a photo of it. Use the hashtag #snschallenge, so everyone sees it! At the end of the month, one participant is randomly chosen, and is the lucky winner of a $50 Gift Certificate to shop at Scrap ‘N Stamp!  Not bad, for doing something you’d already be doing anyway, right?

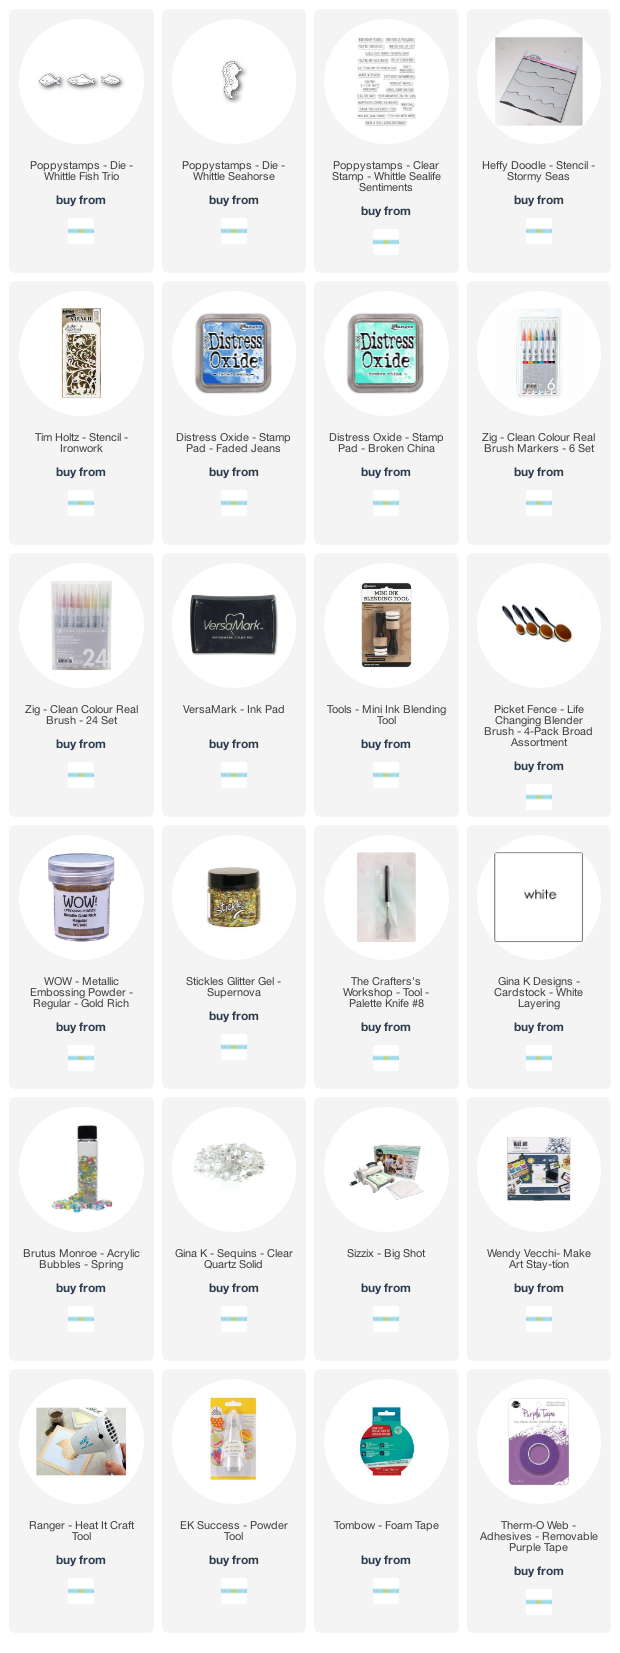
You can find the supplies to re-create my card, below. When you shop regular priced items at Scrap ‘N Stamp, be sure to use my Designer Code 10DEB, for 10% OFF your total order!

Let's Celebrate!

Affiliate links for supplies are provided. If you choose to use my links, you help support me in maintaining my blog, at no extra cost to you. Thanks in advance!


Let’s Celebrate! Read More »

It’s Sum-Sum-Summertime!

How are you enjoying your sum-sum-summertime?! We’re (thankfully) through our heatwave here in Vancouver. Now is a great time to be inside, catching up on your summer birthday cards or even starting your holiday winter cards! It’s never too early.

IN A PINCH

Today’s prompt for the Scrap ‘N Stamp Random Acts of Cardness daily prompt challenge is ‘summer’. So I finally got to use my new stamps & dies called In a Pinch, from Hero Arts! It’s full of great beach themed images, which is perfect for summer.

It's Sum-Sum-Summertime!

How fun is this?! The sentiments in this set are also cute, and punny!

CARD DETAILS

Start with the Tim Holtz Bubbling Die, and die cut white cardstock with your Big Shot. Next, layer the die cut over a sheet of this gorgeous Lavinia Stamps DreamScapes paper in blues, greens & purple. Now, attach this to your card base. Next, stamp the shell, sea urchin and crab from the In A Pinch stamp set in Nocturne ink, onto white cardstock. Cover the stamping with clear embossing powder, and heat set. I didn’t realize, until I was heat embossing, that I had stamped on Yupo instead of cardstock. That’s okay –  alcohol ink markers are perfect for colouring on Yupo!  After colouring, use the In A Pinch Die Cuts with your Big Shot to die cut each image.  Layer the images with glue and foam tape on the bottom corner of the card front.

Stamp the sentiment onto white cardstock in Nocturne, cover with clear embossing powder, and heat set. Die cut the sentiment with an oval die, and pop it up with foam tape in the top left corner. Add some Brutus Monroe Acrylic Bubbles to the front for more fun!

I love the fun dimension that the Bubbling Die adds to the card front!

JOIN THE SUM-SUM-SUMMERTIME CHALLENGE!

Playing along with the Scrap ‘N Stamp Random Acts of Cardness challenge is easy – and free to join! Head over to the Facebook page HERE. Play along with as many days as you like. Create and then share your card on the page, using the hashtag #snschallenge there, and your other social media accounts.  At the end of the month, one person is randomly chosen as WINNER of a $50 GIFT CERTIFICATE to the Scrap ‘N Stamp store!

It's Sum-Sum-Summertime!

SUPPLIES

When you shop for supplies at the Scrap ‘N Stamp store, be sure to use my Designer Discount Code 10DEB, for 10% OFF your total purchase (regularly priced merchandise only).

Affiliate links for supplies are provided. If you choose to use my links, you help support me in maintaining my blog, at no extra cost to you. Thanks in advance!


It’s Sum-Sum-Summertime! Read More »

Fun With Stencils!

Hello, and happy Saturday! It’s Deb here, for the Design Team. Today’s word prompt for the Scrap ‘N Stamp daily challenge is stencils. So today we’re going to have some fun with stencils, using them in different ways. For me, stencils are one of the most versatile products to have in your craft stash. Not only are the versatile, but they’re also very well priced, giving you a great ‘bang for your buck’, so to speak.

STENCILS WITH INKS

This is the ‘usual’ first way we all use stencils. Simply brushing inks through the stencil, to create a background. It’s quick, fun, and you can choose any colour you want to use.  For this card, I’ve paired a stencil strip from Taylored Expressions with the Poppystamps ‘Whittle’ dies. (If you haven’t yet enjoyed our recent Whittle Things Blog Hop, be sure to START HERE, and comment along the way!).

Fun With Stencils

CARD DETAILS

Start with a piece of white cardstock, and blend Broken China Distress Oxide all over. Next, choose one of the wave stencil strips from the Taylored Expressions Set The Scene Waves stencil strip set. Brush on Faded Jeans Distress Oxide, to create the two colours of water.  Use a stitched square die to cut the panel, and attach it with foam tape to a dark blue card square. Attach this to a light blue card base.  Stamp the sentiment in dark blue ink onto the light blue cardstock strip from the Whittle Sealife Sentiments stamp set. Attach the sentiment strip to a strip of dark blue, and glue it to the card front.

Use the Poppystamps Whittle Fish Trio and Whittle Seahorse dies, and die cut the shape. Colour them using Zig markers, and a water brush.  Attach the fish and seahorse to the front of the card.  For embellishments, I chose the Gina K. Clear Quartz Solid sequins, and Brutus Monroe Acrylic Bubbles, to add the ‘bubble look’.

STENCIL WITH GLITTER GEL

The opening of the stencils is an invitation to use just about any medium! Two of my favourites are Modeling Paste (texture paste) and Glitter Gel.  This Tim Holtz Flourish stencil was deserving of some fancy glitter gel, I thought.

Fun With Stencils

The shine & sparkle of this Stickles Glitter Gel is amazing, isn’t it?!

CARD DETAILS

First, tape the stencil to your cardstock; I usually use Purple Tape for this. Next, apply the glitter gel through the stencil, using a palette knife. Be sure to clean off the stencil & palette knife right away with warm soapy water, so it doesn’t permanently stick! Place the stenciled piece aside, to allow the gel to dry.

Stamp the sentiment from the Penny Black Sentiments Collection onto dark blue cardstock in Versamark ink. Cover the stamping with gold embossing powder, and set with a heat tool. Cut banner tails on the right end of the sentiment piece.

Now that your stenciled piece is dry, layer it with a bright green background, on a dark blue cardstock base. Attach the sentiment to the front, using foam tape. No need to add anything else, because the gorgeous shape of the stencil, and shine of the glitter gel, takes care of the rest!

ARE YOU PLAYING ALONG?

I hope that you’re playing along with the daily challenge! Then you can have your own fun with stencils! To join, visit the Facebook challenge page HERE. Share a picture of your project, and use the hashtag #snschallenge. There’s a new word for each day of the month, and you can play along with as many days as you like. At the end of the month, one luck  person is randomly chosen, and WINS a $50 Gift Certificate to the Scrap ‘N Stamp store!

Affiliate links for supplies are provided. If you choose to use my links, you help support me in maintaining my blog, at no extra cost to you. Thanks in advance!

*my apologies – the Flourish stencil is no longer available – but the Ironwork stencil is similar. also, the Waves stencil strips are not available, but the Heffy Doodle Stormy Seas stencil easily substitutes*


Fun With Stencils! Read More »

Free Shipping Anywhere In Canada