Scratch-N-Stamp
Search

Checkout

Keep up with Sales, New Products and other events at Scrap `n Stamp. Sign up for our newsletter now!

What's New

Hot Deals


Tags

Tuesday with Tara {take 32 & a chance to WIN}

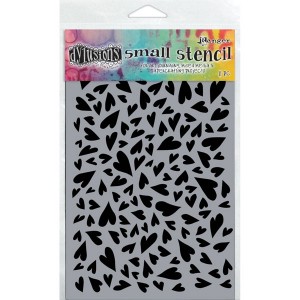
Happy Tuesday!  It’s been a bit of a challenge for me getting this post together this week, but I’m happy to say HOORAY if you are reading this and it is actually still Tuesday 🙂  Valentine’s Day is right around the corner so I have one more Valentine to share with you this week… plus a chance for you to win one of the fabulous Dylusions Heart Stencils that I used on my project!  I think that’s worth another HOORAY!
valentine2016 (2)

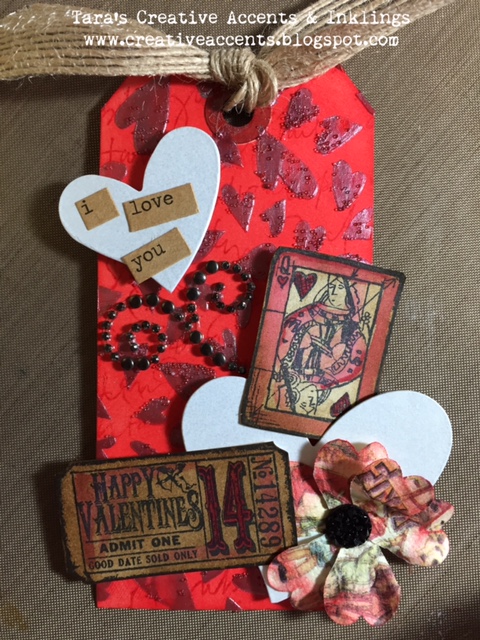
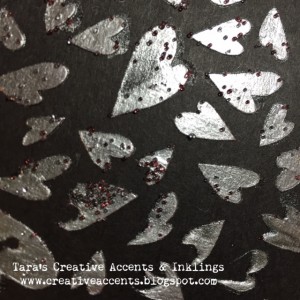
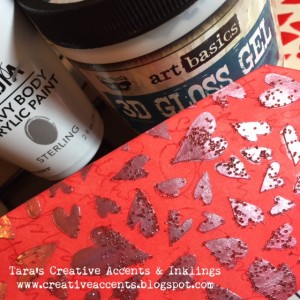
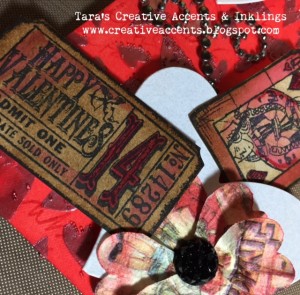
I had two new things I wanted to create with this week… the Dylusions heart stencil and Candied Apple Distress Ink that I finally got my hands on, just in time for Valentine’s Day, right!?  I started out just grabbing a tag and an ink applicator tool and getting some red ink on the tag.  I couldn’t wait to see what this new Distress Ink would look like and I was not disappointed, it’s yummy!  I inked a background text stamp in the same ink and stamped it over my entire tag.  Next, I got curious what would happen if I mixed some Media sterling silver paint in with some translucent 3D gloss gel… so I did a little blending of them on my craft sheet and swiped the combination through my heart stencil onto the tag.  I sprinkled a few micro beads onto the wet paste and set it aside to dry.   It turned out much like I hoped it would, looking very cool!  The paste picked up a bit of the red color from my background, giving it a slightly pink undertone.  I mixed up more than I needed, so tried out my mixture on a black tag as well… the silver really stands out here, and I only used a tiny bit in the mix!

IMG_7837 (1)

valentine2016 (3) 
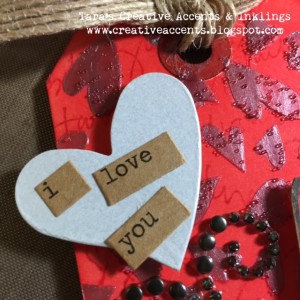
The rest of my tag isn’t all that complicated… I stamped out a ticket and playing card from some Tim Holtz stamps and coloured them very simply with Vintage Photo Distress Ink & Festive Berries Distress Marker.  Once they were trimmed, I arranged them together with some die cut hearts, a flower & some bling.  Seasonal Chit Chat stickers & some ribbon finish the tag!  Hope you like it!
valentine2016 (4)

valentine2016 (1)

We LOVE that each of you is reading the blog today and would LOVE to hear back from you, so today is your chance to win an awesome stencil from the shop!

Win this Dylusions Heart stencil by Dyan Reaveley


Simply leave a comment on this blog post telling me what sort of projects you LOVE to create, or what inspires you to create! (If that question is too hard… tell me the name of your Valentine!)  I’ll select a random person to win the stencil next Monday night and announce the winner next Tuesday, Feb 16!  I look forward to hearing from you and seeing you back here next week!

Have a happy Valentine’s Day!

Inky hugs,

Tara

{Ingredients used on today’s project}

Dylusions Heart stencil by Dyan Reavely DYS47078
Finnabair 3D gloss gel transparent (Coming Soon!)
Finnabair micro beads blush (Coming Soon!)
Distress Ink Candied Apple
Distress Ink Vintage Photo
Distress Marker Festive Berries
Background Text Stamp by A Stamp in the Hand
Tim Holtz Odds & Ends stamp CMS100
Tim Holtz Mini Blueprints #2 CMS146
Ranger Archival Ink Black
Tim Holtz Chitchat Seasonal stickers


Tuesday with Tara {take 32 & a chance to WIN} Read More »

Tuesday with Tara {take 20}

Happy Tuesday!  Today I’m sharing a tag inspired by Tim Holtz… even though my inspiration came from Tim’s June tag, the cup dies from Sizzix are perfect for cozy autumn days!

My cups and the background were all inked up with Distress Ink.  For a how-to on the techniques that inspired this tag, check out the original tag by Tim Holtz.  Here’s some more close ups of my twist on it:

I think it would be fun to take inspiration from this and throw some holiday elements on it to make it a Christmas card 🙂 Or perhaps use it as a gift tag with a coffee, tea or hot chocolate themed gift!

Hope you have a creative day!

Inky hugs,

Tara


Tuesday with Tara {take 20} Read More »

Tuesday with Tara {take 6}

Happy Tuesday!  It’s a rainy day for me here in North Carolina, so I’m hoping to squeeze in a bit of time in my creative studio getting inky & playing with my new Big Shot machine!  I’ve got some dies that need playing with… and I’m looking forward to sharing with you what I create in the near future 🙂

Today I want to share with you an answer to one of the questions I’ve gotten asked most often when I demo or teach TAG projects- what do you DO with them?  One thing I like to use tags for (besides being a great way to experiment with techniques and just hang on to as inspiration pieces!) is to use them as a focal point on a card.  The card today features what I consider a ‘standard’ #8 tag on a 5×7 card.  Add some ink and some washi tape and you’ve got an easy way to transform a tag into a great card!

My tag was created using a mix of scraps, stencils, embellishments & stamps that I combined to celebrate my Dad’s recent 60th birthday!  I won’t go into a lot of details about the tag, but I hope it shows you a fun way to take some bits & pieces and turn them into a cohesive piece!  The big number was stenciled, outlined and then Clear Distress Crackle Paint was painted over it for texture (you probably noticed by now that I love adding crackle to my projects!).  The idea-ology numbers were painted with a bit of Distress Paint to make them pop and add more color to the tag.  I used black & white elements like the stickers & washi tape in several spots to bring it all together!


To create the perfect card for my tag, I took my base card, which was white, and cut a 1″ strip from the front open edge.  This made my card front a perfect size for a tag to be centered on it!  I used an inking tool to apply Distress Ink around the edges of the card front (lay the card flat on your craft sheet to get good coverage on the open end of the card without getting ink on the inside of your card).  Because I had worked with a mix of Distress Ink & Paint on my tag, I chose to apply Distress Paint along the inside edge of the card, this is the part that shows since I cut that 1″ strip.  Once that was dry I applied a strip of washi tape beside it.  You can make your card look like a perfectly coordinated project by using colors and elements that are the same on the tag and the card base.

supplies used:

kraft #8 tag

crinkle ribbon, inked to match project

5×7 white card

paper trimmer

tim Holtz idea-ology alpha parts, newsprint

distress paint- twisted citron & antique linen

distress crackle paint

tim Holtz idea-ology big chat stickers & small talk stickers

tim Holtz numbers stencil ths020

hickory smoke distress ink & distress marker

mermaid lagoon distress ink

ink applicator tool

washi tape- black with white numbers

assorted scraps of paper from previous projects 🙂

riley the moose stamp


Hope this gives you a bit of inspiration!  If you’ve got a stash of tags you’ve made, why not pull them out and transform them into some quick cards!  Have a creative day!
Inky hugs,
Tara

Tuesday with Tara {take 6} Read More »

Free Shipping Anywhere In Canada