Scratch-N-Stamp
Search

Checkout

Keep up with Sales, New Products and other events at Scrap `n Stamp. Sign up for our newsletter now!

What's New

Hot Deals


Tags

TBT – Jingle Bell WOW

Well, HELLO THERE!!  Thanks for popping in for this week’s sneak peek installment of  Throwback Thursday for the Scrap’n Stamp Blog!!  We’re revisiting another Christmastime creation from two years ago-November 28, 2014…..

I’ve got a Christmas themed tag I made for two challenges, one of which is a ‘new’ one for me to enter; Fashionable Stamping Challenge and my ‘early’ entry for Compendium of Curiosities 3 at Studio L3!  At FSC Challenge #86 is to make A Christmas Tag and it’s challenge #16-Layering Stencil Embossing at CC3.  I’m going to try to turn any challenge makes into a card or tag for Christmas, so that I stayed motivated and multi-task with getting Christmas cards made!


DSC05376

In keeping with the rules and such with the CC3 challenge, I’m working from my copy of Tim Holtz’s Compendium of Curiosities 3 book-page 50, and not sharing the technique.  But, I can share the details of what I used to bring this tag together and how I used the Layering Stencil Embossing technique.

DSC05380

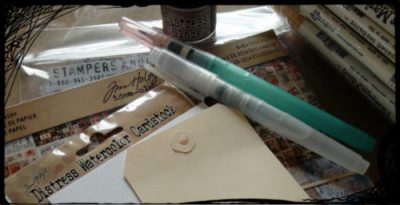
So, here you can see some of the items I’ve gathered to concoct this tag–I’ve got a #8 manila tag, some DIs in Broken China & Evergreen Bough & Scattered Straw is in there, too.  Of course there’s my copy of Tim’s CofC #3 and two of Tim’s Layering Stencils that I’m going to use.

DSC05359

I’ve been working with Tim’s Christmas Blueprints #5 and this is the jingle bell image from that set.  It’s fun and playful and a chance for me to go ‘non-traditional’ with color.  Here, I’ve stamped my focal image onto the tag with black pigment ink, then I heat embossed with black WOW embossing powder.

DSC05361

And just like that–I’ve got layers of color, stenciling and embossed stenciling!!  I layered my DIs on the tag first-Scattered Straw, Broken China & Evergreen Bough and heat dried.  Then I used the Stars LS with Broken China DP and heat dried.  I used the Layer Stenciling Embossing technique with that last layer of blue stenciling!  Isn’t that fun?!  I love that blue embossing!!🙂

DSC05373

Before I embellished, I flicked Bolivian Blue Twinkling H2Os and Picket Fence DP over the entire tag with a round paint brush.  The label & sentiment is from the Simple Sayings set.  I stamped the label image onto manila stock with Distress Embossing ink and heat embossed with Cornflower Blue EP from Wendy Vecchi.  I love that blue!

DSC05370

I did spritz one more layer of Pewter Perfect Pearls Mist spray over the tag!  I really was in a spritzing mood–it’s totally fun to do! Once I felt I’d done enough spritzing, I heat dried everything.  After all of that, I wasn’t about to smudge any of it!!  I positioned my collection of mirror stars and set in place with matte gel.

DSC05372

Here’s the backside of the tag–spritzed with Peeled Paint DS (from a mini-mister) and White Linen Dylusions ink spray through the Christmas LS.  I heat dried the sprays and blended a little bit of Broken China DI over the surface and rubbed Vintage Photo DI over the edges.

DSC05369

And yet, more spritzing!!  I stamped the jingle bell image with Distress EI onto manila stock and heat embossed with Silver EP.  I colored the bell with Scattered Straw & Mustard Seed DI’s and heat set.  Then I spritzed the bell with Sunflower Sparkle & Pewter Perfect Pearls Mists.  I fussy cut it and adhered to the tag with adhesive foam.

DSC05366

I used Chit Chat & Seasonal Chit Chat stickers to form ‘jingle all the way’.  I distressed the stickers a bit with Tea Dye & Black Soot DIs.  I attached them to the bell and tag with little strips of double-back tape and mini foam dots.  I tied a little bow out of silver cord and attached to the top of the bell with matte gel.

DSC05375

OH–I love these little itty bitty bells!  I have these silver bells (leftover from Christmas card creations past) strung on a piece of silver cord that I tied into the ribbon that tops the tag.  Now, the tag makes a little jingle noise when it’s shaken🙂

DSC05364

I’m really happy with how this tag came out.  Those little shadows of white stars in the background, with the shine of the mirror stars in the foreground could be my favorite parts of this tag…but I’m not biased or anything!!😉

So, until next time–Stay Artsy Fartsy!!

DSC04507

SUPPIES I USED:

  • Surfaces: #8 Manila Tag (Inkssentials/Ranger); Manila Stock; Black Stock (Core’dinations)
  • Stamps: Christmas Blueprints #5 & Simple Sayings (Tim Holtz/Stampers Anonymous)
  • Distress Inks, Paint & Embossing Ink (Tim Holtz/Ranger); Colorbox Pigment Ink (Clearsnap); Archival Ink (Ranger); Black EP (WOW); Cornflower Blue EP (Wendy Vecchi/Ranger); Dylusions Ink Spray (Ranger); Perfect Pearls Mist Spray (Ranger)
  • Layering Stencils (Tim Holtz/Stampers Anonymous); Mirror Stars, Chit Chat Stickers & Seasonal Chit Chat Stickers (Tim Holtz/Idea-ology); Silver Cord; Tiny Bells; Satin Ribbon
  • Double-Back Tape (3M); Matte Gel (Liquitex); Craft Sheet (Ranger); Heat Tool; Embossing Heat Gun; Foam Squares & Dots; Paper Distresser (Tim Holtz/Tonic Studios); Detail Scissors (Fiskars); Mini Mister (Ranger)

TBT – Jingle Bell WOW Read More »

Halloween TBT with… Shari from Ain’t that Artsy Fartsy

I am thrilled to introduce  Shari of  Ain’t That Artsy Fartsy. She has agreed to host our TBT’s (Throw Back Thursdays)!  If you can’t wait to see all her wonderful projects make sure to check out her blog.  —Raya

shari

Hello, my name is Shari and my Happy Place in blog-land is called,

Ain’t That Artsy Fartsy.

I’ve been a crafter, in one way or another, since about 1998 after helping someone make  their own, home-made, hand-stamped, wedding invitations – I was hooked and have been creating cards ever since!  I don’t subscribe to any one particular style – I Love It All!  As you peruse my work, you’ll find examples of Clean & Simple, Grungy, Vintage…I’m all over the place and I love to experiment with new techniques.

I am married to my hubbie Don, and we have 3 dogs and 2 cats all nestled together on 12 acres of land located on the gorgeous Pend Oreille River – a place that we call Heaven on Earth.

I hope you come back often and find your own Artsy Fartsy inspiration in the creations that I share! So, it being Halloween we thought that this would be a good place to start…..

We all know what Tim’s Tag looks like–

TAG-MAIN

Perfectly patriotic for our July 4th holiday earlier this month here in the U.S.!  I don’t have any of those fun images, but I do have some other seasonal Mini-Blueprints stamps, so I did a 3 month fast forward to Halloween instead🙂

DSC07906

We had Fall-like weather this weekend with stormy skies, thunder & lightning and sporadic downpours of rain–It was fun and put me in the mood for Halloween!

I gathered up some of my supplies to make this month’s tag.

DSC07879

I’m using a jumbo tag for my version that I covered with a piece of this seasonal collage paper stash.

DSC07876

These Halloween images are in the Mini Blueprints #7 set and just like Tim, I stamped them onto Distress WC paper with Jet Black Archival.  These images are a bit tall, so that’s why I’m using a jumbo tag.  I did a quickie placement of the stamps onto a #8 manila tag and realized they wouldn’t all fit.

DSC07878

I water colored my images with Distress Markers, then rubbed the Distress Micro Glaze over the images and buffed away.  I used Ripe Persimmon, Mustard Seed & Dusty Concord as my background colors.

DSC07881

I inked the ripped edges of the images with Walnut Stain DI and adhered onto the tag.  I then snipped off any extra paper and ran through my sewing machine to add that rough stitched border.  I distressed the edges with my paper distresser and inked the edges with more Walnut Stain DI and my ink blending tool.

DSC07882

I’m using Spiced Marmalade & Dusty Concord DMs to ink my seam binding.  This is a great technique for creating a two-toned ribbon!  I LOVE this technique!!

DSC07900

I don’t have the vial labels that Tim used on his tag, but I improvised with one of his enameled tags that I painted with Black Soot DP.  Now, I also ran out of my sheet of black remnant rubs from the Apothecary set and only have the sheet of white rubs left–That’s why I painted the tag black.  Otherwise, you wouldn’t be able to see the words on the white background

DSC07911

I had to get a close-up of this mirrored star.  I love the matte areas where the Black Soot DP settled.

DSC07903

I topped my tag with my colored seam binding, which blended wonderfully when spritzed with water and heat set.  I also stained some cheesecloth with Black Soot DSS and ran that through with the seam binding.  I added a type charm with the letter ‘H’ for Halloween.

DSC07896

I’m headed over to Tim’s blog right now and get this entered, before the clock strikes midnight on the 31st!  Hey–that’s still 3 days away!! I’m ‘early’ for once, not sliding in right under the wire!  WHEW, that feels good!!

Thanks so much for coming by today!  I have a plan to be back before the end of the week with one last July challenge project (due on the 31st), so I hope you come back for that!  Gosh, I hope I can make that!!🙂

Until next time–Stay Artsy Fartsy!!

DSC04507

SUPPLIES I USED:

  • PAPER: Jumbo Manila Tag ; Distress Watercolor Paper (Tim Holtz/Ranger); Seasonal Collage Paper Stash 8×8 (Tim Holtz/Idea-ology)
  • MEDIUMS: Distress Inks, Markers, Paint, Micro Glaze, Spray Stain (Tim Holtz/Ranger); Archival Ink (Ranger)
  • EMBELLISHMENTS: Mirrored Star, Type Charm, Enameled Tag & Mini Numerals (Tim Holtz/Idea-ology); Seam Binding ; Cheesecloth
  • TOOLS: Craft Sheet (Ranger); Heat Tool; Sewing Machine (Kenmore); Craft Scissors; Glue Stick; Air Art Tool (Artworx)

Halloween TBT with… Shari from Ain’t that Artsy Fartsy Read More »

Tuesday with Tara {take 42}

Happy Tuesday!  Today I’m sharing with you a project I did a while back using Tim Holtz’s Distress Paint marbling technique (you can see some step by step photos of the technique on his blog here- skip to step 8!) I used 3 small tags and added some stamped details and Distress Ink around the edges as well before finishing with my focal images.

cc3c-1a

The bird stamps are by Memory Box (both birds are from one stamp, inked & stamped separately to cover two tags) and the sentiment is from my stash (Inkdinkado).  They are stamped simply in black Archival Ink, then embellished with a little bit of Distress Stickles.  Simple details like colorful Prima flowers, bling & crinkle ribbon finish this card.

cc3c-1b

cc3c-1c

A card layout like this is a great way to showcase small tags you’ve used to experiment with background techniques.  Your backgrounds will shine when you keep the images simple and bold.  If you have Distress Paints and haven’t played with them in a while, pull out a few colors and try out this technique!  It’s a fun one 🙂

Leave me a comment and you could win a Memory Box bird die– it matches the stamps used on my card!  I’d love to know, do you use tags when you are trying out new (to you) techniques?

The winner of our giveaway from last week is KELLY- thanks for your comment 🙂  Send us a message on facebook or use this form with your mailing address and we’ll send your prize (a butterfly stamp!) off to you!

Have a creative week!

Inky hugs,

Tara

Tuesday with Tara {take 42} Read More »

Free Shipping Anywhere In Canada