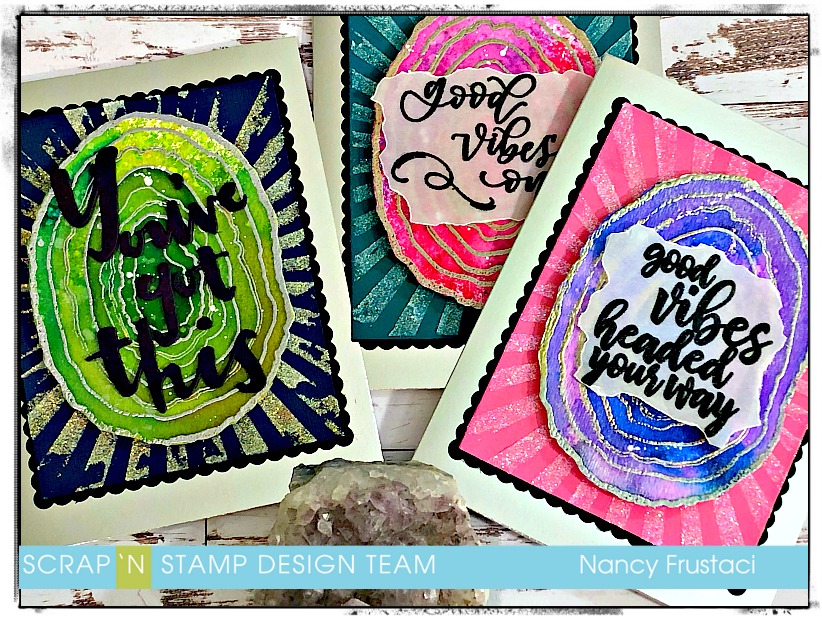
Sending Good Vibes
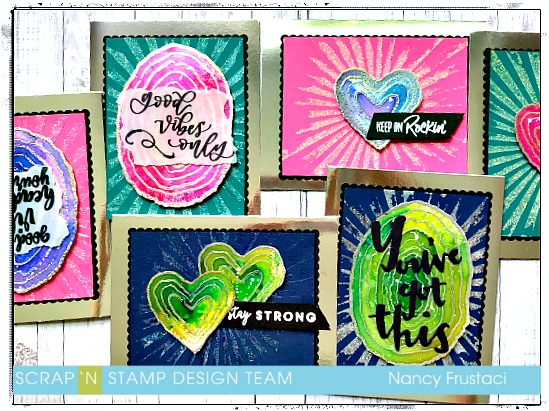
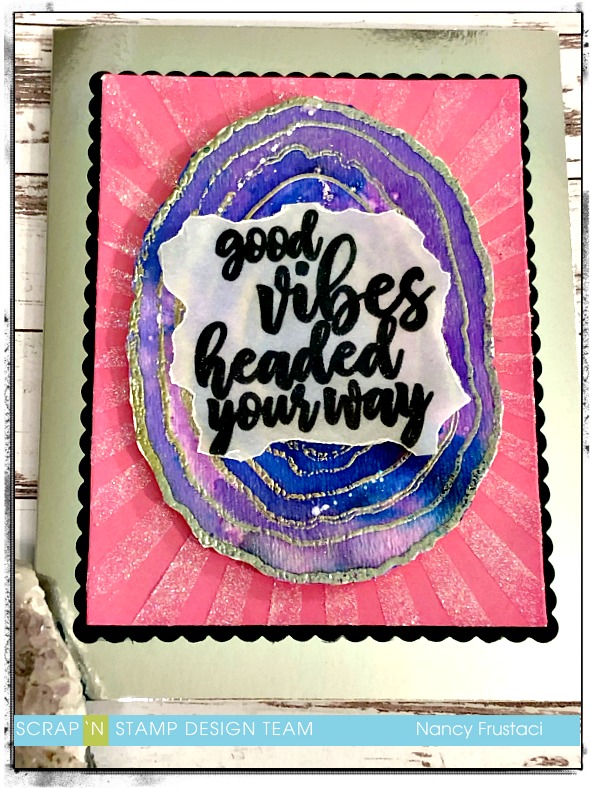
Hello and Happy Wednesday. Today I am on the blog with a set of glitter fun encouragement cards using the Concord and 9th Geode stamp set along with the Picket Fence “good vibe” stamp and Boss Babe stamp set from MFT. I couldn’t have planned it better.
I am all about crystals and their healing properties so I knew this set was destined to be in my collection. I had a lot of fun creating, not 1 but 6 cards. Three with the bigger geode and three with the cute heart geode which you can see on my blog.
I started off the card by stamping out the geodes onto some watercolour paper using my Tim Holtz stamping platform. I used the platform as I decided I was going to heat emboss these geodes which meant I needed to be able to restamp the images if need be and the platform makes that doable. If I was using a clear block I know I would not be able to restamp it.
Once I had it all stamped out with versa mark, I used both silver and gold embossing powder for the geodes. That’s right, I mixed the two together for some of the stamped images. I felt it just added a little more interest to the geodes.
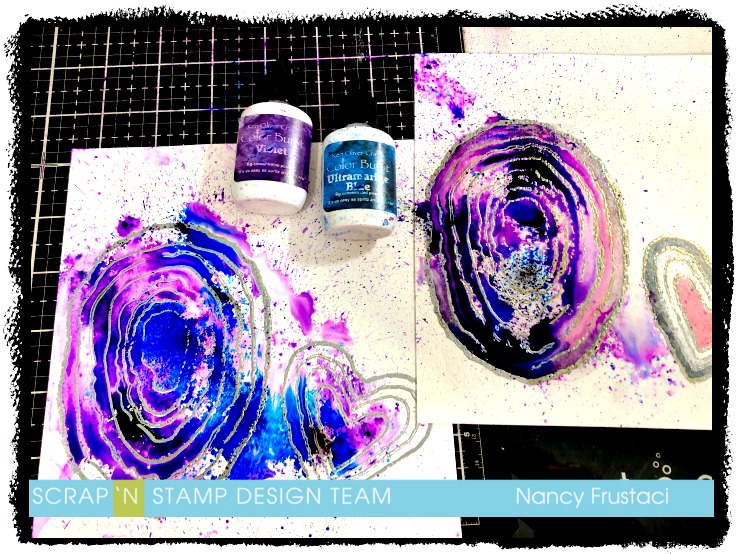
Now it was time for the fun part, getting inky and messy. Here I mixed some of my Ken Oliver colour burst with some of my Distress stains and Dylusion ink sprays. I went in layers. Starting with some water and then the colour bursts. Then adding some of the inks from my collection to bring in more layers to the geode. I love how these turned out! So many layers of delicious colour. I repeated the process several times, with greens, yellows, pinks, and reds. You should have seen my hands after these cards, they were blue and purple for days. lol!
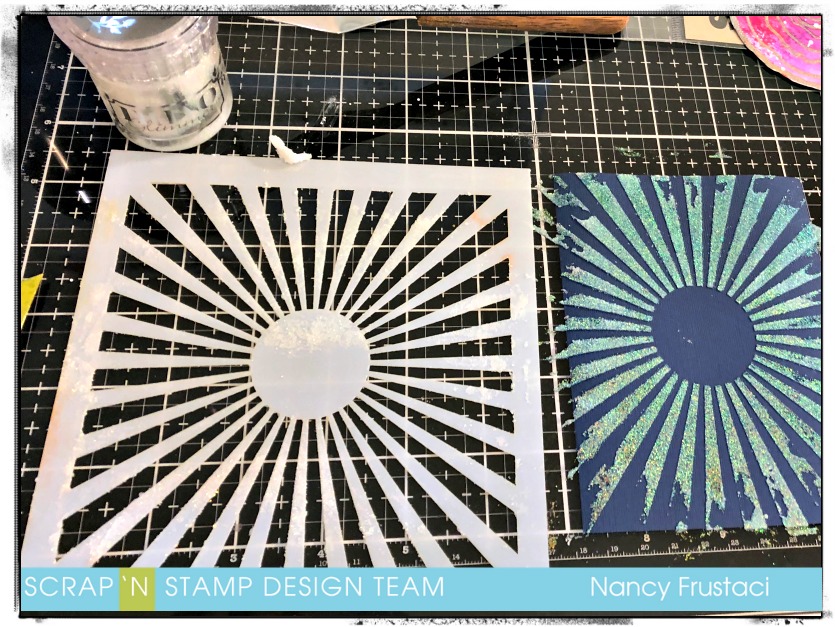
I set the stamped images aside to dry and went on to the background. I wanted to make it look like actual energetic vibes coming out of the geode, so I took some coloured paper from my stash, the MTF sunburst stencil, and some tonic Nuvo glitter paste and went to town. I managed to get three panels done before running out of that beautiful glittery goodness. Because of this, I had to think of a way to finish off the rest of the backgrounds. I decided to make my own glitter paste with some translucent paste and white/sparkly glitter from my stash. This worked out pretty well. Just a little bit of a finer look tha the Nuvo paste gives.
I repeated the process six or seven times with different colour cardstock until I got enough that I liked. I set those aside to dry and went on to cutting out the geodes. I did this all by hand but there is a coordinating die for the set you can find at Scrap’n Stamp.
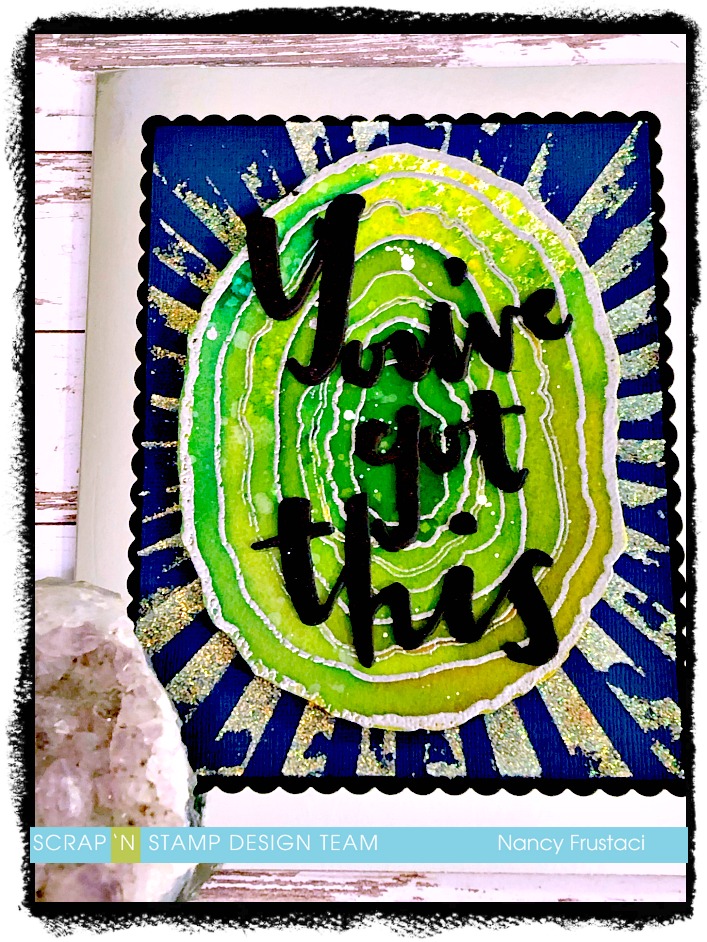
I then went on to die cut all the black scalloped layers for the cards. While I was at it I die cut the ” You got this” sentiment which is also a Concord and 9th sentiment. For the rest of the cards, I stamped the sentiments onto both vellum and black cardstock, which I then heat set with clear embossing powder as well as white and silver.
I took some precut sliver cards from my stash which measured 61/2 x 5, and started to assemble everything. I adhered the black scallops flat to the base, I then added fun foam to the back of the stenciled panels and added that on top of the black. I popped up the geodes twice with my foam tape as I wanted a little more dimension and then I added the sentiments. For the vellum sentiments I used clear foam tape to pop it up. I hid all the adhesive underneath the black embossing.
I hope you got some inspiration! Please come check out my blog for the other three cards.
Have a wonderful week,
Nancy
Sending Good Vibes Read More »