Scratch-N-Stamp
Search

Checkout

Keep up with Sales, New Products and other events at Scrap `n Stamp. Sign up for our newsletter now!

What's New

Hot Deals


christmas

Tuesday with Tara {take 126}

Happy Tuesday!  I’ve got another simple card to share with you today…

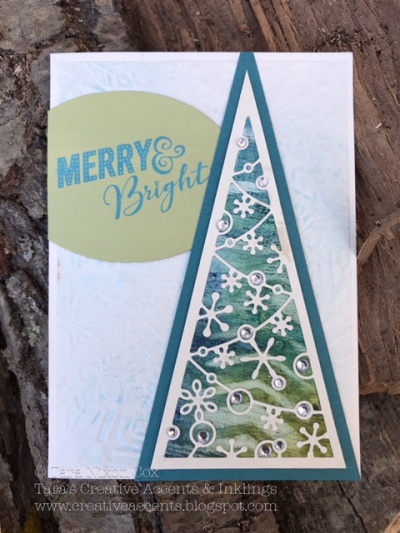
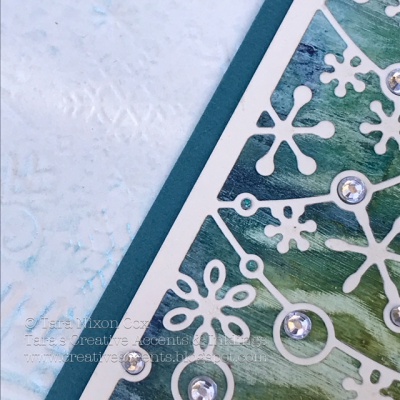
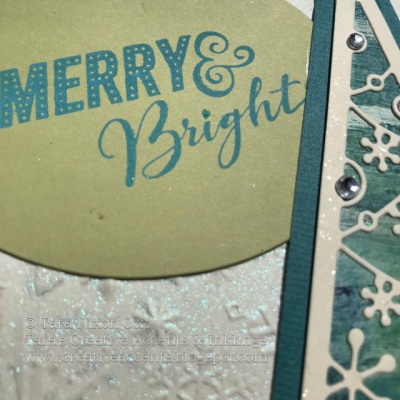
If you’ve followed my work for very long, you’ve probably figured out that kraft is my favorite neutral color to work with, and this card is no exception to that!  I started with a kraft base, and the entire design started with some leftover elements from another project… namely, the tree & words (I used the negative space on a tag, which I think I haven’t shared here yet!  I guess you know what’s coming soon. LOL).  I wanted to shape the letters, so cut some Frosted Film in an oval shape and placed it on my card front.  This gave a very subtle shimmer to the base and a focal point to arrange my dies over.  I stamped a script (Silent night text by Artful Stamper) and some snowflakes in white Staz On ink to add texture.

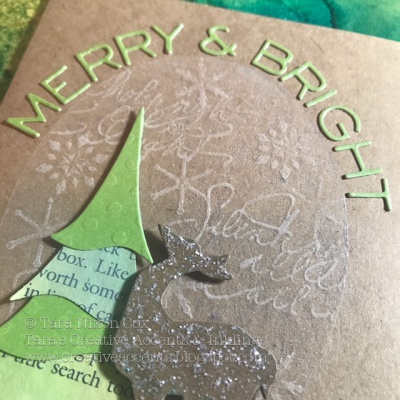
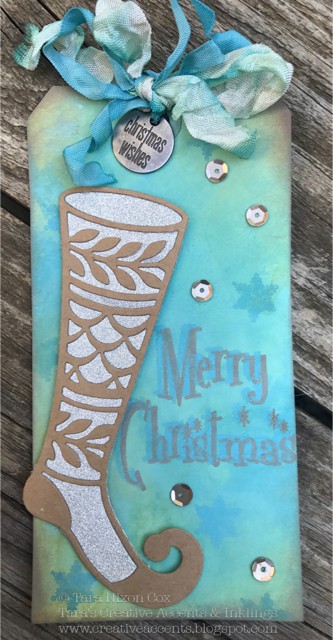
I covered the entire deer in Distress Stickles and let it dry to a shimmery finish.  Very simple and subtle… but I hope you like it!

Inky hugs,

Tara


Materials Used:

Tim Holtz Holiday Words #2 dies

Dee’s distinctively Tree die

Tim Holtz mover & shapers deer (mini)

Tim Holtz Frosted Film

Silent Night script stamp by Artful Stamper

Assorted Snowflake Stamps (this set would be awesome if you need some little ones!)

Tuesday with Tara {take 126} Read More »

Tuesday with Tara {take 125}

Happy Tuesday!

I mentioned last week that I had a piece of my background paper left over that I was playing with… here’s what I came up using it!  It’s a simple Christmas card with a completely different feel than my last card.  Hope you enjoy!


The tree die cut is a negative space design, so after cutting it I trimmed it down to have a narrow border and glued it over the background paper.  Once that was dry, I trimmed again and layered it onto a teal layer of card stock.  I left the top & bottom edges of that piece so it could be trimmed to fit on my finished card.  I played around with several background ideas, looking for a way to add texture and shine without competing with the focal point.  I chose this fabulous snowflake embossing folder and sprayed it with Perfect Pearls mist, then trimmed it down to fit on a card base the same ivory color.

I wanted the sentiment on a round/oval shape die to match the round baubles on the tree, so die cut a lighter green oval and stamped with Distress Oxide in blue to tie it all together.  It’s a very simple layout, but there’s a lot of shine and texture 🙂

And another shot in direct sunlight to catch the shimmer and texture on the ivory background…

Hope this gives you a little inspiration for your Christmas card crafting… there’s a ton of great products in the online store if you need a little something new to give you a kick of inspiration!  Have a great week, and check back with us on Friday when we announce the winners of the blog hop giveaway!

Inky hugs,

Tara


p.s. today is the last day to comment to win on the blog hop posts!


Materials Used:

Sizzix embossing folder, 3D snowflakes

Memory Box Snowflake Tree Die

Oval die (Sizzix)

Merry & Bright stamp by Stampabilities

Turquoise Perfect Pearl Mist (get a similar look with new Mica Sprays!)

Distress Crayons, Gesso, stencil (see technique in last week’s post!)

Distress Oxide in Broken China

Tuesday with Tara {take 125} Read More »

Tuesday with Tara {take 109}

Happy Tuesday!

Guess what arrived after last week’s blog hop post went live?  My package that included the freebie stocking die, which I hope many of you will have arriving soon at your homes after you did some retail therapy in the online store 🙂  So, as promised, I’m sharing one final “Christmas in July” creation… on the first of August 🙂

I decided to go with a tag… which would be fabulous hanging on a gift bag or bottle of wine as a gift, or it may end up the focal point of a card later on!  I die cut the gorgeous stocking die twice, once out of kraft and once out of the silver glitter cardstock.  I taped up the back of the glitter die cut to keep all those detailed pieces from going anywhere, then layered the kraft die cut over it.  I love the contrast of the neutral kraft over that glittery base!

I inked up a manila tag with a variety of green & blue Distress Oxide Inks, then added a bit more shading a stamped sentiment in Vintage Photo Distress Oxide.  A few brown toned sequins worked well to mix with both the kraft & the glitter elements.

I pulled some pre-inked pieces of crinkle ribbon from my stash that coordinated nicely with my tag and added a little piece of Christmas idea-ology by Tim Holtz to finish it off!  All in all, it’s a pretty simple project, but something as detailed as this stocking die doesn’t need much to look complete!  Plus, I think I managed to make something completely different than everyone else who did the hop, which can sometimes be a challenge after you’ve seen their amazing inspiration pieces!  If you missed the hop, check it out HERE.


Thanks for stopping by!

Inky hugs,

Tara


Supplies I’ve used:

Dee’s Distinctively Stocking Die

Silver Glitter Paper

In the Making Retro Merry Christmas stamp (love that the words are separate so I can rearrange them!)

Distress Oxide Inks (a variety from set 1)

Manila Tag #8

Crinkle Ribbon (inked with assorted Distress Inks)

Christmas charm by Tim Holtz idea-ology


Tuesday with Tara {take 109} Read More »

Free Shipping Anywhere In Canada