Scratch-N-Stamp
Search

Checkout

Keep up with Sales, New Products and other events at Scrap `n Stamp. Sign up for our newsletter now!

What's New

Hot Deals


Dreamweaver Stencils

Tuesday Tutorial – Embossing Dreamweaver Stencils with your Big Shot

Hi everyone! Kate here with a fun Dreamweaver Stencil Tutorial.

I am really excited to show you a couple of really cool ways that you can use your Dreamweaver Stencils in your Big Shot to emboss designs just like you would with Sizzix Texturz, Spellbinders dies or any of the embossing folders from Sizzix, Cuttlebug or Crafts Too. And, then I’m going to pump it up a notch and show you how to cut and use the Spellbinders Tan Embossing Mats to create unique embossed shapes. Using your Dreamweaver Stencils this way is so much fun so let’s get started!

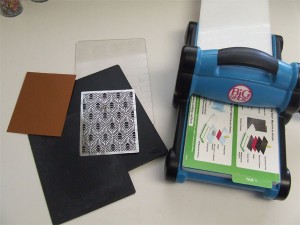
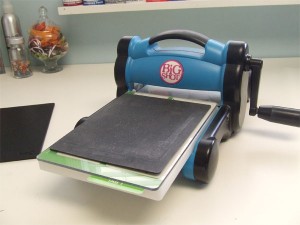
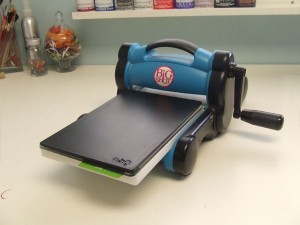
First, I will cover the basic embossing technique. For this you will need your Big Shot with the Multi-purpose platform, a clear cutting pad, Sizzix Texturz Silicone Rubber Mat & Sizzix Texturz Impressions Pad, a Dreamweaver stencil and cardstock.

The most important thing is to make sure that you get your ‘sandwich’ right. If you do this then you will get terrific results every time.

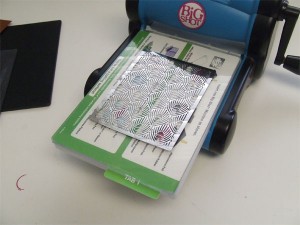
Stencil Embossing Sandwich (from the bottom up):

  • 1 – Multi-purpose Platform (Tab 1)
  • 2 – Clear cutting pad
  • 3 – Dreamweaver stencil

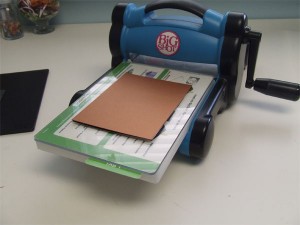
  • 4 – Cardstock (with the side you want the embossing on facing down)

  • 5 – Silicone Rubber Mat

  • 6 – Impressions Pad

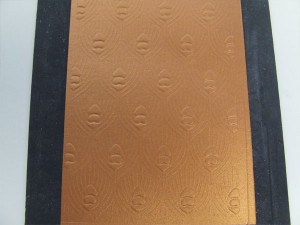
Roll through your Big Shot and voila! You have a beautiful embossed image. Easy, right?

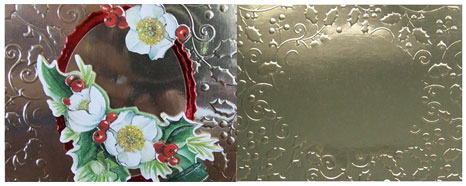
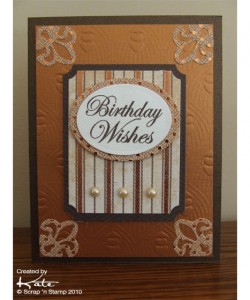
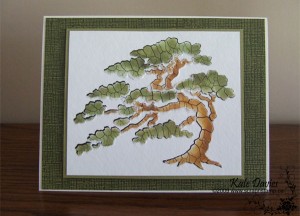
Here is the card that I made with it. The embossing just adds a little bit more dimension and interest to the card front, don’t you think?

Now, let’s pump it up a notch. I’m going to show you how to emboss just part of your image so that you can create unique shapes and borders for your projects.

With this technique your Dreamweaver stencils just got even more versatile! And the only extra thing that you will need is a Spellbinders 12 x 12 Tan Embossing Pad or a package of the 4 1/2″ x 6″ Tan Embossing Pads that you will cut up to create different embossed shapes. I know…I wasn’t sure about cutting up embossing pads either when I first heard about this technique but you will be using your pieces that you cut over and over so it’s okay. You can cut your tan pads with a craft knife, Tim Holtz Serrated Scissors or the EZ Mount Craft Scissors. You will also need something to mark your shapes on the embossing pad. I use a Sharpie marker but a ball point pen will also work. It just needs to be something that won’t rub off.

Say you wanted to emboss the outer area on a large background stencil and leave an oval in the center plain. How would you do that? It’s easier than you might think.

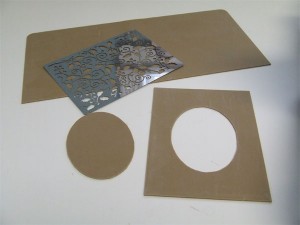
The first step is to cut your embossing pad to the size that you want to emboss.  In this case I cut a tan mat 4 1/4″ x 5 1/2″  because I was using a large Dreamweaver background stencil and was making an A2 card. Then used a Spellbinders Oval Nestabilities to trace the oval shape onto the center of the embossing pad. Using a craft knife I cut out the oval and now had two shapes that I can use to emboss parts of the image on my stencil.

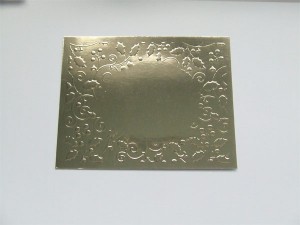
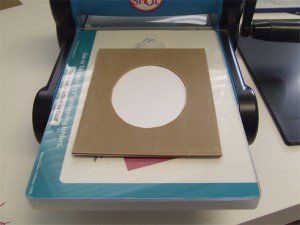
To emboss the design with the oval shape plain you simply layer everything using the Stencil Embossing Sandwich except that I removed Tab 1 and just used the bottom platform. You may have to do this so that the embossing pad, paper or stencil doesn’t shift too much. Each machine is different to experiment with yours until you get the results you like.  Run the sandwich through your Big Shot and this is how it looks – your design is only embossed where the tan embossing pad covered the stencil. It’s that cool?

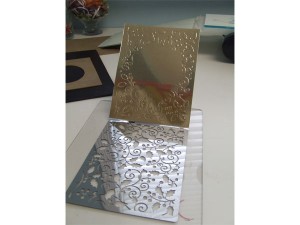
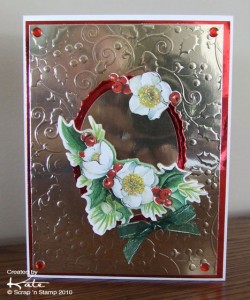
And here is my finished card. The picture isn’t the best because the gold foil paper was reflecting me taking the picture but you get the idea.

Just think about all the custom elements you can make for your cards and scrapbook projects.

But that’s not all you can do. Just by changing the shape of your embossing pad you can emboss borders along the side or bottom of your project. Or maybe you would like to have embossing just across the middle of your card. Well, it’s really easy.

Let me show you how to emboss just along the side of an A2 card front.

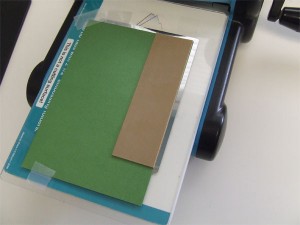
First I cut my cardstock a little bit bigger than I wanted it, then I cut a piece of tan embossing pad the size that I wanted my embossing to end up (1 1/2″ wide and 5 1/8″ long). Now I made my sandwich using the base platform and then I taped the stencil and the cardstock to the clear plate using some Scotch Removable tape to keep everything from moving. Just make sure that you put the tape away from the area where you will be putting the embossing pad. I also positioned the cardstock so that the edges were along the top and sides of the stencil design so that I could place the embossing pad exactly where I wanted it.

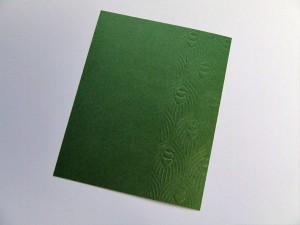
I completed the sandwich with the Texturz Impressions Pad, ran it through my Big Shot and as you can see I was able to create an embossed border just where I wanted it. How cool is that?

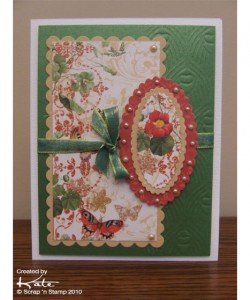
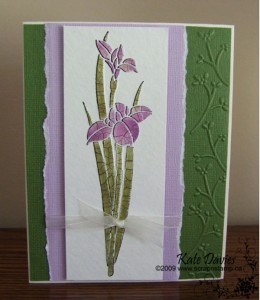
It made the perfect base for this card. The embossing is subtle but a nice finishing touch.

Well, that’s it for this tutorial. There’s really no limit to what you can do with this technique. Different stencils and papers will create totally different looks. It’s a lot of fun to see how each piece looks after you have put it through your Big Shot. A fun surprise each time. I hope you give it a try and have as much fun as I did making the cards for this tutorial.

© Scrap ‘n Stamp Canada 2010

Tuesday Tutorial – Embossing Dreamweaver Stencils with your Big Shot Read More »

Tuesday Tutorial – Dreamweaver Embossing Paste

Hello everyone! Thanks for dropping by for another Tuesday Tutorial.

Today I am going to show you another really cool technique that you can do with your Dreamweaver Stencils – Paste Embossing. It is so much fun and you can create fabulous effects. When I first learned how to do this technique I was totally blown away by how versatile and easy it was.

Today I want to tell you a little about the embossing pastes and then show you step-by-step how to paste emboss. It’s important to understand the difference between the Dreamweaver embossing pastes so that you get the result that you want on your projects as each paste has different properties and applications that it works best on.

So…here we go!

Dreamweaver Regular Embossing Paste:

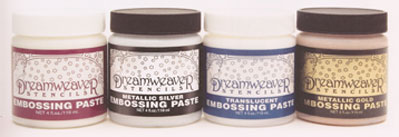
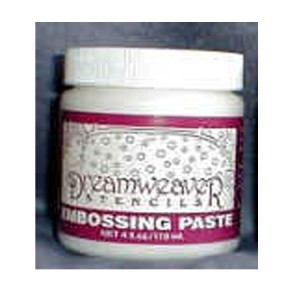
Regular embossing paste is an opaque, 100% acrylic medium that is acid free. It dries to a matte finish and can be colored with chalks and pigment inks when dry or pigments can be mixed into it before it is applied to the stencil. It is very porous so it will absorb color easily. Another option is to add glitter on top of the paste when it is still wet. A thin application of this paste will dry in about 15 minutes whereas a thicker application will take 30 minutes or more.

(Regular embossing paste is also available in colors and both a matte & glossy finish).

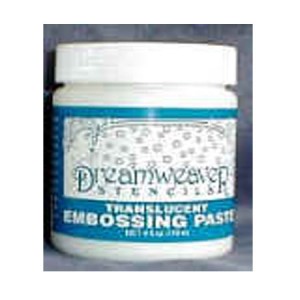
Dreamweaver Translucent Embossing Paste :

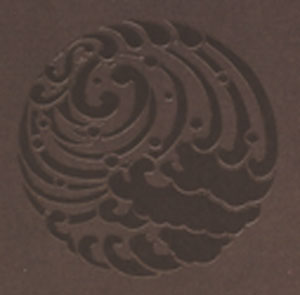
Dreamweaver Translucent Embossing Paste dries clear and smooth. It is a 100% acrylic medium that is acid free. This paste is nonporous, dries very slowly and has a very glossy finish. You can use it on dark colored papers to give your image an embossed, watermark look or you can stencil your image with inks to add color (on light colored papers) and then apply the paste to enhance the colors. Because the paste is transparent you can also mix color into it by adding pigment powders.

Here are some samples showing Translucent Embossing Paste on dark paper and over an inked background.

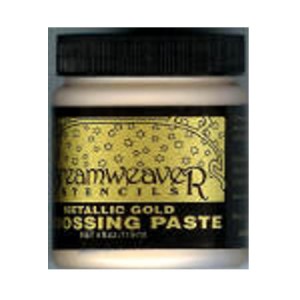
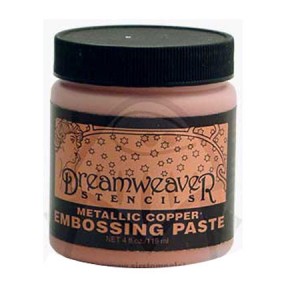
Dreamweaver Metallic Embossing Paste :

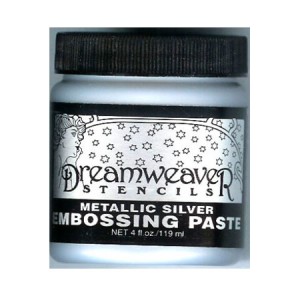
It isn’t always easy to find metallic pigments or paints to mix into paste and it’s hard to know how much to use to really make the paste shimmer. With the Dreamweaver Metallic Silver, Gold or Copper Embossing Paste you get just the right amount of shine. This paste uses the Translucent Embossing Paste as it’s base so it will dry more slowly. Metallic pigments have been mixed in so that you achieve opaque coverage with an even metallic finish. It’s easy to create dramatic effects on both light and dark papers. The samples here show how beautiful these pastes look on dark papers.

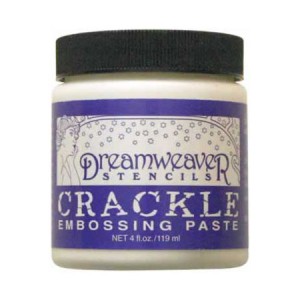
Dreamweaver Crackle Embossing Paste :

This unique paste creates a crackled, aged look when applied over a dry base coat of Matte Black paste. Add color to the crackled paste by sprinkling with mica powders or glitter while wet or stenciling with color when dry.Because it is a 2-step process extra drying time is needed.

So now that you know a little bit about the embossing pastes, let’s get started paste embossing!

You are going to need a few supplies – a Dreamweaver stencil, embossing paste of your choice, Scotch Removable Tape, a palette knife, cardstock or watercolor paper and a pan of water with a little bit of dish soap in it for cleaning your stencil.

The general techniques for applying Embossing Pastes are the same but you will want to use a lighter touch when working with the Translucent Embossing Paste as the consistency of this paste is very smooth. Always remove your stencil as quickly as possible as both types of paste become tacky fairly quickly and if they remain on the stencil too long they may adhere to the brass or stainless and tear the paper when you remove the stencil. Have a container of warm, soapy water handy to put your stencils into if you are not able to wash the paste from them right away.

Step 1 :

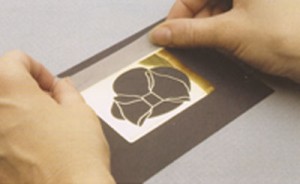
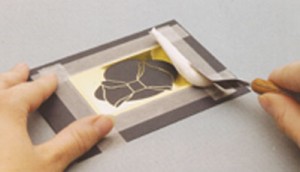
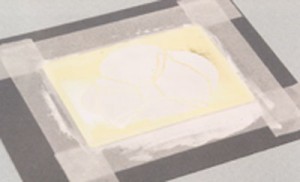
Before you apply your embossing paste the stencil should be securely fastened to the paper with a border of removable tape. This special tape will not tear the paper when it is removed later and is well worth having on hand. Position your stencil onto your paper where you would like your image to appear and then apply the first piece of tape (referred to as the “hinge”). It is important to remember to leave this piece of tape on until the very end of the paste embossing process. If you always place your first piece of tape at the top of the stencil, you will alway know which piece of tape went down first and should be removed last.

Make sure the hinge piece and all the other pieces of tape extend at least a half inch past the edge of the stencil. Now tape down the sides and then the bottom making sure that each piece tape overlaps. The taping process is very important because it keeps your stencil flat against the paper and protects the outside edges from any excess paste that may slide off.

Step 2 :

Work quickly when applying the paste. The paper starts absorbing the moisture from the paste right away and if you spend too much time applying the paste the paper will warp and pull away from the stencil which will allow paste to seep underneath.

Pick up the paste on one edge of your palette knife as if you were picking up icing for a cake. Smooth the paste over the stencil area in one gentle motion keeping the knife blade at an angle. The paste will probably be about 1/8″ – 1/4″ thick on the stencil. Run your knife over the surface again and remove any excess paste and make sure that all the areas are filled. This should result in a smooth, even application. Try not to overwork the paste.

Step 3 :

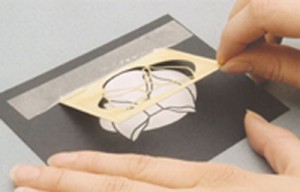
Quickly remove the tape from the bottom and then the sides. Leave the top, “hinge” tape in place. Now, pull up against the hinged tape so that the stencil is not pulled through the wet paste.

Set your paste image aside to dry. Don’t be surprised if your paper warps, it will flatten out when your paper dries.

Immediately place the dirty stencil in a pan of water and mild detergent and clean it. If necessary use a soft scrub brush or old toothbrush to remove excess paste. Dry with a soft cloth. If there is any residue on the stencil you may be able to remove it with rubbing alcohol.

Adding Color to Embossing Pastes :

There are several ways to add color to your embossing paste projects, some when the paste is wet and others after it has dried. Here are a few suggestions :

  • Sprinkle glitter onto the wet paste after removing the stencil. Tap off the excess and let dry.
  • If you are using Regular Embossing Paste you can add color with chalks or pigment inks after the paste has dried by repositioning the stencil over top and applying color with stencil brushes.
  • Metallic and pigment powders (like Pearl Ex) can be added to both the Regular and Translucent Pastes to create an unlimited number of beautiful colors and effects.

These are just a few of the ways that you can add color to your stenciled images. If you would like more information or ideas you may want to get the Dreamweaver’s book – New Dimensions In Cardmaking – Using Embossing Pastes with Metal Stencils. It’s a great reference book and has a gallery of card samples that is sure to inspire you.

We have added lots of samples to our Gallery in a special album using Dreamweaver stencils so be sure to check them out. I hope they inspire you and you give this wonderful technique a try.

Happy crafting!

© Scrap ‘n Stamp Canada 2010

Tuesday Tutorial – Dreamweaver Embossing Paste Read More »

Christmas Tuesday Tutorial – Dreamweaver Stencils and Glitter

Click here to view an updated version of this Tuesday Tutorial >>>

Hi All, it’s Shellie here with this weeks Christmas Tuesday Tutorial!  I LOVE GLITTER, especially on Christmas cards, so today I am going to show you how to used your Dreamweavers Stencils to create fun glittery images!

g1

Products You Will Need: Spellbinders Nestabilities Dies, Dreamweavers Stencils, Scor-Tape Adhesive Sheets, Glitter, A bar of soap, Scotch Removable Tape

g2

Using a piece of Scotch Removable Tape attach your Deckled Rectangle die to your Scor-Tape Adhesive sheet, make sure you place he die in the corner so you don’t waste any of your adhesive.  Cut out using your Big Shot machine.

g3

Rub your bar of soap all over one side of your Dreamweaver Stencil.  This will act as a release agent so your stencil does not stick to your tape.

Peel off the backing of your Scor-Tape Adhesive Sheet and stick down your Dreamweaver stencil.

g4

Mask off any part of your stencil that you do not want to get covered in Mahogany Glitter (I only wanted the base of the tree glittered with Mahogany)  I used a piece of scrap cardstock and some Scotch Removable Tape to cover up my stencil.

g5

Dump on Mahogany Glitter and rub onto tape with your finger

g6

Your glittered stencil will look like this.

g7

Remove your mask and move it to the top of the tree covering up all but the top circle.

g8

Dump on Gold glitter and rub in with your finger

g10

Remove your mask to expose the remaining adhesive and dump on Green Glitter, don’t forget to rub it in with your finger

g11

Peel off  the backing of your Scor-Tape Adhesive Sheet and stick your project onto a piece of patterned paper.

g12

Remove the Dreamweavers stencil to expose the rest of the adhesive sheet

g13

Dump on Transparent glitter and rub in with your finger

g14

Your art work should now look like this.

g17

To finish my card I layered Basic Grey Wassail papers onto Core’Dinations cardstock and attached my art work using 3D Dots, I cut out a few presents from another piece of Basic Grey Wassail paper and attached them in from of my art work using 3D dots.

I would LOVE to see what you come up with using this technique, upload your projects to our Members Christmas Gallery and be entered in our Draw for this weeks Blog Candy!!

BLOG CANDY

This is just one of the fantastic items we will be giving away this week as Blog Candy. Check back everyday and we’ll show you another great item that you could win.


Dreamweaver Stencil - Ornament Tree - Retail Value $8.49
Dreamweaver Stencil – Ornament Tree – Retail Value $8.49

Getting your name entered into the draw is really simple!

A Look Ahead

Come back every day this week for more exciting projects to get you thinking about Christmas.

Here is a quick look at what else we have in store for you this week:

Wednesday – Gifts from the Kitchen

Thursday -Gift Calendar

Friday – Christmas Sketch

Saturday – Christmas Showcase, Our Fave Projects!


Until Next Time, Happy Crafting!

Shellie

Christmas Tuesday Tutorial – Dreamweaver Stencils and Glitter Read More »
Free Shipping Anywhere In Canada