Scratch-N-Stamp
Search

Checkout

Keep up with Sales, New Products and other events at Scrap `n Stamp. Sign up for our newsletter now!

What's New

Hot Deals


Techniques

Tuesday with Tara {take 321} Looks like snow y’all

Happy Tuesday!  Today the challenge word that inspired my card was STENCILS and I was excited as I just got some new ones from Vicki Boutin recently.  I’m such a fan of her colorful work and this Wild Soul Stencil from the Storyteller collection is the first product I finally got my hands on… I didn’t even notice it was a set of three! (I also got the 6×8 paper pad for some quick creations!).  I follow Vicki on Facebook and she often does tutorials, so I went looking for a fun stencil technique.  You can find the video I used as my inspiration on October 1- it’s a fun one.

So I started with the technique she shared using Distress Ink, a stencil and a bunch of water on a smaller scale since I was working with cards instead of scrapbook page.  Once it was ready, I trimmed it down to size and then as I was contemplating my card (and the SNOW my hometown in BC got yesterday!) I added a layer of snowflakes using this great stencil by Paper Rose.
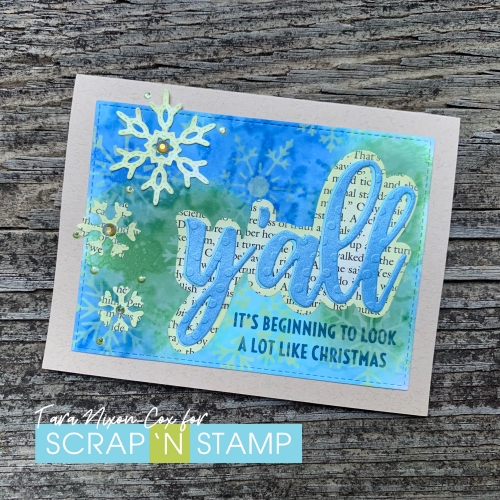
Once I decided I wanted to embrace the snow theme I went digging through my supplies.  I recently got this big y’all die from Picket Fence (which I don’t imaging SNS will have anytime soon, but since I’m living in the south now it’s something I had to have it) so I found a sentiment to pair it with.  These sweet stitched snowflakes are from Memory Box, which I thought was a nice touch with the stitched edge on my background.  A few elements cut from book print adds a really fun touch, and I inked them in the same pale green (shabby shutters) Distress Oxide ink that I used with the stencil over the background.
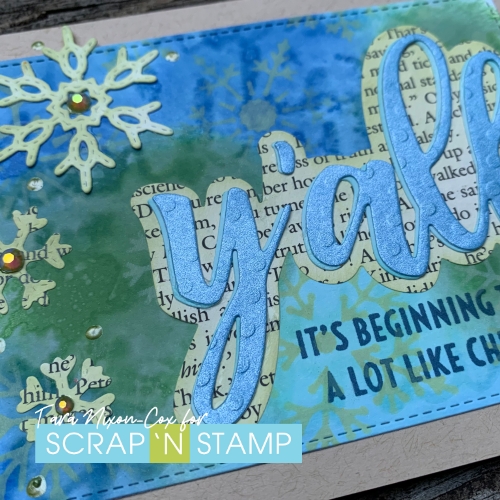
This background has almost a tie-die feel to it… which I’m not sure is something I’ve ever seen with snowflakes before, but I kinda like it!  Hope you do too 🙂

Inky hugs,

Tara

Tuesday with Tara {take 321} Looks like snow y’all Read More »

All About Smooshing

Happy Friday! Father’s Day and the Summer Solstice are on Sunday, but I hope you’ll be able to find a little time to craft this weekend, too. And maybe you will do some ink smooshing! A fun and simple technique that can lead to great results.

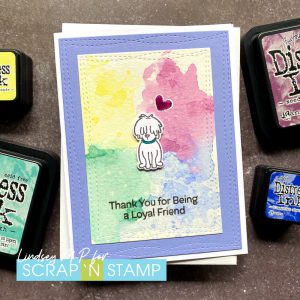
For my first card today, I used a smooshing technique that gives a little more control than usual over the end result.


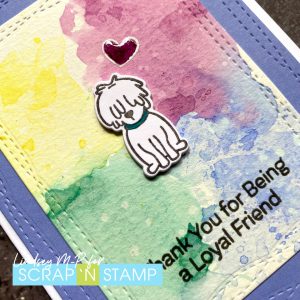
All you need is a craft mat or similar waterproof surface (I use a laminated half sheet of cardstock) and a piece of clear acetate – as a former teacher, I do seem to have a few sheets still lying around. 😀 For colours, I used four distress inks: seedless preserves, blueprint sketch, evergreen bough and squeezed lemonade. For each colour, I smooshed the ink pad, spritzed with water, then used the acetate to pick up the ink and transfer it to my watercolour panel. This way, you can see exactly where you’re smooshing it! It also keeps the colours from blending too much, if that’s the look you want. Once I had my background the way I wanted it, I set it aside to dry and stamped this cute guy from My Favorite Things’ Puppy Kisses. Since I wanted him to really pop against the background, I didn’t worry about adding any shading or shadows, just coloured his collar with a couple of green Copics. I also die cut a few extra shapes, so I could layer them together and add a bit of dimension.

Once my smooshed panel was dry, I die cut it and a coordinating blue cardstock panel with MFT’s wonky stitched dies. For the heart, I stamped with Versamark and embossed with white, then watercoloured inside with more seedless preserves to increase the intensity. (As you can tell, I couldn’t resist adding a little Glossy Accents at the end. 😀 ) The sentiment is stamped with the same grey ink as my pup.


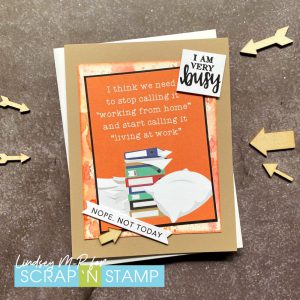
If you’ve received any happy mail from Scrap ‘n Stamp recently, you may have found a fun journaling card tucked in with your order. I decided to turn mine into a Father’s Day card for a work-from-home dad:

Of course I never throw away the leftovers from smooshing! I had a panel I had previously used to die cut an autumn leaf, but look how well it works with this journaling card! I matted the card in black and edged the smooshed layer with some of the same carved pumpkin distress ink I’d used for smooshing. “Nope. Not Today” is a snarky sentiment strip, while the busy stamp and the arrow are from deep in my stash. 😉

I hope these have given you some inspiration to get smooshing! Have a great weekend!


All About Smooshing Read More »

Tuesday with Tara {take 233} Happy Hello

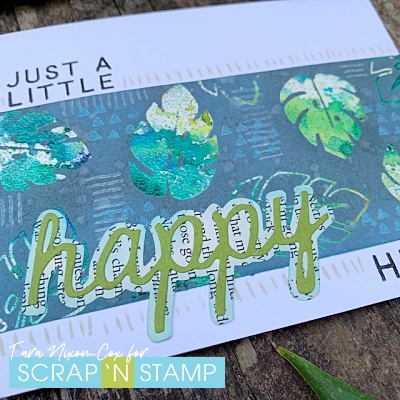
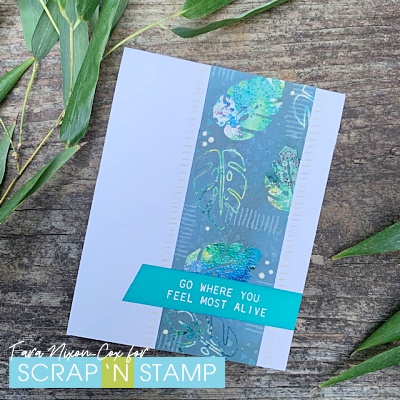
Happy Tuesday and happy New Year’s Eve! Today I’m sharing a project I’ve had set aside on the back-burner for a while. I created this in the midst of my fall & Christmas projects, when I still kinda had some summer inspiration hanging on. The cards are simple, and so is the technique, but I’ve got a bit of a step by step tutorial for you to finish of the year right 🙂

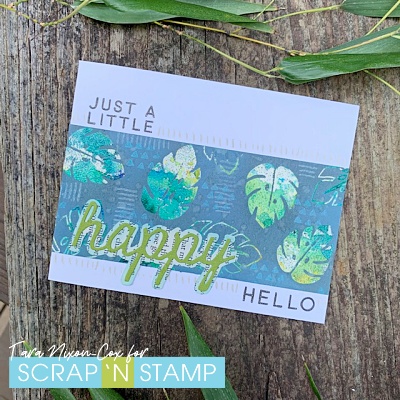
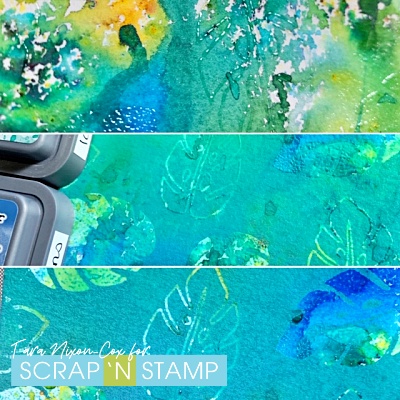
I used a mix of products here, but I’m focusing on the paper I made using some of the leaves & background images from the Toucan Paradise set by Concord & 9th.

I love the tropical leaves and other design elements on this set- it’s so much fun! Here’s where I wanted to share how I created the background, which is my own variation of the Joseph’s Coat Technique. Unfortunately, I’m having technical difficulties and getting this lovely little question mark instead of an image.

Once you’ve checked out my cards, please pop over to my personal blog for the quick tutorial on this technique 🙂

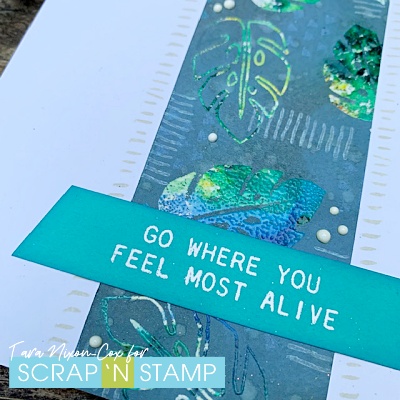
Here’s a look at the second card I made with my background paper!

I just love the colorful leaves against the muted background, hope you do too!

Inky hugs,

Tara

Tuesday with Tara {take 233} Happy Hello Read More »

Free Shipping Anywhere In Canada