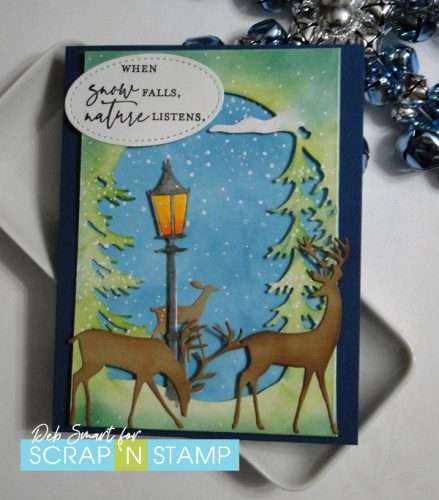
Scratch-N-Stamp
Search

Checkout

Keep up with Sales, New Products and other events at Scrap `n Stamp. Sign up for our newsletter now!

What's New

Hot Deals


Author name: Deb Smart

Cute Mug Notes

Welcome to the weekend! My word for the Scrap ‘N Stamp daily challenge is ‘drinks’. I really wanted to use the Honey Bee Mugs & Kisses die set that I used for our Tea for Two Inspiration Hop again. But of course, in a different way. Then I thought – well, Valentine’s Day is coming up! It’s always fun to share a cute note card with friends and coworkers. These little mugs fit the bill perfectly!

MUG NOTES

You could decorate these cute mug notes for any occasion! Think ‘thank you’ notes, ‘let’s meet for coffee’ notes, etc. Here’s 3 examples that I created.

Cute Mug Notes

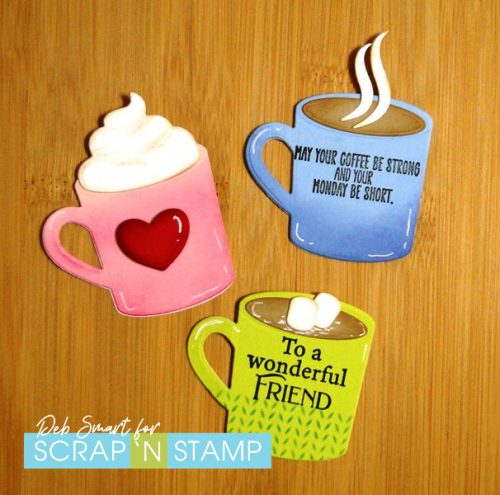
Aren’t they cute?! And making them in different colours adds to the fun. I think that the blue one would be perfect for a co-worker!

MUG DETAILS

For each mug, I die cut a white back, and then die cut the coloured cardstock fronts. Then I decided how to decorate each mug. For the blue mug, I kept it simple. Blend Faded Jean distress oxide onto the bottom & edges of the mug. Die cut the steam from white cardstock, and the coffee from light brown cardstock. Lightly blend Vintage Photo distress oxide around the edges of each, and glue them into place. Next, stamp the sentiment from the Impression Obsession Coffee Mug Sayings set in Nocturne ink. Add some highlight to the mug with a white gel pen. Finally, attach the front & back by placing glue only on the handle of the mug – and glue the mug front to the die cut white mug back.

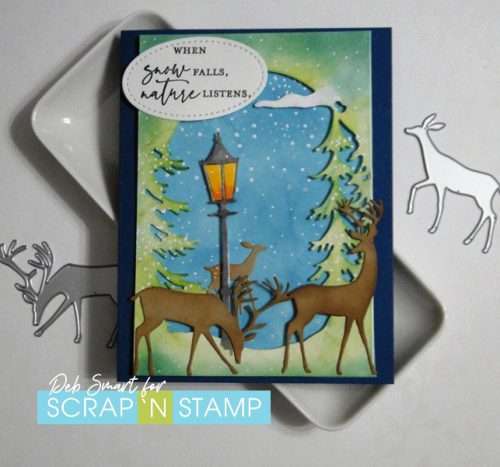
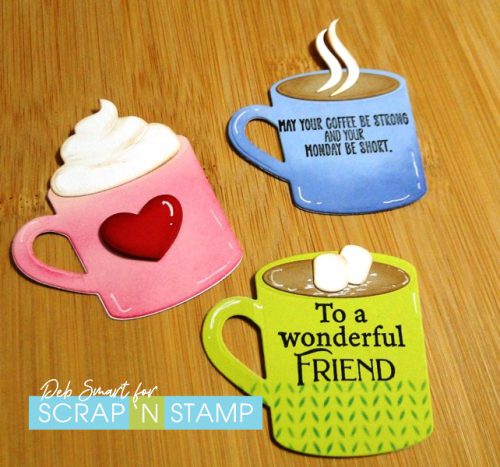
The pink mug is decorated the same way; blend Picked Berries onto the mug, and add the white highlights. Die cut the heart from red cardstock, then blend Fired Brick around the edges. Make it pop with the white reflection on the top curve of the heart. For the whip cream, lightly blend Vintage Photo ink around the edges & into the folds of the whip.  Before gluing the front & back mug pieces together, stamp the sentiment from the Poppy Stamps Diamond Sentiments set on the inside.  You can see how the mug opens, in the photo below.

Cute Mug Notes

For the neon  green mug, I stenciled the pattern across the bottom of the mug using a retired MFT stencil. Next, the sentiment is stamped in Nocturne ink, again using the Poppy Stamps set. I’m going with a hot chocolate theme for this mug-you can see the lightly blended marshmallows, floating in the hot chocolate!

HAVE FUN!

By creating a little note card that opens up, you can write a little something to the recipient, if you want. Switch up the colours and sentiments, for different occasions!

You can see the card I created for our Tea for Two Inspiration Hop in THIS POST. Be sure to leave a comment on that post too – and the others in the Hop, if you haven’t already. Everyone who comments on the Hop posts is automatically entered to Win a $50 Gift Card from Scrap ‘N Stamp!

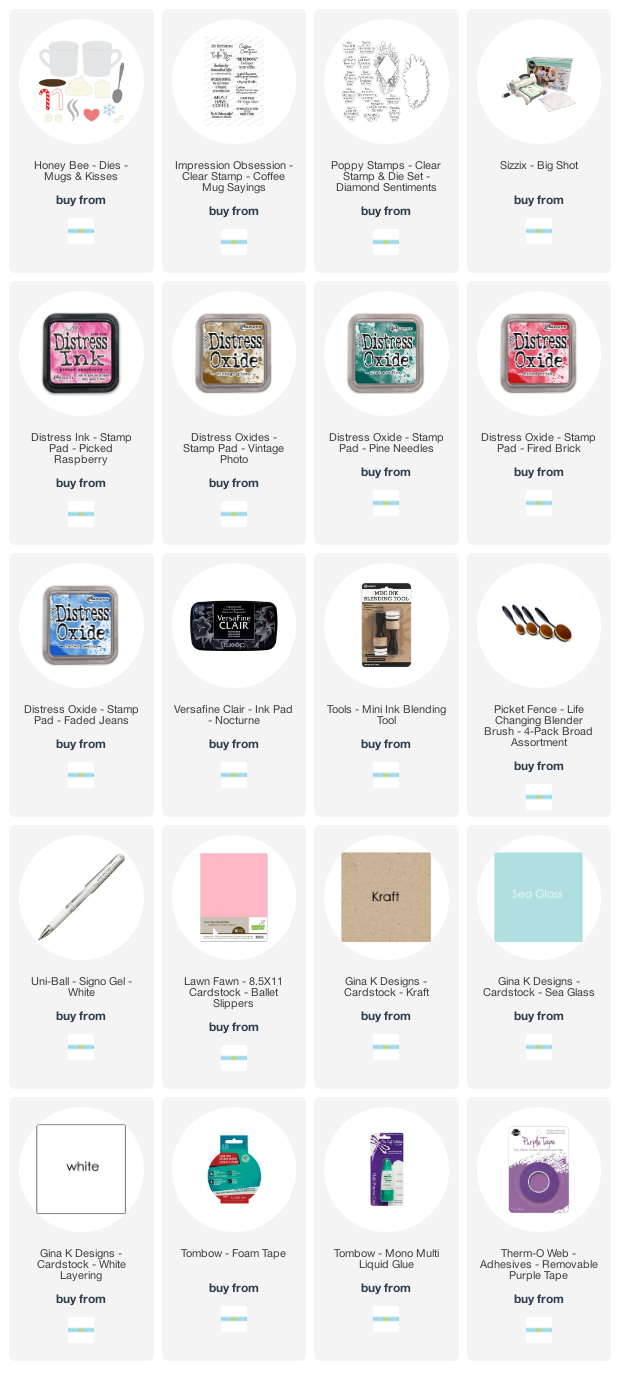
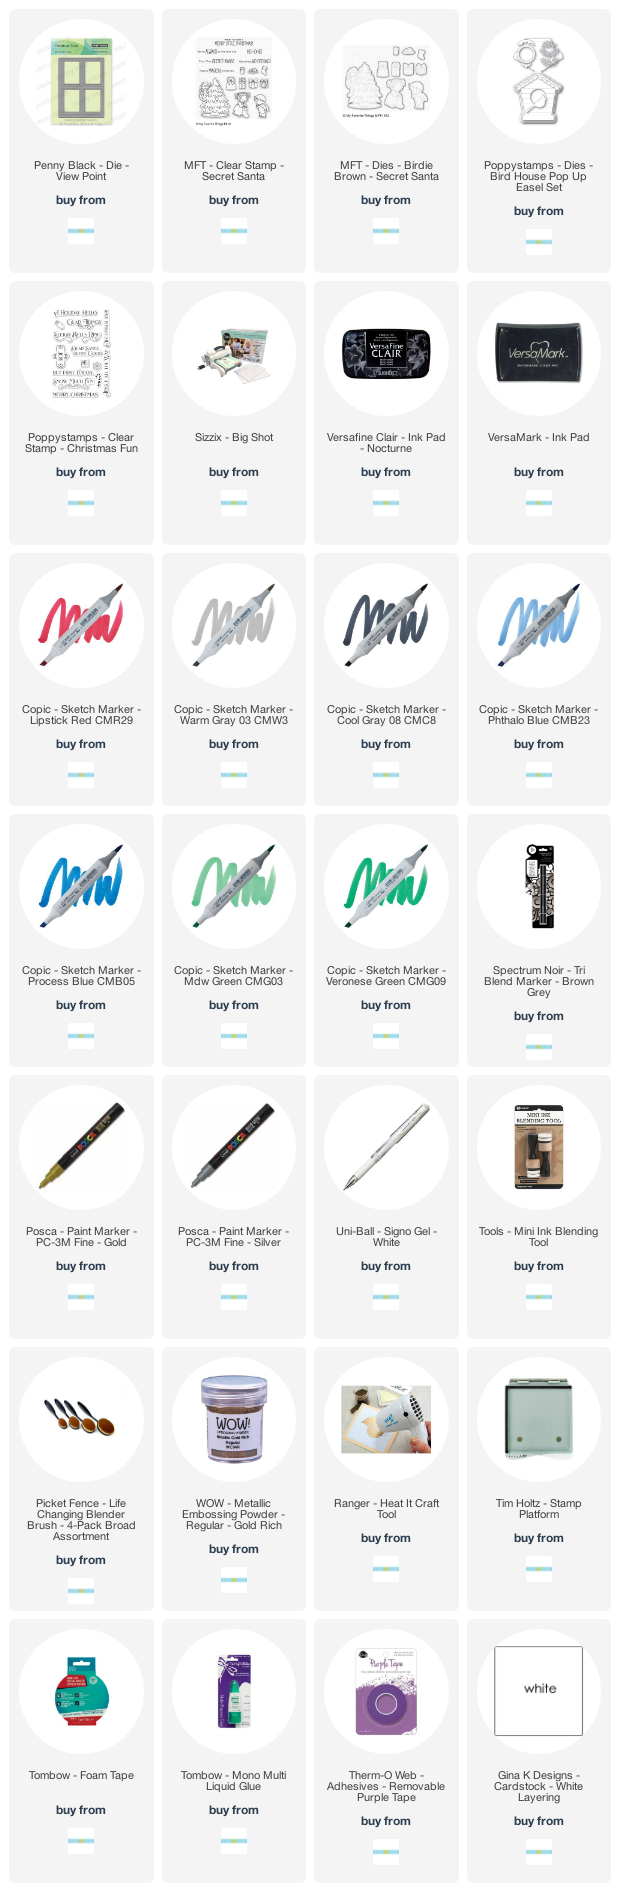
If you’d like to create these cute mug notes yourself, I’ve created a shopping list for you, below.

Affiliate links are provided, at no cost to you. When you choose to use my links, I receive a small commission, which helps me maintain my blog & keep creating. Thanks in advance!


Cute Mug Notes Read More »

Santa’s On His Way!

Happy Holidays, my friend! I hope that however you celebrate, you have a safe and happy season.  Santa’s on his way for all the good girls and boys (and grown up’s, too – hey, if you don’t believe, you get socks!). So today’s card features the jolly old elf himself, Santa Claus. It’s also today’s word prompt for the Scrap ‘N Stamp challenge. I hope you’ll play along!

SECRET SANTA

Of course, Santa likes to stay low key and kind of behind the scenes. That’s why he’s giving the “shhh” signal in this, one of my favourite sets. It’s called Secret Santa, from MFT.

Santa's On His Way!

I also used the fabulous new die from Penny Black, called Viewpoint, for the window frame. More about this in the details, below.

CARD DETAILS

To achieve the presents being in front of the tree requires some masking. First, die cut the Santa/tree image from copy paper. Set up your 4.25″ x 5.5″ white cardstock in your stamp positioner. Now, lay the die cut image in the middle of the cardstock. Now, lay the present stamps over the die cut where you want them, surrounding the tree. Press the lid of the stamp positioner down, picking up the present stamps. Now, remove the die cut Santa/tree, and stamp the presents in Nocturne ink. Repeat this as many times as you want, to add more presents – you can also create die cut masks for the present shapes, as well.

Once you’ve stamped your presents, mask those off, and then stamp the Santa/tree image. Now you’re ready to colour with your favourite markers. I used my Copic markers, plus a Spectrum Noir Tri-Blend. You can see all of the markers in the shopping links, at the bottom of this post.

CREATE THE WINDOW FRAME

The great thing about this Viewpoint die is that you can use just the frame, or also use the inserts to create depth to your window. First, run the die cut through your Big Shot with white cardstock. You’ll notice that in each window pane, the bottom and left portion of the pane cuts an extra piece. To create the dimension, colour the bottom piece in a lighter shade of grey, and the left side in a slightly darker shade. I chose the Copic W3 Warm Grey and the Spectrum Noir Tri Blend Brown Grey.

Next, run your stamped & coloured image panel through the Big Shot with the Viewpoint die. This cuts your image into 4 panes.  Now, on a background panel, glue the frame, and then the frame inserts. Finally, glue in the 4 sections of your image – and voila!  Of course, you could also choose to leave your image uncut, and simply lay the frame & inserts (or just the window frame) over the whole piece.

Santa's On His Way!

FINISH IT OFF

To continue with the illusion of looking into the scene, die cut some of the pine branches in green cardstock using the Poppy Stamps Bird House Pop Up Easel set. Add texture & more colour by sponging on some Mowed Lawn distress ink, and then glue them into the top corners over the window frame.

Stamp the sentiment from the Poppy Stamps Christmas Fun set in Versamark ink onto a strip of red cardstock. Cover it with gold embossing powder, and heat set. Snip some banner tails on each end, and then pop it up with foam squares across the bottom of the window.

Santa's On His Way!

MERRY CHRISTMAS!

If you have time between your celebrations and wrapping of gifts, I hope that you’ll join us on the Scrap ‘N Stamp Facebook page, for the daily challenge. Simply share your project, using the hashtag #snschallenge, to join. At the end of the month, one participant is randomly chosen, and will WIN a $50 Gift Certificate to shop Scrap ‘N Stamp!

Until then, you can use my Designer Discount Code 10DEB at checkout, and receive 10% OFF your total order (regular priced items).

Affiliate links are provided, at no cost to you. When you choose to use my links, I receive a small commission, which helps me maintain my blog & keep creating. Thanks in advance!


Santa’s On His Way! Read More »

Darling Deer

Hello my friend! It’s Deb here with a Saturday post for the Scrap ‘N Stamp Design Team. In case you didn’t know, each month in the Facebook group HERE, we post a list of words, one for each day of the month. The challenge is to choose a word prompt, create a project featuring that word in an image, and share it to the group using the hashtag #snschallenge. At the end of the month, one lucky participant is randomly chosen, to WIN a $50 Gift Certificate to Scrap ‘N Stamp! My word prompt for today is ‘reindeer’ – appropriate for this time of year, right? So I chose the new Sizzix/Tim Holtz Darling Deer Dies as my reindeer.

DARLING DEER

I just love the different poses & sizes of the 4 deer that come in this set. I’ve used 3 of the 4 in my card, along with creating the background with the Memory Box Lamplit Tree Collage Die.

Darling Deer

Now,  before you question why there is a lamp post with the deer – we’ve had deer wandering down our street, and in our front (and behind our back yard)!  Granted, we live at the base of a mountain, but they’re always breathtakingly beautiful!

CARD DETAILS

For the background, start with a piece of white or light blue cardstock (if you start with light blue, it cuts down on your ink blending time!). Blend on Broken China Distress Oxide ink, getting lighter towards the middle. Next, die cut the Lamplit Tree Collage using your Big Shot, and white cardstock. Blend different shades of green ink onto the trees and ground, darker around the edges and corners.  Blend orange and yellow for the lamp light, and colour the lamp with a dark gray marker. While you have your Big Shot out, die cut 3 of the Darling Deer from a light brown or kraft colour cardstock.  Apply Vintage Photo ink with a blending brush onto the deer, for shading.  For the smallest deer, keep it lighter, just adding a bit of blending to his rump. Then, add some dots on top, using a white Posca Paint Pen. This makes it look like a baby deer (yes, I know baby deer aren’t born in winter!).

Add snow to the background and foreground panels by stamping the snow from the Colorado Craft Company Kittens & Mittens set, in Versamark ink, repeatedly. Cover with white embossing powder, and then heat set. Add a few more snowflakes if necessary, using the white Posca Paint Pen.

Attach the die cut panel to the ink blended background with foam squares. Next, glue the deer into place. Stamp the sentiment from the Penny Black When Snow Falls stamp set in Nocturne ink, and then die cut it with a stitched Oval. Attach it to the top corner of the card front. Finally, add the card front to a dark blue card base.

Darling Deer

Wouldn’t this be a lovely scene to come upon? Definitely Instagram worthy – if I were able to stop saying “OH” long enough to take a photo!

JOIN THE FUN

I hope that you’ll join the fun with our daily challenge! It’s also a great way to kickstart your creative process, and get lots of cards made at the same time! I hope you’ve enjoyed seeing my Darling Deer; I’ve included shopping links to Scrap ‘N Stamp for the supplies, below.

Darling Deer

Affiliate links are provided, at no cost to you. When you choose to use my links, I receive a small commission, which helps me maintain my blog & keep creating. Thanks in advance!


Darling Deer Read More »

Free Shipping Anywhere In Canada