Scratch-N-Stamp
Search

Checkout

Keep up with Sales, New Products and other events at Scrap `n Stamp. Sign up for our newsletter now!

What's New

Hot Deals


Diamond Sentiments

Layered Die Cuts

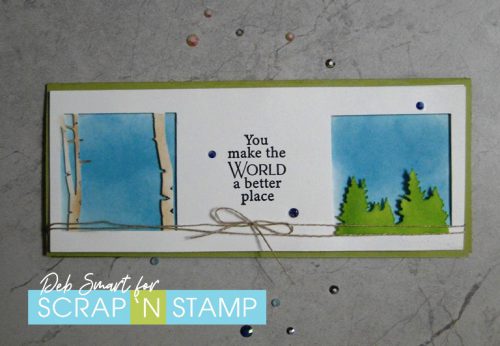
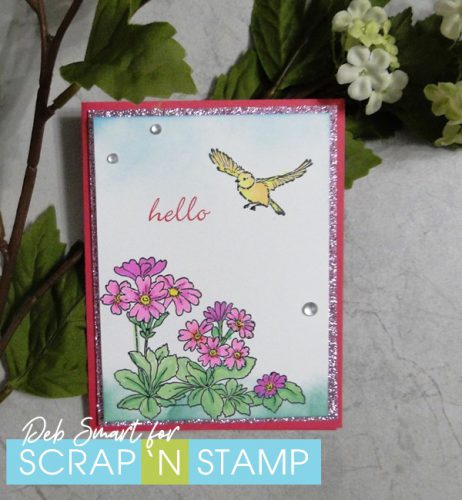
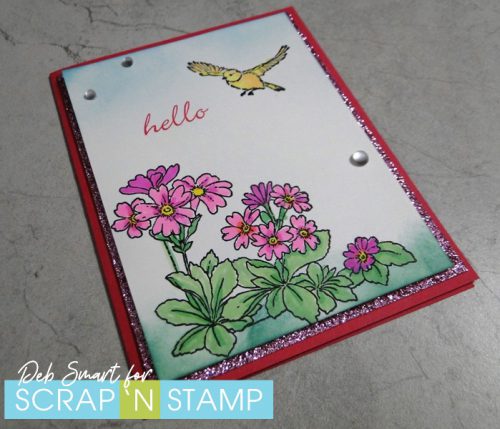
Welcome to the weekend, my friend! It’s Deb here from the Design Team, to share my project for today’s Scrap ‘N Stamp Daily Challenge. Today’s word that I chose is cuts, as in die cuts. So for my project I decided to do a layered die cuts card.

DOODLE ART BACKGROUND

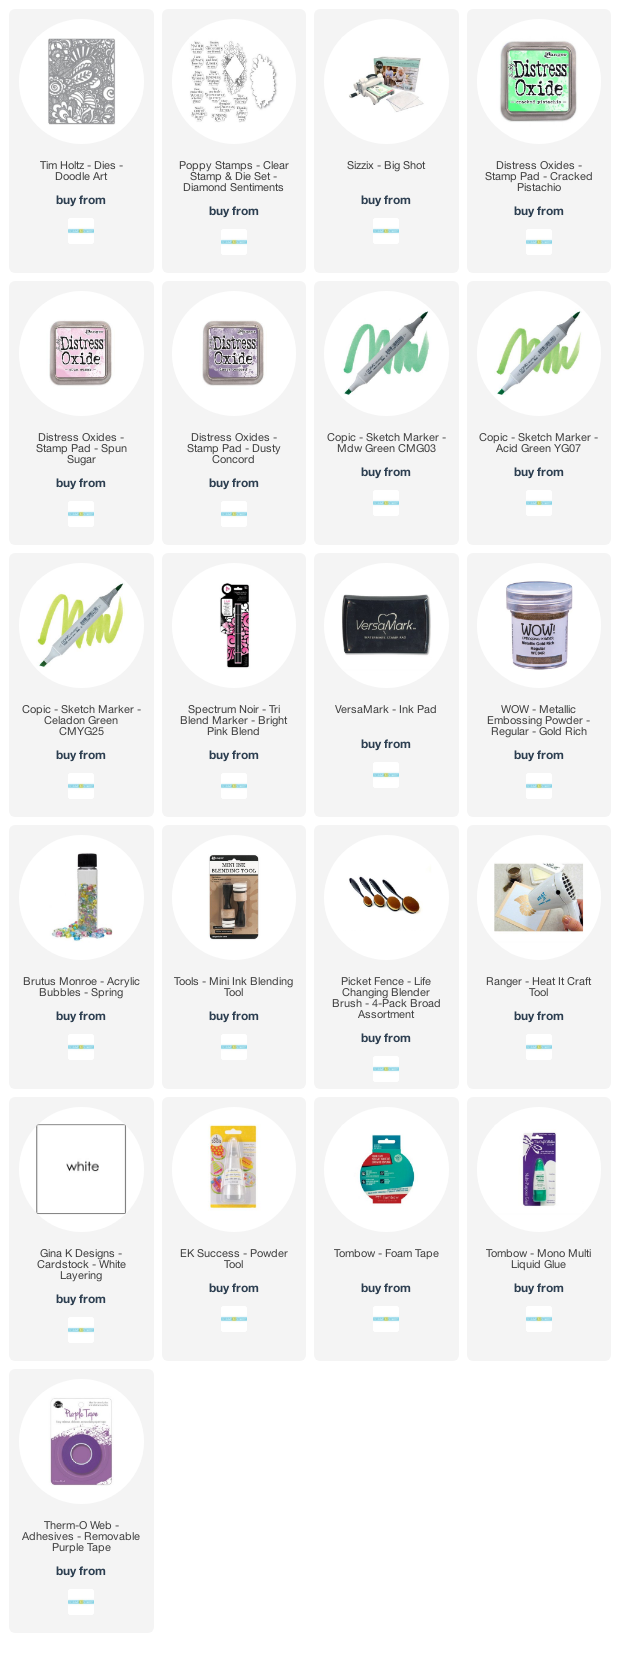
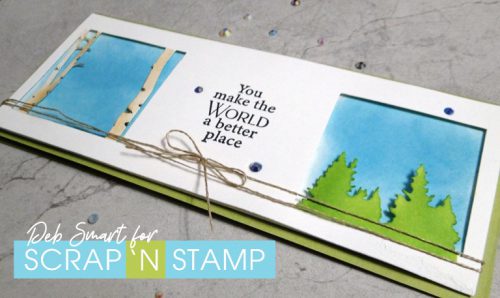
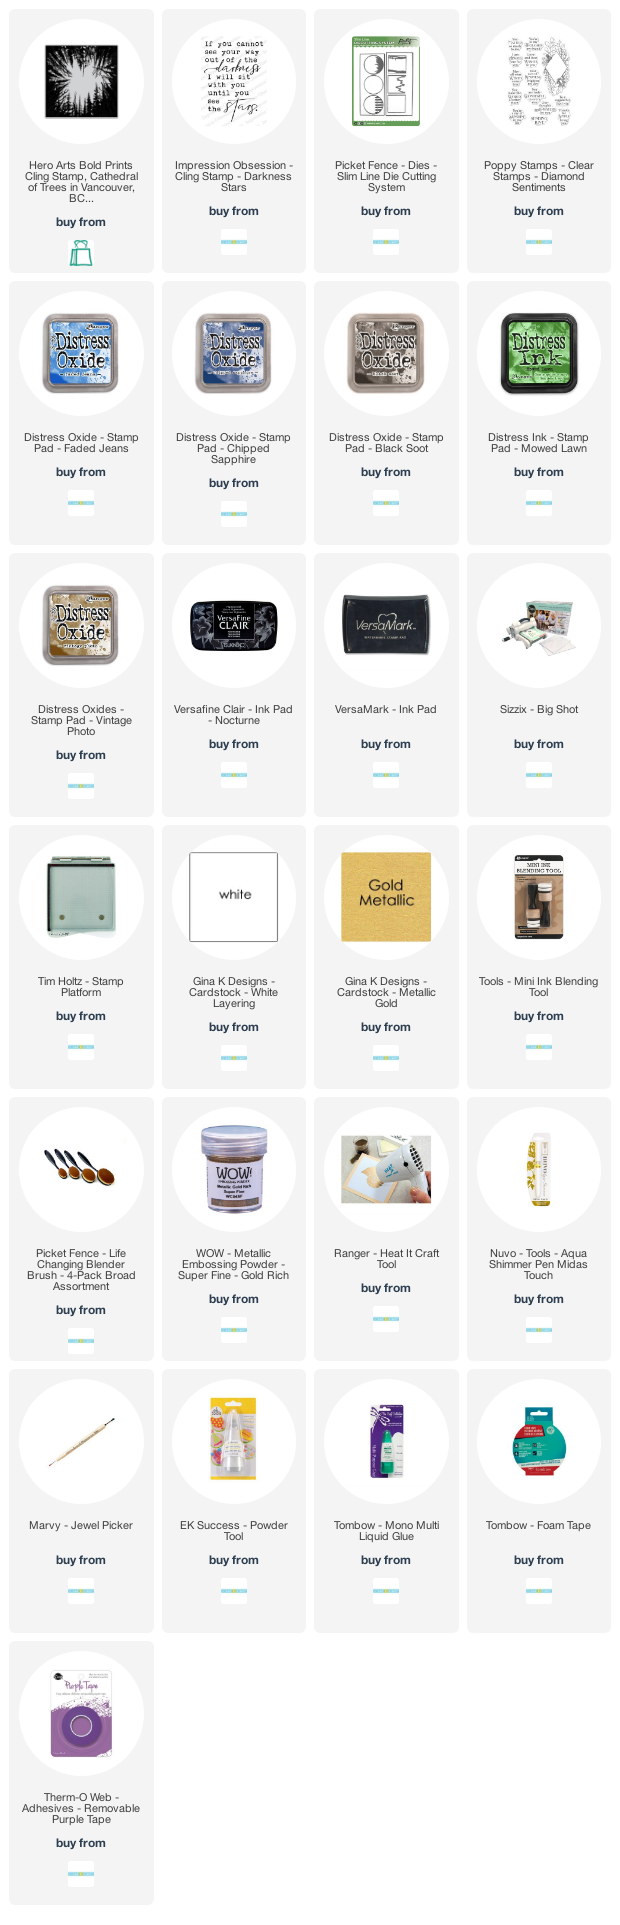
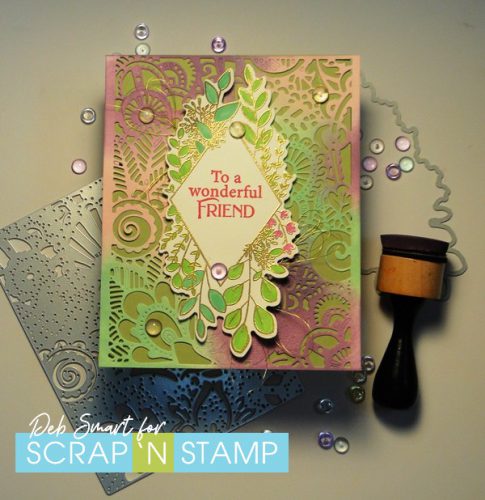
To start, I decided to use the Tim Holtz Doodle Art Thinlit for the background. It’s full sized, so it covers the entire card front. Start with a piece of white cardstock, and blend on some Distress Oxide inks. I chose Cracked Pistachio, Dusty Concord and Spun Sugar.  After blending the inks, lay the Thinlit over the cardstock, and run it through your Big Shot.  With these detailed background dies, I find that I have to run them through several times, to ensure that every area cuts through.

Layered Die Cuts

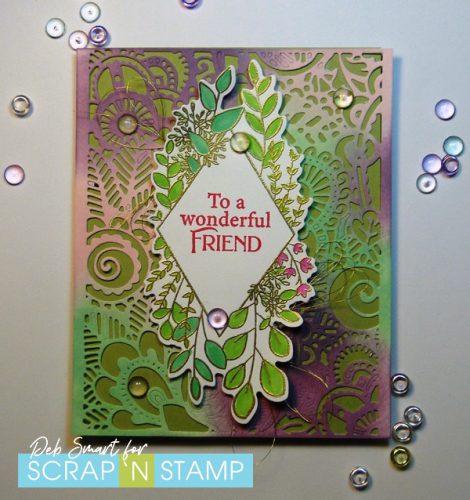
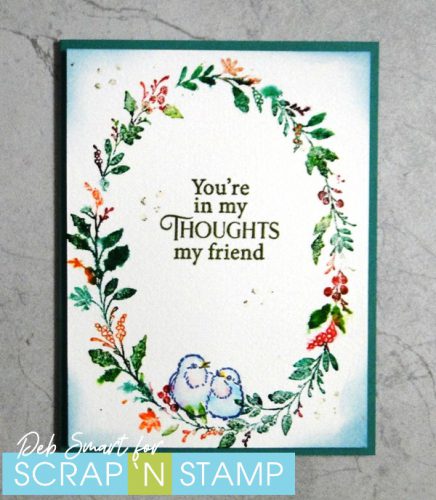
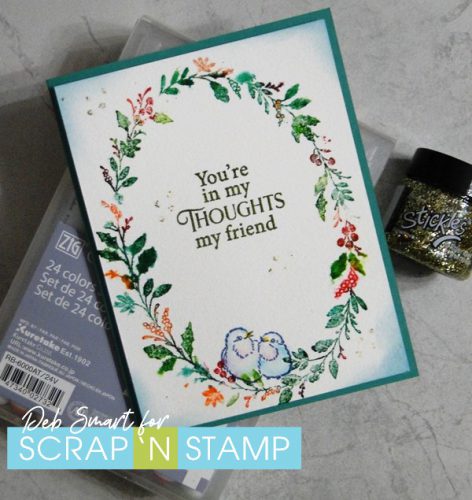
Next, stamp the Diamond Sentiments stamp from Poppystamps in Versamark ink onto another piece of white cardstock. Cover the ink with gold embossing powder, and heat set. Now you’re ready to colour the leaves and flowers. I used Copic markers in YG25 Celadon Green, YG07 Acid Green, and G03 Meadow.  The pink if from Spectrum Noir Tri-Blend Bright Pink marker. The sentiment is from the same set, stamped in dark pink. I like this Diamond Sentiments set, because it comes with the coordinating Die!

Layered Die Cuts

To finish off the card front, wrap some gold thread and tuck  it in behind the Diamond Sentiment. Glue the die cut background onto a light green card base, and then add the sentiment with foam squares or tape. The final touch is to add some Brutus Monroe Acrylic Bubbles.

JOIN THE CHALLENGE

If you haven’t already, I hope that you’ll join our daily challenge. It’s fun, easy, and there’s a prize to be won! You’ll find a different word prompt for each day of the month. Play along as often as you like! Just share a photo of your project on the Facebook page HERE, and use the hashtag #snschallenge. At the end of each month, one participant is randomly chosen to WIN a $50 Gift Card to shop Scrap ‘N Stamp!

And speaking of shopping – be sure to use my Designer Discount Code 10DEB for 10% OFF your total order (regular priced items only).

Layered Die Cuts

Affiliate shopping links are provided. If you choose to use my links, you help support me in maintaining my blog, at no extra cost to you. Thanks in advance!


Layered Die Cuts Read More »

Trees, Trees and More Trees!

Hey creative friend! It’s Deb here, for the Design Team. Do you known what I realized, today? I realized that I have a LOT of stamp sets with trees! Trees, trees, and more trees! I guess that’s why I chose trees for today’s prompt for the Scrap ‘N Stamp challenge. My house is also surrounded by trees – it’s lovely to look at, especially at this time of year. We have evergreen trees, but we also have a lot of deciduous. So when the leaf buds start emerging, it’s a riot of all shades of green!

CATHEDRAL OF TREES

This first card uses an ‘oldie but a goodie’ stamp from Hero Arts, called Cathedral of Trees. I love this perspective of looking up, from the middle of a grove of trees.

Trees, Trees and More Trees!

CARD DETAILS

A trick I like to use when doing an ink blended background is to start with a piece of coloured cardstock, rather than white. Choose the lightest of the colour you’re using – in this case, start with light blue. Next, blend on Distress Oxide inks in (from  outside in) Black Soot, Chipped Sapphire and Faded Jeans. Leave the very middle without ink – so that just the cardstock shows through. This gives you the illusion that the center is ‘glowing’ with light.

Next, set up the blended panel in your stamp positioner, with the Cathedral of Trees stamp. Cover the stamp with Nocturne ink, and press firmly. With these large background stamps, I always find it best to ink & stamp twice, to ensure full coverage.  With the panel still in the positioner, line up the sentiment stamp Darkness Stars from Impression Obsession. Stamp with Versamark ink. Remove the panel, cover the sentiment stamping with gold embossing powder, and heat set.

To add some stars, mix a bit of white gouache or acrylic paint with water. Pick up the paint with a small brush, and splatter onto the panel. I also added some gold stars by dotting a Nuvo Glimmer Pen in Midas Touch randomly onto the panel.

Layer the finished panel onto a piece of Gina K. gold cardstock, and then onto a dark blue card base.

Trees, Trees and More Trees

SLIMLINE TREES

This next card doesn’t use any tree stamps – but it does use tree dies! I chose the Picket Fence Studios Slimline Die Cutting System with the 2 tree square dies.

I love the simplicity of this card! The blended blue sky just shines, doesn’t it?

CARD DETAILS

First, use the smaller of the slimline dies to cut 2 pieces from white cardstock. Put one aside – this will be for the background. Place the 2nd one back onto your Big Shot cutting plate, and place the 2 square tree dies at either end, and cut. To colour the birch trees, lightly blend on Vintage Photo distress oxide, and then add the black with a fine marker. Colour the evergreen trees with Mowed Lawn distress oxide, and a blending tool. Now, stamp the sentiment from the Poppystamps Diamond Sentiments in the middle, with Nocturne ink.

Place the die cut layer over top of the uncut piece, and lightly trace out the square openings with a pencil. Next, use a blending tool and apply Broken China distress oxide. Layer the 2 panels together with foam tape or squares. Decorate the front by wrapping some linen thread around the front, tying off with a small bow. Add a few coloured rhinestones, and then attach the card front to a green card base.

JOIN THE DAILY CHALLENGE

Are you playing along with the Scrap ‘N Stamp daily challenge? You don’t have to play every single day – play as often as you can! You can find the details HERE in the Facebook group, along with the list of prompts for this month. At the end of each month, one lucky participant is randomly chosen, and wins a $50 Gift Certificate to shop the Scrap ‘N Stamp store! I hope that you’ll join me in today’s challenge with trees, trees and more trees!

SUPPLIES

Speaking of shopping the Scrap ‘N Stamp store, I’ve listed the products I used for my cards, below. Affiliate links for supplies are provided. If you choose to use my links, you help support me in maintaining my blog, at no extra cost to you. Thanks in advance!


Trees, Trees and More Trees! Read More »

Today’s Prompt is Birds

Welcome to the weekend, my friend! It’s Deb here, for the Scrap ‘N Stamp Design Team. Today’s prompt is ‘birds’, for the daily challenge. If you haven’t checked this out, you should! The challenge takes place on the Scrap ‘N Stamp FB challenge page HERE. You’ll see a word prompt for each day of the month. To join, simply create your card, and share a picture of it in the group. Be sure to use the hashtag #snschallenge, so it gets noticed!

BIRDS FOR SPRING

We have a LOT of birds that visit our house daily, for the food we put out. It can get pretty busy out there, and it’s always fun to watch. So I thought this would be a good word, especially for Spring. I created two cards to share today, both using the Penny Black Wreath & Wings stamp set.

Today's Prompt is Birds

For this card above, I used my Zig Real Brush Clean Color Markers and a Mini Mister, for a soft watercolour effect. When doing this effect with multiple colours, it’s important to use your stamp platform. Once the wreath is stamped, remove it, and line up the pair of birds. Stamp them, and then lightly watercolour. To watercolour the birds, I wet the area, and then put down some ink with a marker. Next, use a water brush to spread the ink.

Stamp the sentiment from the Poppystamps Diamond Sentiments stamp set, in Versamark ink. Cover it with gold embossing powder, and heat set.

Today's Prompt is Birds

I wanted to add a touch of sparkle, so I used the MFT Winter Stencil Strips, masked off a few of the dots, and applied the Stickles Glitter Gel ‘Super Nova’ in random areas. (those aren’t messy blotches!) Finally, lightly blend some Broken China Distress ink around the edges of the panel, before layering it onto the card base.

BIRDS AND FLOWERS

Of course, Spring is also the perfect time for new flowers! This time, I combine the Wreath & Wings with another Penny Black stamp, called Perfect Pairing.

The flowers are from the Perfect Pairing set, and the bird is from the Wreath & Wings.  Stamp the images in Nocturne ink, and heat set clear embossing powder over top. Use your markers to colour; I chose to use Spectrum Noir Tri-Blend Markers in Light Green, Bright Pink, and Citrus, plus Copics for the bird. The sentiment is from the Perfect Pairings stamp set, stamped in dark pink ink.

The gorgeous sparkle paper behind the card front is from the Memory Box Graceful Garden Glitter Pad – it has a gorgeous selection of glitter cardstock! A few clear drop embellishments finish off this cheerful, very spring-like card.

SUPPLIES

I hope that you enjoyed today’s two happy cards, for today’s prompt of birds! The supplies to create them can all be found in the Scrap ‘N Stamp store. Be sure to create your own ‘bird’ cards, and share them for the challenge! At the end of the month, one lucky entrant is randomly chosen, and wins a $50 Gift Card!

Affiliate links for the supplies I use are provided. If you choose to use my links, you help support me in maintaining my blog, at no extra cost to you. Thanks in advance!


Today’s Prompt is Birds Read More »

Free Shipping Anywhere In Canada