Scratch-N-Stamp
Search

Checkout

Keep up with Sales, New Products and other events at Scrap `n Stamp. Sign up for our newsletter now!

What's New

Hot Deals


mft die-namics

Poinsetta Christmas

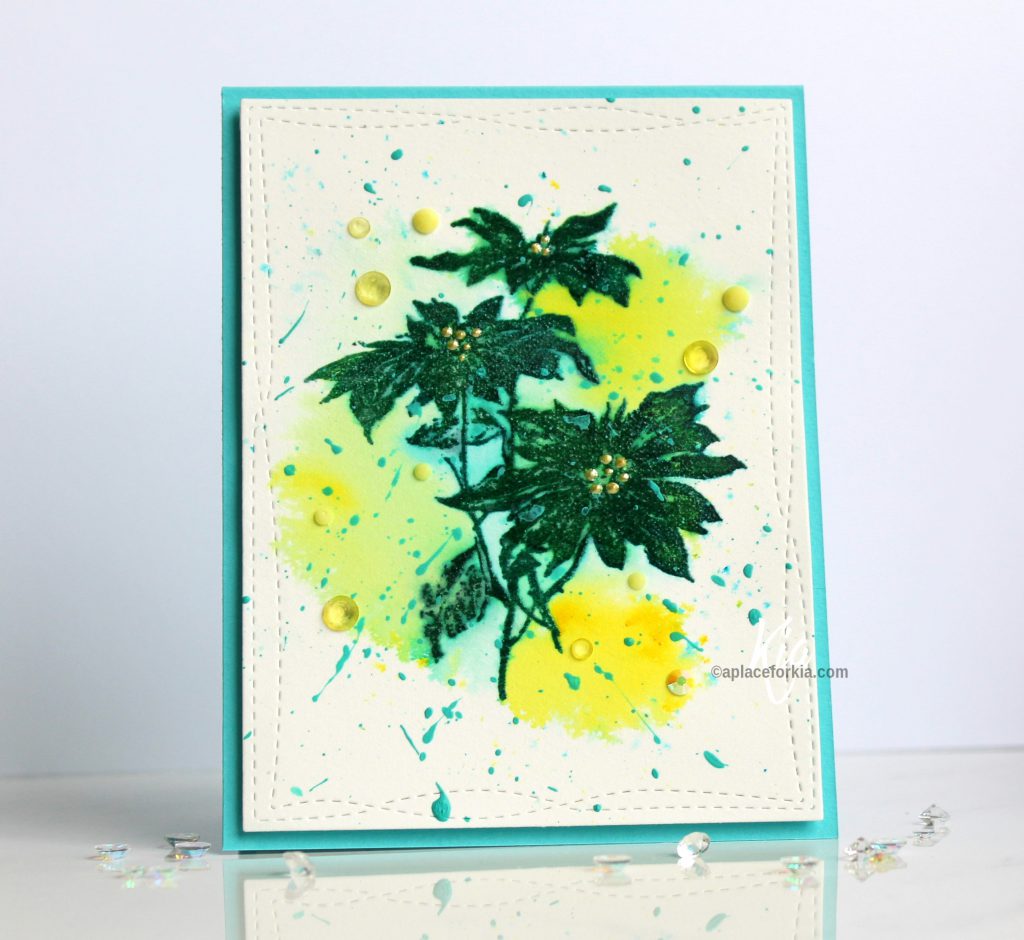
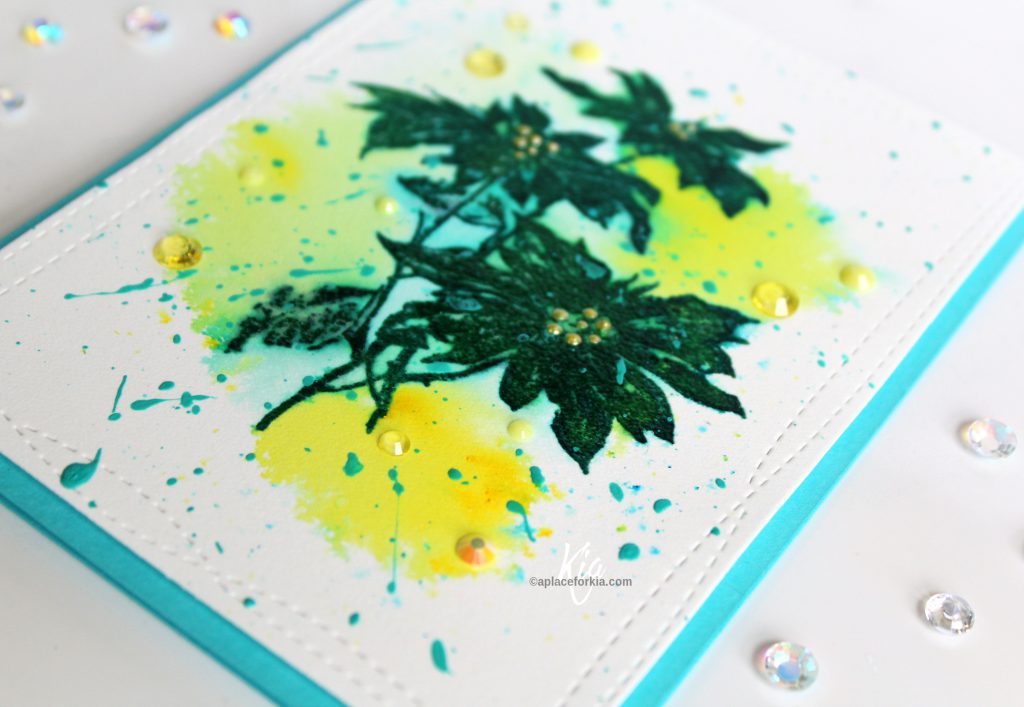
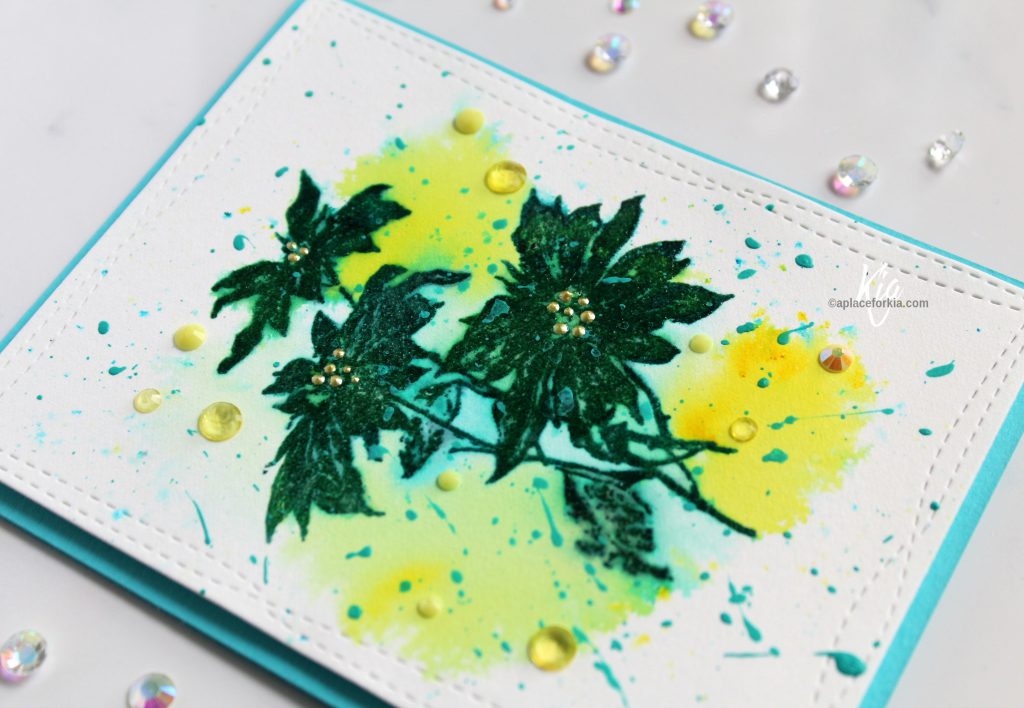
Hello fellow stampers, Kia here with you today to share this Poinsettia card.

To start this card and using watercolour paper I first die cut my panel using My Favorite Things Wonky Rectangle STAX.

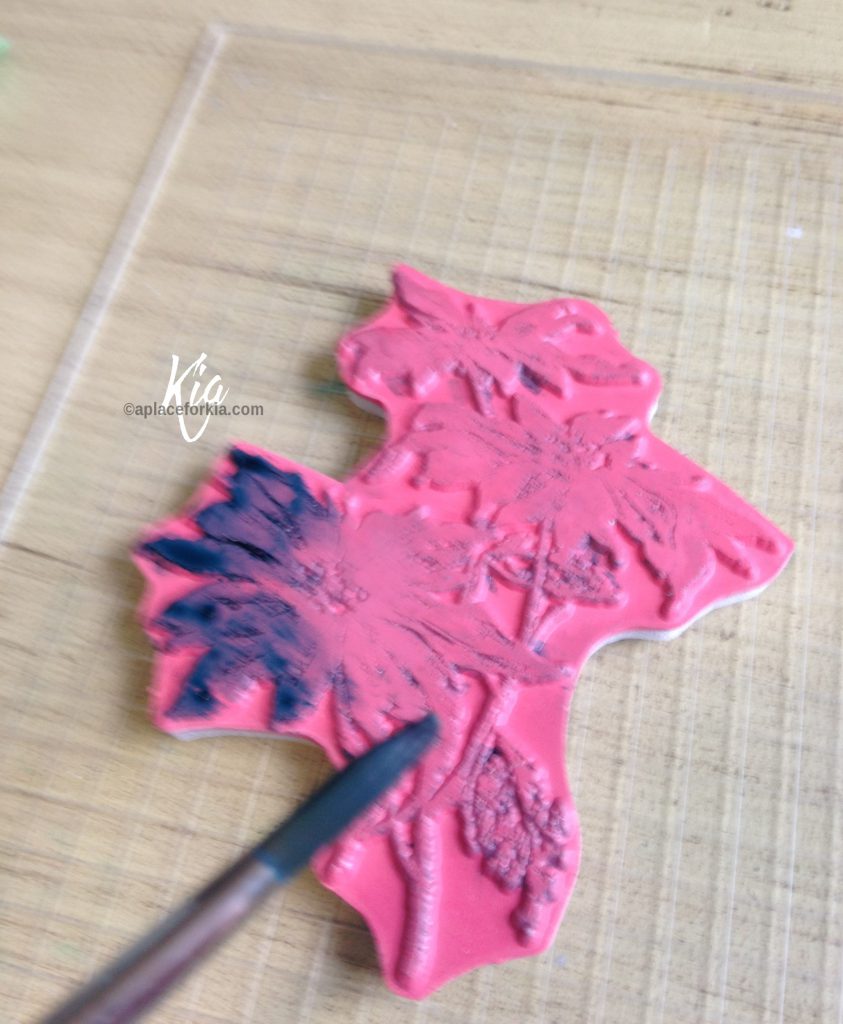
I thought I would do something a bit different today, by painting my stamp with Color Burst Powders. Some time ago I was trying to ink up a background stamp with Color Burst powders, and the colour was something less than desirable. I needed something to give the paint something to grip to, and of course what came to mind is Versamark embossing ink. It worked perfectly, so I have done this every time I want to use a different kind of colour medium with my stamps. Excuse my shaky picture, I was taking it with my phone and only one hand available. lol

You can see how the colour attaches easily to the stamp. This is the second color I was using for this card, being Phthalo Green. I started by mixing up Turquoise Color Burst with a few spritzes of water, inking the stamp with the Versamark and painting on the colour. I then cleaned the stamp and did a second colour using Phthalo Green, using the same process. Once everything was dry, I inked up the stamp again with Ranger Paradise Teal and Library Green inks, then directly on top of the inks I used the Versamark embossing ink, and heat embossed with Nuvo embossing powder, which gave the flower back some definition. And yes, I get a bit of contamination in my Versamark, but I keep and use an older ink pad for when I do this, keeping a clean pad for my daily use.

Once my panel was dry I then placed it back in the container with new saran, and sprinkled on Lemon Yellow Color Burst, again using water sparingly. As I spritzed, the colours from the previous stamp also migrated out to join the new colours. Love it! I tend to let my paints dry naturally as I think heating deadens the vibrancy of the colours, and it warps the watercolour paper. So, once the panel was dry, I attached fun foam to the back using Be Creative Tape and attached the panel, I also prepared the other side of the fun foam so I could attach the panel to my card base once I was done with the next step, which was to splatter with acrylic paint in turquoise. I used a liner brush to do this splatter, I like the differences in the splatters I get with it. I then attached the piece to my card base. Even though it was not dry, I could still finish the card. I then added Liquid Pearls (note to self, get the Dandelion Nuvo Crystal Drops) to the flower centres and a scattering of sequins to finish.

I hope you have enjoyed this card. I have other pictures of my process over on my blog in this post.

Thank you for joining us here at Scrap’n Stamp, I look forward to seeing you next time.


Poinsetta Christmas Read More »

Sending Hugs – Hero Arts Color Layering Koala Bundle

Sending Hugs – Hero Arts Color Layering Koala Bundle

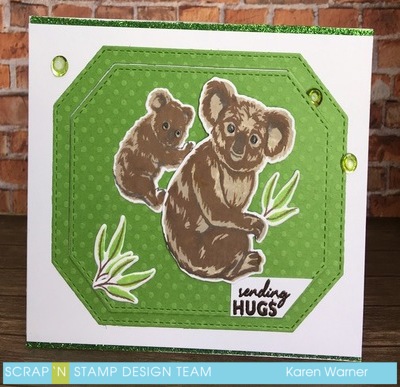
Hello Everyone. Thank you for stopping by. Todays project is a  Sending Hugs Card using  Hero Arts Color Layering Koala Bundle.

Each bundle  contains a  Color Layering Stamp Set,  co-ordinating dies and the necessary ink to layer the stamps with a successful outcome. In most cases four is the magic number. The four inks in this bundle  are  set AF381 Earth Neutrals Dye Ink  (Charcoal, Cup O’ Joe, Wet Cement and Pumpkin Pie). Green Hills from my stash was added , any green would work.


Hero Arts Color Layering Koala Stamp Set and co-ordinating dies are available to purchase separately too.   They are the same stamps and dies available in the combo pack. Hero Arts Color Layering Stamps have clear instructions on how to layer the stamps on the back of the stamp set  packaging . In addition there are photos of each step and the inks used to achieve each step.

Making the Card:

Starting with  the lightest ink and the  solid stamp, working toward  the darkest shade with  the less area to stamp.  The inks were used in this order:  Wet Cement,  Cup O’Joe and finally Charcoal.

The greenery was stamped starting with the branch with  Cup O’ Joe and the greenery in Green Hills. These two stamps were stamped  three times.

Once the ink was dry the images were cut out using the co-ordinating dies.

MFT Die-namics Stitched Tag-Corner Rectangle Stax  cut a frame with Green  Bazzill Premium Card Stock (counting from the smallest die, six and seven were used to make the frame).  Reserving the negative space (centre) for the card. A  1/4 x 5-1/2″ strip  was  also cut and set  aside  for the inside panel.

A white card stock panel was cut to 4 x 5-1/2 ” for the card front . MFT Die-namics Stitched Tag-Corner Rectangle Stax die number six was used to cut the centre of the panel. This will be used later.

Card Assembly:

A white Card Stock card base was cut  to form a side fold landscape card  11 x 4- 1/2 ” and  scored at 5-1/2 ” . Be Creative Tape 5 mm was applied to top and bottom of the card front. Nuvo Pure Sheen Glitter , Green Meadow was burnished into the tape. Removing any excess with a fine brush.

Onto  the card front panel. The  Tag-Corner frame  is adhered to  the outside of the  the die cut centre, essentially framing the centre  of the panel.  The white panel is attached with Be Creative Tape 3mm between the  Pure Sheen Glitter strips. Foam tape is applied to the white card stock centre and placed back  into the front panel. Liquid adhesive is used to  secure  Bazzil Tone on Tone Polkadot frame centre to the popped up centre of the front panel.

Next the images are added to the popped up centre portion. The larger Koala is added to the right hand side with foam tape for added dimension,   the smaller Koala is adhered with Nuvo Deluxe Adhesive  below the ear of the larger Koala. Greenery is tucked into the larger Koala’s Hand. Two Greenery sprigs are attached  to the bottom left hand side of the Bazzill Premium Card Stock.

Sentiment:

Hero Arts Color Layering Koala Stamp Set ” Sending Hugs”  stamp was  inked with VersaMark Watermark Ink and stamp  onto white card stock. Nuvo Embossing Powder, Hot Chocolate was sprinkled over and heat set.   The sentiment strip was trimmed and added just below the larger Koala’s foot (bottom right hand side of the popped up  green card stock centre )

Nuvo Deluxe Adhesive was applied to the bottom   edge of the inside panel. The Bazzill strip that was reserved for later was attached over the  liquid adhesive.  The inside panel was attached to the inside card base.

Finishing Touches:

Beads were added to the eyes of  both Koalas . Nuvo Prickly Pear  Sequins and Sparkling Crystals were layered onto the card front. Nuvo Glitter Gloss was applied to the greenery.

That completes this card. Until Next time – Karen xo


Sending Hugs – Hero Arts Color Layering Koala Bundle Read More »

Free Shipping Anywhere In Canada