Scratch-N-Stamp
Search

Checkout

Keep up with Sales, New Products and other events at Scrap `n Stamp. Sign up for our newsletter now!

What's New

Hot Deals


Sales

Digital Greetings

This image has an empty alt attribute; its file name is digital-greetings-1.jpg
Digital Greetings

Hey guys! It’s Chala here for today’s Random Acts of Cardness word “Greetings”!

It looks like we will all be celebrating Christmas a lot differently than we all wanted to. So, I decided to take today’s challenge word and bring my handmade card to life with a digital greeting. This is a unique way to send a special video greeting to my loved ones far away.

It is a really simple process actually. All you need is a smart phone and/or a computer. I incorporated my Silhouette die cut machine, but you don’t need one to create this type of card.

I started out by searching for a *free* program that could convert a video into a QR code link. The best one I could find was a site called Mevie. It allowed me to upload a video I took with my iPhone. All you need to do is register for free, which I recommend. As a registered user you can store your videos indefinitely. Otherwise, your videos would only be available for 30 days.

The process to upload and create the code was very quick and easy, even with my old and slow Mac! Watch the video below to see how I created it.

http://www.youtube.com/watch?v=5pmV36mMS0E

After the QR code is created and saved you can then print it out and add it either to the front, inside or back of your card. Just make sure you let the recipient know there is a little something extra for them by scanning the code with their phone camera.

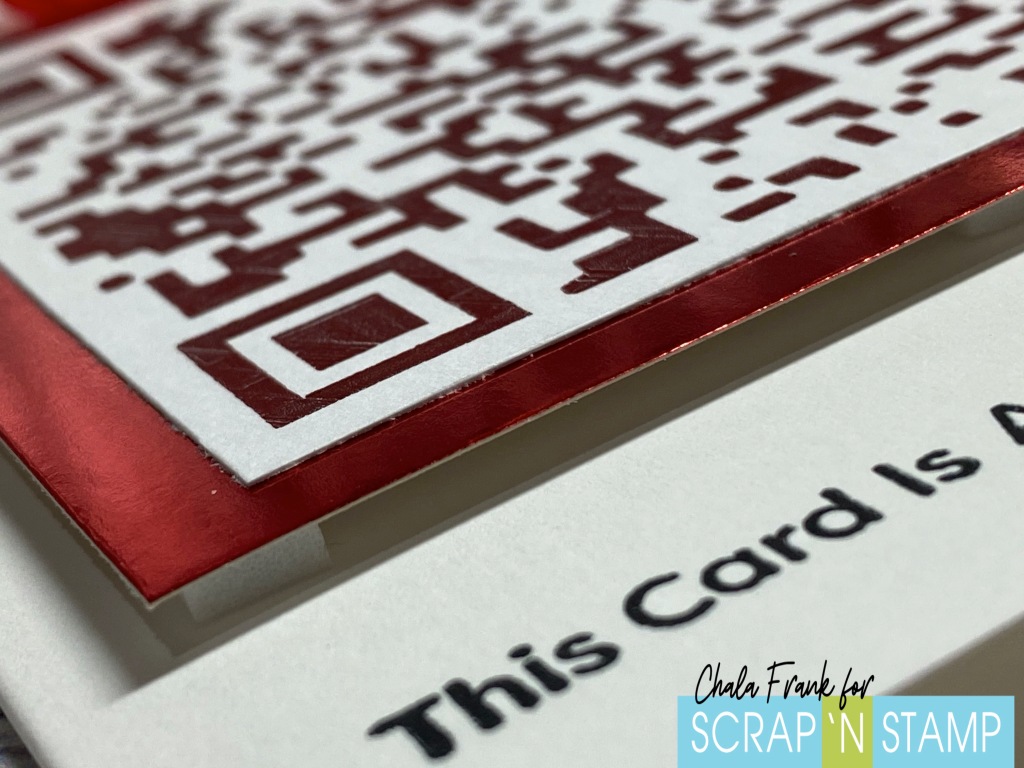
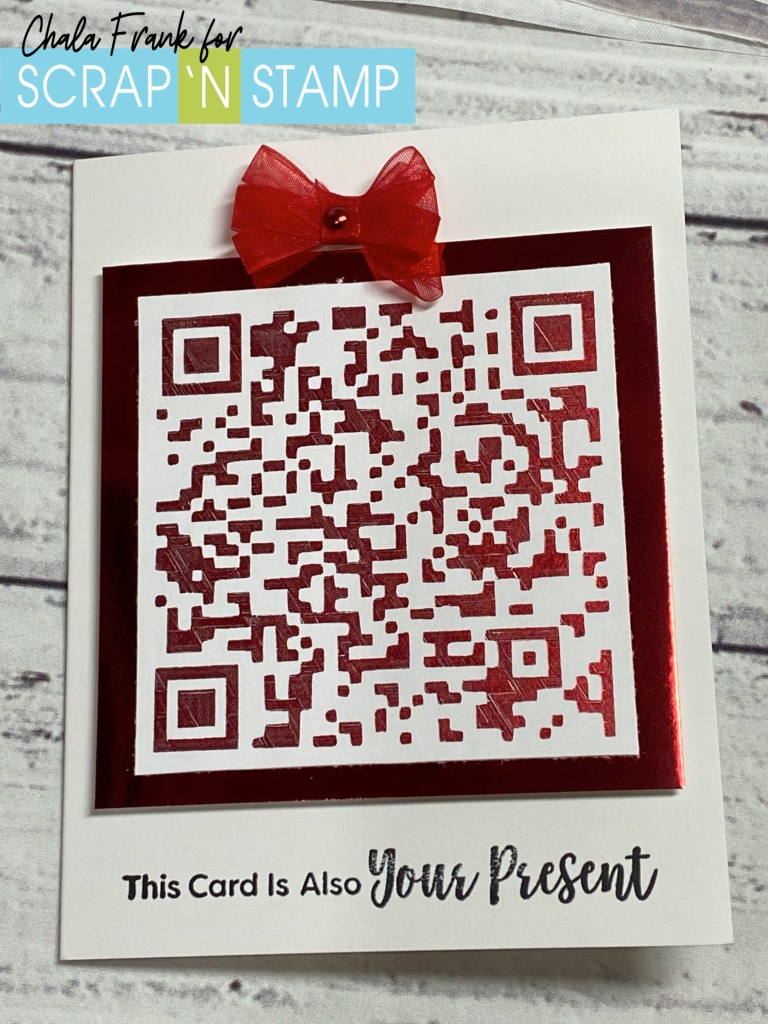
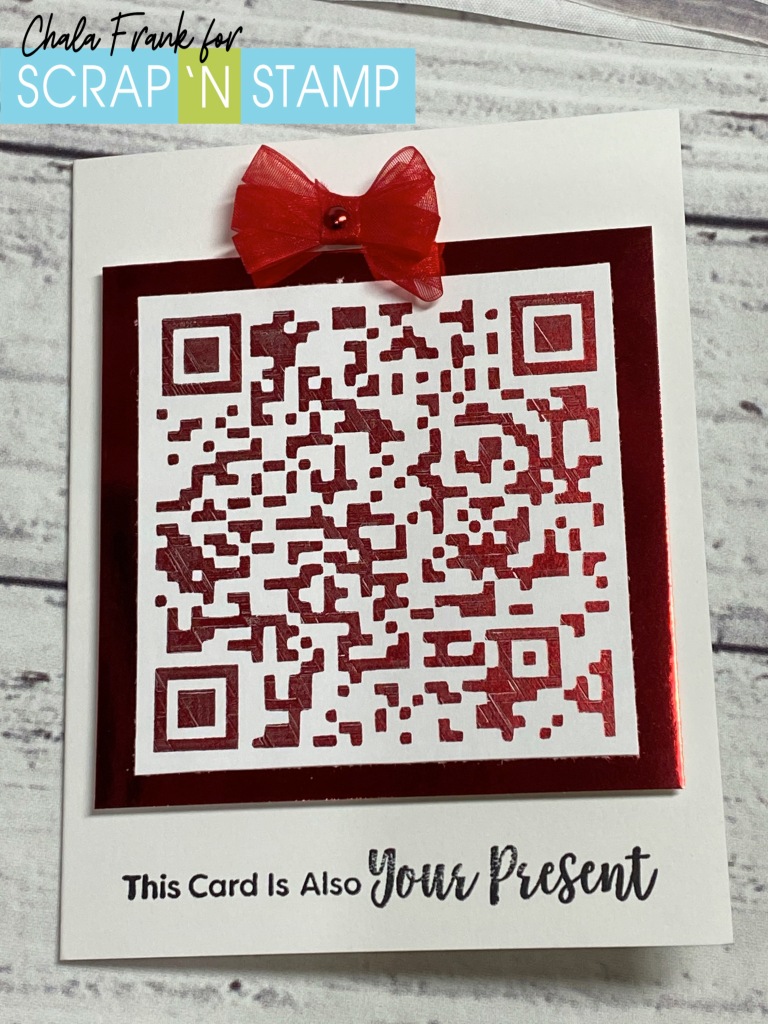
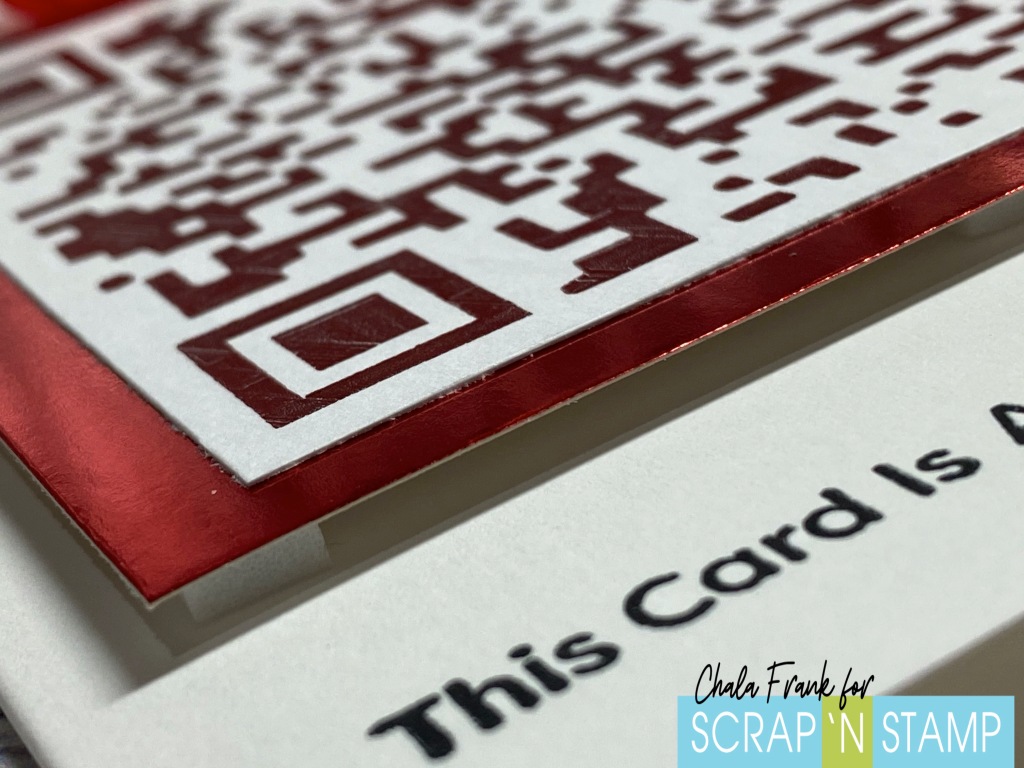
I made my code the main event of my card and wanted to make it look like it was the wrapping paper of a present. To step it up a bit, I pulled out my We R Memory Keepers All in one Foil Quill. The best part is as of the date of this posting it is part of the Black Frid’eh 50% off Sale over at Scrap’N Stamp! I won’t go into all the details of how I did the foiling as I have shown how this product works before and you can check out that video by clicking HERE. Basically, I imported the image, traced it and then instead of “cutting” I sketched the image with the Foil Quill using some Gemini Paper Craft Berry Foil and the cross hatch sketch feature ensuring that I decrease the spacing between the hatching to create a more solid sketched image.

I was a little worried about whether the QR code would work with the foiling or if the shine of it would cause issues. Luckily, it worked perfectly!! I then trimmed out the QR Code into a square for my “present”. I adhered it onto a standard A2 size folding card with some foam squares and created a ribbon bow and secured it with a brad. One very important thing to remember is to adhere the QR code the correct way up! Surprising, I got it right the first time (trust me, no one was more shocked than me! lol!). I then trimmed out the code and layered it onto a piece of red foil cardstock from the American Crafts 6×6 Holiday paper pack.

I kept the sentiment super fun and simple using the My Favorite Things Sassy Pants Holiday Too sentiment “The Card is Your Present” with VersaFine Claire Nocturne Ink in Nocturne. I thought this one was perfect! I then left the inside blank so that I could write to the recipient as well as to let them know to scan the present for a special “gift”.

I know that this card may seem really simple to look at, but if you have loved ones who would enjoy receiving a video greeting, it will be an incredibly special keepsake and something they will want to show others!

Remember, you don’t have to make it into a present, you can create your regular cards and simply print, cut out the code and adhere it on the inside or back of your card.
This image has an empty alt attribute; its file name is digital-greetings.jpg
Digital Greetings
This image has an empty alt attribute; its file name is digital-greetings-2.jpg
Digital Greetings
This image has an empty alt attribute; its file name is digital-greetings-2-1.jpg
Digital Greetings

I thank you for so much for stopping by today and I hope this has given you a way to send a special greeting to those you can’t be with.
This image has an empty alt attribute; its file name is screen-shot-2019-09-28-at-11.01.00-am.png
Crafting Through the Chaos of Life!

Digital Greetings Read More »

Add Some Sparkle To Your Day!

Hello, my crafty friend! It’s Deb here, from the Design Team. I hope that today finds you & your loved ones doing well, and staying healthy. Life in these days is rather unusual, but it’s important to ALL of us that we all maintain our social distancing, don’t hoard supplies, and stay healthy! If you see anyone not doing the right thing, just gently remind them that it’s not just for them -but also for whoever else they come in contact with. That could be strangers, or their own loved ones. Okay – enough of the public health PSA for now – let’s get on to adding some sparkle to your day! We can all use it, for sure.

As a design team member, I just received a wonderful box of new products from Scrap ‘N Stamp. It arrived just before the weekend – perfect timing! So I decided to use some of the new products, to share with you.

SPARKLE WITH SUGAR CRYSTAL GLIMMER PAPER

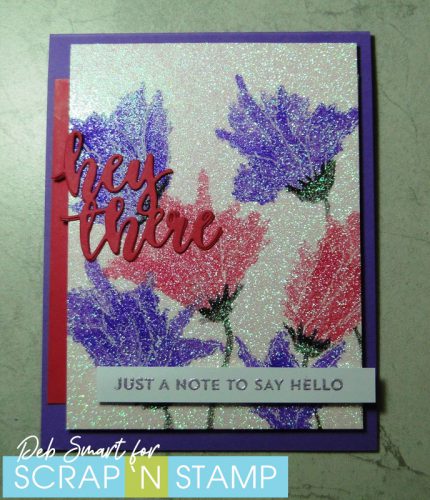
This is the first time I’ve used this Tonic glitter paper – and I’m IN LOVE! It’s beautiful to use, and it doesn’t shed! Not when being, or during the making of my project. I’m sold on it, for sure! This is the gorgeous Sugar Crystal colour.

Add Some Sparkle To Your Day!

Believe it or not, it’s even more sparkly in real life!

FLOWER DETAILS

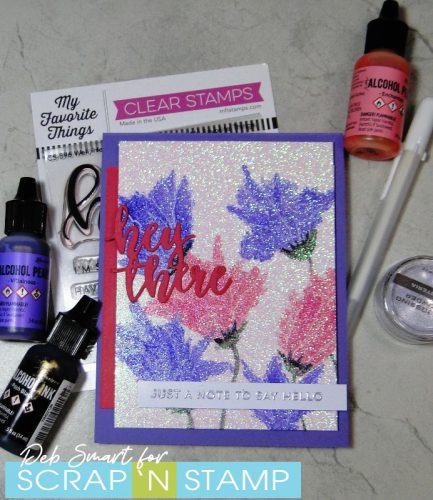
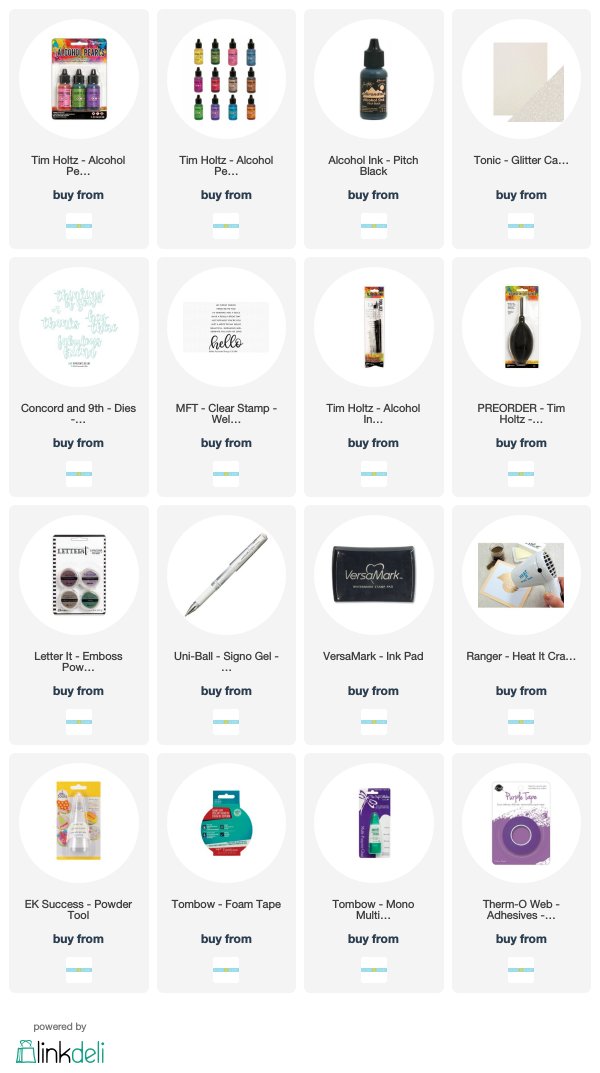
There’s no stamp involved in the flowers – these are made with Ranger Alcohol Ink Pearls, directly on the glimmer paper! You can see that the ink changes colour a bit, when it contacts with the paper. By adding layers of ink, you can achieve 2 colours, with just one ink. I used the Pearls in Villainous (purple) and Enchanted (pink).

Start with your panel of glimmer paper. Have your alcohol pearl open & ready to use, along with either a straw, the new Ranger Alcohol Ink Air Blower, or canned air. Start with one drop of alcohol pearl ink onto the glimmer paper. Next, blow the ink from the bottom of the drop upwards, to create the petal shape.  Repeat adding one ink drop at a time, and blowing it upwards and to the left and right, to create a flower shape.  You’ll see that the petals on the bottom are lighter, and the 2nd layer of petals is darker.  Create your flowers using both the Villainous and Enchanted pearl inks, randomly on your panel.  Once the flowers shape is done, you can add in detail to the petals, with a white gel pen.

Next, create the stem & part of the flower where the stem joins the petals. To do this, use the Ranger Pitch Black ink and a small Ranger alcohol ink brush. Put a drop of the Pitch Black ink at the bottom of the flower, and spread it out using the brush. Use the brush to flick the ink upwards, into the petals, to create the bottom of the flower.  For the stem, place a few drops of the Pitch Black ink onto a slick surface, or in an ink palette. Pick up the ink with the brush, and draw the stem downward, from the bottom of the flower. The most amazing part of this – that the Pitch Black ink actually looks green, on this glimmer paper! I found that out totally by accident, when I was practicing on a scrap piece!

SENTIMENT DETAILS

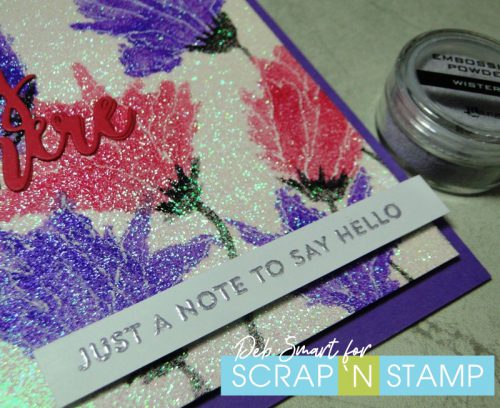
Use the Concord & 9th Fabulous Phrases dies, and some dark pink cardstock. Die cut the sentiment twice, and glue them on top of each other. Another new product I used for this project is the Ranger Letter It Embossing Powders. Another win! I love embossing powders for their dimension & shine, but hate that gritty mess they leave! Guess what?! This embossing powder is SOFT!! Seriously – no grit left on my work surface! I used the beautiful Wisteria colour – take a look at this close up of the colour & shine of this powder.

Add Some Sparkle To Your Day!

So pretty! It looks like molten lava, if lava were a wisteria colour! Stamp the sentiment from the MFT Well, Hello stamp set in Versamark. Cover it with the Wisteria Letter It embossing powder, and set with a  heat tool. When done, layer the sentiments onto the inked panel.  Create a card base of dark purple, and add a strip of the dark pink cardstock on the left hand side. Attach your card front, with foam tape.

SUPPLIES

I hope today’s project has inspired you to get outside your ‘stamping’ comfort zone, and experiment with the Ranger alcohol inks! Pearls or regular, they are a lot of fun to use, and come in gorgeous colours that match the Ranger inks. To see more projects made with them, just type ‘alcohol inks’ in to the search feature on the blog.

All  supplies can  be ordered through the Scrap ‘N Stamp online store. The great news is that the store is STILL OPEN, and operating safely within the recommended guidelines. So order away!  Right now there’s a huge Clearance Sale on, or you can shop new arrivals & regular products and get a 10% Discount using my Discount Code 10DEB at checkout.

Add Some Sparkle To Your Day!


Add Some Sparkle To Your Day! Read More »

Gel Press & Oxides

Gel Press & Distress Oxides

Happy Thanksgiving! Chala here and I am so excited that you are joining me today for this fun technique using the Gel Press and Distress Oxide inks.

I have run into some technical difficulties with my computer and the video and am very disappointed with it’s outcome. In the meantime I will do my best to describe what I did to create these 9 (that’s right 9!!) fabulous cards.

The Gel Press is new to me and I was excited to open it up! They come in several different size, however, I chose the 5″ x 7″ as I usually create A2 size cards. It is like a big blob of firm jello! I removed the two protector sheets and laid it down on my clean Tim Holtz Glass Media Mat which was perfect! Laying it on this mat made it so the gel plate would not move around.

I used a TON of stamps! Look around in your stash to pull out your unused gems and follow along!

I will admit I was a bit overwhelmed staring at this clean, clear blob of jelly. But, I dove right in and started smushing ink direct from the ink pad onto the surface of the gel plate. Right now you can purchase the first 36 Distress Oxides Ink colours at an incredible deal. Click here to check it out!

You can use swipes, swirls, or use your brayer or blending tool, etc. Just know that if you don’t work your ink into the gel plate it will stay that shape.

What I mean by this is, if you simply stamp down the square ink pad you will get that exact shape when you press down your paper. I think I will be using the gel plate a lot to create mirror images of certain stamps.

After I smooshed the ink onto the plate I used my brayer to move the ink around. I wanted to get a smooth transition between the colours. Don’t waste the ink on the brayer! Grab another piece of cardstock and brayer the leftover ink onto it to create another background!

Grab the stamp set you want to use and stamp the image carefully onto the gel press. I used acrylic blocks to help with this process. Then stamp that image onto another background. What we are basically doing is layering images and colours to create one of a kind backgrounds.

Once I stamped the amount of images I wanted onto my gel plate I grabbed a blank piece of cards stock and laid it on top of the gel plate and gently pressed down. I tried several techniques from rubbing my fingers on the back to using the brayer to help transfer the ink. My favourite technique was grabbing an acrylic block and dragging the edge along the back. This seemed to give me the best transfer results.

When you pull up the piece of cardstock you will notice you get a negative image of the stamps you used. So, some of the stamps that had words on them actually appear backwards on my gel pressed piece. I don’t mind this, but you might want to keep that in mind when you are choosing your stamps.

I repeated this process using a variety of stamps and using both Neenah White Classic Crest cardstock as well as Canson Watercolour paper. Each paper gave me a different look.

I noted some stamps worked better than others. My favourite was the Concord & 9th Barnwood Background. The textured look was amazing. If I didn’t like how something turned out I just continued layer on colours and stamps until it worked out. Even the pieces that I cleaned my brayer off on created interesting results. I didn’t let anything go to waste. Using a piece of cardstock that I also pulled up any residual ink after my first presses.

I didn’t get to use all the backgrounds I made but I can save them for another project. The ones that I am not “In Love” with I can use to die cut sentiment from our cut them down into strips to create a different look.

The great thing about the gel press was that it was so easy to clean! After I pulled up all the ink I simply swiped a microfibre cloth over top. I double checked how clean it was with a baby wipe and was surprised that there was little to no ink left over.

You can use a variety of mediums with the gel press including acrylic paint. Many people don’t even clean their gel press as they like the unique images they get by continuing to layer the paints or inks and like that each “pull” gives a new surprise.

I am not that person…I like my materials clean. LOL! Maybe over time I will give up this control…but not today my friend!

I highly recommend adding the gel press to your arsenal of craft tools! I was able to create many backgrounds in short order which I love!

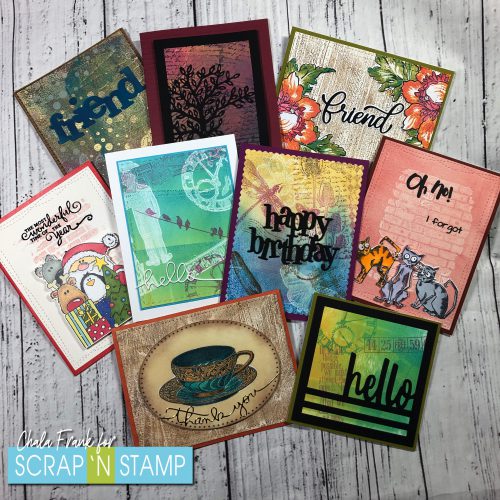
Here is a look at all the cards I created.

Head over to my personal blog by clicking here to see individual photos of each card.

After much deliberation I have decided to share the video even though the quality is not the greatest. For that I apologize. However, after putting in that much work I did want you to have the opportunity to be able to see how easy this process is. If you can stick it out you can see all the cards at the end!

https://youtu.be/GSWvGMReSmk

I am so thankful that you shared your time with me today and I look forward to be able to share with you again soon!

~Chala

Gel Press & Oxides Read More »

Free Shipping Anywhere In Canada