Scratch-N-Stamp
Search

Checkout

Keep up with Sales, New Products and other events at Scrap `n Stamp. Sign up for our newsletter now!

What's New

Hot Deals


Author name: Nancy Frustaci

Season Greetings from the Great White North

Hello and Happy Thursday

I am happy to be on the blog today sharing this non traditional  set of holiday cards with you all.

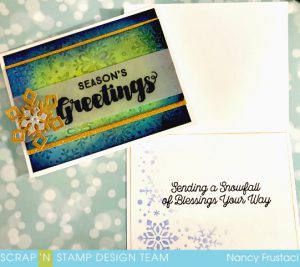
These cards feature some of my favorite products, aka Distress Oxides, Lawn Fawn stitched snowflakes and Taylored Expression snowflake embossing folders.

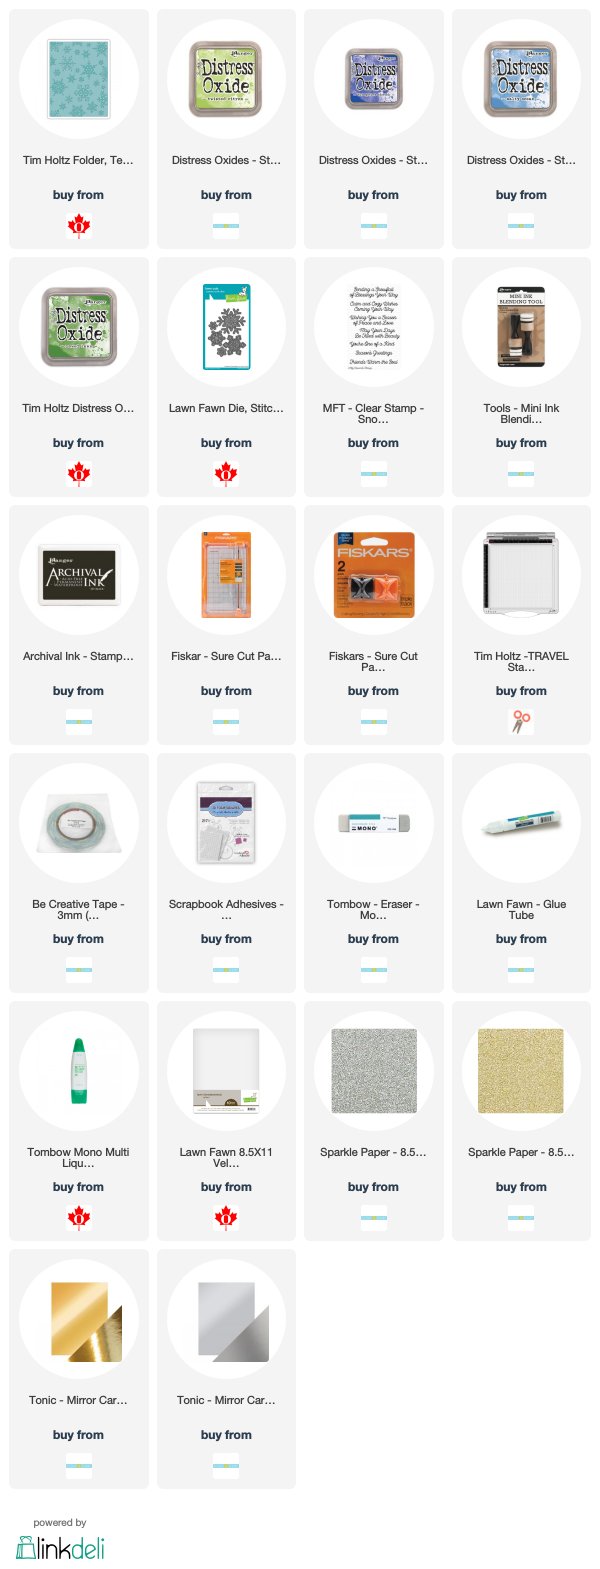
All the products I have used are linked at the bottom of the blog.

I hope you enjoy and find some inspiration!
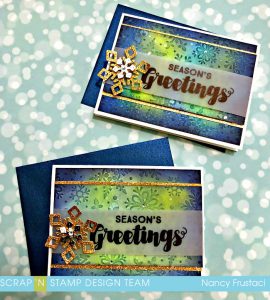
These distressed beauties were inspired by a card class I had recently taken taught by a good friend of mine Jo Bird. She is phenomenal with distress inks and I always come out of her classes so inspired and ready to try new techniques and or color combinations.

So I used what I learned from her class and made it my own.

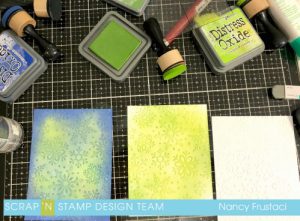
I started off by preparing my bases which were standard A2 5½ x 4¼  cards, and then my panel pieces which measured 5¼ x 4 (I should mention I initially made 4 of these cards and then loved them so much created 6 more)   Once everything was cut down and scored it was time for the creating to begin. I pulled out a snowflake embossing folder and ran my panels through my Gemini jr with the folder. (Sometimes I forget how much I love the embossing folders. You get so much interest with so little work)  Now it was time for the fun to really begin. It was time to get inky.

When I was choosing the colors for the cards, I had a specific client in mind as I was finishing up some Christmas cards for them. So I pulled out Twisted Citron, Mowed Lawn, Salty Ocean , Blueprint Sketch and Jo’s fav Black Soot.  ( To be honest before her classes I don’t think I had ever used Black Soot before, now I CANT get enough! Thanks Jo 🙂 )

I started off covering the of panels  completely with Twisted Citron. I then moved in with Mowed Lawn going over it lightly, from there I added in the Salty Ocean around the edges and brought it home with the Blue Print Sketch.  I then spritzed the panels using my Tim holtz spray bottle and then set it aside to dry ( Normally I’d use my heat tool to speed up the process but it bit the dust on me  )

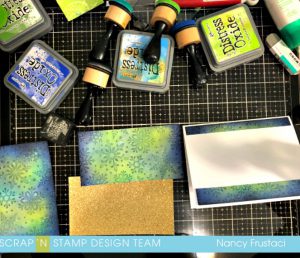
Once the panels were dry I decided to go over it again just to deepen the colors and with this second layer I decided to spritz it with my Perfect Pearl mix. This added a nice light shimmer and helped to get rid of any streaks left by the blending tool.

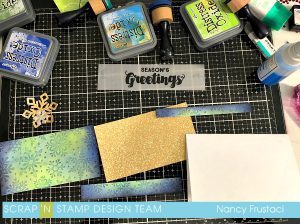
I set all four snowflake backgrounds aside to dry and started to work on the remaining parts to the card. I started by cutting down some gold glitter card to 3 x 5¼, I also cut down some vellum strips to 6 x1½ I left them a little longer so I would be able to wrap it around the snowflake panel. Once I had all that cut and set a side, I moved on to die cutting the last elements for the card which were the snowflakes. I used both gold glitter card stock and silver metallic cardstock for the snowflakes, which I end up layering together.  Lastly I stamped my sentiment on to vellum using Archival black ink. The sentiment I used was from the Joyous Christmas sentiment set from My Favorite Things.

Once the panels were dry I went over with Black Soot, trimmed the panel down to 2¾ x 5¼ with the left over stirps I adhered them down to the card base flat, I did this for all four panels. I then went in and adhered the gold strips flat as well  using Be Creative tape as its nice and strong.

The next step was to add the sentiment strip to the distressed panel. I used a little bit of liquid glue behind the stamping and wrapped the edges around the panel, I taped down the little flaps to the back and finally added foam taped to pop it up on the card base.

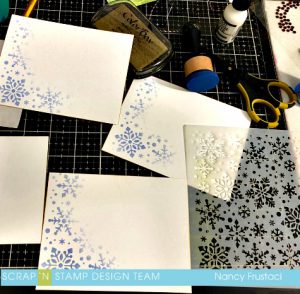
After every panel was adhered I added the snowflakes with some foam dots, just for a tiny bit more dimension.  Lastly I had to finish off the inside of the card. I cut down some 80lb card stock to 5¼ x 4, I pulled out a snowflake stencil and took some Blue Print Sketch and inked up the panels. I used yet another sentiment stamp from My favorite things to tie it all together.  Before I adhered it to the inside of the card I decided to just add a little extra something, I took some Gold Pigment ink and went around the panel, this gave it a little extra shimmer.

I apologize for the long winded nature of this post, I do hope you enjoyed and found some inspirations for sone non traditional Holiday cards.

Stay tuned as I will be back with more Christmas and holiday themed cards.

Have a wonderful weekend.

Nancy


Season Greetings from the Great White North Read More »

Thinking of You

Good Morning

Hope you all had a wonderful weekend.

I am on the blog today sharing a card I created to pay homage to Remembrance Day here in Canada and

Veterans Day for those down in the States.

“Lest we forget”


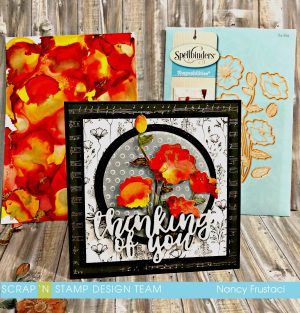
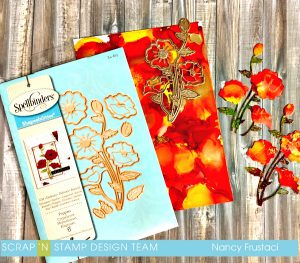
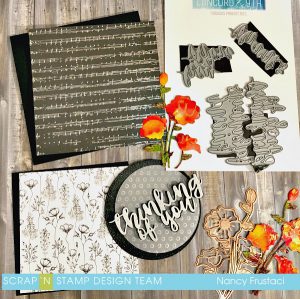
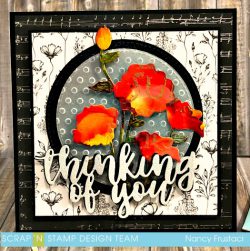
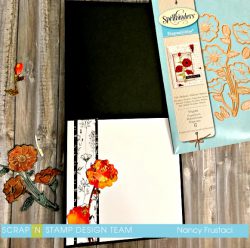
When I new I would be posting close to remembrance day I knew right away I wanted to used the Spellbinders Poppy die set, it embosses as it die cuts so you get so much more added dimension and detail.

I had a vision of what I wanted to do, so I went through some of my premade alcohol ink backgrounds I created, which are quiet a few as the process was really addictive. You cant just make one you just keep creating and creating until your literally out of Yupo paper and have to wait to purchase more. LoL (Ok maybe that’s just me, I just couldn’t not stop)

 I pulled out this beautiful red yellow and orange background. If I remember correctly I used Chili pepper red, flamingo and sunset yellow with gold mixative. I just went to town layering and adding rubbing alcohol to it and blowing with a straw till I was happy with the result. I made three or four of this style and yet no two look a like.   I ran the background through my big show with the spellbinders die, I did this a few times so not to waste to much of the background.

From there I needed to figure out how I would add color to the stems and leaves. I decide I would use a copic marker to do so. I cant remember which color I used and I totally forgot to mark it down. Sometimes I get to into the zone and forget to write my process and products down.

I put the die cuts aside and figured out what I was going to do for the rest of the card, and to be honest this was the longest part of creating the card, I was paralyzed by analysis so to speak. I went through all my pattern papers , embossing folders, and looking through layout and old cards to get inspired.   I ended up with this layout and really happy with it.

The card itself is 5×5 and created with 110 lb black card stock, as are the second square and larger circle layers of this card.

 I cut down two different pattern papers for this card, the largest being the music notes measures 4¾ x 4¾ and adhered down directly to the card base.

The second piece of pattern paper is the black and white poppy background which measures 4×4/  which I layered on to another piece of black cardstock which measured 4 1/8 x 4 1/8. I then popped this on top of the music notes using my foam tape.

I die cut two nesting circles from my My Favorite things Stitched circle dies, one of the layers from heavy weight vellum and the large layer from heavy weight black cardstock.  I deiced I wanted a little more texture to the card so I ran the vellum through my big shot using a  dotted embossing folder.

While I was using my machine I die cut the sentiment using a Concord and 9th die set. I ran it through several times and used my stick-it adhesive sheet behind the card stock as it made it so much easier to adhere them together.  While I was stacking the sentiments I decided to off set it just a tad to give it a little extra dimension and interest.

To add just a little bit more  interest to the black circle I used my sparkly clear Nuvo Aqua brush to add that extra shimmer I felt it was missing.


 Now it was time to finish assembling the card, I used some kool take clear foam tape to adhere the vellum on to the black circle layer, which I then layered on top of the background paper. I popped up the poppies with more foam tape ( Because you can never have to much dimension)  I added the sentiment with the same kool tack adhesive as I did not want anything to show from behind.

 I used the left over pieces of the pattern paper and second die cut to finish off the inside of the card.

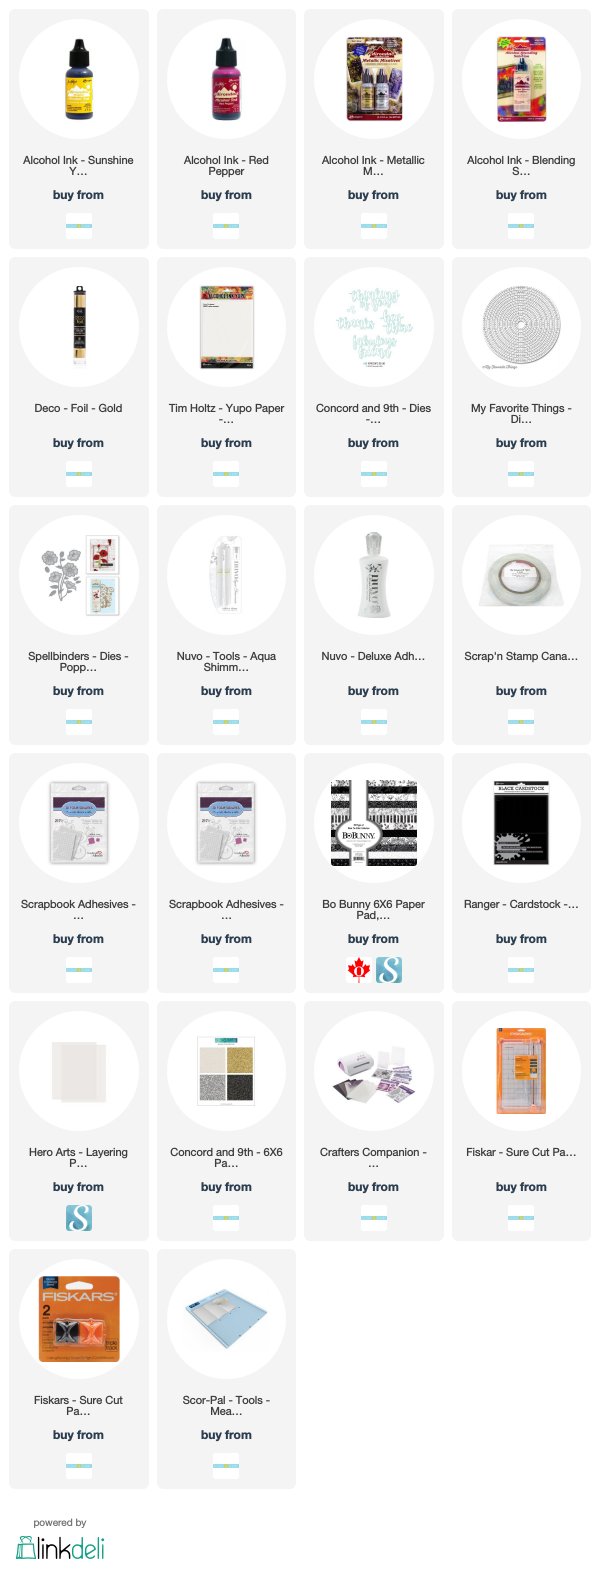
Thanks for stopping by, all  the products  I used that were not discontinued are linked below.

I really love how this card turned out. I hope you found some inspiration in it.

Have a wonderful week a head.


Thinking of You Read More »

Believe in the Magic


Good Morning  and Happy Sunday.

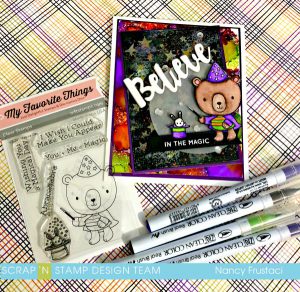
I am on the blog today sharing with you a cute little Halloween style card. I am playing off the colours for our very first challenge that is still going on till Nov 1 over on our  Scrap’n Stamp facebook Challenge  page so please come on over and play along.  For my card I pulled out a stamp set I have been longing to use but had not had the chance to. The cute little Magical Day set From My Favourite Things.

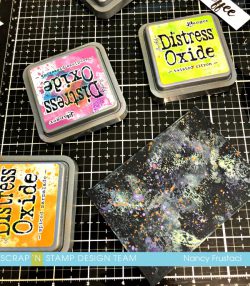
It all started off with the black layer of the background. I was literally just playing around to see how well the Oxides inks would stand out on it.  To my happy surprise I really liked the look, so I went with it.  I mushed the ink on to my Glass Media Matt and dragged the black card stock through the ink. I didn’t use water as the card stock wasn’t  going to hold up well wet.  I also ended up pulling out my Fine Tech paints and splattered some orange and purple just to make things stand out a little more.

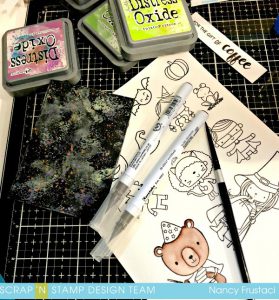
Once I was happy with the background I set it aside to dry and went on to stamp my images. I decided to stamp the bear and his little bunny using Versa Fine Black Onyx ink and then go over it with clear embossing powder.  I knew I wanted to watercolor the image in and this made it easier to contain the movement of the ink.  From there it was time to color, so I pulled out my Zig Clean Colour real brush makers, a paint brush and some water and went to town.

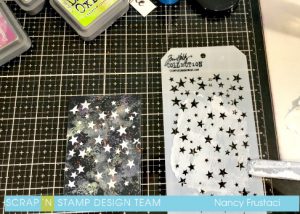
Once I was done with the images I set them aside to dry and went back to my background panel.  It felt a little plain so I  thought I would add some texture and interest using my stencil and some texture paste.  I mixed in some glow in the dark embossing powder to the paste and stenciled it over. I then added more of the embossing powder once I removed the stencil as I wanted to make sure it would really glow in the dark.

Now it was time to figure out the rest of the design for the card. I went through my stash of backgrounds, paper and dies to see what I wanted to create.

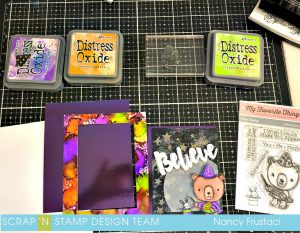
I decided to pull out more of the Alcohol ink background panels I had previously made and incorporate it into this card. ( Really hitting the PURPLE GREEN AND ORANGE colour challenge here)   I die cute some vellum using my stitched circle dies, as well as the ‘believe’ sentiment die which I cut out three times Gemini so I could layer it for more dimension.

The card itself is a bit bigger then an A2 but not by much. It measures 4½ x 5½. I cut down and layered the alcohol ink panel on to some mirror card stock that measures 4 1/8 x5 1/8 , I also layered the black distressed panel on to the same purple mirror card stock which measured 3 3/8 x 5 5/8 

I stamped and die cut a black banner using the MFT Die Stitched Banners and heat embossed in white embossing powder. I popped all the layers up to give some extra dimension and interest. For the vellum circle I went over it with Nuvo Aqua Shimmer brush as I wanted give it that magical look. I also went over the “Believe” sentiment.  In person this is very very sparkly 🙂  For finishing touches on the front of the card I added some sparkling clear sequins.

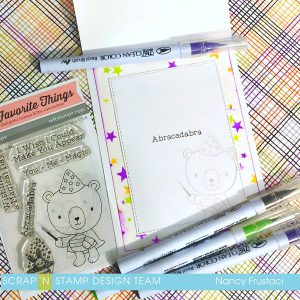
I also decided to finish off the inside of the card. I pulled out the same starry stencil from Tim Holtz and my Distress Oxides and added some detail all around as well I stamped the little bear again using a light gray ink with a coordinating sentiment from the stamp.


Sorry for the long winded nature of this post I try so hard to keep it short but fail each time lol..

I hope you found some inspiration and that you come on over the facebook page and share your creations with us.

Have a wonderful Sunday and a beautiful week ahead.

Nancy


Believe in the Magic Read More »

Free Shipping Anywhere In Canada