Scratch-N-Stamp
Search

Checkout

Keep up with Sales, New Products and other events at Scrap `n Stamp. Sign up for our newsletter now!

What's New

Hot Deals


Picket Fence Studios

Colour Burst -Fabulous Feather

Hello Crafty Friends. Happy Sunday. Nancy F here, and man it seems like it has been forever since I have been on the blog. Lots of craziness, which has left little crafty mojo. But I am back and I am continuing with the monthly theme of all things watercolour.

I have two new cards featuring alot of the same products I used for the blog hop, but twisting it up in a fun way to use your stencils and die cut machine. Then adding a new die or two and some opal polish from my stash to snazzy it all up. I hope you enjoy and find some inspiration.
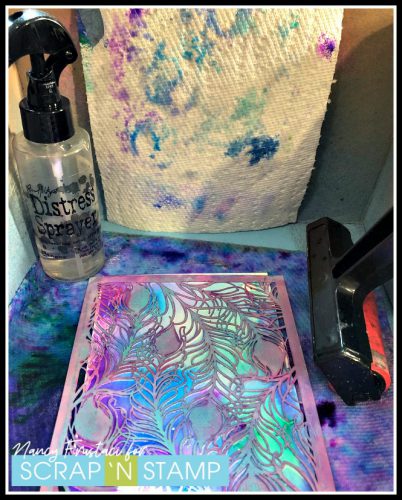
As I mentioned in my blog post for the hop, I created so many backgrounds, using the beautiful colour bursts that I really wanted to find a way to use them up. In the above picture, you can see part of the process.
I started off with watercolour paper, placed the stencil down and added the colour burst powders right on top and sprayed with water using my distress mister. I decided to add another card on top as to not waste any of the ink and see what kind of image I would get.  I loved how it turned out so much I made a few more versions of it. 

Since I had so many backgrounds I decided to play around with a technique I had never tried before, using your stencils to emboss. Yup you heard me right. Many probably knew this and have tried it but I have not, and wasn’t really sure how it would work out. I was pleasantly surprised by how well it worked. To get started I pulled out my long platform (this is what came with my big shot) the tan embossing mats, my metal shim, the plastic plates and of course a good old stencil. For this I used the peacock feather from Hero Arts.
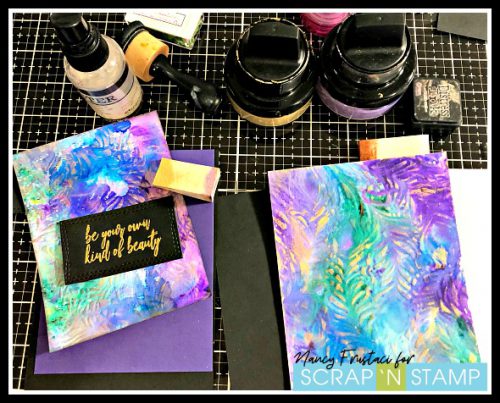
I set up my platform on tab two then added the plastic plate, the tan embossing matt, the inked background, then the stencil and metal shim along with the second plastic plate, (I did another version of this technique using a die-cut and I can not remember which I had to use a paper shim with. If you try this you may need to do that) and ran it through. I was pleasantly surprised at how well this turned out.

Along with numerous backgrounds from my previous play session, I also had numerous sentiments that I had gone and stamped out from the Picket fence studio “Shake our Tailfeather” set. I heat embossed these with gold and white embossing powder. I guess I’ve gotten in the habit of making bulk cards and always needing to make sure I have extra of things, just in case it goes sideways. I die cut the gold using the wonky stitched dies from My Favorite Things. while I was at my machine I die cut several feathers from black and white heavy cardstock, and some fancy foil friendly paper I had in my stash.
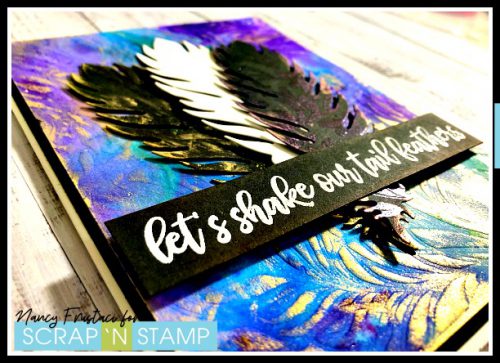
Once I was finished all the die cutting and embossing it was time to add some shine and interest to the cards. I used some shimmer opals from my stash to lightly brush up on the embossing. I loved how this turned out, it really made the colours and the feather details stand out more. Once the opals were dry I went over it with some black soot. Thanks to a dear friend of mine I am completely stuck on the black soot. It’s like Franks Red Hot sauces, “I put that shh” on everything, lol

As for those beautiful feathers, I didn’t do too much. One of them was special foil friendly paper, so I decided to give it a try and ran it through my laminator with purple foil. I can’t say I am all that impressed with this but it does add a little flare. I decided the feathers needed an extra little something so I took the opals and went around them slightly just to bring out some of the detail.
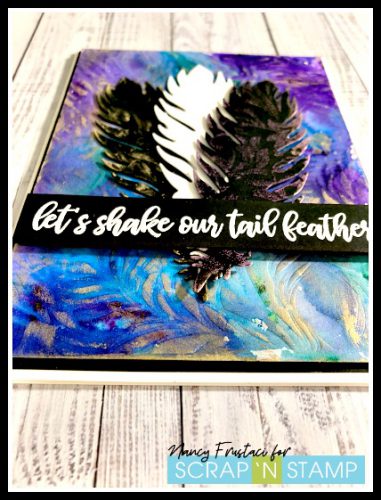
It was time to finally assemble the cards. Both were varying sizes because 1, I started with different size panels when I did the inking and 2, I couldn’t bear to cut any of the panels down and waste any of these beauties. So the largest is this feather card measuring at 6 1/2 x 4 3/4 and the smaller is a standard A2 5 1/2 x 4 1/4. I kept it simple just layering the two onto black panels and white bases. I was very happy with how they turned out.
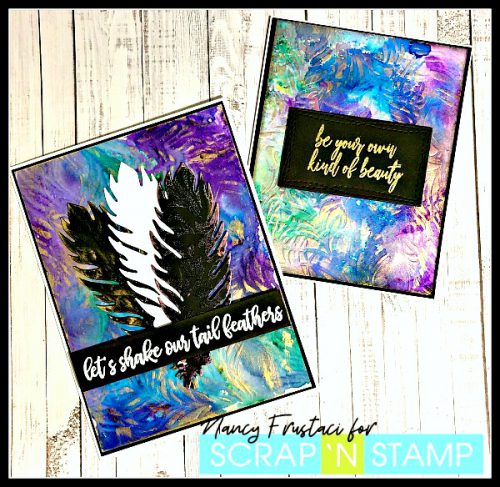
Lastly, I decided to pop the inked panels up on to the black card stock for some dimension, I also popped up some of the feathers and sentiment just for a little something extra.

I hope you found some inspiration and try using your stencils for embossing. It was a lot of fun and something I will deffenitly do once more.

Have a lovely week ahead and I hope you have time to get your craft on.

Nancy.


Colour Burst -Fabulous Feather Read More »

Tuesday with Tara {take 216} Without Coffee

Happy Tuesday!

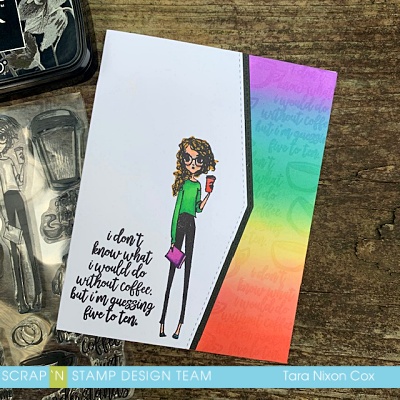
Happy Tuesday with Tara! Today is the day a lot of kids & teachers are officially back in the swing of things with a new school year! I thought some more rainbows & coffee would be in order to help you get through the day! I’m sharing another fun rainbow card with the Coffee Understands stamp set by Picket Fence Studios, this one questions what we would do without coffee. As you can see by the sentiment, it’s probably best that we don’t find out the answer! ha!

Coffee Understands by Picket Fence Studios: Without Coffee

Simple Design.

There is something about this stamp image that makes me want to keep my card fairly simple. I love how long & lean she is (total opposite of me!). It looks like she’s got her priorities straight, coffee in one hand, ready to take on the world (or a classroom, at least)!

Bold & Colorful.

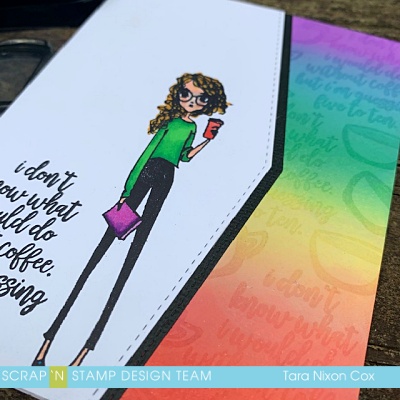
Just because a card is simple does not mean it can’t be bold & colorful! I paired bold black & white with a colorful rainbow panel I inked up with a variety of Distress Oxide Inks. The colors blend together so nicely and it ends up looking like I used a wider variety of colors than I actually did! Curiosity got me wondering what would happen if I stamped with a watermark ink pad over my inked rainbow… and I was pleased with how it came out! (I used Versamark, but I’m guessing this Gina K Embossing & Watermark Ink would work just as well!)

Coffee Understands by Picket Fence Studios: Distress Oxide Rainbow

Details.

As I mentioned earlier, I tried to keep this card pretty simple. The stitched details from the edge die (by MFT) are repeated on the white card front and the black strip beside it. I stamped with bold black ink and repeated the sentiment in watermark on the rainbow panel. A single cup design from the stamp set was also repeated to fill in the gaps. Then I chose a few colors from the rainbow to brighten up my stamped image. Repeating details like the stamp images and colors kept the design feeling simple.

I hope you like my happy rainbow, and that you have no reason to find out what your day, week or year will be like without coffee!

Inky hugs,

Tara

Tuesday with Tara {take 216} Without Coffee Read More »

Step Up Your Cards with Masking!

No, not the masquerade ball kind of mask – but the kind used in stamping. You can really step up your cards with the masking technique. It takes a simple image or layout, and adds to it without  adding extra layers to your project. Hi there! It’s Deb here for the Scrap ‘N Stamp Design Team, and I hope you’ll enjoy today’s technique.

BASIC MASKING

For basic masking, you’re just going to block off an area where you don’t want any ink. For the most basic, we’ll start with just masking off an straight strip on our front card panel. To create your mask, you want to use a low-tack removable adhesive – Thermo Web’s Purple Tape is perfect for this. If you’re hesitant about it tearing your paper, just rub it onto your work surface a couple of times, to remove some of the tackiness. Set up your panel onto either grid paper, or use a ruler for a straight line.  Next, use a blending tool and apply ink to the area to the left of the mask. My completed card is below, for reference.

Picket Fence Studios BFF Owl

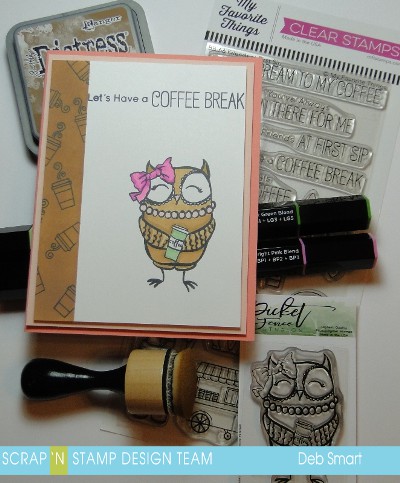
I chose Vintage Photo Distress Oxide ink for a ‘coffee’ feel, and use a Tim Holtz ink applicator for blending it on. With the mask still in place, use the MFT Friends at First Sip stamp set and repeatedly stamp the small coffee cup in the blended area, in Memento Tuxedo Black ink. Be sure to add the little swirl of steam! Once your blending & stamping in that area is complete, gently remove your tape.

CREATE YOUR IMAGE

Use the Picket Fence Studios BFF Owl image, and stamp it to the right of the blended strip, in the Tuxedo Black ink. I chose to colour the owl with my Spectrum Noir Tri-Blend Markers. These markers are great, because they take the guess work out of blending your colours! Each marker has a light, mid and dark tone of one colour. Use the Bright Pink blend for the bow, the Light Green blend for the cup, Pale Pink blend for the pearls & beak, and the Tan blend for the owl.  Now, stamp the sentiment from the MFT stamp across the top of the panel. Attach the stamped panel to a light pink panel with foam tape, and then to a card base of darker pink. There you have it! By adding the masked strip, and blending your marker colours, you’ve added extra dimension to your card, without adding more layers!

IMAGE MASKING

For a more detailed version of masking, first stamp your image onto your card front panel. Now, stamp the image again onto a large Post-It Note. Cut out the image on the Post-It Note, keeping as close to the edges as possible.  Place the Post-It Note image on top of your stamped image.  With your image covered, use your blending tool to apply ink to the rest of the front panel.

Picket Fence Studios Jill Girl

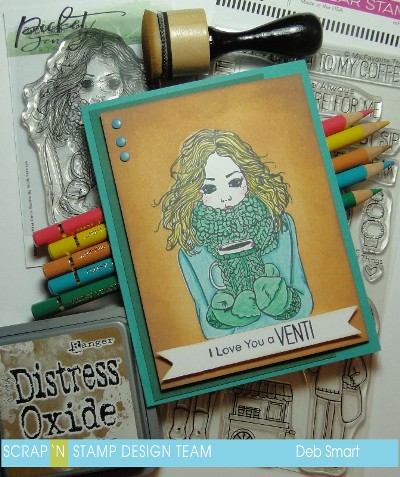
For my card, I first blend on Tea Dye Distress ink, getting lighter towards the image. Next, I add Vintage Photo Distress Oxide ink around the edges, keeping the lighter Tea Dye around the image. This adds extra depth to your card. Once you’re happy with the blending, remove the Post-It Note mask, and colour the Picket Fence Studios Jill Girl.  I chose my Faber-Castell Polychromos pencils to colour with, but of course you can use whatever pencils you have, or your markers. Just be sure that whatever you’re using is safe to use with your base image ink, and paper (i.e. if you’re using watercolours, be sure to use watercolour paper and an amalgam ink).

When finished colouring, stamp the sentiment from the MFT Friends at First Sip stamp set in Tuxedo Black ink on a strip of white cardstock. Use your blending tool and add a bit of the Vintage Photo ink to the edges of the strip, so it’s not completely white. Attach the sentiment strip with foam tape along the bottom of the image. Create a card base of teal cardstock, and attach a panel of green/blue to the left side, with liquid glue. Then attach your front panel with foam tape.  I had some enamel dots in my stash of embellishments that work with the pencil colours I chose, so I added a few of those in the top left corner.

HAVE YOURSELF A MASK BALL!

Try stepping up your next card with some masking! It’s easy to do, and can be used any time. Plus, it doesn’t require a lot of extra or special tools. I hope that I’ve inspired you to branch out a bit with your creating. Have fun! Thanks for spending some time with me – see you next time!

If you’d like to order some supplies for your project, I’ve included links below, for online shopping.

Compensated affiliate links are provided where available, at no cost to you. Your purchase through these links provides me with a small percentage, which helps keep my blog going,  to share with you! Thank you in advance!


Step Up Your Cards with Masking! Read More »

Free Shipping Anywhere In Canada