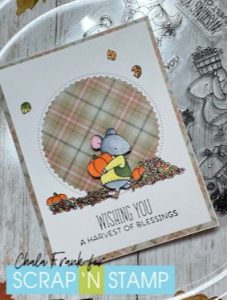
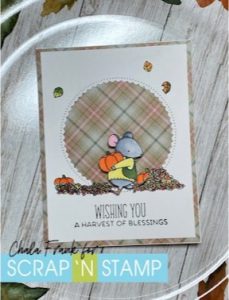
Harvest of Blessings
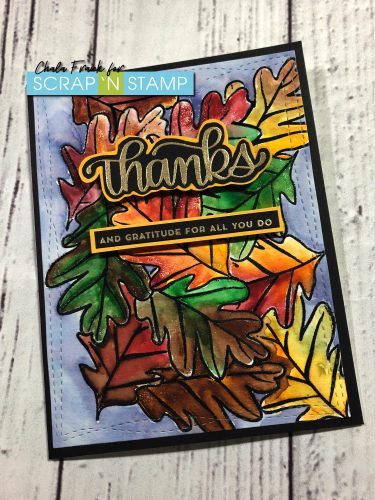
Happy Saturday Crafters! Chala here today and I am happy to share a super easy and fun card to send you all a Harvest of Blessings!
I suffer from “new release desire”. I want all the new products! So while I was sitting there deciding what I wanted to do for today’s card I looked around my craft room at ALL the supplies I have and am really so thankful to have a bountiful collection! I realized there are so many stamps that I have not used in a while or I have not used yet at all! This is a perfect time to revisit and appreciate what I already have!
I pulled out an older My Favorite Things stamp set called Harvest Mouse. I remember seeing this set for the first time and I fell in love with the sweet images. But it was one sentiment in particular that made me want to purchase this set. It was the sentiment “Bushel and a Peck”. My Grandma always used to say “I love you a bushel and a peck and a hug around the neck”. This brought back so many warm and fuzzy feelings. She has only been gone now for about 4 years….and lived to an amazing age of 108! I am so blessed that she lived so long and got to see all my kids be born! But…I digress! I am not using that particular sentiment today, but the “Wishing you a Harvest of Blessings” as it ties in nicely with our Facebook Challenge word for today – Harvest!
Growing up in Saskatchewan harvest time was busy! Farmers spending hours upon hours i the fields trying to get crops off. Women in the gardens bringing in the fruits/vegetables of their long summer labour. Now that I live in a big city I fear I have lost the appreciation from where our food comes from…until this year when my husband decided to take over the task of the garden. It was a job his dad enjoyed and since he passed we wanted to ensure the garden was still a place full of growth and his memories. My husband started the seeds in our bonus room front window (yay…) and then transplanted the little plants into the garden once they had grown enough and he was sure frost wouldn’t kill his little babies that he nurtured for 3 months…in my bonus room. Now, we anxiously await when he will let us harvest the two little pumpkins that he managed to grow! lol! So, when I saw the little mouse with the pumpkin it reminded me of my sweet husband’s efforts.
I stamped the little mouse, leaves and pumpkins in Memento Tuxedo Black ink and did some quick Copic colouring. I then fussy cut out the little images with my EK Success Cutter Bee Scissors.
I scavenged my Die collection and found and inside out scalloped die that I thought would work well to create a focal point for my card. I also pulled out a beautiful plaid pattern paper and thought that would look great behind the die cut circle as a background.
I used my favourite Fiskars Sure Cut Trimmer to trim the circle scalloped panel to 4″ x 5 1/4″ layered it onto of the patterned paper trimmed down to standard A2 size panel.
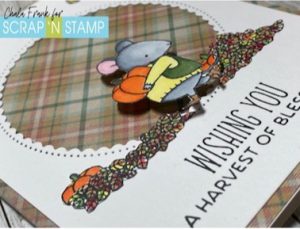
I adhered all the little images (except the mouse) down with Gina K Connect glue. For the mouse I wanted him to stand out a bit and used some Foam Squares which gave him the perfect amount of dimension.
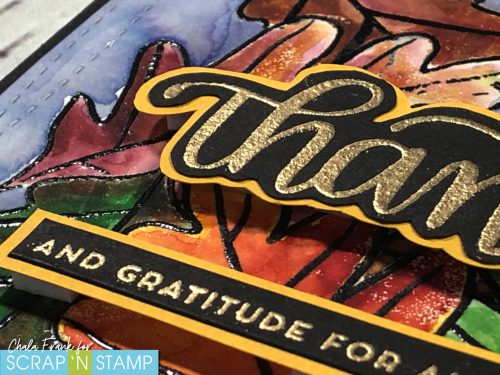
The sentiment was stamped with….can you guess?….my favourite ink for sentiments Versafine Clair Nocturne Ink. To ensure I got my sentiment straight and stamped legibly I used my Hampton Arts Stamp Perfect.
All that was left to do was to adhere the panel onto an A2 side folding card with an adhesive tape runner.
I really love how simple but cute this card came out! I challenge you to look at your craft supplies and be thankful for every item you have. Pull out some old forgotten sets to remember why you wanted them in the first place and then USE THEM! lol!
Thank you so very much for spending this time with me today.
I wish you and yours a very happy and blessed Thanksgiving weekend!
~Chala
Harvest of Blessings Read More »