Scratch-N-Stamp
Search

Checkout

Keep up with Sales, New Products and other events at Scrap `n Stamp. Sign up for our newsletter now!

What's New

Hot Deals


Glitter

Tuesday Tutorial: Glitter on Acetate Technique

Hi everyone! I’m back again with another glitter Tutorial. This technique is one that we featured last year and it is so popular that I wanted to show it again and also show more samples using not only stamping but Outline Stickers too. You follow exactly the same steps when you use Outline Stickers and they are a great option for beginners or anyone that isn’t into stamping but wants to create this awesome look.

There are a few things that I just love about the Glitter on Acetate technique. First, it creates a sort of stained glass effect. Very cool! Secondly, once the glue is dry the glitter never comes off. Yes, that’s right. No bits of glitter falling off your project. It’s stuck exactly where you put it and is on the back of the acetate so it can’t get rubbed off. Third, it’s very easy. Just like paint by numbers. If you can stay in the lines when you are coloring, you can do this!

Here are step-by-step instructions. Hope you give it a try.

Supplies you will need:

  • Acetate sheets
  • Outline stamp or Outline stickers
  • StazOn ink (if you are stamping)
  • Ranger Glossy Accents
  • Studio K Opaque Glitter
  • cardstock, double-sided adhesive & foam squares for frame

Step 1:

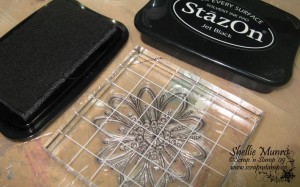
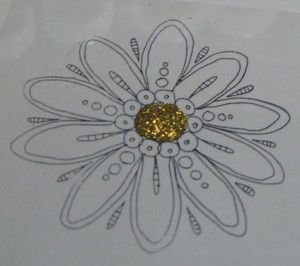
Stamp your image onto an acetate sheet using StazOn ink and let dry. Or, if you are using Outline stickers, peel the outline image you would like to use from the backing sheet and adhere to the acetate sheet. Make sure you leave a good border of acetate around your image as you will need this later to attach it to the frame. The reason you frame it is so that you can raise it up off your card base with foam dots later. This gives it more dimension and really does make it look more like stained glass.

Step 2:

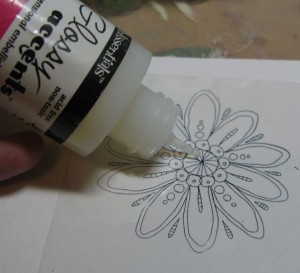
Flip over your acetate sheet so that you are working from the back side. This is very IMPORTANT when you are working with the Outline stickers. If you work on the front you may get glue on the sticker outline and then you won’t get a crisp image. Apply Glossy Accents to all the areas that will be the same color of glitter. In this case, we started with the center first.

Step 3:

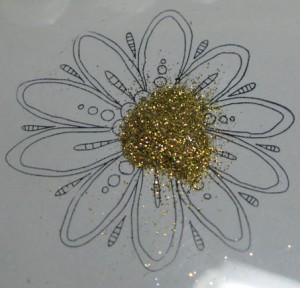
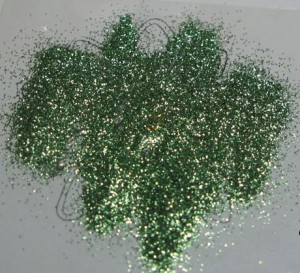
Sprinkle glitter over the Glossy Accents and then shake off excess.

Step 4:

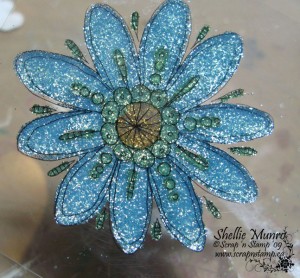
Repeat steps 2 & 3 for each additional color until your image is completely covered. Set aside, with the glitter side facing up and let dry for several hours or overnight.

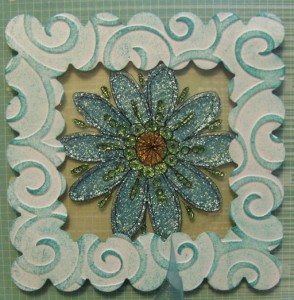
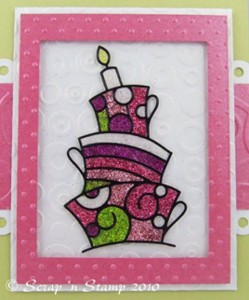
This is our finished image. As you can see each color of glitter stayed exactly where is what applied and there was no mixing of colors.

Step 5:

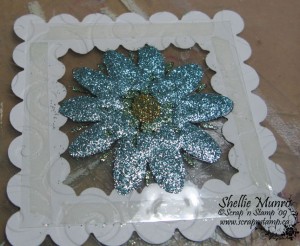
To use your image you will need to mount it in a frame as shown here and then apply it to your project. If you don’t raise it up off of your background it will still look pretty but it isn’t quite as effective.

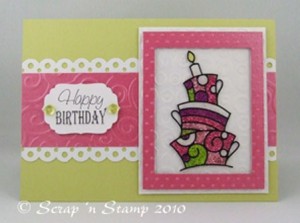
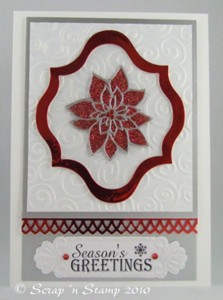
Here’s the finished piece again and pics of some other designs using Outline stickers.

This card was made with the Elizabeth Craft outline stickers – Funky Cakes. This is a really cute sheet of stickers that has cakes for birthdays and weddings on it.

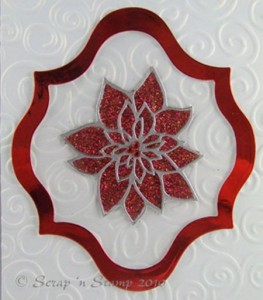
The next card was made with the Dazzles Stacked Poinsettias outline stickers.

There are lots of other Outline Sticker designs that would work for this technique, everything from flowers, cakes & birds to oriental themes and of course Christmas designs. Many of the stickers come in black, silver and gold and some of our seasonal ones are also available in white.

Thanks for dropping by.

Happy crafting!

Tuesday Tutorial: Glitter on Acetate Technique Read More »

Christmas Tuesday Tutorial – Dreamweaver Stencils and Glitter

Click here to view an updated version of this Tuesday Tutorial >>>

Hi All, it’s Shellie here with this weeks Christmas Tuesday Tutorial!  I LOVE GLITTER, especially on Christmas cards, so today I am going to show you how to used your Dreamweavers Stencils to create fun glittery images!

g1

Products You Will Need: Spellbinders Nestabilities Dies, Dreamweavers Stencils, Scor-Tape Adhesive Sheets, Glitter, A bar of soap, Scotch Removable Tape

g2

Using a piece of Scotch Removable Tape attach your Deckled Rectangle die to your Scor-Tape Adhesive sheet, make sure you place he die in the corner so you don’t waste any of your adhesive.  Cut out using your Big Shot machine.

g3

Rub your bar of soap all over one side of your Dreamweaver Stencil.  This will act as a release agent so your stencil does not stick to your tape.

Peel off the backing of your Scor-Tape Adhesive Sheet and stick down your Dreamweaver stencil.

g4

Mask off any part of your stencil that you do not want to get covered in Mahogany Glitter (I only wanted the base of the tree glittered with Mahogany)  I used a piece of scrap cardstock and some Scotch Removable Tape to cover up my stencil.

g5

Dump on Mahogany Glitter and rub onto tape with your finger

g6

Your glittered stencil will look like this.

g7

Remove your mask and move it to the top of the tree covering up all but the top circle.

g8

Dump on Gold glitter and rub in with your finger

g10

Remove your mask to expose the remaining adhesive and dump on Green Glitter, don’t forget to rub it in with your finger

g11

Peel off  the backing of your Scor-Tape Adhesive Sheet and stick your project onto a piece of patterned paper.

g12

Remove the Dreamweavers stencil to expose the rest of the adhesive sheet

g13

Dump on Transparent glitter and rub in with your finger

g14

Your art work should now look like this.

g17

To finish my card I layered Basic Grey Wassail papers onto Core’Dinations cardstock and attached my art work using 3D Dots, I cut out a few presents from another piece of Basic Grey Wassail paper and attached them in from of my art work using 3D dots.

I would LOVE to see what you come up with using this technique, upload your projects to our Members Christmas Gallery and be entered in our Draw for this weeks Blog Candy!!

BLOG CANDY

This is just one of the fantastic items we will be giving away this week as Blog Candy. Check back everyday and we’ll show you another great item that you could win.


Dreamweaver Stencil - Ornament Tree - Retail Value $8.49
Dreamweaver Stencil – Ornament Tree – Retail Value $8.49

Getting your name entered into the draw is really simple!

A Look Ahead

Come back every day this week for more exciting projects to get you thinking about Christmas.

Here is a quick look at what else we have in store for you this week:

Wednesday – Gifts from the Kitchen

Thursday -Gift Calendar

Friday – Christmas Sketch

Saturday – Christmas Showcase, Our Fave Projects!


Until Next Time, Happy Crafting!

Shellie

Christmas Tuesday Tutorial – Dreamweaver Stencils and Glitter Read More »

Tuesday Tutorial – A Simple Masking Technique by Kate

masking-01

Masking is a great way to add perspective to your stamped images and it’s super easy to do. In just a few steps you are able to layer stamped images so that you see all the lines of the images in the front and some of lines on the images at the back are partially hidden. By doing this your stamped designs will look much more realistic.

The example I am going to show you today is very basic but I wanted to show you just how easy this technique really is.

flower sketch

I used a cute little stamp that is an outline of a flower and Memento Dye inks for stamping and colouring the flowers. That’s one great thing about these inks that is different from other dye inks – once they are dry they won’t run and bleed if you get them wet. So, I stamped the flowers with the Tuxedo Black and then water coloured them later and the outline stayed crisp.

masking-12

The first step is to stamp the images that you want to be in the foreground (at the very front) onto cardstock. In this case I stamped three of the flowers along the bottom edge.

masking-02

Next you need to stamp two more flower images onto scrap paper (not cardstock) and cut them out. These are going to be your ‘masks’ and you need to cut out as many as you would need to cover all the images that you have just stamped on the cardstock.

masking-04

When they are all cut out turn them over and give them a light coat of  Wacky Tack glue and let them dry. That will make them sticky just like a Post-It note and you can use them over and over. This is a great glue for any application where you want something to be repositionable.

masking-05

Now you need to place them over the images that you already stamped on your cardstock to cover them completely. Make sure they are lined up correctly and none of the original images are showing through.

masking-06

Ink up your stamp once again and stamp right over the masks so that part of the image is over them.

masking-07

See how the images all overlap. That is what it would look like if you hadn’t done any masking and just stamped one on top of the other.

masking-08

Here’s the magic part of all this. When you take off the masks, the other flowers look like they are sitting behind the first ones you stamped. So cool!

masking-09

Imagine all the possibilities! Combine different flowers into beautiful bouquets. Put bigger elements behind smaller ones.  Make a realistic looking forest of trees. There’s just no end to what you can do with masking!

To finish off the card I watercoloured the flowers using the Memento inks. It’s a quick and easy way to colour any image. To use your ink pads for this just rub them on to a plastic pallette of some kind and then add water from a brush until you get the shade that you want and then water colour as usual.

masking-10

To finish off I cut around the flowers at the top, added some yellow glitter to the flower centers and mounted it on my card base with foam dots. Then I used my Tombow Mono Aqua and put dots of clear glue all over the top of the card and added crystal glitter on top. A little yellow bow and you have a quick and easy card.

masking-01

Hope you enjoyed this week’s tutorial and that you will give this technique a try.

Thanks for dropping by.

Kate

Tuesday Tutorial – A Simple Masking Technique by Kate Read More »

Free Shipping Anywhere In Canada