Scratch-N-Stamp
Search

Checkout

Keep up with Sales, New Products and other events at Scrap `n Stamp. Sign up for our newsletter now!

What's New

Hot Deals


birds

Hero Arts – Color Layering Hummingbird

Welcome to day 22 of May!  The month is flying by!  Speaking of flying….today’s word prompt is birds!  I will be using the beautiful Color Layering Hummingbird stamp from Hero Arts.
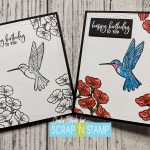
I think the hummingbird is one of my favourite birds and I am often excited to find them flitting about my flowers.  Here is a fun fact, did you know they have no sense of smell?!  They do however, have excellent colour vision!  I thought it would be fun to show you two different card looks – one with no colour and one using the layering stamps to play up how you can add the look of dimension to your image with different colours.

For the first card I simply use the first (or base layer) of each stamp image and stamp with Versafine Claire Nocturne ink.  I created masks for the hibiscus flowers.  You can use the Gina K Masking Magic sheets.  I unfortunately ran out so I used  Avery Removable Full Sheet labels.  To help remove the backing of the masking paper I like to use my Tim Holtz Retractable Craft Pick.  Once I had everything stamped out I then used the My Favorite Things Rectangle Wonky Stitch Die and secured the die onto the cardstock with some Thermo-web purple tape and ran it through my Gemini Jr. Die Cutting machine.  To finish off this first card I back it onto some Hero Hues Premium Cardstock – Pitch Black and then adhere it all onto an A2 side folding card base made from 120lb white cardstock with Art Glitter Glue.  I love the look of this simple black and white card.  If this is not your thing, you can colour the image in with Copics, watercolour or even coloured pencils.  However, this layering stamp has made it super simple for us to add beautiful colour and dimension, so that is what I have done for the next card.

The second card I stamped the exact same way as the first card but then stamped each layering image by following the easy to follow instructions on the back of the packaging.  The Distress Ink colours I used are Broken China, Mermaid Lagoon, Peeled Paint, Forest Moss, Abandoned Coral, Fired Brick and Ripe Persimmon. These inks are available in full size and in the minis. When I first started stamping I wanted ALL the colours, so I found it most economical to invest in the mini “First 36″ Bundle. This also is a huge space saver in the craft room!  I have only had to buy re-inkers for two of the cubes and I have had this set for 3 years!

I used the same My Favorite Things Rectangle Wonky Stitch Die and Hero Hues Premium Cardstock – Pitch Black cardstock.  The finishing touch for this card was adding Zig A Wink of Stella – Clear overtop of the hibiscus flowers to give them some sparkle.

You can check out the quick video tutorial by clicking here: https://youtu.be/IXuB4nUNHYE

Thanks for stopping by and enjoy the rest of your day!

~Chala


Hero Arts – Color Layering Hummingbird Read More »

Tuesday with Tara {take 279} Christmas Bird

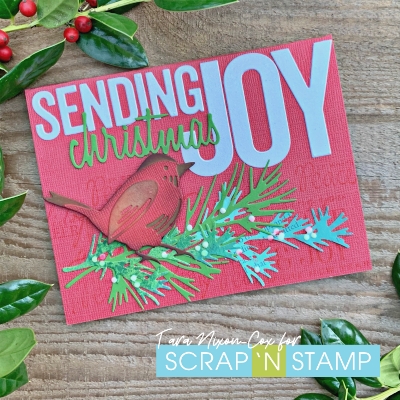
It’s Christmas week!  I can hardly believe we’re in the final days of our Christmas 2020 countdown.  Everything is so different this year, and I keep reminding myself it’s okay to have a slower pace (especially since there are no big gatherings to prepare for!) and just enjoy the season.  I was so late getting started on making Christmas cards this year that I almost feel I should keep going so I have them ready for next year, ha!   I have also been late in purchasing new wintery stamps & dies to create with, but these lovely holiday greens dies by Tim Holtz arrived just in time (and you can bet I’ll be using some of them for creations throughout the year!).

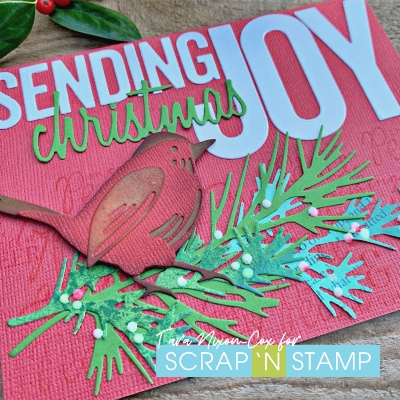
Today’s card combines a few cuts of holiday greens with one of the feathered friend’s dies, all decked out in red.  I’ve used some of the cut out letters from Sending Christmas Joy, by MFT along with a scripty ‘Christmas’ die cut.  (I’ve used an older Tim Holtz one, but any scripty word would work!). I love taking sentiment dies (and stamps) and mixing up the fonts together to change the feel of them.  It’s also a great way to change the way they fit on your cards, as this design would not have fit on an A2 card if I had used the bold ‘Christmas’ letters that were part of the original die!

I finished off my card by adding a bit of detail to the background to break up the solid red… by adding more red.  LOL. I grabbed a variety of small Christmas sentiment stamps from my stash (there’s some OLD wooden ones here, most from 10+ years ago) and stamped them randomly in red across the lower part of the card.  I didn’t want anything too bold to compete with my images, and this was a fun way to add a bit of texture to the card.  I also added some white Nuvo dots as berries to the branches, some of which picked up the red ink from my background and added bits of pink.  I often forget that this happens when they are applied on water reactive inks (like Distress) but in this case it’s a happy accident that just adds variety!

Thanks for stopping by- I hope the coming days are filled with joy & peace!

Inky hugs,

Tara

Tuesday with Tara {take 279} Christmas Bird Read More »

Tuesday with Tara {take 251} Feathered Friend

Happy Tuesday!

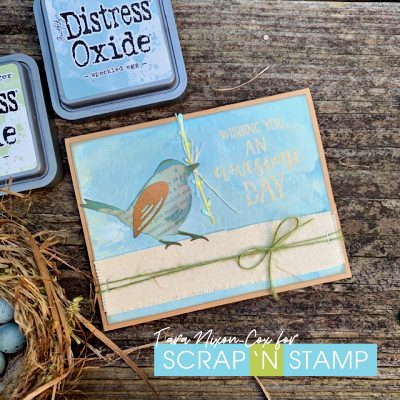
Today I’m sharing a simple card that showcases a fun little mixed media bird from Tim Holtz’s Feathered Friends die set, all ready to build a nest.  There are two birds in this die set and I love them both!  If you haven’t seen yet, I’ve used the larger bird on my beach scene card for our June Perfect Pearls Blog Hop.  (Check it out HERE– and be sure to visit the rest of the blogs too, there’s some great inspiration from our fabulous creative design team!)

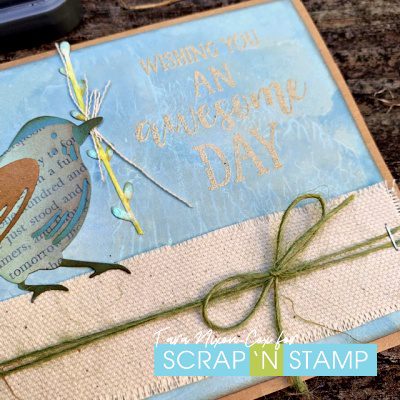
I honestly just grabbed some scraps I had on my work space to die cut this cutie and added a bit of ink.  I love the combo of colored card stock, kraft & book print for her.  The ‘twig’ in her mouth was also a scrap I had from another project, I just added a few touches of perfect pearls to make it shine a bit 🙂

The background layer from my card was an inky mix of Speckled Egg and Old Paper Distress Oxide, mixed together on the same surface that had bits of turquoise Perfect Pearls left on it…  I love how the smooshing gave a bit of a marbled effect with the shimmer.  It’s subtle, but it shines when you hit it with the light!

A piece of frayed canvas gave me both a surface for the bird to stand on and some extra threads for it to carry.  Perfect little additions for a card that is on it’s way to my Mom (Happy Birthday Mom!).

I finished the card off with some heat embossing in a powder that is similar to kraft.  The color is almost too subtle to really pop in a photograph, but I still think it works!  My sentiment is by Gina K.  It’s a beautiful but simple script that works with so many designs.

I hope you like my little feathered friend!  Have a fantastic week 🙂

Inky hugs,

Tara

Tuesday with Tara {take 251} Feathered Friend Read More »

Free Shipping Anywhere In Canada