Scratch-N-Stamp
Search

Checkout

Keep up with Sales, New Products and other events at Scrap `n Stamp. Sign up for our newsletter now!

What's New

Hot Deals


Distress oxides

Summer Sunshine – Sunny Vibes

Happy Lazy Sunday!

MFT Sunny Vibes

Hey Crafty friends!  It’s Chala and I am here today to share some cardmaking inspiration with you!  If you are playing along with us on the Scrap’N Stamp Facebook Challenge page then you know that our word for the day is SUMMER!  I don’t know about you, but when I hear the word summer I automatically think of sunshine!  This is something I don’t feel like we have had a lot of here in Calgary….but here is hoping today’s card warm you up just the same!

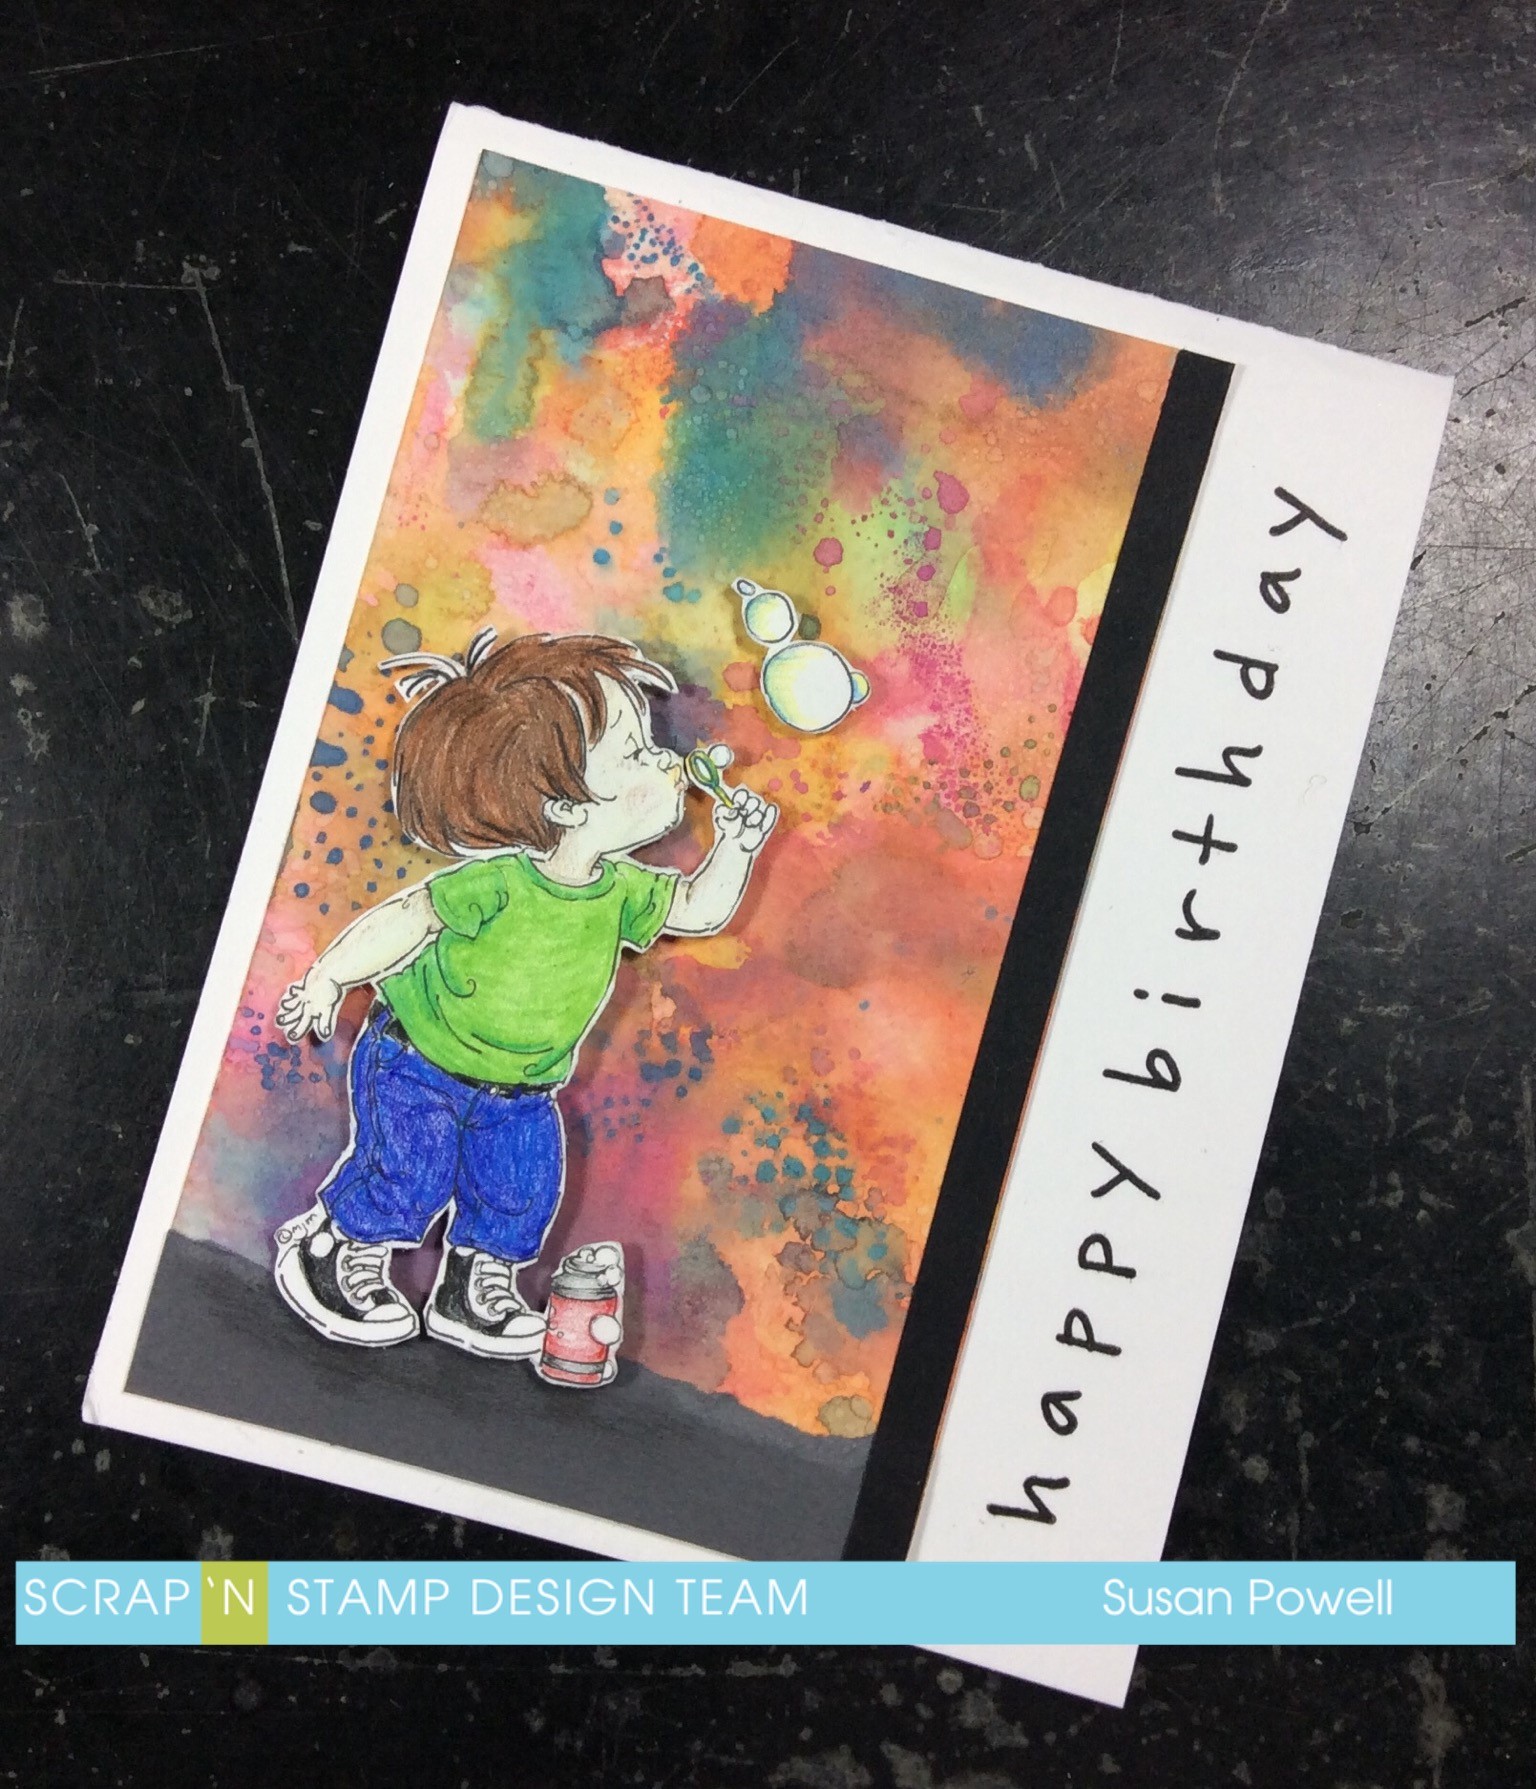
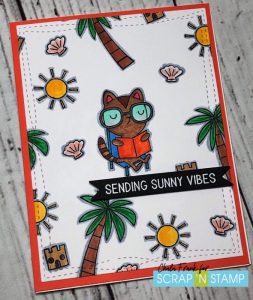
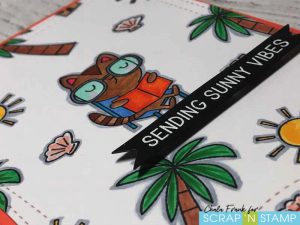
I am loving MFT’s new Sunny Vibes stamp set and it is perfect to create a summer scene card.  I first played around by creating a custom one layer background piece.  I chose a few images and stamped them with Memento Black Tuxedo ink and did some simple Copic colouring.  I just love the little critter lounging with its book!   I added a grey shadow to each of the images to give the background piece a bit of depth.  I then used the larger MFT Wonky Stitched Rectangle Die and mounted that onto some orange cardstock and then adhered that to an A2 side folding card.  For the sentiment I chose to keep it simple with white heat embossing on black cardstock and then cut that into a banner and adhered it with foam adhesive to add dimension.

MFT Sunny Vibes MFT Sunny Vibes

For my second card I pulled out the Summer Sunshine 6″ x 6″ paper pad from Taylored Expressions.  This paper pad has some fun bright colours and patterns that will add the perfect pop of colour to any card.

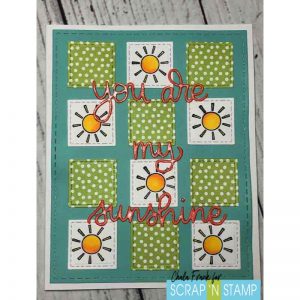
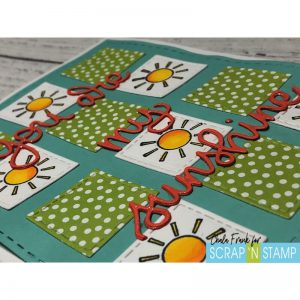
My Mom has been doing some quilting and created a beautiful summer patch quilt picnic blanket for my kids.  This inspired my next card.  I used a small square stitched die and die cut 6 patterned pieces and 6 white squares.  Using my Stamp Perfect Tool I was able to quickly then stamped the sunshine onto the white squares and Copic coloured them.  I then arranged them onto some green cardstock similar to that of what you may find on a quilt.  For the sentiment, I die cut a “You are my Sunshine” sentiment several times and stacked them together using Gina K Connect Adhesive.  To make the sentiment pop I added some Nuvo Aqua Shimmer Pen.  I LOVE the sparkle that this pen gives!

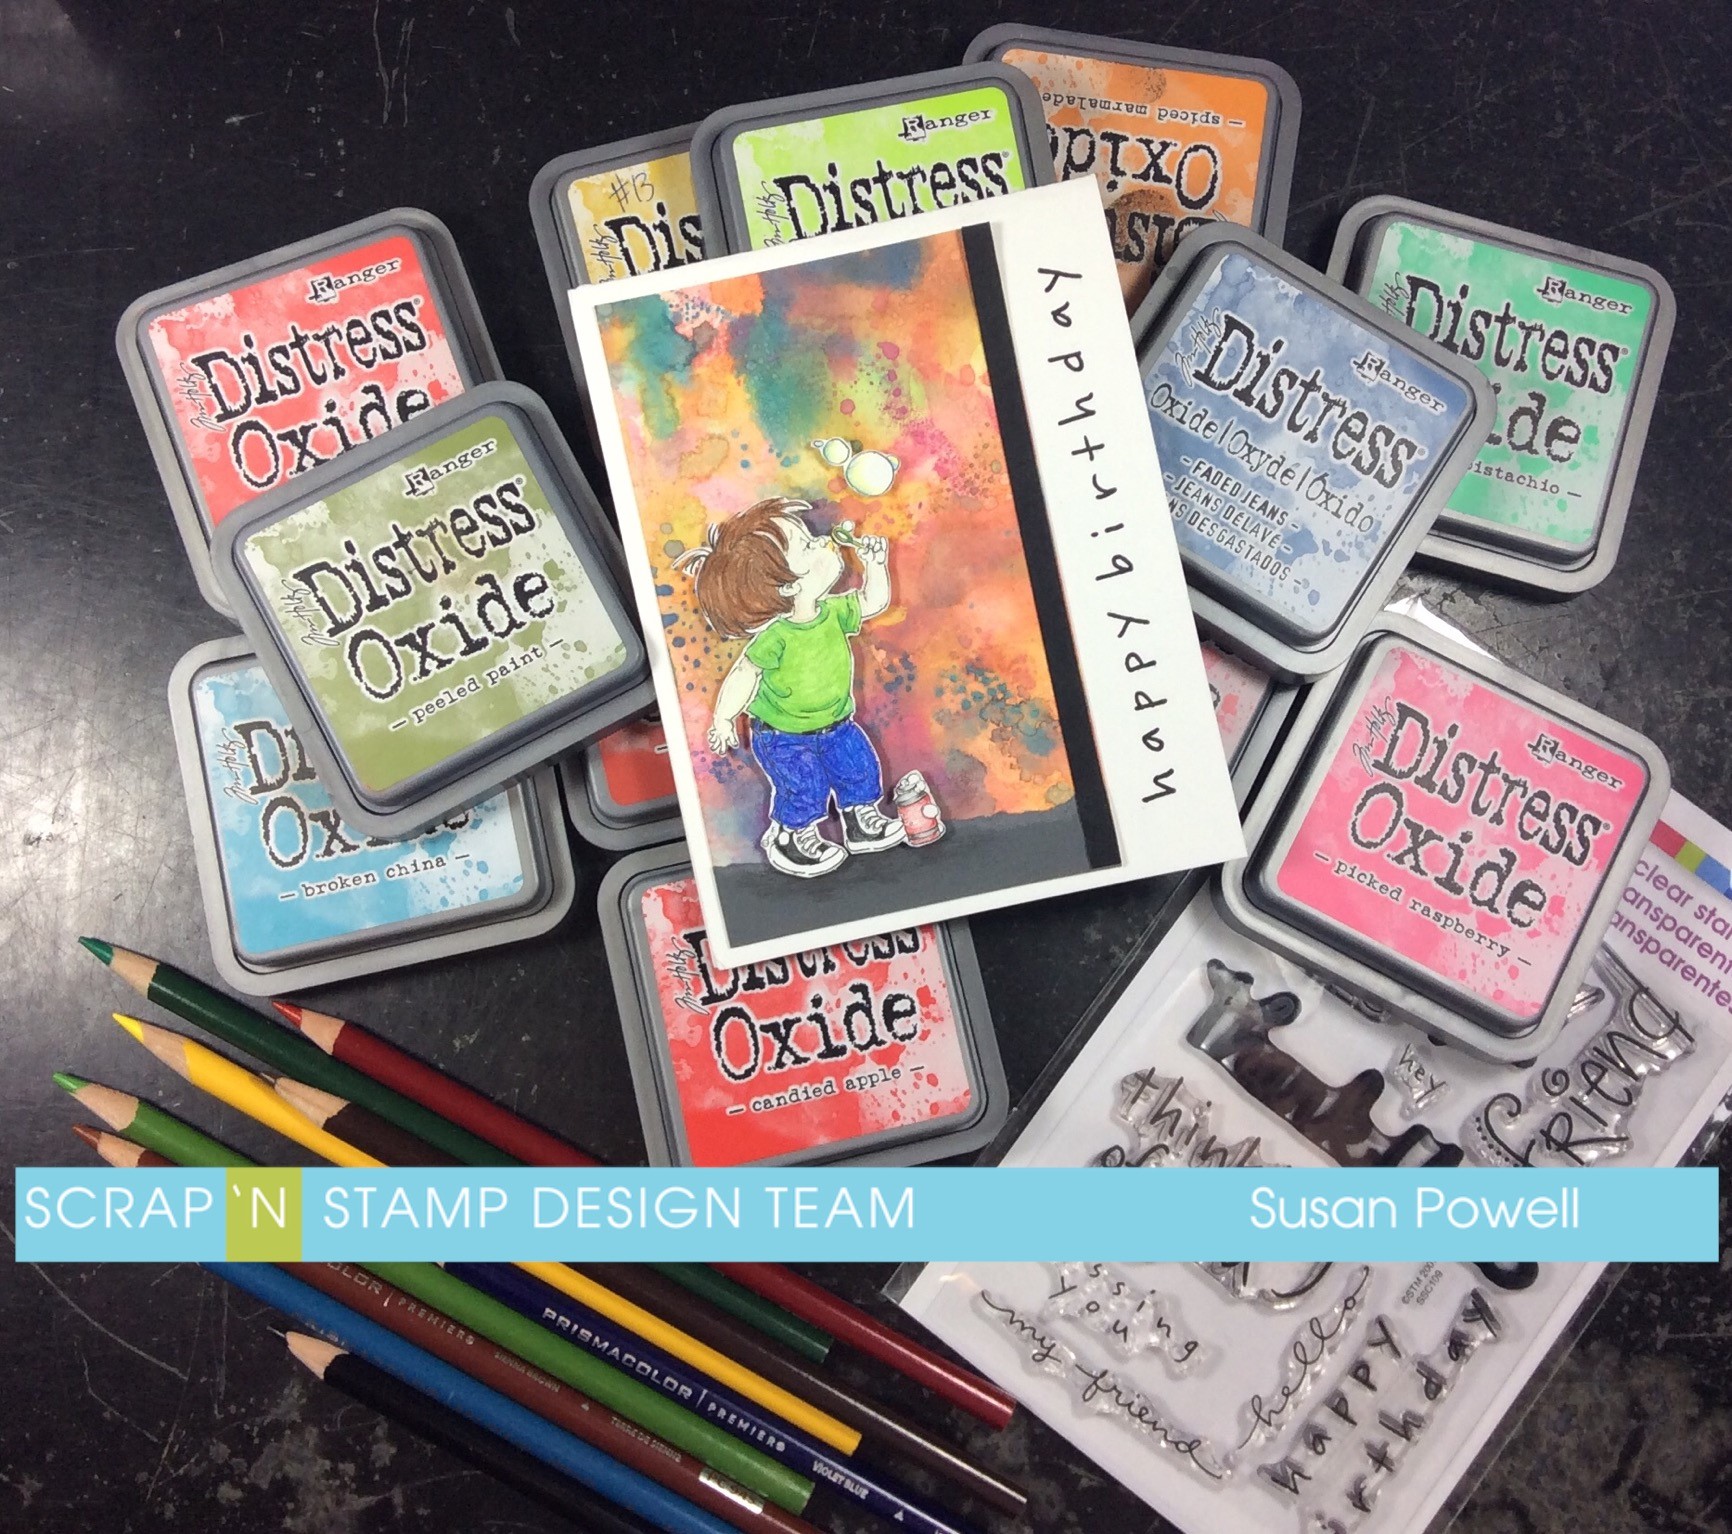
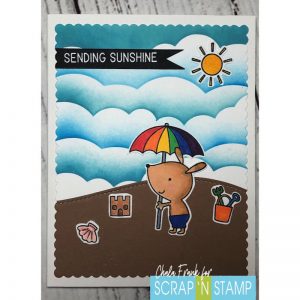
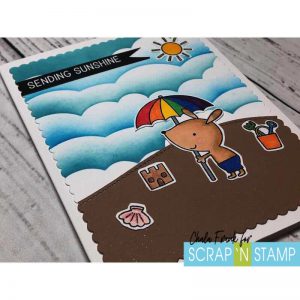
For my final card I wanted to create a beach scene.  I used the MFT Cloud stencil and blended Distress Oxide inks in the colours Broken China and Salty Ocean with one of my smaller Picket Fence Blending Brushes.  I like to do my ink blending on the Wendy Vechhi Make Art Stay-tion as I can use the magnets to hold my project in place while blending.  I die cut some brown cardstock with the Lawn Fawn Hillside Stitched Borders.  I stamped,  Copic coloured and fussy cut out the sunshine, bucket, shell, sandcastle and the puppy holding the sun umbrella with my cutter bee scissors and then adhered them with some of the Gina K liquid adhesive.  This gave me time to wiggle the images into the perfect place.  I again used a simple black cardstock and white heat embossed sentiment cut into a banner.  I wanted to add some more interest to the scene and decided to use my wavy die cut rectangle to give the edge a fun look.  I then adhered this to an A2 size side folding card…and…you guessed it…I added some more sparkle  to the shell and the sunshine with the Nuvo Aqua Shimmer Pen.

MFT Sunny Vibes MFT Sunny Vibes

I really enjoyed how all three cards turned out and how different each one was.  I have a few more ideas for this set but ran out of time!

If you want to see these cards come together you can check out the YouTube video here:

https://youtu.be/hnxHvDr8j_I

Remember to share your Summer inspired cards over at the Scrap’N Stamp Facebook Challenge Page!

Enjoy the rest of your day!

~Chala

Summer Sunshine – Sunny Vibes Read More »

Simple Stencils

Welcome Back!

I hope you all had a great weekend and were able to “Stencil Us In” for our latest blog hop!  Today I am continuing to play with some simple stencils to create some fun birthday cards.

I have also been really enjoying playing with my Distress Oxides lately and creating ink blended backgrounds.  The colours I am using today are Fossilized Amber, Picked Raspberry and Seedless Perseveres.

To start I masked out a white border using post it labelling tape that I got from Amazon.  You can use any masking paper that you have on hand, I also recommend Gina K’s Masking Magic.

I blend the Distress Oxide Inks with a foam blending tool, moving back and forth between the colours to get a beautiful transition from one ink to the other.  I love how easily Distress Oxides blend together.

The next part is the hardest, picking which stencil to use!  I chose the Jet Wing by Carta Bella.

Lay the stencil onto your inked background.  You can leave the masking on for the next step, I was a bit absent minded and took mine off.

Using a finger dauber I apply a generous layer of Brilliance Pigment ink in Moonlight White.   I will then carefully remove the stencil and the masking paper.  You will need to let this dry completely.  I suggest setting it aside for a couple hours….or, if you are impatient like me, you can use your heat tool.

I love the way the stencilling pops off the page and the way the vibrant colours of the Distress Oxides show through.

For the sentiment I used the big and bold Happy Birthday from Hero Arts Snarky Messages stamped in VersaClaire Nocturne Ink.  I recommend using a stamp platform like the Stamp Perfect to ensure you get a good impression of your sentiment.  I played with a few other Carta Bella stencils and love how each card turned out!

I couldn’t resist making one more, this time with in Peacock Feathers, Broken China and Cracked Pistachio.  I think a big bold Thank You sentiment would also look really nice with this background.

Hope you enjoyed today’s cards!

Have a wonderful and crafty week!

~Chala


Simple Stencils Read More »

Fun With Distress Oxides

Hi Everyone. It’s March 1st and it’s still so cold out. I’m really

hoping it warms up soon. I spent last night in my craft room

where it’s warm playing with my distress oxide inks. I set the

camera up to record all the fun but apparently I forgot to hit

the record button – oops. But I do have lots of pics for you.


I pulled out my distress oxide inks and couldn’t decide which ones to

use, so… I used them all 🙂 I cut a piece of watercolor cardstock to

5 1/8 x 3 1/4″ and set about making the background. The amazing

thing about oxide inks is the colors layer on top of each other.

Normally when you layer as much ink as I did it would end up

looking like mud but with the chemical combination in oxide inks

makes it so they layer. It’s all very sciency and super cool!

To make the background, start by smooshing one color of ink onto a

craft mat. Give it a few spritz of water and start pouncing the water

color paper into the ink. Use a heat gun to dry the ink and then

repeat the steps with a new color of ink. Be sure to dry each color

before adding the next one – this is key to building the layers.

Here’s a close up – check out all those colors sitting on top of each

other – so cool!

I’m really sorry I didn’t get a video for you and hope that the

instructions make sense. If you have any questions, please leave them

for me below and I will do my best to help.

Now for the little guy blowing bubbles – isn’t he adorable. The

stamp set is called Bubble Boy from Penny Black and reminds me

of when my kids were little and spent hours blowing bubbles. I don’t

have the actual stamp but I do have the digital image so I printed

it off, colored him in with Prismacolor pencils and then fussy cut

him and the bubbles out. I added a strip of grey cardstock at the

bottom and then adhered bubble boy with some craft foam for

dimension. The sentiment is from Happy Messages by Stampendous.

I performed a little stamp surgery and cut the words apart so I

could easily stamp them in a straight line.  To finish it off I added

the thin strip of black cardstock.


I hope you enjoyed this card and are inspired to create. If you have

any questions, please don’t hesitate to ask.

Be sure to check out the Scrap’n Stamp Challenge Page.

Happy Stampin’

and thanks so much for visiting!

Susan


Shopping list:


Fun With Distress Oxides Read More »

Free Shipping Anywhere In Canada