Scratch-N-Stamp
Search

Checkout

Keep up with Sales, New Products and other events at Scrap `n Stamp. Sign up for our newsletter now!

What's New

Hot Deals


Interactive Card

5 Things We Love about Dad

Happy Monday!  I am here to share a fun “Dad” themed card with you today.
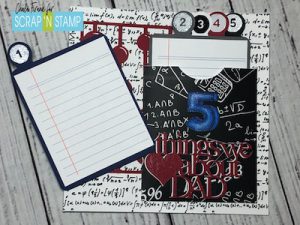
I am going to be doing things a little bit different… I really want to show you an idea of a card and see what products you guys have at home that you can use to create something similar.

My inspiration for today’s card was a digital cut file that I saw in the Silhouette Design Store.  It is by Lori Whitlock and it is called “5 Things Pocket”.  While I know not everyone has an electronic die cutting machine, you can still look through the cut files and get some really great ideas.

I really liked this pocket idea and wanted to incorporate into my card.  I downloaded the file and was able to customize and alter the cut file to fit my needs.  You can easily recreate a pocket like this with metal die cuts like using rectangle dies to create the little files and small circular ones for the tabs.  There are also many free resources on the good ‘ol Inter web!

Since this card is for my husband, I really wanted to personalize it to suit him.  He LOVES math, I mean LOVES.  He can be found spending his leisurely time reading calculus books. and doing equations..for FUN!?  He even spent our holiday last summer in Vegas poolside reading a math and physics book.  People walked by and had a good laugh at him!  It’s funny how we even got together as I am not good at math at all!  None the less…he is MY nerd, so back off girls!  LOL.

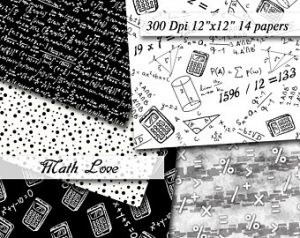
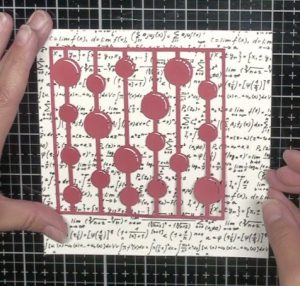
I headed to the internet and found some really great math papers that I could download (and I just know he is going to try to solve the calculations on them). I found this set on Etsy from KecheliPapers.  They were perfect for my theme!  I also found another digital cut file from the Silhouette Design Store that looked very similar to an abacus, so I die cut that from some red paper.  Again, you can customize your papers and card to suit who you are making the card for and use background dies that you already have.
I cut one of the papers down to fit a 5 1/2″ square card base and adhered it to the card base with my tape runner and glued the abacus looking die cut closer to the top left hand side of the card.
I used another of the papers to create the envelope and used Gina K Connect Glue as the adhesive.  This is a very strong liquid adhesive and I know it will hold up to the pulling that will happen when the little files are removed and inserted back into it and it gives me wiggle room to ensure I have the edges lines up evenly.  As that has time to set up I can then move onto the little files that will be inserted inside the envelope.   My husband has a very small colour palette that he likes, red, black, blue white and gray, so those are the colours I chose.  You can easily create these and the tabs with dies in your stash.  The next thing to do is to stamp the numbers on the tabs.  I pulled out all the number stamps in my collection and found some that were the perfect size.  This is actually a stamp set that is used to create day-timers.  for the red, blue, gray and white I will stamp with Versamark ink and use clear embossing powder and for the white one I will use Versamark Claire Nocturne Black ink and clear embossing powder.  I suggest using a stamp platform like the stamp perfect so that you can stamp multiple times and get a good impression.  I also notice these stamps developed air bubbles underneath which hindered the stamping, so to overcome this I used the Versamark marker to fill in any gaps.  This is a useful tool to have around, especially because it has the bullet tip one end and the brush tip on the other.
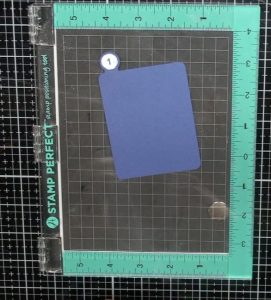
I want to add some lined paper onto the file so that my kids can write what they love about their Dad.  I used another Silhouette file, but you can easily just use white paper or even use lined paper from a small note book.  I adhered this with my taper runner.

I need to work on my sentiment and used one of the big number 5 stamps I had and stamped that with Memento Black Tuxedo ink so I could Copic colour in complimentary blue colours (B24, B26 & B29).  To get the exact sentiment I wanted I created a cut file in my Silhouette Design Studio and sized it to fit on the envelope.  I changed the sentiment from saying “5 Things I Love About You” to “5 Things We Love About Dad”.  You can easily create your own sentiments with stamps, alphabet stamps, alphabet die cuts or even your own printer!  I die cut this twice once from red and once from white cardstock and then used the Gina K Connect Glue to adhere the two together just a little offset to help the sentiment pop off the black background.

It’s now time to finish adhering everything down to the card base.  I used Be-Creative Scor Tape to adhere the envelope to the base.  I chose this adhesive as it is a VERY strong adhesive and again, it will hold up to being pulled on.  Check out my YouTube video to see my special trick on how I use Scar-Tape.  I will then adhere the sentiment with the liquid adhesive to give myself time to wiggle it into the perfect position.
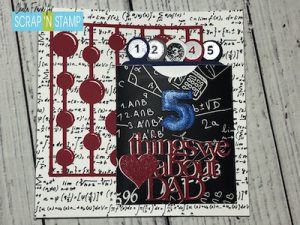
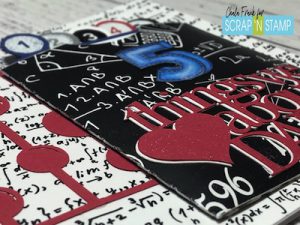
Of course, I could not resist adding a bit of sparkle to this card…even if it is for my husband!  So I pulled out my Nuvo Aqua Shimmer Pen and sparkled that bad boy up!

You can watch the corresponding YouTube video here:                  https://youtu.be/toopBH8ki6s               

I hope you enjoyed today’s blog post and that you feel inspired to create your own interactive envelope card.  Make sure you head over to the Facebook Challenge Page and share your “Dad” inspired cards!

Enjoy the rest of your week!

~Chala


5 Things We Love about Dad Read More »

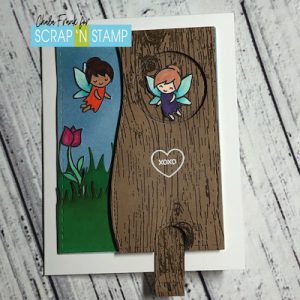
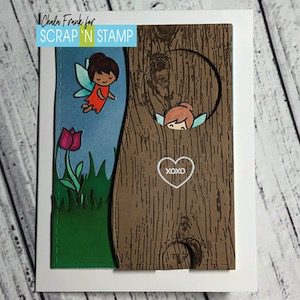
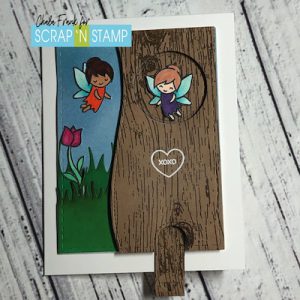
Lawn Fawn – Fairy Friends – Double Loop Slider Card

Welcome Back!  I hope you have all had an opportunity to play along in the 30 day challenge that we have over at the Scrap’n Stamp Facebook Challenge Page! Today’s challenge is Lawn Fawn and I pulled out a bunch of my Lawn Fawn products to create this fun double loop slider card.  This is a similar concept as to the Double Slider Surprise…..but created in just a little different way and using different dies.

It was when I was sorting through my pre-stamped and pre-cut pieces that I have that it reminded me of this technique that I saw a couple years ago done with MFT products.  It was with a little woodland critter popping out of a tree. I thought it would be fun to recreate this idea but use the Fairy Friends stamp set from Lawn Fawn that I recently purchased.  I was also able to use several other Lawn Fawn products and I will try to list all of them as I go.

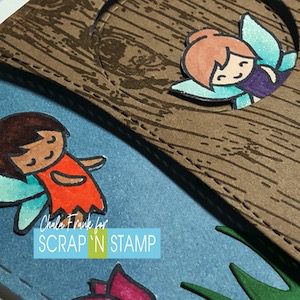
I already had the grassy pieces pre cut from the Grassy Hillside Border die from Lawn Fawn and added some distress ink on the edges in Mowed Lawn, Peeled Paint and Forest Moss.  This gave the pieces more dimension.  I then ink blended a standard A2 size white card panel with Broken China distress ink to create the sky background.  This will be the main piece we will adhere all our pieces on to.

I already had a piece of brown cardstock with wood grain stamped on it.  This is perfect to create the tree.  I cut the piece down with he a stitched rectangle die  and then created shape to the tree trunk using one of the Hillside Border dies.

I also used a circle stitched die to create the hole that my little fairy is going to pop out of.   After die cutting the circle I place a piece of low tack tape on the front to hold the hole in place.  I am going to turn it over and place some Gina K connect glue on the circle portion only. Having it temporarily taped to the original piece will insure that I get it place exactly where I want it.  I will adhere that down onto the blue distress inked card base and then carefully remove the low tack tape and the rest of the die cut tree.  Only the circle should be adhered down.

I stamped the images I wanted to use in Memento Tuxedo Black ink, copic coloured and then fussy cut them out.  I adhered the grass border, flower and the one fairy on the left side of the card with some Gina K Connect adhesive. I trimmed the grass piece making sure I had enough that would show on the left side of the card when the tree was attached and so that it would not add bulk where I want the slider to go.  I then began working on the slider mechanism.

I used some elements from the Let’s Toast Pull Tab add on (The pull tab and the directional arrow) and die cut them from the left over pieces of the wood grain paper from the tree.  I ended up cutting the “T” portion off as it was too long.

Next I move onto die cutting two slots.  These need to be far enough away from each other so that your element fits in between the slots. I cut down a piece of light plastic approximately an inch and a half wide.  Yours will be as wide as what ever slot you will need or the size of the die cut you use. This is the track of your slider.  You can also use a craft knife and a ruler to create these slots if you do not have a die cut that will work.  Just make sure that your slots line up to each other both horizontally and vertically.  If you are off it could cause your slider not to work properly.  I also took the “notch” from the pull tab set and die cut on the bottom of both the card panel and the tree making sure that the notches can line up perfectly when I need to adhere them.

For the “belt” of the slider mechanism I used a piece of plastic tarp I had in my garbage from a painting project.  It was fairly light but worked okay.  I recommend maybe using something a little heavier.  The consistency of a plastic sandwich bag or Ziploc baggie would work well.  The length will be just long enough so that the two ends can over lap enough to secure together.  You will feed the baggie ends from the front to the back, fold the ends over (trimming to overlap just enough to adhere).  Make sure it is not too tight or it will not slide.

The next part is a bit tricky to explain…so, make sure you head over to watch the video for clarification.

https://youtu.be/PQ_7bHy96-s

I now want to adhere the pull tab to the “belt” or plastic slider we created on the back side of the panel.  I am using some strong Be creative tape.  Only adhere a strip horizontal to the top of your slider. I like to adhere it over top of the seam I made so that It does move through the track and hinder the slide of your element.  I made the mistake the first time of using too much adhesive and my slider would not slide down very far.  You will then turn your base over and work on adhering the image that you want to pop up.  Again, this is a bit of fiddling and I place the tree trunk over to figure out where best to adhere the fairy so that she was partially hidden when the slider was in its original position and when the pull tab was pulled she rose up enough…but, not to high.  I recommend pulling the slider tab all the way down and then line up the image you want to pop up in the exact place you want to see it, and adhere it it in that position.  Due to the size of my image I also needed to use a piece of acetate to boost her up a bit.  You won’t be able to see the acetate because it is clear.

I then turned the panel over to the back again and created a track for the slider to follow with foam tape.  I then proceed to apply the foam tape to the rest of the back of the card ensuring not to place any that might impede on the slider.  At this point I turned it over to the front and adhered the tree down with smaller pieces of foam tape and made sure everything was sliding properly.

You can now remove the foam tape off the back and carefully adhere it down to your card base.  I stamped the coordinating sentient from the Fairy Friends stamp set “have a magical day”.  The last addition I made was to add some clear Wink of Stella to the fairy wings and then using a  heart and “xoxo” from the How you Bean? Conversation Hearts add on from Lawn Fawn I stamped with Versamark and heat embossed with white embossing powder.  I thought this made it look like someone carved it into the tree.  I will warn you though it was a bit of a challenge to do, so, make sure you get all your stamping done before you adhere everything down!

I hope you enjoyed my vision for the “Lawn Fawn” challenge for today.

Take Care!

~Chala

Lawn Fawn – Fairy Friends – Double Loop Slider Card Read More »

Lawn Fawn & Chibitronics Light up Card

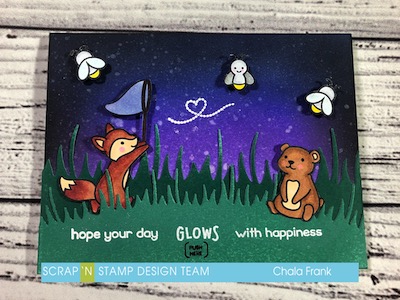
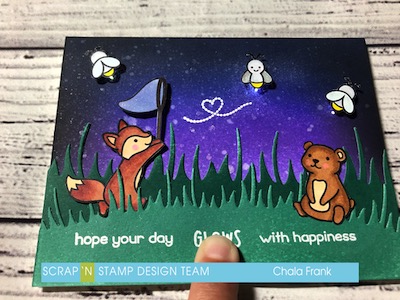
Welcome back to the blog! I cannot believe how fast summer has come and gone! I wanted to hang on to that “Ooooh oh…those summer nights” (Insert your best Olivia Newton John and Jon Travolta voices here) feeling by creating a fun light up card using the Lawn Fawn Butterfly Kisses and Little Fireflies stamps as well as showing you how you can add a new dimension to your cards with Chibitronic lights!

There is a lot going on in this card and I just can’t show you the cool light feature in pictures very well….so I am going to direct you to watch it all come together on the YouTube video below. I will have a list of materials and links on where you can find them at the end of this blog.

https://youtu.be/usfpKPRF4TU

If you liked today’s card please remember to leave a comment here on the blog or on my YouTube channel to let me know! We love to hear your comments and if you have any questions about the techniques we show we would love you help you as well!

Lawn Fawn Butterfly Kisses
Lawn Fawn Interactive Chibitronics Light Up Card

Remember to share your creations over at our Scrap’N Stamp Challenge Page! We love to see what you create!!

Enjoy these last summer days!

Chala, xoxoxo

Lawn Fawn & Chibitronics Light up Card Read More »

Free Shipping Anywhere In Canada