Scratch-N-Stamp
Search

Checkout

Keep up with Sales, New Products and other events at Scrap `n Stamp. Sign up for our newsletter now!

What's New

Hot Deals


Penny Black

Winter Tales by Penny Black

Happy Monday, my friend! I have a super cute card to share with you today, so grab your favourite beverage, and settle in for a bit. As soon as I saw the preview of the winter release, I knew that I would be ordering this Winter Tales stamp set by Penny Black. I just love scenic stamp images, and the little birds on this one are just too cute! Seeing this stamp brought to mind my wonderful Design Team member Kia – she loves birds, and probably has the most bird related stamps than anyone I know. And that’s okay, because she’s so talented, and always creates gorgeous projects with them. So, hopefully I’ll live up to her standard with my birds in today’s project.

WINTER TALES

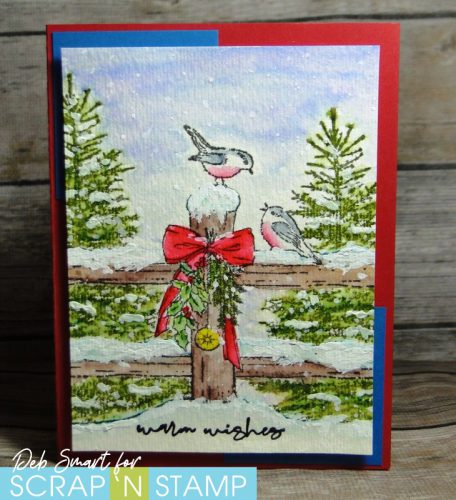
This Winter Tales stamp is a large one, but I trimmed it down to fit a standard A2 card.
Penny Black Winter Tales

Well – was I right about these adorable birds?! They look like they’re having a very animated conversation – how fun would it be to understand bird talk?

IMAGE DETAILS

This image lends itself to colouring with your favourite medium. I chose to watercolour with my Zig Clean Color Real Brush Markers, and a water brush. To start, set up the stamp and your watercolour paper in your stamp platform. Because watercolour paper has a texture to it, you’ll want to be able to re-ink and stamp at least twice, for a clear impression. Use an archival ink to cover the entire stamp, and press onto your panel. Repeat at least once more, until the image is crisp & clear.  Now, stamp the image again onto a piece of masking or photo copy paper, and hand cut with scissors. This is your mask, so that you can stamp the trees behind the image.

Use the Winter Tree stamp, also from Penny Black, and stamp it in Gina K. Fresh Asparagus ink, with the mask in place. Stamp the tree on either side of the middle fence post; repeating the stamping for good ink coverage. With that done, you can remove the mask, and start colouring the image.  For colouring with the markers, first apply a bit of colour directly to the image, and then immediately blend it on with a damp water brush. Continue to do this until you’re happy with the depth of colour. Once the colours are dry, you may want to go back in to add more ink, to create depth and shadows.

CREATE SNOW AND BACKGROUND

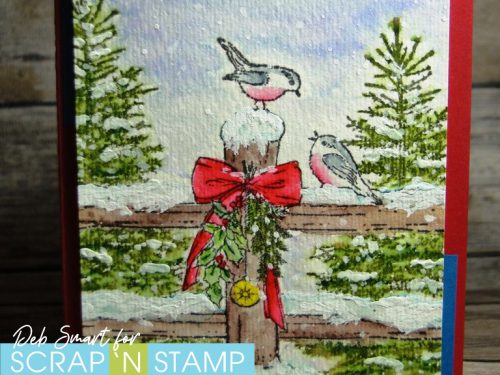
To create the snow, add white Gouache paint without thinning it, directly onto the areas where the snow should be. Those are the tops of the fence rails and post, on the ground, and on the trees. For the sky, use the Blue marker and lightly brush it across the sky. Do a small area at a time, immediately blending with the water brush, so it isn’t too dark, or blotchy. I love how the other colours within the blue start to show through, when it’s blended with the water.

When the sky and snow are dry, thin out the remaining gouache paint with a bit of water. Put your mask back in place, to cover the birds and fence. Pick up the thinned gouache with your paintbrush, and splatter it onto the panel, creating smaller snowflakes. Remove the mask, and add a few snowflakes by hand onto the fence and trees.

Here’s a close up photo, so you can see how the gouache, without water, creates dimension for the snow.
Penny Black Winter Tales

FINISH YOUR CARD

Now, stamp the small sentiment from the Concord & 9th Mistletoe Messages at the bottom, in Nocturne ink. Cover with clear embossing powder, and heat set.  Layer 2  blue squares in opposite corners of your red card base, and then attach your image panel with foam tape.
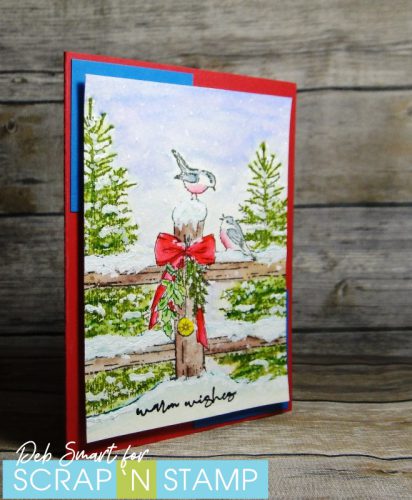
Penny Black Winter Tales

I coloured my birds to look similar to robins, but you can make them into your favourite bird!

Thanks for spending some time with me today! I  hope  you’ve been inspired to have fun creating your own winter or Christmas cards. Or, just change up the sentiment, don’t add the snow, and this would make a great anniversary or thank you card, too! If you haven’t already, be sure to leave comments on each blog in our White Christmas blog hop, for a chance to WIN a $50 Scrap ‘N Stamp Gift Card! You can start HERE at Tara’s post.

To order the products to make this card, links are included below.
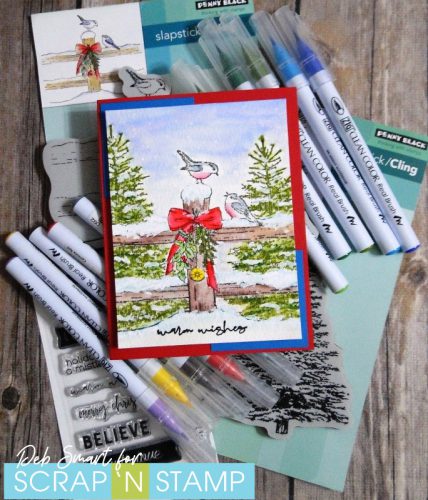
Winter Tales Penny Black

Affiliate links are provided, at no cost to you.


Winter Tales by Penny Black Read More »

Distress Oxide Christmas Cards

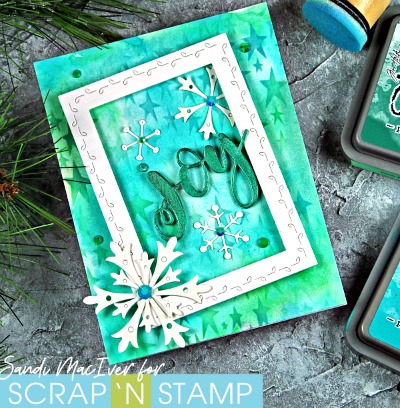
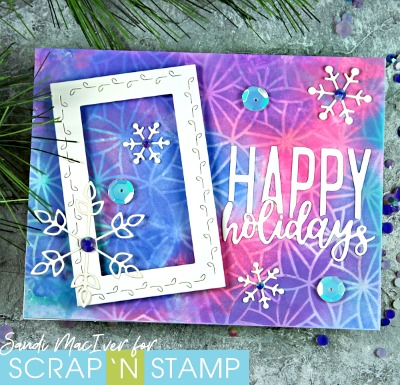
Hi Crafty friends and welcome back. Sandi MacIver here and in keeping with our monthly Distress Oxide Challenge, I created some Christmas cards to share with you today.

Distress Oxide Christmas Cards

I won’t go into too much details as I share a video below walking you through the steps to create these fabulous backgrounds.

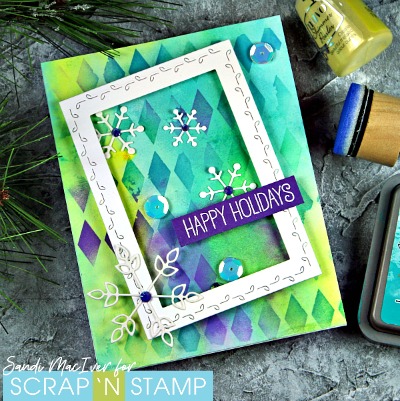
Distress Oxide Christmas Cards

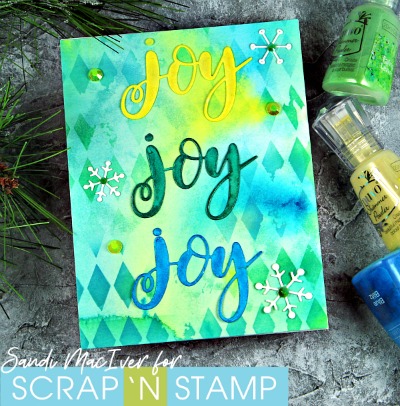
I did start by Smooshing Distress Oxide ink onto Watercolor paper. On some backgrounds I added a second layer of colour with the Nuvo Shimmer Powders.

Distress Oxide Christmas Cards

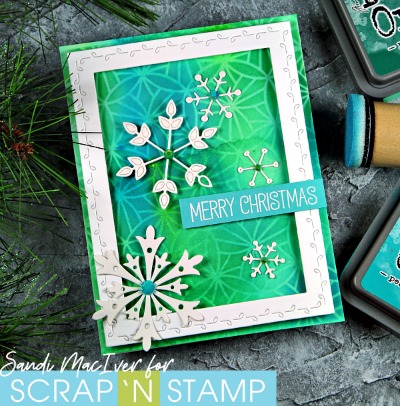
Over that I did a bit of stenciling again using Distress Oxides. Once all the backgrounds were finished, I die cut frames using the Penny Black Leaf Stitched Frames and snowflakes with the My Favourite Things Layered Snowflakes Die-namics.

Distress Oxide Christmas Cards

Finally the sentiments are from Concord and 9th Happy Holidays Label dies above. the “JOY” is from My Favourite Things and the other sentiments are My Favourite Things “Birdie Brown – Greetings Galore.

Distress Oxide Christmas Cards

I used a few jewels and sequins as my final embellishments.

You can watch the video in HD over on my YouTube Channel

That’s it for me today, I hope you enjoyed the cards and will give this fun background technique a try. I have listed the products used for the Distress Oxide Christmas Cards below for you with links to the store.

Distress Oxide Christmas Cards Read More »

Homeward with Fall Colours

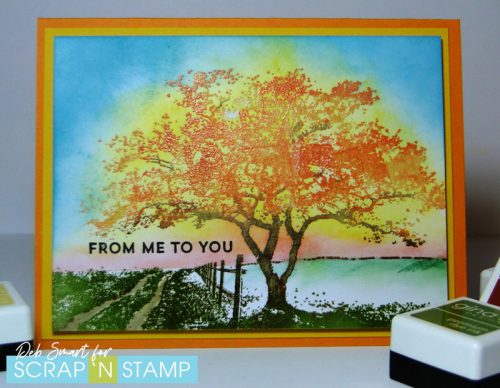
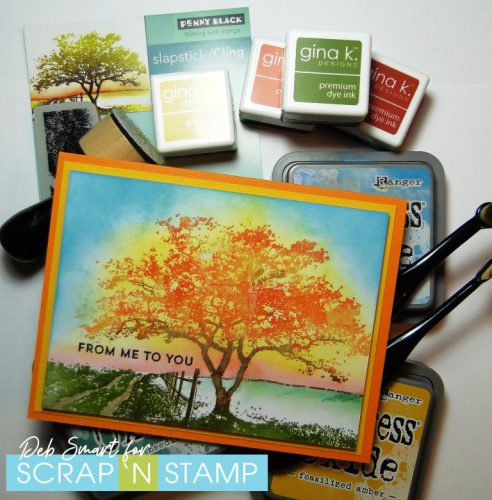
Hello there, and happy Friday! It’s Deb here, posting for the Scrap ‘N Stamp Design Team today. Since our recent blog hop featured the Distress Oxide inks, I thought I’d carry on with that theme. It’s also definitely fall, so I decided to use the Penny Black stamp Homeward with fall colours.

HOMEWARD

I just love the scenic stamps by Penny Black! They’re so expressive, as well as versatile. Take today’s stamp – Homeward. Just change up the colours you use, and it could be for all 4 seasons!

Penny Black Homeward stamp

I really enjoyed creating this card! I combined regular dye inks with the distress oxides. Read on, for the details!

CARD DETAILS

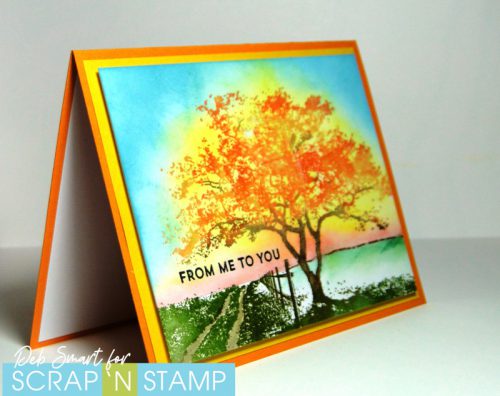
First, start by setting up your panel of white cardstock in your stamping platform. This is a ‘must’, for easily stamping in multiple colours. Next, ink up one colour at a time. The Gina K. Autumn Ink Cube Collection works perfectly for this image! Start with the Fresh Asparagus and ink up the grassy foreground and grass to the left of the fence. Next, pull in a dark brown for the tree trunk, fence and horizon line. For the tree leaves, add a combination of Tomato Soup, Sweet Corn and a bit of Faded Brick, and then stamp. You can use a brown marker to go back and add in the smaller branches.

Once you’re finished with the coloured stamping, clean off the stamp, and then ink it up in Versamark ink. Stamp over your entire image. Cover it with clear embossing powder, and heat set. Now you’re good to add in your distress oxides, without taking away from all the gorgeous colours!

DISTRESS OXIDE BACKGROUND COLOURS

To create the background, first mask off the horizon line. I simply held a piece of copy paper in place, covering the bottom of the panel. Blend on some Fired Brick just above the horizon line, to give it a sunrise glow. Next, add Fossilized Amber above the Fired Brick, and around the tree. This gives it a beautiful sunrise glow. Colour in the wheel ruts with some Vintage Photo. I love using the small Life Changing Blender Brushes for these small areas. Finally, blend on Broken China at the top.

The sentiment is from the MFT Well, Hello stamp set, stamped in Nocturne ink.  Now you’re ready to layer your panel onto a gold coloured cardstock panel with foam tape, and then onto a dark orange card base.

distress oxide inks

Doesn’t the Fossilized Amber just seem to glow?! I’d love to be walking along the path next to this tree. All that’s missing is leaves to crunch, underfoot.

JOIN THE DISTRESS OXIDE CHALLENGE

If you love distress oxide inks as much as me – or if you’re just starting with them – join in the Scrap ‘N Stamp Facebook challenge! All you have to do is create a project using distress oxide inks, and add it to the FB challenge page.  You’ll get your name entered to win a $50 gift certificate to Scrap’n Stamp! You’ve got until Oct. 31st to post. Make sure to hashtag it for another chance to win #SNSchallenge.

Want another way to win? Be sure to visit & leave a comment on each of our Let’s Get (Di)Stressed blog hop posts! One lucky winner will be randomly chosen & announced on Oct. 22nd – you can start at my post HERE.

If you’re shopping for supplies, I’ve added links below for your convenience! Compensated affiliate links are used, at no extra cost to you.

Penny Black stamp Homeward

Homeward with Fall Colours Read More »

Free Shipping Anywhere In Canada