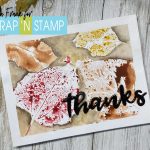
Watercolour Leaf Print Card
Hi There!
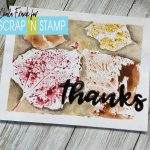
Thanks for popping by to check out my Watercolour Leaf Print Card.
This card is so simple yet elegant and I love the technique of printing with things from nature.
You will need to venture outside to find some leaves of varying shapes and sizes. If you can find leaves that have not yet gone crispy, I found they worked best for this technique.
I am using Canson XL Mix Media 98lb paper, however, you can use regular watercolour if you like. I am using the mixed media paper as I was unsure if I wanted to stamp a sentiment on the front. I find that sometimes watercolour can be a bit “toothy” and stamping does not always come out clear.
The next item you are going to need is some watercolours. The brand does not so much matter, as long as you like using them, that is the important thing. I am using Grumbacher watercolours. They start out in the tube and I squeezed out a small amount into a pallet, which I then let the paints dry and I can reactivate them with a couple spritzes of water.
I am using a flat watercolour brush, two small rounds and a 1/4 inch angle shader brush, but you can use whatever brushes you like to work with. I first use the flat brush to apply some of the watercolour onto the back of the leaf. Using the back takes advantage of all the vein details and will transfer better onto the paper. The consistency of the paint is really up to you and what look you are going for, however, I found that a thicker consistency of paint seemed to work best to transfer a more detailed image onto the paper.
Once I had enough paint on the leaf I then turned it over and laid it onto the paper applying even pressure to transfer the image. You can do this as many times as you like, with which ever leaf and colour that you think looks best.
Let these stamped images dry completely before moving onto the next step. You can use a heat tool to speed the process up if you like.
Now we will use our round brushes to wet the areas between the stamped images. Drop in whatever background colours you like to help make the images pop. I stuck with a very simple pallet and used some left over mixed paint that I already had. Basically what I am trying to achieve is some shadowing behind the leaves to help them stand out.
I suggest that you do this process slowly and build many layers of paint, drying in between. I find that if I take my time and build many layers as opposed to trying to get a thick layer of paint right away, I am much happier with the outcome. Be patient and enjoy the process of layering the paint and take note of how the pigments flow. Don’t forget to have fun! Play around and experiment! You can see my layering process by clicking HERE to watch the video.
When I was happy with the background I achieved I then dried the project and removed the light tack tape that I used to adhere the paper to my board. I like creating a white border around my watercolours.
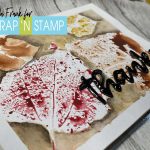
I shifted gears for the sentiment on the front, instead of stamping I decided to go with a simple “Thanks” die cut and adhered three layers together with Art Glitter Glue to create some dimension. I secured the panel onto an A2 120lb white cardstock base and then secured the “Thanks” sentiment down on the lower right hand corner and added some Glossy Accents for shine.
The inside sentiment was stamped in VersaClaire Nocturne ink with a sentiment from the Kind Thanks stamp set from My Favorite Things.
 I hope you enjoyed today’s card technique and I would love if you posted what you create over at the Facebook Challenge page!
Have a crafty day!
~Chala
Watercolour Leaf Print Card Read More »


