Scratch-N-Stamp
Search

Checkout

Keep up with Sales, New Products and other events at Scrap `n Stamp. Sign up for our newsletter now!

What's New

Hot Deals


Embossing Folders

Altenew Daisies Card using Copics

Card using Altenew 3D embossing folder called Daisies

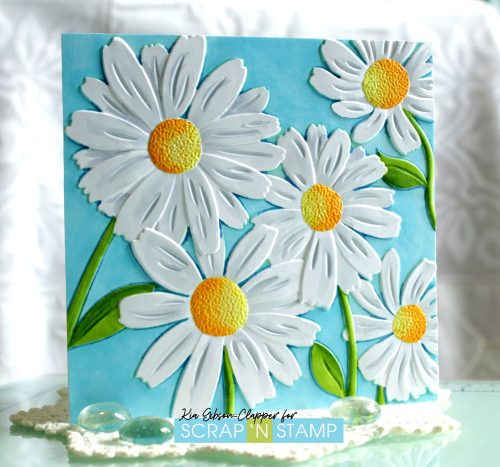
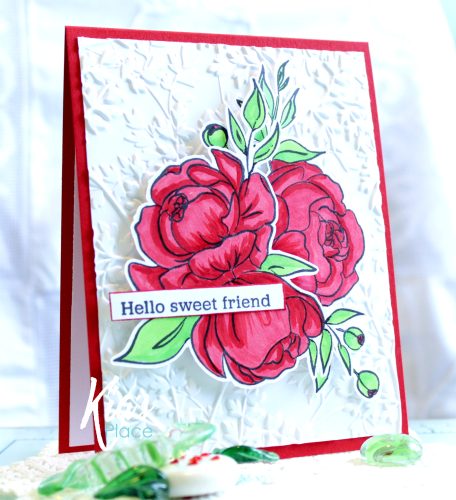
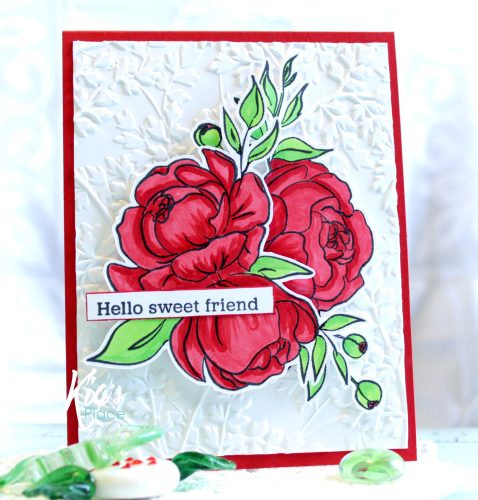
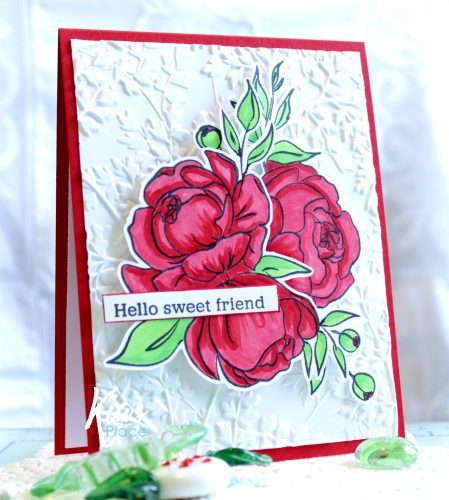
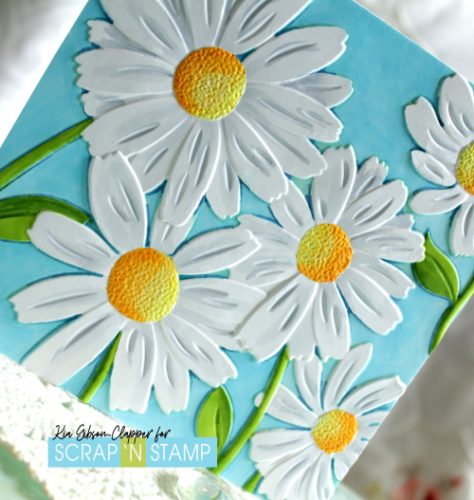
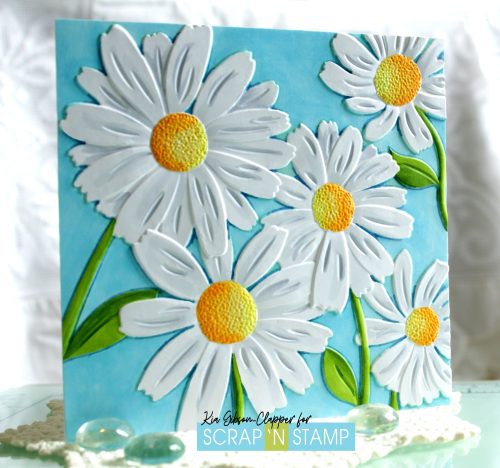
Hello to you! I am back today with a card I made using Altenew’s 3D embossing folder called “Daisies”, which I coloured using Copic markers. Yes, it is a little more time consuming, but I always love the results, and I hope you do as well.

First was to prepare my piece of cardstock. I spritzed both sides of my Hammermill card with water before inserting in the embossing folder, which relaxes the paper. I then ran the piece through my Gemini Jr.

Card using Altenew 3D embossing folder called Daisies

For this card I used 2 layers of B01 to colour the background. As there were some very tiny areas where my Copic tip would not fit I added Sharpie thin markers and went around the flowers and stems with green and blue markers.

I coloured the flower centres using T02, Y15,  Y17 and Y38; for the flowers I used C1 and C3; and the leaves are YG15, YG17 and YG25.

Card using Altenew 3D embossing folder called Daisies

When all the colouring was complete I attached the panel to my Neenah cardbase using Art Glitter glue, which allowed me a bit of wiggle room.

After all my colouring I did not want to cover up anything on the front of the card so I did not add a sentiment. As I always finish the inside of my cards I will put the sentiment inside the card, once I determine who I will be sending it to.

I hope you have enjoyed this card today, and wish to thank you for your visit.

See you next time.

Altenew Daisies Card using Copics Read More »

Sweet Friend

Hello crafty friends, Kia here with you today to share this card called “Sweet Friend”, which is featuring Altenew’s Precious Peony stamps set. This is such a beautiful set, which always makes it fun to colour. I used two of the stamps from the set for this design, and only 5 Copic markers for colour. Using such a small number of Copic’s was a first for me, but I love the results.

I picked two of the stamp images from the set to colour. The Copic colours for the flowers are R35 and R27, and for the leaves YG05, YG06 and YG07.

Once I finished with the colouring I cut the images out, and set them aside. Moving on to the background I opted to use an embossing folder, which is also from Altenew called Garden Harmony and Hammermill cardstock. I spritzed both side of the card before running through my machine.

To put it all together I picked a Gina K Design cardstock called Red Hot for my card base. Using glue I attached the embossed piece to my card front. I then attached the right side image using glue. To the left image I added foam squares before attaching it resting over the opposite flower. I then finished my card with a sentiment from Pinkfresh Design called Heart Smiles.

For the inside of my card I again embossed another piece of Hammermill card, gluing it in place. I then stamped a sentiment also from the Pinkfresh Heart Smiles stamp set, and went around the edges of the piece using a Copic marker, which I also did for the sentiment on the front of the card.

Thank you for visiting today. I hope you have enjoyed this card as much as I enjoyed making it. I wll be back next week with another card made from this set. See you then.


Sweet Friend Read More »

SOME CHRISTMAS CHEER

Hi Friends! It’s Susan here with cards for today’s Random Acts of Cardness challenge. Today’s prompt is water. One of my favorite techniques is Ink Smooshing which you need water for so that’s what I did. I ink smooshed a larger piece of paper then turned it into 2 Christmas cards. If you haven’t heard of ink smooshing it’s so easy that I’m sure it you’ll love it.

There’s two ways that I do it. First one is to smoosh the ink pad onto my glass work surface, spritz it with some water then smoosh the paper into the wet ink. Don’t smoosh the whole paper into it – dab the paper into the ink in sections. Dry it with your heat gun, then repeat the process with another ink color. I did 5 colors on this one – it may not a traditional ink color combo but there is red and green in it so it works for me.

The other way that I like to do this technique is to use a piece of acetate. I smoosh my ink pad onto the acetate, spritz it with water and then instead of pouncing the paper into the ink I take the acetate sheet and dab it onto the paper. This way allows you to see exactly where and how much ink you’re adding.

When the panel was dry I cut 3 different sized circles to make ornaments with and one panel using a stitched rectangle die. The sentiments, stars and strings to hang the ornaments with on the card above are from Taylored Expressions Beautiful Baubles Add Ons Stamp Set. I embossed them with silver and gold because I couldn’t make up my mind on which one to use so I used them both.

For the card below I used the Full of Joy Stamp Set from Concord & 9th and again used both silver and gold to emboss the sentiment. I cut the panel with the second larges die in the Lawn Fawn Large Stitched Rectangle Die set.

I used a fine tip black marker to add some shadow to the embossing on both cards and I also used the Peaceful Poinsettia Embossing Folder from Taylored Epressions to emboss a piece of white card stock to add to both card bases before adding the ink smooshed pieces.

My favorite is the second one. Which one do you prefer?


Thanks for sharing part of your day with me 🙂

Take care,
Susan
Shopping list:
I use affiliate links when I can. If you shop through one of my links it will allow me to earn a small commission at no additional cost to you. Thank you for your support!!


SOME CHRISTMAS CHEER Read More »

Free Shipping Anywhere In Canada