Happy Monday Everyone,
I am sharing another creation using the Concord and 9th Leaf Turnabout stamp and Jumping for Joy set from My Favorite things. I don’t know if you have done this as a kid but I always envisioned jumping into a big bundle of leaves and doing “snow angels in them” but never did get the chance to do it, so here is my homage to that vision.
This design was in my head from the moment I saw the two stamps sets on the Scrap’N Stamp site.

I stamped out the cute little girl image from the Jumping for Joy stamp set from My Favorite things using Black Tuxedo Memento ink because its Copic friendly. For the coloring you can see I used Copic markers but I linked to the Chameleons as that is what Scrap’N Stamp carries and I have been told great things about the markers. Later on I stamped out the little squirrel image from another MFT stamp set because I felt it would match well with the sentiment I chose.

I also stamped out the individual leaf that came in the Concord and 9th set, with different shades of yellow, red, brown and green distress oxides and fussy cut all those leaves as well, while I was at it I fussy cut out the little girl image and squirrel so everything matched and their was no white edges.
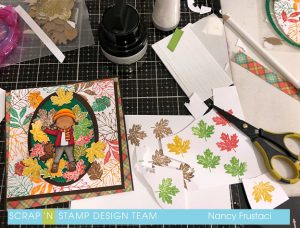
Once everything was fussy cut I worked on the lay out of the card, I used numerous layers of different card stock, from green glitter card stock to green mirror card stock. I created the card base from heavy weight chicalote Bazzill cardstock to 5½ x 5 ½. For the front of the panel I cut down some green mirror cardstock to 5¼ x 5¼ which I also ran through my die cut machine with using my stitched square dies.
I popped up the green with some foam tape to the front of my card base. I ran my stamped background piece through my Gemini Jr cutting out the middle portion with an oval die. I repeated the process two more times using brown card stock and glitter card stock and different sizes of ovals.
I layered my leaf background onto some more chocolate cardstock for a little subtle interest. and added it to the backs from there it was time to work on my little pile of leaves. I popped up the chocolate oval and the green glitter, I like this as it looked like grass. From there i started to fiddle with all the leaves, trying to get them to look the way I wanted. Once that was accomplished and everything was were I wanted it, I pulled out my press and seal wrap and pressed it over my project, this helped keep everything in place and made adhering things so quick and easy.
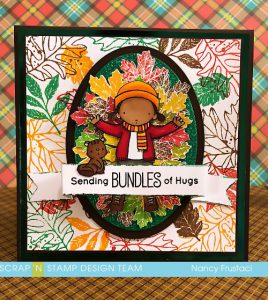
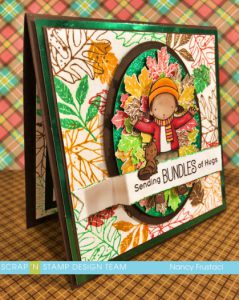
I added the little girl with foam tape ( This card has lots of dimension) and then used a banner die from my stash to add the sentiment. I did jazz that up a little as I wanted it to stand out more. I took my Zig two way pen and added glue around the edges, once it was tacky I pulled out some Ranger foil in the coordinating green and added it to the banner. I really like how this all turned out. I finished the inside of the card with some of the cut down pieces of the background and green mirror paper. just to tie it all together.
I am sorry if this is long winded but there was a lot of steps and I didn’t really know how to skimp out on anything for you.
I do hope you enjoyed and found some inspiration.
Thanks for stopping by, please do leave me a comment and let me know what you think.
Have a beautiful week.
Nancy

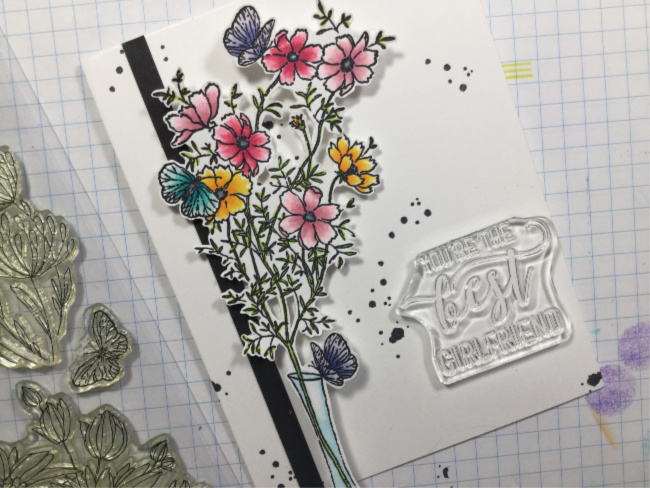
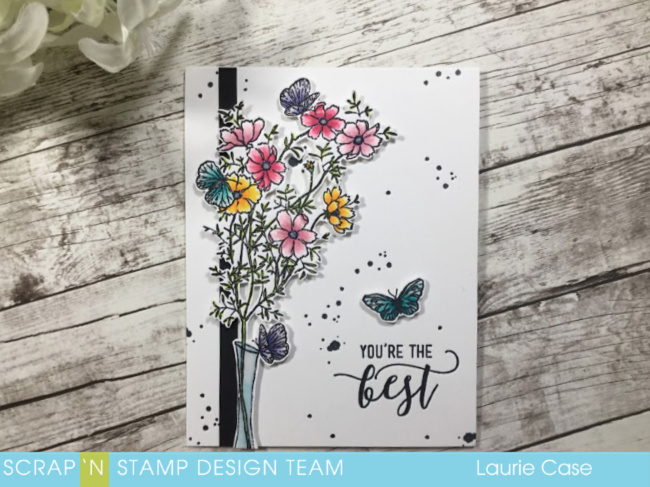
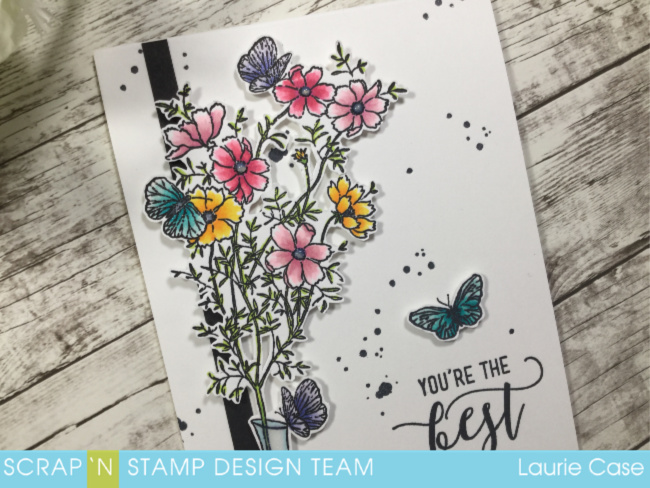
 I finished everything off with a simple white embossed sentiment on a black strip the width of my card. It’s simple, but I hope you like it!
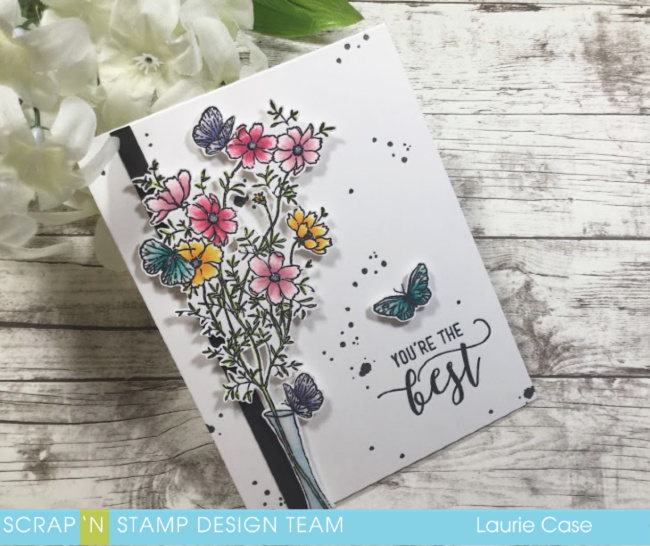