Scratch-N-Stamp
Search

Checkout

Keep up with Sales, New Products and other events at Scrap `n Stamp. Sign up for our newsletter now!

What's New

Hot Deals


Heffy Doodle

Tuesday with Tara {take 309} blowing hugs

Happy Tuesday!

I know… that’s not how it works, we don’t blow hugs. We blow kisses… but my challenge word today is “BLOW” and my card is sending hugs, so it is what it is.

This card really feels to me like a comedy of errors.  Every step seemed to turn into a hot mess and yet somehow, I cleaned it up a bit and made a card.  All those errors were exhausting though!  LOL.

My mission was to use the Alcohol Ink Air Blower, since it was a new tool in my stash that I hadn’t used yet.  I had aspirations to share some fabulous technique with you and even attempted to record a video… but I hit a few bumps along the way.  The first of those being that I have no idea where my alcohol inks are right now.  Once I gave up on finding them (I’ve got an inner ear infection right now and “looking high & low” just makes me dizzy!) it occurred to me that I could try blowing some of my spray inks!

I selected my Dina Wakley Gloss Sprays since they are less absorbent than some of my others and I knew they would move around on the papers well.  It’s been a while since I played with them, so I had to re-learn a few things (like how they don’t work too well for smooshing two papers together to transfer ink!) but I finally started to figure them out and came up with this.  I’ve also got a whole pile of backgrounds that are ready to be transformed another day!

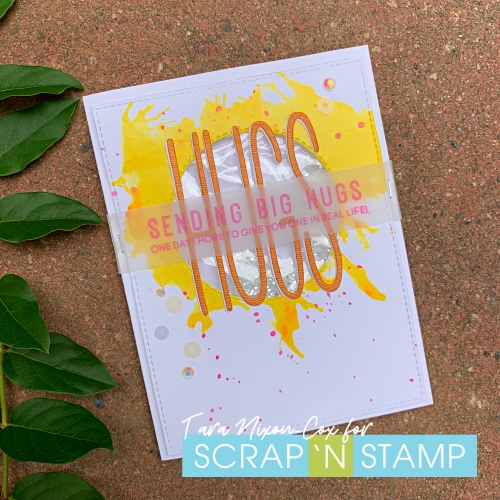
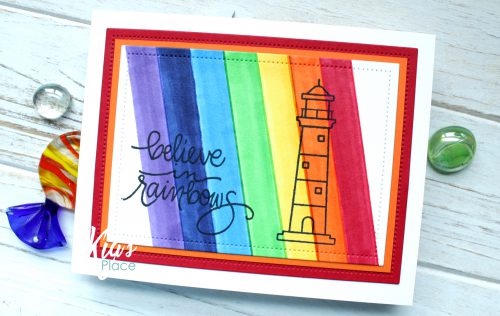
For this card, I simplified and skipped the color blending- working with just the Lemon Gloss Spray.  I poured a small puddle on a piece of white Cardstock and used the blowing tool to spread it out into a splatter design.  I was planning to use the Twiggy HUGS I had die cut from metallic orange card stock, so I knew yellow was a good choice! Once the paint was partially dried, I added some splatters of the Magenta Gloss Spray on top.  You can see where the colors blended together in some spots giving a bit of orange to the design.  These sprays really pop, and give off more gloss depending how thick they are painted!

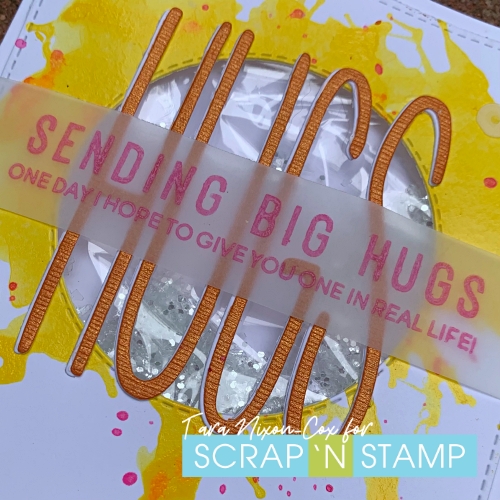
I die cut a large stitched rectangle panel so I could mount it onto a white card base.  When I played around with the placement of the word, it just didn’t seem like quite enough (even with the addition of the sentiment duo by Heffy Doodle). Then I remembered the stitched circle from the Picket Fence Slimline die set, and decided to turn it into a shaker card.

This is where I had more of a hot mess… as I’m sure you can see by all the wrinkles (aka texture) in my shaker window!  I wanted to do a simple pocket style shaker, so I reused some packaging from one of my clear stamp sets.  I got the brilliant idea to seal the edges with my hair straightener (since I haven’t been using it on my hair with all the humidity lately!) and if I was a bit more patient it probably would have been a brilliant idea.

  • What I did right: place the plastic pocket between pieces of paper so that the plastic wouldn’t melt onto my straightener.
  • What I did wrong: forget to turn down the heat once it finally warmed up.

I doubt I need to say much more than that… since you can clearly see that things got a little too hot and got all wrinkled up on me!  So much for straightening, eh? LOL

I was pretty tired of the mess I was making at this point, so I decided to just go with it and share my lessons learned with you!  I did manage to keep it together when I stamped my sentiment on vellum and left it overnight to dry.  (I used Picked Raspberry Distress Oxide Ink).  I finished it off with some sequins and a touch of Studio Katia bling, and overall I like it.  Maybe I’ll try it again and work out some of those wrinkles… If nothing else, I hope my hot mess makes you smile!

Inky hugs,

Tara


Tuesday with Tara {take 309} blowing hugs Read More »

Rainbows

Hello all! Kia here with you today for Day 19 of Random Act of Cardness. Today’s word is Rainbows.

I have made 4 cards for today. I think I got a bit carried away, but I was having fun. The colours in a rainbow have all my favourite and I love using them all together, so this was an easy challenge for me.

For the card above I used the Picket Fence stencil applying distress texture paste in Crackle. After letting the paste dry I put down the stencil again and applied the colour via distress ink pads and my Life Changing Brushes. I then added splatters using 3 of the colours, being Candied Apple, Mustard Seed and Wilted Violet and I stamped the sentiment using VersaFine Clair ink in Fantasia.

For this Clean and Simple card I am using Heffy Doodles Lighthouse which I stamped with Memento Ink, along with a technique called Pointillism and my Copic markers. I wanted the yellow to be on the top, so that is where I started. I went around adding the start of the colours on the left side of the Lighthouse.

I then added yellow to the light area of the Lighthouse at the top, along with adding yellow in the windows. I coloured the front door in the red, and stamped the sentiment using Memento ink in Tuxedo Black. A fast and easy card to make.

Yes, the colours are done in the reverse – it is what I call a stampers prerogative. I did not like the heavier colours on the right, and did not like the Lighthouse on the left. So, I did it my way. The stripes I did using my Copics and tape to measure out each of the colours.

When finished I die cut the piece with Paper Rose Pierced Rectangles die. I then die cut the red card using the same die set, and cut the piece of orange matting, attaching all together and affixing to my white card base. I then stamped the Lighthouse and sentiment using Memento Ink in Tuxedo Black.

For my final card today,  I came closer to a Rainbow. Using distress inks on watercolour paper I water coloured the colours, meeting the colours as I went to get some blooms happening. Once the ink was dry I stamped the Lighthouse and sentiment using VersaFine Clair ink in Nocturne.

To finish up I matted in black and attached the pieces to a Gina K Design Coral Reef card.

Needless to say, I had a lot of fun, and I hope you enjoy these cards as well. Following are Affiliate links to the products that I used for these cards at no extra cost to you.


Rainbows Read More »

Whittle Things Blog Hop

It’s JUNE, friends, and we are celebrating all the ‘Whittle Things’ with our blog hop this month!  Yep, we’re featuring the adorable Whittle dies by Poppystamps this month and believe me when I tell you, they are CUTE!

I’m sure you’ll have a wish list once you reach the end of the hop… and this weekend you can save 20% on all the Whittles and everything else by Poppystamps!  Happy shopping!

As always, we LOVE reading your comments and hearing what you think about the projects you see during our blog hops!  We’ll be randomly selecting one name from all those who leave comments to win a $50 gift certificate!

And now… let me share my creations!

I chose one set of dies to work with this month- the adorable Whittle Cactus Trio.  I’ve been trying to develop my green thumb as of late, and these seemed like a really fun way to work that into my card making!   I started out inking up some shades of green on Cardstock and then cut the trio out several times.  Since they are so tiny (the biggest of the trio is just 1.4″ tall) I doubled them all up two layers thick with some glue.  Then the ideas started flowing… so I made TWO cards to share with you today!

For the first card, I used a scrap of corrugated card stock to create a little planter for my cacti.  I experimented with several colors of Distress Paint, but my final product is primarily Crackling Campfire Distress Paint.  It makes a fabulous terra cotta pot!  Once I had the design, I inked up some book print for my background.  This is a simple ombre mix of Salvaged Patina & Peacock Feathers Distress Ink.

I finished off the card with a cute little burlap flower embellishment and a sentiment from an awesome set by Heffy Doodle called Everyday Sentiment Duos.  It’s a super versatile set with a simple font you can dress up or down depending what you pair it with.  I inked the two parts of the ‘new home’ sentiment separately here, adding the smaller font on my card base & the larger font on Kraft across the top of the card.  Lastly, I splattered a bit of white paint for fun.

My second card uses the same elements as my first, but I positioned the cactus trio in a frame I made using one of the windows from the slimline die set by Picket Fence Studios.  I experimented with a variety of colors on this as well, finally adding Abandoned Coral Distress Ink to the mix (which is why it looks a bit dark & dirty compared to how vibrant it normally is!).  I stamped over the frame in the same coral ink with the MFT best friends cling background stamp.

Another sentiment from the Sentiment Duos (embossed with Rustic Wilderness Distress Embossing Glaze) seemed like a great compliment to the design.

I had a scrap of watercolor paper that I’d painted a wash of yellows & oranges on, so I added a touch of the coral and used it as the base for my frame.  A little bit of yellow twine wrapped around the frame added a bit of fun texture.  I also played around with another burlap blossom, added ink and glue and formed it into a bloom for one of my cacti!

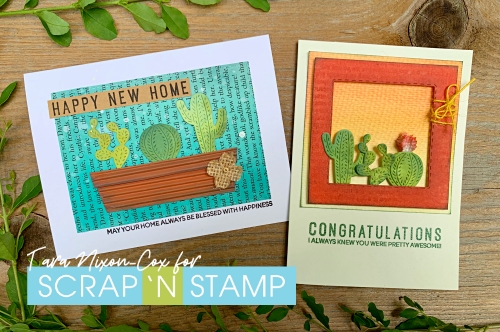
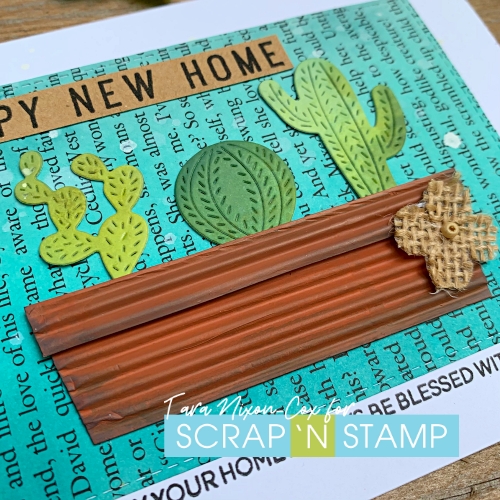
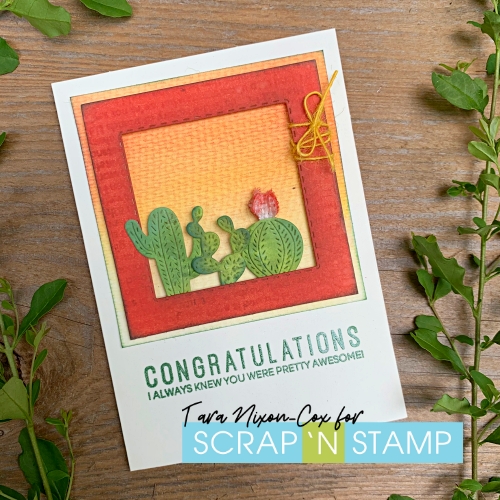
Aren’t they some of the cutest little cacti you’ve ever seen?  And just wait until to see what the girls have done with the Whittle dies they used!  Actually, you don’t have to wait… you can hop on over and see Chala, for starters!

Here’s the full hop order, with links to the rest of the design team!

Thanks for stopping by and joining our hop- have fun!
Inky hugs,
Tara

Whittle Things Blog Hop Read More »

Free Shipping Anywhere In Canada