Scratch-N-Stamp
Search

Checkout

Keep up with Sales, New Products and other events at Scrap `n Stamp. Sign up for our newsletter now!

What's New

Hot Deals


card making

Try Adding Foiling Fun Without Extra Tools!

TRY ADDING FOILING FUN WITHOUT EXTRA TOOLS!

Hello crafting friend! It’s Deb here today, with something new for you to try. Have you been wanting to add foiling to your projects, but you’re not sure about committing to a foiling tool? Well, I  have a great way for you to try adding foiling fun without extra tools! I ordered some of the fun Ranger Shiny Transfer Foil sheets from the Scrap ‘N Stamp online store. All  you need to use them is your cardstock base, some adhesives and a bit of elbow grease.

APPLYING THE FOIL – TAPE METHOD

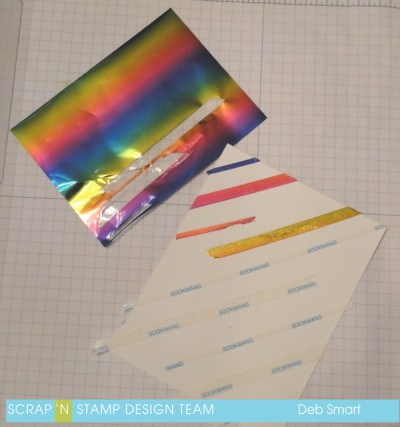
When I say that these Shiny Transfer Foil Sheets are easy to use, I’m not kidding! First, cut your panel of cardstock. Any colour you want to work with! I started with a white panel, but in the end changed to black. Next, add your adhesive. I used two different widths of Be Creative (Sookwang) Tape; the 1/8″ and 1/4″. I lay them in alternating strips across the panel. Remove the backing from the adhesive strips one at a time, and lay the foil over top of the tape. Rub firmly with your fingers, or use your bone folder, to press the foil onto the tape. Gently peel the foil sheet off of the adhesive; pull slowly in one direction. As you’re pulling off the foil sheet, look at your panel to make sure that the foil has transferred. If you notice that it hasn’t, simply lay the foil back down on top of the tap, and rub more firmly.  If you accidentally lift off the tape and find that an area is without foil, simply lay the foil back down on the tape, and repeat the process – u

sing a piece of the foil that hasn’t already been transferred. The photo below shows how the foil looks once transferred onto the cardstock, and the blank space left on the foil sheet, where the colour once was! I chose the ‘Celebrate’ package of foils to use, as it has a variety of patterned colours.

Try Adding Foiling Fun Without Extra Tools!

CREATE YOUR CARD

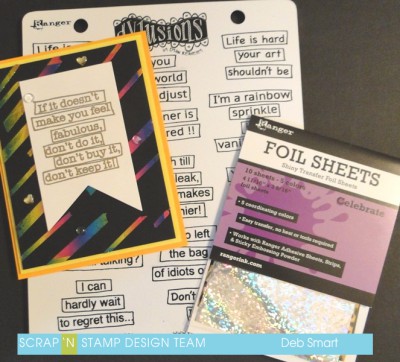
When I finished the foiling on the white panel, I like it, but it wasn’t quite the ‘wow’ that I had in mind. So, I repeated the whole process, this time on a black cardstock panel! Don’t worry – I saved the white one to use in another project.  Since this was my 2nd panel, I thought I’d try & be more quick about it – and I lay the entire foil sheet (you get 2 of each colour/pattern per package) onto the taped panel. Well, it did work out, but I can’t say it was much quicker! Because I had my tape beginning and ending in different directions, I had to take more time to burnish the foil onto the tape, as I was peeling off the foil backing. I also had to go back in more places & add the foil onto places where it didn’t stick. So – the lesson in this is – don’t rush! Just have fun and enjoy the process!

Try Adding Foiling Fun Without Extra Tools!

To create the sentiment piece, I stamped the sentiment from the Dylusions Laugh Til You Leak stamp set in Versamark ink and heat set it with gold embossing powder.  Cut banner tails at the bottom, and add it on top of your foiled panel with foam squares. Next, I layered the panel onto a panel of bright yellow cardstock, and then onto a light orange card base. These were from my stash, and unfortunately I don’t remember the names of the colours! I think they were from the Lawn Fawn Rainbow pack of cardstock. Pop them up with foam tape, for extra dimension. To finish off my card, I used some embellishments from my personal stash (we all  have one of these, right? goodies we’ve had for ages, and don’t remember from where we got them?).

GET FOILING NOW!

I hope that you’ve enjoyed this project, which shows you how easy it is to use the Ranger Shiny Transfer Foil Sheets. Be sure to check out the store – there are lots of different colours available! If you’d like to see another technique using these foil sheets and Ranger Sticky Embossing Powder, you can head over to my blog to see it!

Try Adding Foiling Fun Without Extra Tools!

Try Adding Foiling Fun Without Extra Tools! Read More »

One Stencil, Three Ways

ONE STENCIL, THREE WAYS

Boy, do I love getting a lot of use from my crafting supplies! Hello there – it’s Deb here, and I’m posting today for the Scrap ‘N Stamp Design Team.  I really hope you enjoy today’s project, because it’s not just 1 project, but 3 different techniques for using one stencil. In this case, it’s one stencil, three ways – three different techniques to be precise.  I love using stencils, because of their versatility. Depending on the stencil, it can be the focal point, or a background. It can be subtle, or in your face. You can use the entire stencil, or just part of it. So enough talk – let’s get on with the fun! I have kept the pictures in this post to the most important ones, but if you’d like to see more of the steps involved, you can head over to my blog post for more visuals.

STENCIL WITH INK & BLENDER BRUSHES

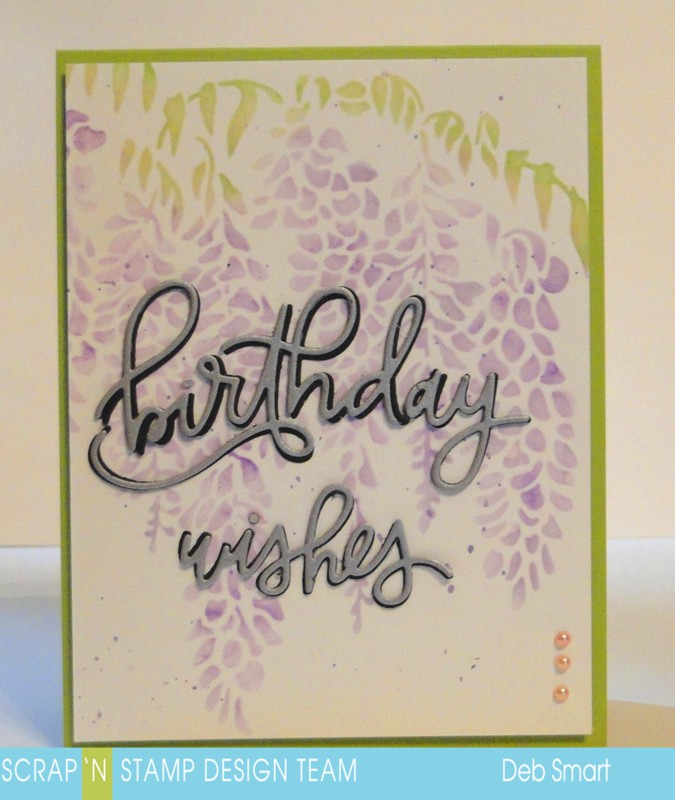
This is probably the quickest, and most common way to use your stencil. I chose the beautiful Wisteria stencil from The Crafters Workshop. It’s a full 6″ X 6″, so you have the choice of what type of project to create. I chose to use the full stencil, but then cut down the panel to create a card front.

To do the stenciling, first cut a panel of white cardstock to the same size as the stencil. Hold the stencil in place with some Thermo Web Purple Tape around the edges. Next, apply the ink with the Picket Fence Studios Life Changing Blender Brushes.

One Stencil, Three Ways

Above, you can see the card front finished, with a die cut added. I shared this card on my own blog last week; you can read more about it in this post.

STENCIL WITH NUVO SHIMMER POWDERS

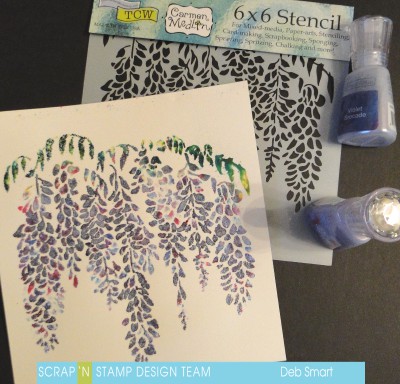
Now this technique is lots of fun – and a bit messy! There’s more pictures for this technique on my own blog, so you get more of an idea how to do it. First, because the Nuvo Shimmer Powders are highly pigmented powders that are activated by water, you need to get your work space set up. Put down a craft mat, or something to protect your work surface. Because  you’ll be adding water, you don’t want the water to seep under the stencil. Follow the directions on a temporary re-positionable spray adhesive; spray it on the back of the stencil, and wait until it is tacky.

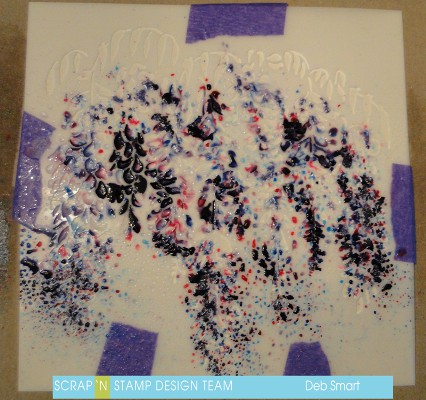
Cut a panel of watercolour paper to size, and then lay the stencil, tacky side down, over the paper. (just for good measure, I also put Purple Tape around the edges, but it wasn’t necessary). Next, sprinkle the Nuvo Shimmer Powders over the stencil. I used two different colours; Lilac Waterfall and Violet Brocade. Alternate placement of the powders, to mix up the colours.  Once you’re sprinkled on some powders, lightly spray with water. The photo below shows the powders reacting to the sprayed water. I know – it looks like a hot mess at this stage!

Stencil with Nuvo Shimmer Powders

You can see in the photo above that the shimmer powders are a mixture of colours; not just a flat one shade. You can add more powder, and then more water, to areas where you may have missed, or where you want more colour. The photo below shows the powders now dried, and the stencil removed. Note – you don’t have to wait for the image to be dry, before removing the stencil. And the great part is that the temporary adhesive has blocked the water from seeping under the stencil, so you can still see the individual petals.

One Stencil, Three Ways

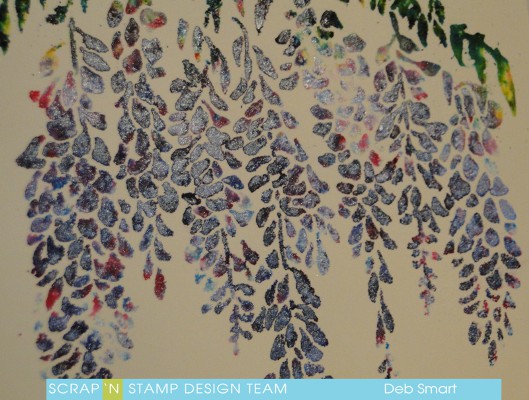
In case you’re wondering where the shimmer is – I took this next close up photo, just so you can see it! Even so, the photo doesn’t really do it justice. In person, it’s gorgeous!

Gorgeous Nuvo Shimmer Powders

STENCIL WITH EMBOSSING PASTE & NUVO SHIMMER POWDERS

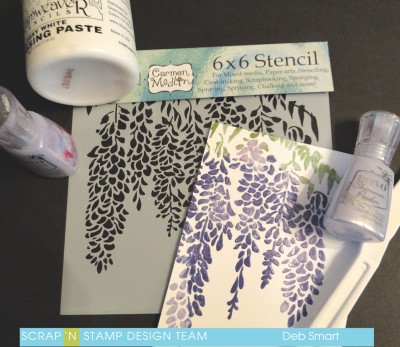
I guess technically, this is a 3rd and 4th way to use the stencils! You can use embossing paste as it is, but I wanted to add colour to mine, so I added the same Nuvo Shimmer Paste as I did in the technique above.

This is another technique that can be a bit messy; I try my best to set up my area to control any out of control paste! First, I got out two large pieces of wax paper – yup, from the kitchen cupboard! Next, I used my palette knife to put some of the white embossing paste on each piece of wax paper. The reason I used 2 pieces is that I wanted to use both the Lilac Waterfall and the Violet Brocade Shimmer Powders, without getting them mixed together.

Sprinkle one of the shimmer powders onto one of the pastes, and the other one onto the other paste. Use your palette knife to mix them up.  ( I have a photo of this step in my blog post).

Once you have your powder and paste mixed up, apply them one at a time on top of the stencil. Hold your palette knife like a regular knife, and apply it like you’re buttering toast. It’s that easy!  Apply the paste in different areas, so that you can see the two different colours. If you want extra ‘high’ texture, build up the paste. For a lower profile texture, skim the palette knife over the paste, skimming off any excess sitting on top of the stencil.

I was so excited to see the results that I forgot to take a picture before removing the stencil! So sorry about that! But below, you can see the result, with the stencil removed.

Stencil with Embossing paste

FINAL CARD

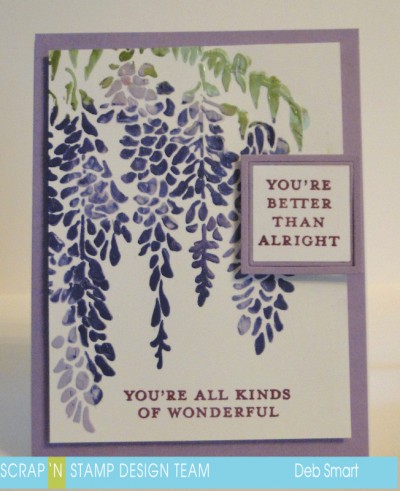
I decided to create a card front using the embossing paste panel that I created. I trimmed it down just a bit, and added a panel of light purple cardstock behind it.

One Stencil, Three Ways

The sentiments are from the Concord & 9th Everyday Bouquet set. They are stamped in Seedless Preserves Distress ink; one onto a scrap of white cardstock, the other directly onto the bottom of the panel. The top sentiment is die cut using the matching Everyday Bouquet Dies; they include the cute double frame, which is die cut in the same cardstock as the panel behind.

I do hope you’ve enjoyed today’s post, and are inspired to look at your crafting supplies with new eyes! By using different products, you can stretch your supplies and your crafting dollars. Not to mention, coming up with amazing new projects to share with your friends!

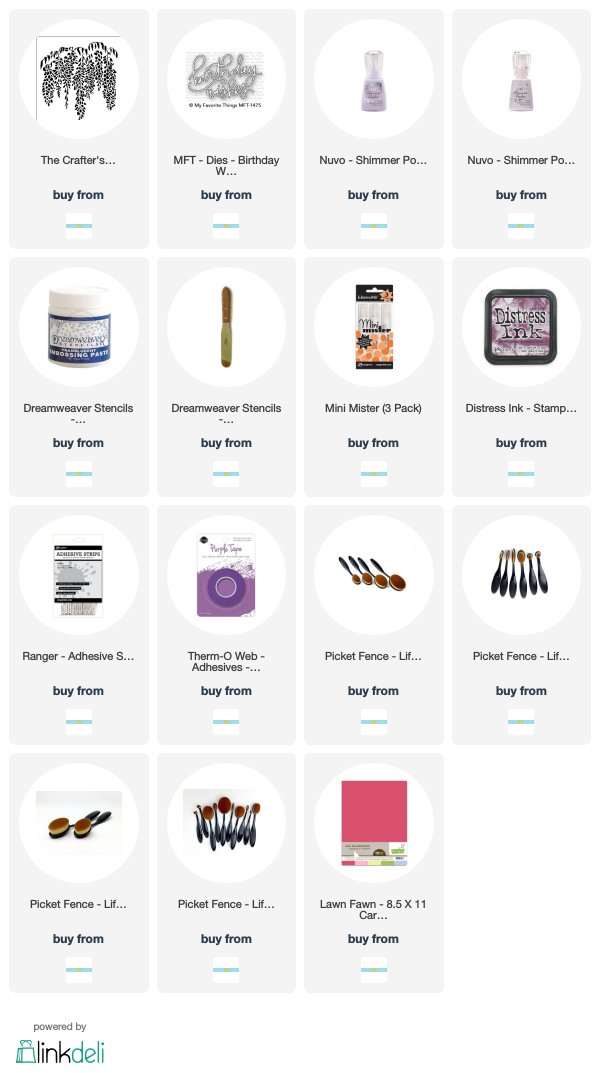
All supplies are available through Scrap ‘N Stamp. I’ve included links for you, below.

Compensated affiliate links are provided where available, at no cost to you. 


One Stencil, Three Ways Read More »

Have a Bright & Sunny Day!

HAVE A BRIGHT & SUNNY DAY!

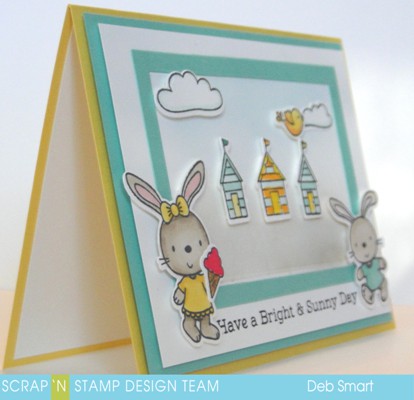
Hello stamping friend! It’s Deb here, for the Scrap ‘N Stamp Design Team. I know that winter isn’t quite over yet, but we’re having beautiful sunshine & blue skies here in Vancouver! I thought I’d share some of this great weather, and hope that you have a bright & sunny day, too. The Beach Bunnies stamp set & dies from My Favorite Things are my choice for sharing today. Who can resist smiling at cute bunnies?

BEACH BUNNIES

I love creating happy little scenes with these types of sets. They have all the pieces you need, and using the matching dies makes everything come together so easily. I always recommend purchasing the dies at the same time as the stamp set. I used to fool myself, and think ‘oh, I can cut those out by hand’ – only to be sadly disappointed in ragged edges and snipped off bits. So – personal experience shared – buy the dies! 🙂

Have a Bright & Sunny Day!

Just look at those cuties, having fun – and ice cream!

CARD DETAILS

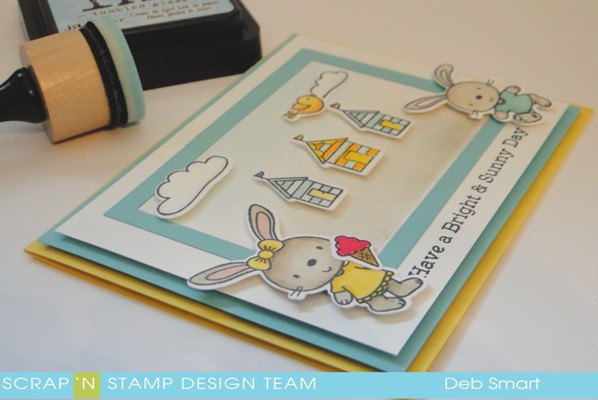
I decided to frame the beach scene, so I used my Hero Arts Nesting Rectangle Infinity Dies and some blue cardstock to create the frame.  Next, I made small pencil marks where the frame was to go, and then masked it off with my Thermo Web Purple Tape. This tape is great, because it won’t tear your cardstock when you remove it. I then used some Distress inks to blend in the sky with Tumbled Glass, and the sand in Gathered Twigs. That was the quickest part – next, you need to create the images.

On white cardstock, stamp each of the images in Memento Tuxedo Black ink. Use your favourite colouring medium; I used my Zig Clean Color Real Brush markers. I kept the colours light & bright, because hey – beach weather! After colouring, use the matching Beach Bunnies dies to die cut each image.

Have a Bright & Sunny Day!

LAYER IT ALL TOGETHER

After you’ve done your colouring and die cutting, you’re ready to layer your scene together. Erase the light pencil marks, and attach your die cut frame to the white panel. Next, stamp the sentiment from the Beach Bunnies stamp set underneath the frame, in Memento Tuxedo Black ink.

Attach all of the die cut images with foam squares or tape, arranging the beach houses in the middle of the frame. The clouds of course go above, as well as the little bird.  Attach the ice cream to the hand of the little girl bunny, and attach both of the bunnies outside the frame, on either end of the sentiment.

Have a Bright & Sunny Day!

CREATE YOUR OWN BRIGHT & SUNNY DAY!

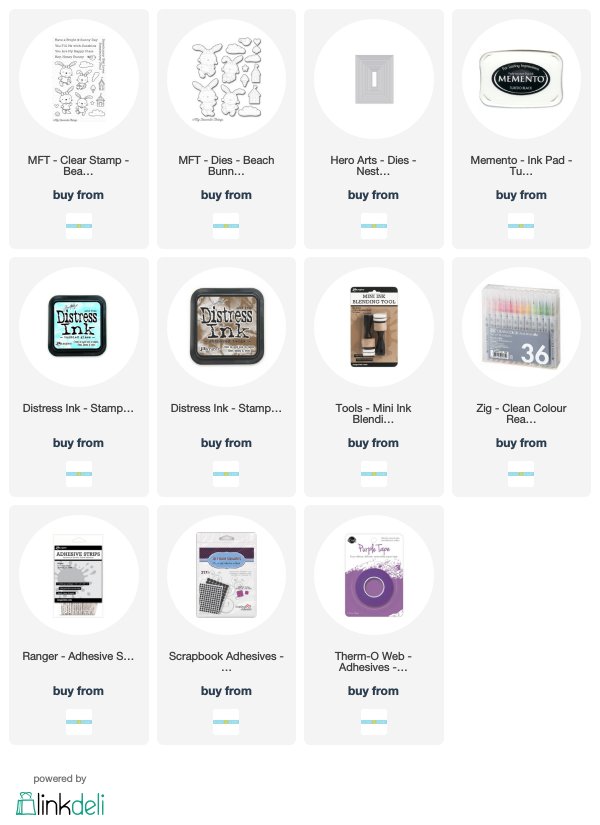
Are you ready to have a bright & sunny day? No matter what the weather outside is doing, you can create your own! I hope I’ve inspired you to have some fun, and make your own weather. All of the supplies can be purchased from the Scrap ‘N Stamp online store – you can use the links below to go directly there!  Be sure to check out the fabulous new products that have arrived, and look at the current specials. There’s always something you need!


Have a Bright & Sunny Day! Read More »

Free Shipping Anywhere In Canada