Scratch-N-Stamp
Search

Checkout

Keep up with Sales, New Products and other events at Scrap `n Stamp. Sign up for our newsletter now!

What's New

Hot Deals


Cards

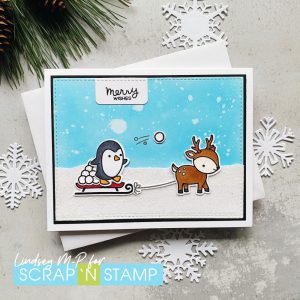
Let It Snow?

And just like that, it’s Friday again! Hope everyone is doing well, especially if you’ve been affected by the horrible weather events in BC.

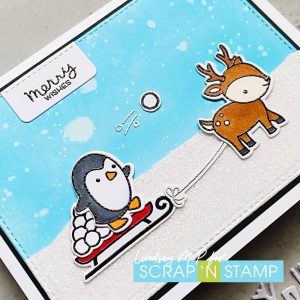
I don’t know about you, but I’m just as happy when snow stays away for as long as possible. 😉  But that doesn’t mean I can’t put a little of the white stuff on a card for today’s Random Acts of Cardness challenge prompt, SNOW!


It’s a bonus when I can manage to make a cute card with just a little bit of sass! That penguin seems made for pitching snowballs, and I suppose it’s one way to get his little reindeer to pull the sled. The background is made with mermaid lagoon distress oxide ink blended on white cardstock, and then splattered with water. A few of my splats are larger than ideal, but oh well. 😀  The snow is made using a fun new product, snowfall distress grit-paste! It’s added to a separate piece of watercolour paper so it wouldn’t pick up any of the oxide colour. My critters, sled and snowballs are all from Lawn Fawn’s Toboggan Together, and the sentiment from Tiny Tag Sayings. The panel and sentiment dies are older My Favorite Things dies from my stash.


I hope my little snowy scene has inspired you to play along on the Scrap ‘n Stamp Random Acts of Cardness Facebook group! And stay tuned this weekend for the winner announcement for the Let It Snow Inspiration Hop!

Let It Snow? Read More »

Watercolour Leaf Print Card

Hi There!

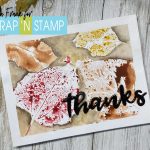
Thanks for popping by to check out my Watercolour Leaf Print Card.

This card is so simple yet elegant and I love the technique of printing with things from nature.

You will need to venture outside to find some leaves of varying shapes and sizes.  If you can find leaves that have not yet gone crispy, I found they worked best for this technique.

I am using Canson XL Mix Media 98lb paper, however, you can use regular watercolour if you like.  I am using the mixed media paper as I was unsure if I wanted to stamp a sentiment on the front.  I find that sometimes watercolour can be a bit “toothy” and stamping does not always come out clear.

The next item you are going to need is some watercolours.  The brand does not so much matter, as long as you like using them, that is the important thing.  I am using Grumbacher watercolours.  They start out in the tube and I squeezed out a small amount into a pallet, which I then let the paints dry and I can reactivate them with a couple spritzes of water.

I am using a flat watercolour brush, two small rounds and a 1/4 inch angle shader brush, but you can use whatever brushes you like to work with.  I first use the flat brush to apply some of the watercolour onto the back of the leaf.  Using the back takes advantage of all the vein details and will transfer better onto the paper.  The consistency of the paint is really up to you and what look you are going for, however, I found that a thicker consistency of paint seemed to work best to transfer a more detailed image onto the paper.

Once I had enough paint on the leaf I then turned it over and laid it onto the paper applying even pressure to transfer the image.  You can do this as many times as you like, with which ever leaf and colour that you think looks best.

Let these stamped images dry completely before moving onto the next step.  You can use a heat tool to speed the process up if you like.

Now we will use our round brushes to wet the areas between the stamped images.  Drop in whatever background colours you like to help make the images pop.  I stuck with a very simple pallet and used some left over mixed paint that I already had.  Basically what I am trying to achieve is some shadowing behind the leaves to help them stand out.

I suggest that you do this process slowly and build many layers of paint, drying in between.  I find that if I take my time and build many layers as opposed to trying to get a thick layer of paint right away, I am much happier with the outcome.   Be patient and enjoy the process of layering the paint and take note of how the pigments flow.  Don’t forget to have fun!  Play around and experiment!  You can see my layering process by clicking HERE to watch the video.

When I was happy with the background I achieved I then dried the project and removed the light tack tape that I used to adhere the paper to my board.  I like creating a white border around my watercolours.

I shifted gears for the sentiment on the front, instead of stamping I decided to go with a simple “Thanks” die cut and adhered three layers together with Art Glitter Glue to create some dimension.  I secured the panel onto an A2 120lb white cardstock base and then secured the “Thanks” sentiment down on the lower right hand corner and added some Glossy Accents for shine.

The inside sentiment was stamped in VersaClaire Nocturne ink with a sentiment from the Kind Thanks stamp set from My Favorite Things.
 I hope you enjoyed today’s card technique and I would love if you posted what you create over at the Facebook Challenge page!

Have a crafty day!

~Chala
Watercolour Leaf Print Card Read More »

Seas the Day August Blog Hop

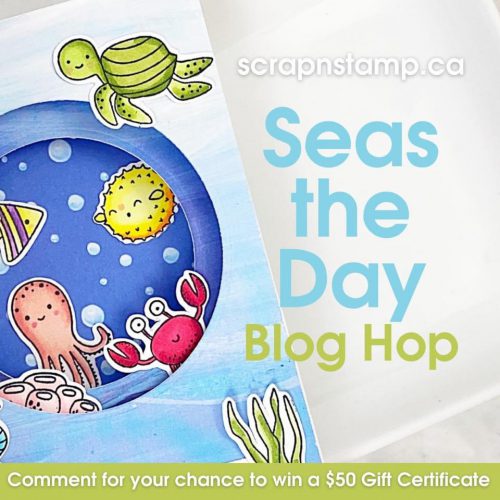
Woo!  It’s a new month and a new opportunity to Seas the Day and check out our Scrap ‘N Stamp Blog Hop!

We are featuring some fun engineered cards this month, and hopefully our card themes will have you dreaming of time on the beach or the water, or whatever grants your soul some rest… ahhh…

I’m not gonna lie, my cards have definitely been more CAS lately (or at least simple, perhaps not so clean. ha!) and the thought of making an engineered card intimidated me!  Thankfully this fab tunnel card kit by Photoplay made the assembly part easy!  I already have a variety of nesting dies at home, so I chose to work with the value pack that doesn’t have dies included. (If you don’t have them already, it also comes with circle or rectangle dies.)

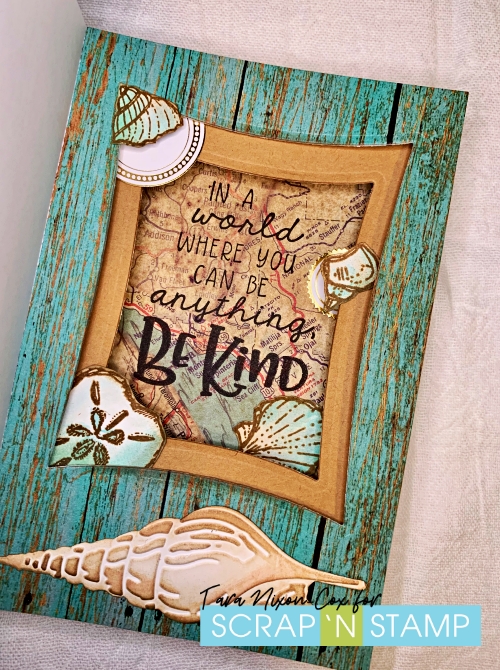
Since I was already going rogue, I went with an old nesting die set by Spellbinders to make things interesting.  I knew I was going to be using seashells on my card and I like the curves of these.  I also gathered some patterned paper and Cardstock I thought would work well together and using the tutorial on YouTube, I built my card base!

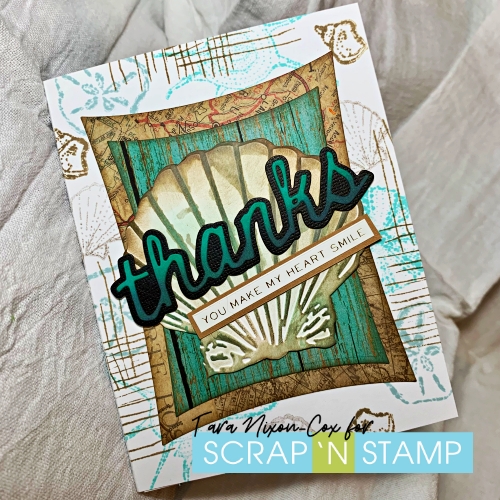
I used the largest cutout from the inside tunnel as well as a larger die cut piece on the front of my card.  I stamped several shells from this Jane Davenport set in shades of Distress Ink, layered with some mixed media stamps.  I also cut and embossed seashells by Tim Holtz, and almost didn’t use this one because it was slightly off… once I grunged it up a bit more with excess ink and layered the sentiment over it (also by Tim Holtz) I really like it!

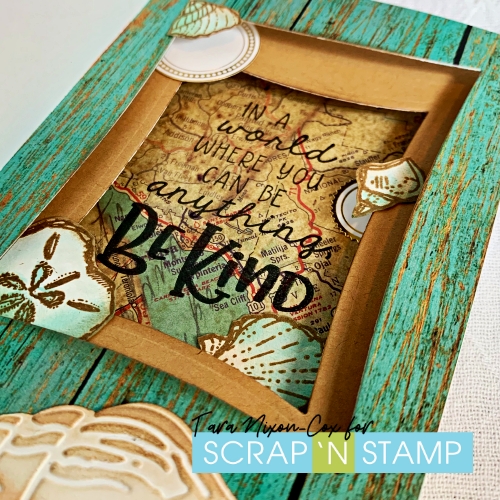
Inside, I used the same elements you see on the front, framed around a sentiment by Taylored Expressions.

The shells were stamped in Vintage Photo Distress Archival Ink (I’ve got the original jumbo quad pad they were released in, this new set is on my wish list!) and watercolored with some of the Distress Inks I used on the front of the card, mostly Salvaged Patina.  The addition of round metallic stickers adds a bit of shine and helps tie it together with the card front.

As you can see, I added the smaller embossed shell inside the card as well.  I’m so glad I had this piece of wood grain patterned paper!  I really wanted to use an embossing folder and make one, but felt that another textured layer might be too much for this style of card.  I stayed up way past my bedtime working on this card, so it’s great when all the pieces come together 🙂

The rest of the team has been working on wowing you as well, so please HOP ON and enjoy the rest of their projects!

Please be sure to leave comments along the way for your chance to win a $50 gc for the online store!  There’s also an INTERACTIVE SALE happening right now too, and you can save on a variety of products to assist you making fun interactive projects like this one!

Happy hopping & Inky hugs,

Tara

Seas the Day August Blog Hop Read More »

Free Shipping Anywhere In Canada