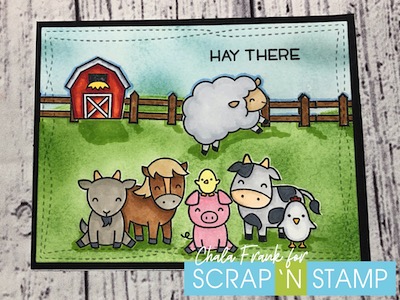
Hay There! I am back to share how I created a one-layer card by channeling my inner Kelly Latevola!
This stamp set has been around for awhile but I don’t think it is one that goes out of style. The little farm critters are so adorable and as a farm girl at heart I couldn’t pass an opportunity up to use them again.
The process of masking a one layer card is not one that is easily described in written word. I encourage you to click on the video below to see how the process unfolded.
https://youtu.be/5NqQYsv7xEg
The key thing you need to remember is whatever you want to appear “in front” needs to be stamped first.
As you create your masks remember to save them for future projects!
If you are just starting out I recommend the set of 24 which give you a great selection of colours at a fair price point.
Getting started:
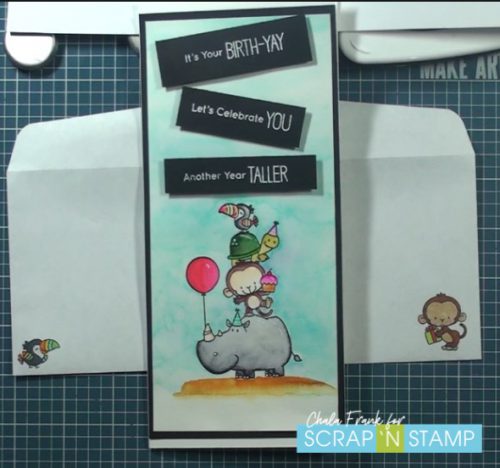
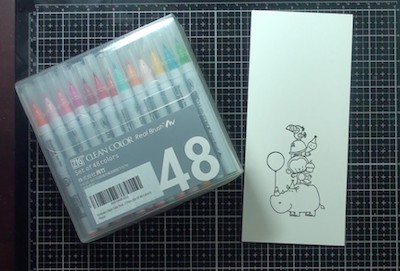
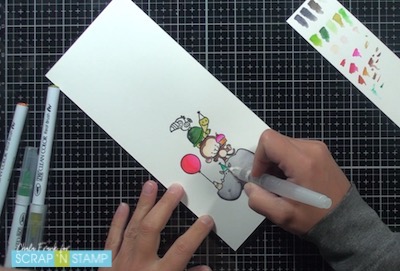
For today’s card I pulled out the Birth-yay stamp set from MFT. I stamped it with VersaClair Nocturne Ink onto some Canson Cold pressed water colour paper cut down to 4″ x 9″.
The Technique:
I am using a wet on dry technique. Start colouring with your lightest colour. You can then go back after to add a darker shadow or shading. It is always easier to cover lighter colours then try to mute darker ones!
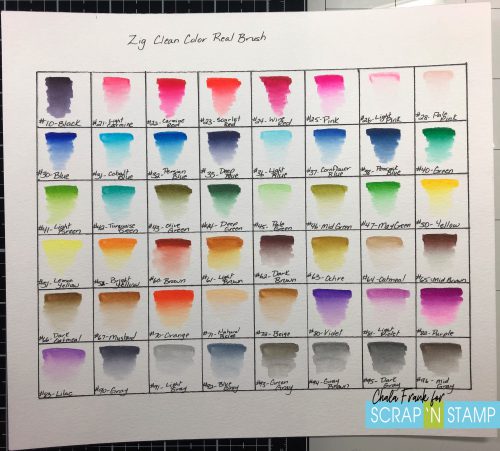
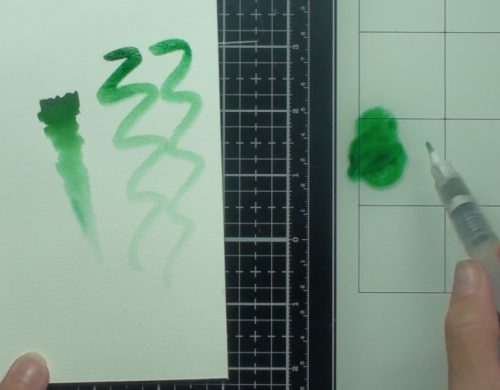
Take time to swatch your mediums so that you have a better idea of what colours you would like to use. You can see I did not do this in the video…but decided to take time to do it once I was done. This will make colouring on future projects much easier and quicker!
Zig Clean Color Real Brush Set of 48 colour swatch
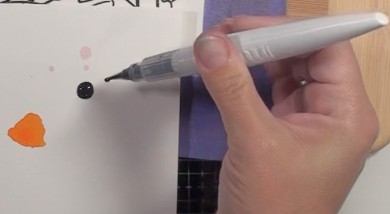
Once I achieve the shading I like I will go back over with my darker colour and use my Aqua Flow waterbrush to pull the colour out.
To avoid getting a “muddy” look with the watercolours (and because I am impatient) use your heat tool to dry the image in between.
A few of my thoughts:
The Zig Real Brush markers are very user friendly. I shared with you in a previous post my experience with Nuvo Aqua Flow Brush Pens and to me they are night and day. I love both for very different reasons. In my opinion, I found the Nuvo Aqua Flow Brush Pens to be very juicy and heavy pigmented.
You may find as a beginner to watercoloring that the Zig Real Brush markers give you a bit more control and are more forgiving. The look is more translucent and in keeping with a more “traditional” watercolour look.
To create the blue wash background I scribbled the Zig Real Brush marker onto my Tim Holtz Glass media mat. Then I picked up the colour with the Aqua Flow water brush and applied it direct to the watercolour paper.
Finishing Touches:
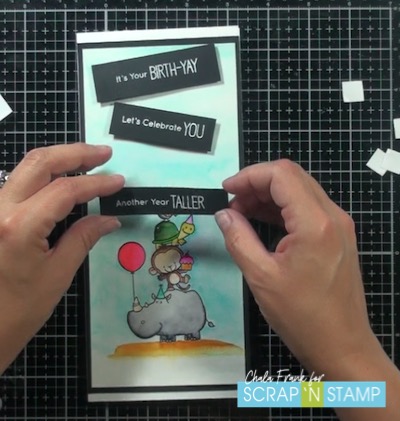
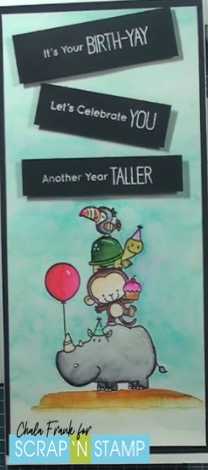
Once the image was dry, I trimmed down the panel and matted it onto some Lawn Fawn Black Licorice carstock and adhered that to the card base. My card base measured 9″ x 8″ and was scored it at 4″ creating a unique business envelope sized card.
I stamped the coordinating sentiments from the Birth-yay stamp set onto Lawn Fawn Black Licorice cardstock. Then using Versamark ink I heat embossed with white embossing power.
By using foam squares to pop the sentiment strips up I add a nice layer of dimension and interest to the project.
I added some highlights to the card with a white gel pen. and stamped a few images onto the envelope itself and coloured them with Copic Markers.
I was so excited to send this card in the mail I forgot to take nice close up pictures of the finished product. 🤦🏻♀️ So I apologize for the grainy look of this photo.
The Video:
Remember you can watch the video of how I painted and put this card together by clicking below.
https://www.youtube.com/watch?v=XLU9ows7gBY
Zig Clean Color Real Brush Markers
As always, I appreciate you spending time with me today. Don’t forget to head on over to the What’s New and Hot Deals section to check out the latest arrivals and savings!
Did you know?
Did you know there are several ways you can win prizes with Scrap’N Stamp? Here are a few ways you can participate for your chance to win!
Hop along with us at the beginning of each month to find out our monthly theme. We have an amazing design team and I am sure you will leave feeling inspired!
Leave comments on our blogs and social media sites. (That includes the Design Team Members personal blogs and social media sites!)
Hello! Chala here for today’s blog and I am excited to share a “new to me” product the Nuvo Aqua Flow Watercolour Pens.
Scrap’N Stamp sent me two packages of the Nuvo Aqua Flow Pens to try and I thought I would share my thoughts and the card I created.
Having used pens similar to this in the past like the Wink of Stella and the Aqua Flow Waterbrushes I thought I had a good idea of how they worked…but, I quickly learned that there were some differences as well!
Let’s start by talking about the sets I received and the colours that are included in each.
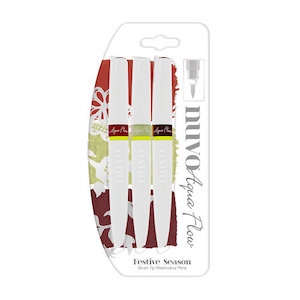
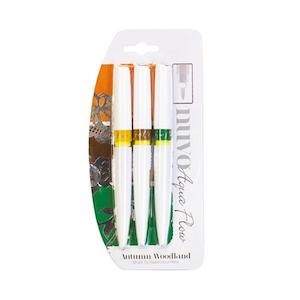
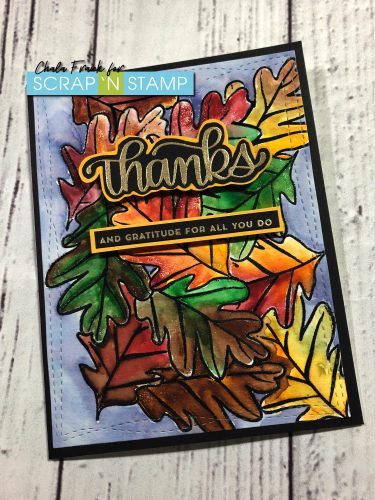
The Festive Season set which included Matador Red, Pressed Olive and Baked Cherry. The Autumn Woodland set and it comes with Spiced Ginger, Rustic Oak and Evergreen Fern. These sets really compliment each other well and were perfect for the fall themed card I had in mind. I did some simple stamping, masking and heat embossing to create a scene and then wanted to watercolour the images in. (Check out the YouTube video to see the card being made) Before I got started though…there was a bit of set up with the pens.
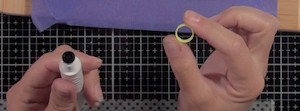
The first thing you need to do is to remove the little yellow washer. To do this you unscrew the pen top from the base. Remove the yellow washer. You can throw this away as you won’t need it anymore. Carefully rethread the top and bottom piece together, being careful not to cross-thready. There should be a “click” once it is together. I recommend taking the lid off the top to do this as it took me a while to figure out I was just turning the lid and not the whole pen top.
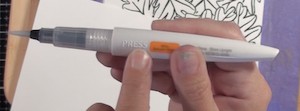
With the two pieces are back together, locate the raised word “press” it should be located next to the colour indicator swatch on the base of the pen. gently squeeze to push the watercolour into the clear reservoir of the pen. Don’t squeeze too hard as you can actually project some of the pigment out. You will want to have a scrap piece of paper handy so that when the colour drips out you can work it into the bristles of the brush. This process can be seen in my YouTube video which is linked below.
Continue this process with all of your pens. Once they are primed and ready to go….it’s time to play!
The one thing I noticed was how “juicy” these were and how rich the pigment is! A little goes a long with with these babies! You can use them direct to paper, wet on dry, wet on wet or scribble some onto a smooth media surface like the Tim Holtz Glass mat and then use a brush to pick up the colour. Again, I show all of this in my YouTube video linked below.
These pens would be great if you like to travel with your supplies. It is best to seal them in a bag or container to ensure they do not leak or become crushed. I think the best way to store these would be laying flat on their side or with the brush tip pointing up in a container to avoid leaking.
Please note that on the back of the packaging there is a bright yellow sticker that says “Adult use only. Not suitable for under 14’s”. I am not exactly sure why this would be…but, it must be there for a reason. The only thing I can think of is because the pigments are so rich they might stain! So, if you are using with small children…use at your own risk!
My honest opinion is that I really enjoyed using these and I think if you are looking for alternative to tradition cake/pans of watercolour these might be fun for you to try. Below is the finished card that I created.
I love how rich the colours are, not like your traditional watercolours which can be quite translucent. That’s not to say that you can’t achieve that translucent look by adding more water. Again, I encourage you to check out the YouTube video where I show how I used them. I also will link all the materials I use below and in the YouTube video description.
https://youtu.be/T8oe89dRGQk
Nuvo Aqua Flow Watercolour Brush
I hope that you found this blog and video helpful and it inspires you to try them out! I would love if you share your creations over at the Scrap’N Stamp Facebook Challenge Page!