Scratch-N-Stamp
Search

Checkout

Keep up with Sales, New Products and other events at Scrap `n Stamp. Sign up for our newsletter now!

What's New

Hot Deals


CAS

Tuesday with Tara {take 235} A Million Thanks

Happy Tuesday!  This week I finally had some creative time with some Wendy Vecchi products!  I used the Make Art Stay-tion for the first time- it’s  a 12×12 magnetic surface that includes a magnetic ruler and 4 strong magnets to hold your work in place (perfect for stencils as you’ll see here).  The bonus for me is that having it means I have a 12×12 works space, instead of my typical 8ish inches amidst my messy workspace!  LOL

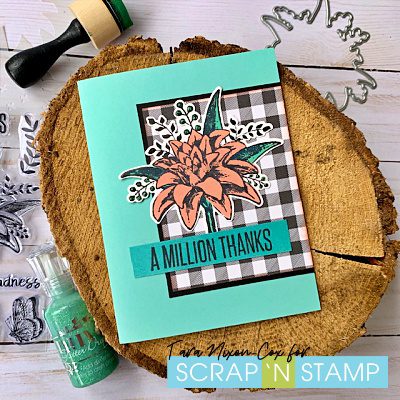
I worked with the ‘A Million Thanks‘ set, which includes stamps, dies and a stencil.  It’s a pretty great little package!

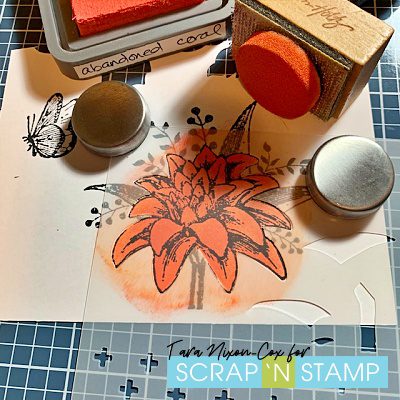
I decided to see how the coordinating stencil worked, so used it with Distress Oxide Ink (just two shades) to color the large floral image in this set.  It’s pretty neat!  Here’s a few pics of the steps using the stencil on the Make Art Stay-tion.  Before I started, everything was stamped with Versafine Clair in Nocturne.

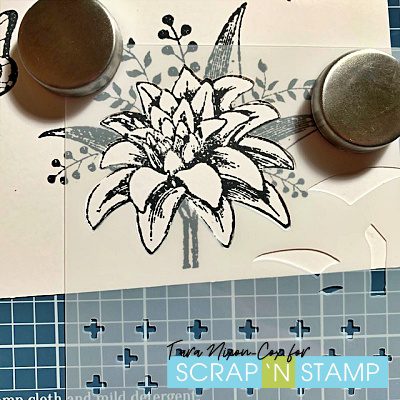
I used Abandoned Coral Distress Oxide Ink to color the flower through the stencil with an Ink Blending Tool (I prefer the new mini tool, though I have plenty of the old rectangular ones, so just use a mini ink blending foam on the larger base!

Each leaf has it’s own stencil, and the one you see me using in this next photo even has two parts to include inking that teeny section of the leaf.  I’ve used Lucky Clover Distress Oxide for these.

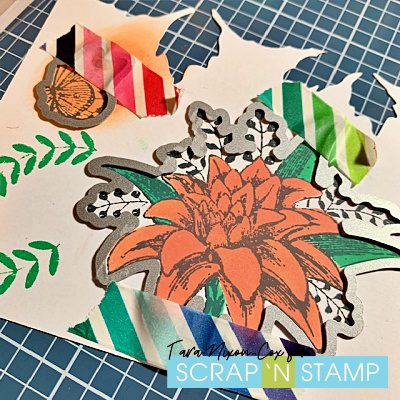
I’m sure all of you are familiar with how to use the coordinating dies with stamps, but here’s a pic showing how I use washi tape to hold everything in place.

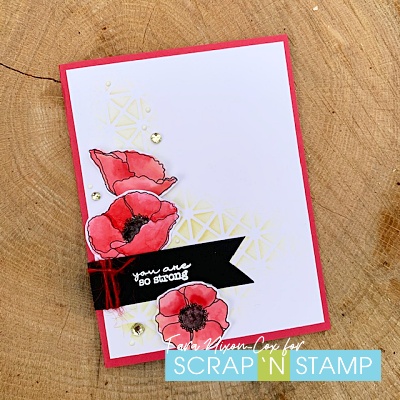
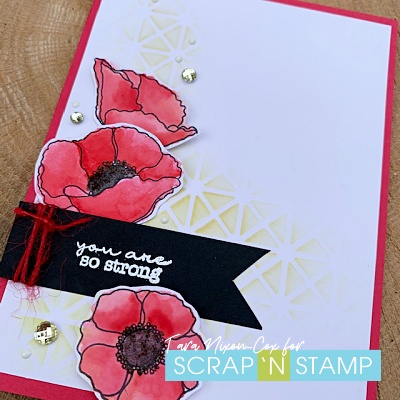
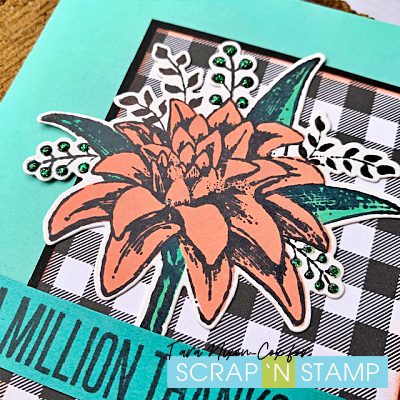
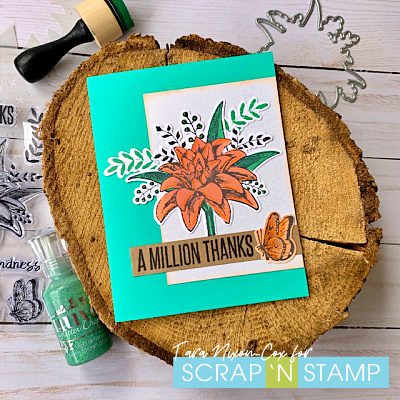
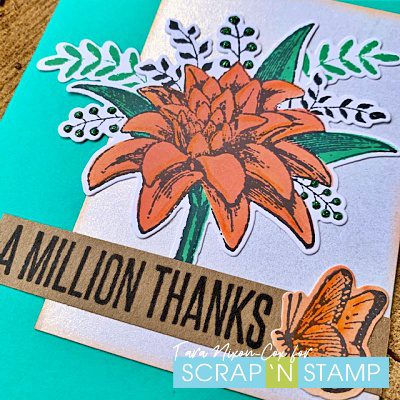
This card layout was inspired by a sketch I saw on Instagram by Freshly Made Sketches.  It’s a pretty great one that I’m sure I’ll use again!  After trying a few different pieces of card stock for the rectangular panel, I dug through some 6×6 pads and found this black & white buffalo plaid paper which I think is PERFECT on this card!  The only other detail I added was some Nuvo Glitter Drops in Aquatic Mist to the berry sprigs.

I made a second card as well, just slightly different colors but the same basic design.  The card base is bolder than the first card, so I used a pearlescent white layer and a stamped sentiment on kraft as my accent pieces.  This one also has the additional die cut sprigs & butterfly on it.

My images also have a tiny it of shading on them, which I did with a pencil crayon.

The A Million Thanks stamp set also includes some sentiments that will be perfect inside of these cards.  I love when you get lots of variety in a single set!

Inky hugs,

Tara

Tuesday with Tara {take 235} A Million Thanks Read More »

Winter Thanks

I know you’ve heard it 1000 times already, but how on earth is it 2020? I saw a meme on facebook in the last few weeks that said something about how can it be that the new millennium started 20 years ago when 1980 was only 20 years ago. I had a good laugh at that. I was born in the 70s so the 80s are very vivid in my mind… and there’s no way that was 40 years ago!!!

I am back with the design team, but on a part time basis right now… Hopefully you’ll see some more from me in the coming weeks.

For this month, I knew I wasn’t done playing with my Christmas stamps and dies… so I wanted to create something that shows you can use these images for at least a little while in to the new year. And since I’ve needed quite a few thank you cards in the last little bit, I decided to make a winter thank you card.

I don’t have any process photos for this card because honestly, it was pretty easy to put together. I cut out the Memory Box Telluride Snowflake using some silver glitter paper from the Concord & 9th 6×6 neutral glitter pack and I trimmed off the extra piece I didn’t need (the hanger). I used a Spellbinders circle die to cut out a window on a 4X5.5″ piece of white cardstock. I added some Gina K Connect Glue around the one portion of the window and glued the snowflake so it was peeking out of the window. I used foam adhesive to put the layer of patterned paper from the MFT 6X6 Over the Rainbow pad behind the snowflake. I added regular double sided tape behind the patterned paper and foam adhesive behind the rest of the panel before adhering it all to the card front. I finished it off using the Lawn Fawn Simply Sentiments stamp with Versafine Clair Nocturne ink and cut it out with the Lawn Fawn Everyday Sentiments Banners die.

Once designed, this card would be great to mass produce as it wouldn’t take long to get a bunch of them put together.

Winter Thanks Read More »

Tuesday with Tara {take 225} Pretty Poppies

Happy Tuesday! Today I’m sharing another card with you that uses some of the same products I featured on my card last Friday in our Poignant Poppies Blog Hop. I chose to make more of clean & simple card (inspired by the current AAA Challenge to make a card with maxi white space and an optional geometric element). Here’s what I came up with:

I stamped the poppy images in black permanent ink & did some quick water coloring with a few shades of red Distress Ink. While the images dried, I selected a shade of red card stock to be my card base. Next I embossed a simple sentiment from the stamp set in white on a scrap of black card stock. I had a general idea of my card layout, so added some geometric stenciling (using a Life Changing Blender Brush) to the background in a rough L shape.

I did some loose fussy cutting (ie. not so “fussy” LOL) of the poppy images and played around with the arrangement until I was happy with it. Once I settled on that, I trimmed the sentiment strip and added a bit of red twine. I added partial dimension to the poppies by adhering part of them with a flat adhesive and part of them with foam squares. This allowed me to tuck the flat parts under other layers and give a bit more movement to the card. Lastly, I finished it off with Distress Stickles in the flower’s centers, a bit of gold tone bling and some dots of white Enamel Accents.

I’m loving challenges to do CAS cards these days as they allow me to focus on my card design and take some of the pressure off to create something over-the-top amazing! I hope you like what I came up with 🙂

Inky hugs,

Tara

Tuesday with Tara {take 225} Pretty Poppies Read More »

Free Shipping Anywhere In Canada