Scratch-N-Stamp
Search

Checkout

Keep up with Sales, New Products and other events at Scrap `n Stamp. Sign up for our newsletter now!

What's New

Hot Deals


Hero Arts

Hero Arts – Color Layering Hummingbird

Welcome to day 22 of May!  The month is flying by!  Speaking of flying….today’s word prompt is birds!  I will be using the beautiful Color Layering Hummingbird stamp from Hero Arts.

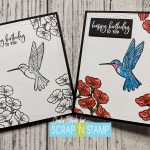
I think the hummingbird is one of my favourite birds and I am often excited to find them flitting about my flowers.  Here is a fun fact, did you know they have no sense of smell?!  They do however, have excellent colour vision!  I thought it would be fun to show you two different card looks – one with no colour and one using the layering stamps to play up how you can add the look of dimension to your image with different colours.

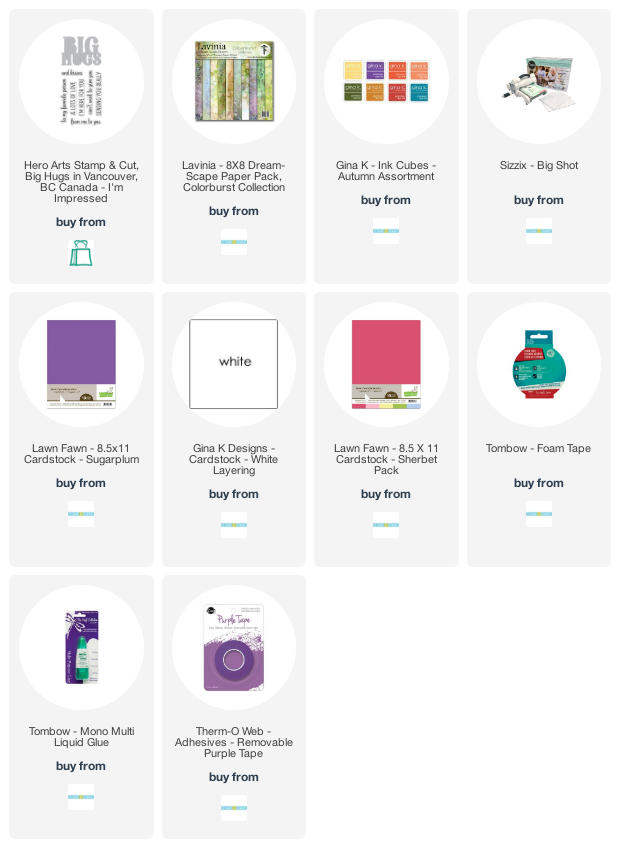
For the first card I simply use the first (or base layer) of each stamp image and stamp with Versafine Claire Nocturne ink.  I created masks for the hibiscus flowers.  You can use the Gina K Masking Magic sheets.  I unfortunately ran out so I used  Avery Removable Full Sheet labels.  To help remove the backing of the masking paper I like to use my Tim Holtz Retractable Craft Pick.  Once I had everything stamped out I then used the My Favorite Things Rectangle Wonky Stitch Die and secured the die onto the cardstock with some Thermo-web purple tape and ran it through my Gemini Jr. Die Cutting machine.  To finish off this first card I back it onto some Hero Hues Premium Cardstock – Pitch Black and then adhere it all onto an A2 side folding card base made from 120lb white cardstock with Art Glitter Glue.  I love the look of this simple black and white card.  If this is not your thing, you can colour the image in with Copics, watercolour or even coloured pencils.  However, this layering stamp has made it super simple for us to add beautiful colour and dimension, so that is what I have done for the next card.

The second card I stamped the exact same way as the first card but then stamped each layering image by following the easy to follow instructions on the back of the packaging.  The Distress Ink colours I used are Broken China, Mermaid Lagoon, Peeled Paint, Forest Moss, Abandoned Coral, Fired Brick and Ripe Persimmon. These inks are available in full size and in the minis. When I first started stamping I wanted ALL the colours, so I found it most economical to invest in the mini “First 36″ Bundle. This also is a huge space saver in the craft room!  I have only had to buy re-inkers for two of the cubes and I have had this set for 3 years!

I used the same My Favorite Things Rectangle Wonky Stitch Die and Hero Hues Premium Cardstock – Pitch Black cardstock.  The finishing touch for this card was adding Zig A Wink of Stella – Clear overtop of the hibiscus flowers to give them some sparkle.

You can check out the quick video tutorial by clicking here: https://youtu.be/IXuB4nUNHYE

Thanks for stopping by and enjoy the rest of your day!

~Chala


Hero Arts – Color Layering Hummingbird Read More »

Trees, Trees and More Trees!

Hey creative friend! It’s Deb here, for the Design Team. Do you known what I realized, today? I realized that I have a LOT of stamp sets with trees! Trees, trees, and more trees! I guess that’s why I chose trees for today’s prompt for the Scrap ‘N Stamp challenge. My house is also surrounded by trees – it’s lovely to look at, especially at this time of year. We have evergreen trees, but we also have a lot of deciduous. So when the leaf buds start emerging, it’s a riot of all shades of green!

CATHEDRAL OF TREES

This first card uses an ‘oldie but a goodie’ stamp from Hero Arts, called Cathedral of Trees. I love this perspective of looking up, from the middle of a grove of trees.

Trees, Trees and More Trees!

CARD DETAILS

A trick I like to use when doing an ink blended background is to start with a piece of coloured cardstock, rather than white. Choose the lightest of the colour you’re using – in this case, start with light blue. Next, blend on Distress Oxide inks in (from  outside in) Black Soot, Chipped Sapphire and Faded Jeans. Leave the very middle without ink – so that just the cardstock shows through. This gives you the illusion that the center is ‘glowing’ with light.

Next, set up the blended panel in your stamp positioner, with the Cathedral of Trees stamp. Cover the stamp with Nocturne ink, and press firmly. With these large background stamps, I always find it best to ink & stamp twice, to ensure full coverage.  With the panel still in the positioner, line up the sentiment stamp Darkness Stars from Impression Obsession. Stamp with Versamark ink. Remove the panel, cover the sentiment stamping with gold embossing powder, and heat set.

To add some stars, mix a bit of white gouache or acrylic paint with water. Pick up the paint with a small brush, and splatter onto the panel. I also added some gold stars by dotting a Nuvo Glimmer Pen in Midas Touch randomly onto the panel.

Layer the finished panel onto a piece of Gina K. gold cardstock, and then onto a dark blue card base.

Trees, Trees and More Trees

SLIMLINE TREES

This next card doesn’t use any tree stamps – but it does use tree dies! I chose the Picket Fence Studios Slimline Die Cutting System with the 2 tree square dies.

I love the simplicity of this card! The blended blue sky just shines, doesn’t it?

CARD DETAILS

First, use the smaller of the slimline dies to cut 2 pieces from white cardstock. Put one aside – this will be for the background. Place the 2nd one back onto your Big Shot cutting plate, and place the 2 square tree dies at either end, and cut. To colour the birch trees, lightly blend on Vintage Photo distress oxide, and then add the black with a fine marker. Colour the evergreen trees with Mowed Lawn distress oxide, and a blending tool. Now, stamp the sentiment from the Poppystamps Diamond Sentiments in the middle, with Nocturne ink.

Place the die cut layer over top of the uncut piece, and lightly trace out the square openings with a pencil. Next, use a blending tool and apply Broken China distress oxide. Layer the 2 panels together with foam tape or squares. Decorate the front by wrapping some linen thread around the front, tying off with a small bow. Add a few coloured rhinestones, and then attach the card front to a green card base.

JOIN THE DAILY CHALLENGE

Are you playing along with the Scrap ‘N Stamp daily challenge? You don’t have to play every single day – play as often as you can! You can find the details HERE in the Facebook group, along with the list of prompts for this month. At the end of each month, one lucky participant is randomly chosen, and wins a $50 Gift Certificate to shop the Scrap ‘N Stamp store! I hope that you’ll join me in today’s challenge with trees, trees and more trees!

SUPPLIES

Speaking of shopping the Scrap ‘N Stamp store, I’ve listed the products I used for my cards, below. Affiliate links for supplies are provided. If you choose to use my links, you help support me in maintaining my blog, at no extra cost to you. Thanks in advance!


Trees, Trees and More Trees! Read More »

Who Needs a Hug?

If there’s one thing that this pandemic has taught me, it’s the importance of physical connection with out loved ones! Who needs a hug? I do, and I bet you do, too. Luckily, I have my husband and 2 sons at home for daily hugs, but I’m really looking forward to the day when I can hug my friends & extended family.  Hey there, it’s Deb here for the Design Team! Today’s daily challenge word is ‘die cuts’ (okay, it’s 2 words) so I chose the new Hero Arts Big Hugs Stamp & Cut set to feature.

BIG HUGS

I love it when you can buy a bundle that includes a die with a stamp set! With this set, I wanted it to be the feature of my card. So instead of adding other images, I used some gorgeous Lavinia Stamps Dreamscapes paper for the background.

Who Needs a Hug?

CARD DETAILS

To emphasize the ‘big’, I went with a slimline design! Create your card base with cardstock that measures 7″ wide by 8 1/2″ long. Score in the middle at 3 1/2″, and fold.  I incorporated my card base colours with those in the Lavinia Dreamscapes Colour Burst sheet that I chose. With this particular sheet, I love the addition of the white swirls in the top corner, and left hand side.

Use your Big Shot with the Big Hugs die from the set, and die cut from light purple cardstock. Die cut it again, this time from fun foam, for layering underneath. This gives you great dimension, and you can off-set it slightly, so you can see the white. Doing this ties in the white swirls on the paper, and the white in your sentiment strip.

Stamp the sentiment in Gina K. Passion Flower ink onto white cardstock. Snip banner tails on the left side, and attach it above the die cut letters, using foam tape.  Add a few embellishments for sparkle; I grabbed some from my stash – not sure where they’re from, or how long I’ve had them! (I’m not a hoarder, I’m a ‘craft enthusiast’!)

Who Needs a Hug?

This may be a ‘simple’ card to make, but using the gorgeous paper for background, and then adding the dimension behind the die cuts and sentiment, really adds ‘oomph’ to the design.

SO, WHO NEEDS A HUG?

I hope that you’ve got someone close who you can share a hug with! This card is perfect and quick enough to make that you can send it to your friends & family that you’re not able to hug, right now.  Also, I hope that you’ll join in the Scrap ‘N Stamp Random Acts of Cardness/Daily Challenge on Facebook HERE.  You can join as many or as few days as you want. Just choose the word prompt, create a project using that word, and share it in the group. Be sure to use the hashtag #snschallenge, so it doesn’t get missed! Share it on all of your social media accounts, and get your friends to join, too! At the end of each month, one lucky participant is randomly chosen, and WINS A $50 GIFT CARD to shop the Scrap ‘N Stamp store!

Who Needs a Hug?

SUPPLIES

You can find the supplies I used to created my card in the Scrap ‘N Stamp online store.


Affiliate links for supplies are provided. If you choose to use my links, you help support me in maintaining my blog, at no extra cost to you. Thanks in advance!

Who Needs a Hug? Read More »

Free Shipping Anywhere In Canada