Scratch-N-Stamp
Search

Checkout

Keep up with Sales, New Products and other events at Scrap `n Stamp. Sign up for our newsletter now!

What's New

Hot Deals


Chala

Summer Sunshine – Sunny Vibes

Happy Lazy Sunday!
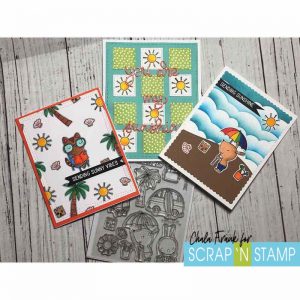
MFT Sunny Vibes

Hey Crafty friends!  It’s Chala and I am here today to share some cardmaking inspiration with you!  If you are playing along with us on the Scrap’N Stamp Facebook Challenge page then you know that our word for the day is SUMMER!  I don’t know about you, but when I hear the word summer I automatically think of sunshine!  This is something I don’t feel like we have had a lot of here in Calgary….but here is hoping today’s card warm you up just the same!

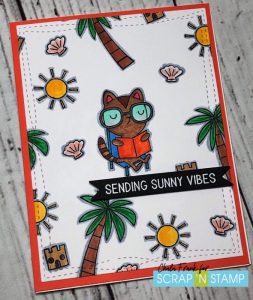
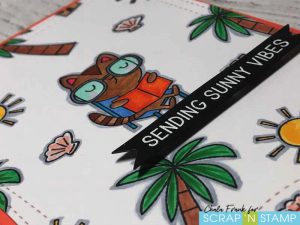
I am loving MFT’s new Sunny Vibes stamp set and it is perfect to create a summer scene card.  I first played around by creating a custom one layer background piece.  I chose a few images and stamped them with Memento Black Tuxedo ink and did some simple Copic colouring.  I just love the little critter lounging with its book!   I added a grey shadow to each of the images to give the background piece a bit of depth.  I then used the larger MFT Wonky Stitched Rectangle Die and mounted that onto some orange cardstock and then adhered that to an A2 side folding card.  For the sentiment I chose to keep it simple with white heat embossing on black cardstock and then cut that into a banner and adhered it with foam adhesive to add dimension.
MFT Sunny Vibes MFT Sunny Vibes

For my second card I pulled out the Summer Sunshine 6″ x 6″ paper pad from Taylored Expressions.  This paper pad has some fun bright colours and patterns that will add the perfect pop of colour to any card.

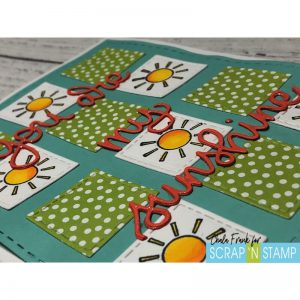
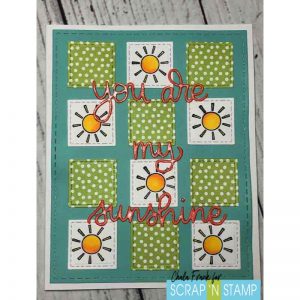
My Mom has been doing some quilting and created a beautiful summer patch quilt picnic blanket for my kids.  This inspired my next card.  I used a small square stitched die and die cut 6 patterned pieces and 6 white squares.  Using my Stamp Perfect Tool I was able to quickly then stamped the sunshine onto the white squares and Copic coloured them.  I then arranged them onto some green cardstock similar to that of what you may find on a quilt.  For the sentiment, I die cut a “You are my Sunshine” sentiment several times and stacked them together using Gina K Connect Adhesive.  To make the sentiment pop I added some Nuvo Aqua Shimmer Pen.  I LOVE the sparkle that this pen gives!
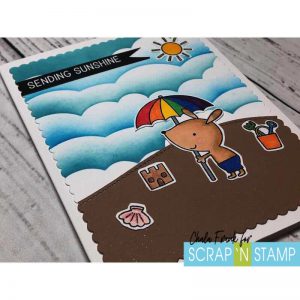
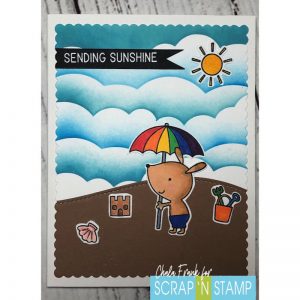
For my final card I wanted to create a beach scene.  I used the MFT Cloud stencil and blended Distress Oxide inks in the colours Broken China and Salty Ocean with one of my smaller Picket Fence Blending Brushes.  I like to do my ink blending on the Wendy Vechhi Make Art Stay-tion as I can use the magnets to hold my project in place while blending.  I die cut some brown cardstock with the Lawn Fawn Hillside Stitched Borders.  I stamped,  Copic coloured and fussy cut out the sunshine, bucket, shell, sandcastle and the puppy holding the sun umbrella with my cutter bee scissors and then adhered them with some of the Gina K liquid adhesive.  This gave me time to wiggle the images into the perfect place.  I again used a simple black cardstock and white heat embossed sentiment cut into a banner.  I wanted to add some more interest to the scene and decided to use my wavy die cut rectangle to give the edge a fun look.  I then adhered this to an A2 size side folding card…and…you guessed it…I added some more sparkle  to the shell and the sunshine with the Nuvo Aqua Shimmer Pen.
MFT Sunny Vibes MFT Sunny Vibes

I really enjoyed how all three cards turned out and how different each one was.  I have a few more ideas for this set but ran out of time!

If you want to see these cards come together you can check out the YouTube video here:

https://youtu.be/hnxHvDr8j_I

Remember to share your Summer inspired cards over at the Scrap’N Stamp Facebook Challenge Page!

Enjoy the rest of your day!

~Chala

Summer Sunshine – Sunny Vibes Read More »

Starstruck

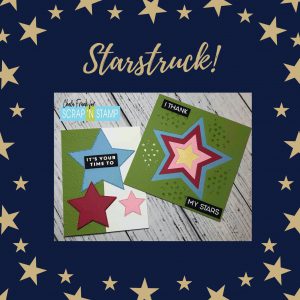
Hello Again!  Chala here and I have two quick and fun cards to share with you to give you some inspiration for today’s Facebook Challenge Word – Stars.

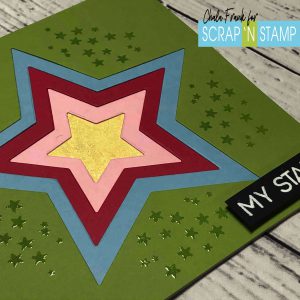
I have some nesting stitched star dies in my collection that I haven’t used in a while so I pulled them out along with the Concord and 9th Lucky stamp set.  I wanted a bright colourful card so I also pulled out a package of the Lawn Fawn Sherbert cardstock.  If you are looking from nice thick cardstock Lawn Fawn is absolutely perfect!  I love the quality of this paper and the colour selection is amazing!

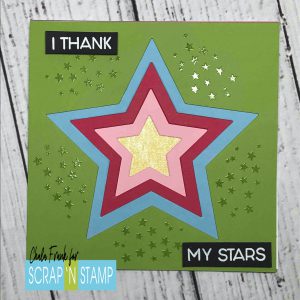
I cut down four pieces of the cardstock into 6″ x 6″ squares to fit on a square card base in the colours Ballet Slippers, Cilantro, Moonstone and Raspberry and then die cut the different sizes of the stars in descending size. I will be using the negative space of these die cute.  I then cut a square piece of the colour Sticky Note just a bit larger than the smaller star die cut.

I want the yellow star to be where your eye is drawn to so and thought some sparkle would help achieve that.  I pulled out my Nuvo Aqua Flow Shimmer Pen and added a nice layer overtop.   If you like shimmer and sparkle this pen is for you!

I put a lot of shimmer on this piece so I wanted to make sure it was going to adhere it flat onto the back so I used some Scar-tape around the edges and adhered it to the backside of the smallest star.  I then just continue to layer the coloured pieces adhering them with a tape runner and then adhere all the layers onto the card base.

I thought the card needed a bit more interest to it so I pulled out the cluster of stars from the Concord and 9th Lucky stamp set and with my Stamp Perfect I stamp the stars with some Versamark sticky ink and heat emboss with clear embossing powder.  I think this adds just enough interest without being too distracting.

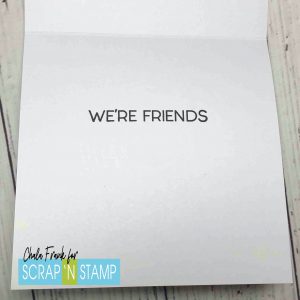
For the sentiment I used the same Concord and 9th Lucky stamp set.  I liked the “I thank my” and wanted it to say “stars”.  I didn’t like the layout so I performed some stamp surgery and cut the “my” off so that I could line it up with the “stars”.  I have a hard time cutting my stamps apart…but I know it will be fine and I can layer them back together like they originally were.  I stamped with Versamark ink onto Lawn Fawn Black Liquorice cardstock and heat embossed with white embossing powder.  I finished the sentiment by stamping “We’re Friends” on the inside with VersaFine Clair Nocturne Black Ink.


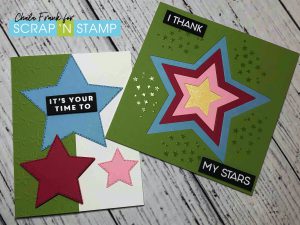
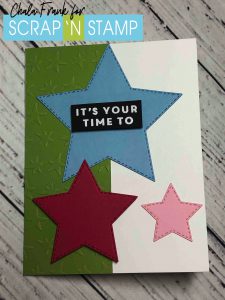
My next card I am making use of some of the stitched stars that were cut out of the 6″x 6″square pieces.  I can use the ones I don’t use on this card for another project.

Again, I wanted to add a bit more interest, this time I used the Sizzix Star Blanket embossing folder and I will emboss the Lawn Fawn Cilantro cardstock and trim it down to 2 1/8″ x 5 1/2″.  I adhere this to the lefthand side of an A2 size card.  I chose three of the stars to adhere onto.  I popped the red die cut star up with some foam squares to add some dimension.

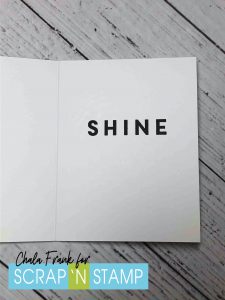
The sentiment I chose is from the Concord & 9th – Shine On stamp set.  I again split the sentiment where I embossed the from sentiment on Lawn Fawn Black Liquorice cardstock and heat embossed with white embossing powder and stamped the rest of the sentiment on the inside with VersaFine Clair Nocturne Black Ink.

You can check out how I put these two cards together by watching the video here.


Thanks so much for stopping by and checking out today’s blog!  I look forward to seeing your “Star” themed creations on the Scrap’n Stamp Facebook Challenge Page!


~Chala

Starstruck Read More »

Perfectly Pink Mother’s Day Card

Happy Hump Day Everyone!

I am excited to be back and I am really enjoying the Random Acts of Cardness Challenge happening over at the Facebook Challenge Page. Today’s word is of course –  PINK!  Not just one of my favourite musical artists but also a perfect colour for my Perfectly Pink Mother’s Day Card!

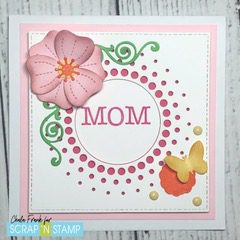
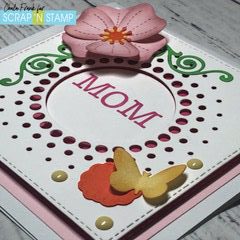
I love mixing old and new products as well as combining different brands together.  For this card I am using a Large Stitched Square Die from the nesting set of Paper Rose, Stitched Squares, The Pretty Poppies Die from Lawn Fawn (although I think the Flower Power set would also be super cute!), the Large Circle Burst from Memory Box, as well as a few dies from the Sizzix Butterfly Embossing Folder and Die Set.

I found that with cards with many layers and die cuts it is easiest for me to do all my die cutting at one.  It is went especially fast since I was able to use my Gemini Jr. die cutting machine.  I received it last year for my birthday and I have declared it a necessity in my craft room and it is worth every penny my husband spent on it!  LOL!

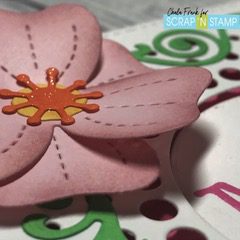
Once I had all the die cutting done I wanted to add some dimension to the flower and some of the other embellishment images with Distress Inks.   I used Wild Honey, Victorian Velvet, Spiced Marmalade, Ripe Persimmon and Bundled Sage and a picket fence blending brush to add some colour to the edges of the die cut images.  I really like how it add texture and dimension to the flower.

After the ink blending it was time to layer the images together to create my scene.  You can watch the YouTube video below to see how the card came together.

I used Gina K Connect Glue to adhere all the smaller die cuts together and for the dark pink stitched square I adhered that with my tape runner onto a 6 x 6 Square Card base.  I stamped the “MOM” sentiment with an alphabet stamp in Picked Raspberry Distress Ink using my Stamp Perfect (which is not exactly centred…but, that’s okay!) I then glued the white circle from the Large Circle Burst with the liquid adhesive and popped the rest of the Circle Burst die cut up with some Foam Squares.  The final touch was to add some enamel coloured dots and some Clear Wink of Stella to the centre of the flower and the small butterfly die cut.

This card was really quick to make and I am really happy with the way it looks.

Remember to play along with the Random Acts of Cardness Challenge this month as we love to see what you all create!  Also, if you missed this month’s Blog Hop be sure you check it out and leave your comments on each participants Blog Hop for your chance to win a $50 Scrap’N Stamp Gift Card.  The winner will be announced on May 14, 2020!

Happy Crafting!

~Chala

Perfectly Pink Mother’s Day Card Read More »

Free Shipping Anywhere In Canada