Scratch-N-Stamp
Search

Checkout

Keep up with Sales, New Products and other events at Scrap `n Stamp. Sign up for our newsletter now!

What's New

Hot Deals


Author name: Chala Frank

Chameleon Picture Changer
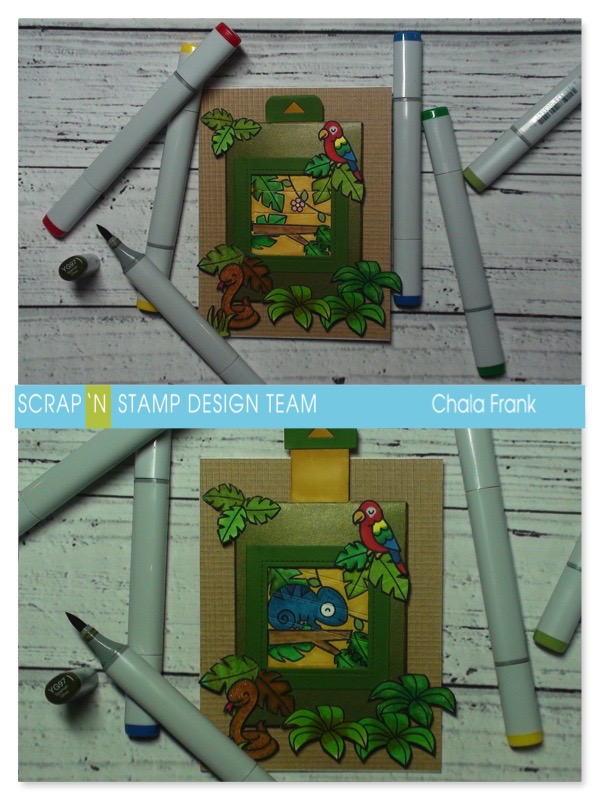
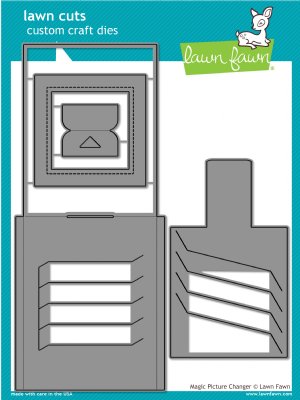
Hello again! Hard to believe we are almost done June! For me, this means my kids are attending a load of birthday parties before the end of the school year and that I am sharing yet another birthday card! My daughter recently attended a very cool birthday party for her friend that had a reptile themed party. What a brave girl! So, of course I had to pull out one of my favourite stamps sets (one that I used in my very first YouTube video), Lawn Fawn – One in a Chameleon and paired it with the Lawn Fawn Picture Changer die set. I will also be using some of the images from the Critters in the Jungle stamp set as well. This picture changer die set is so cool and there are so many possibilities to use it with stamps you already have!

I start out by using the picture changer die and with a pencil I trace out the inner square onto some 110lb white cardstock so that I know where to stamp the images. I need to trace the squares from both dies so that I can ensure I stamp the images in the correct place. Because I want the chameleon to “appear” I will be stamping most of the images twice, trying to get them in the exact same spot inside each square. I will be using Memento Tuxedo Black ink so that I can do some copic colouring. Now, I will warn you that this is a bit of a process to stamp out and there is some masking involved (I like to use the Avery full sheet labels to create my masks), but it is so worth it!! In fact, I did have a few mistakes along the way…but, hoping you won’t notice them in the finished product! Although, if you want to know what they are you can click on the video below and I will let you in on the secret there!
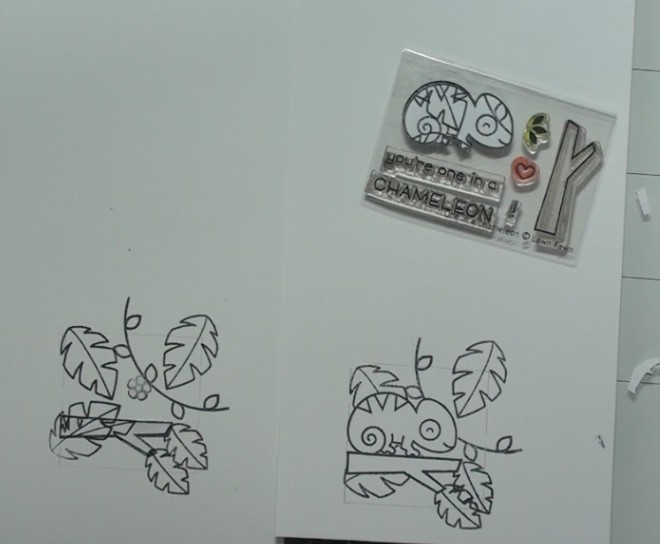
Once everything is stamped out I will colour the images in and then die cut the picture changer pieces out. There are two pieces, the front pocket piece and then the slide that will be sandwiched in between the pocket.

Assembly can be a bit tricky at first. You simply insert the slider piece into the pocket piece (you can watch how this happens in the video below). Then you will push the tabs from the slider portion into the slots of the pocket (Again, much easier if you watch the video!). You will want to make sure you have an anti-static tool or bag and coat both these pieces liberally to help the mechanism slide. I use Be Creative  Scor Tape (3mm) to adhere the sides down.

I don’t have the Magic Picture changer Add-on so I improvised by cutting the front portion of the envelope piece from some shimmer green card stock, trimmed out the tabs and adhered that with the same Be Creative  Scor Tape (3mm). I then use the smaller frame and the pull tab piece that came with the original die set and cut that from some solid green cardstock. I also coloured the pull tab with a copic maker and touched up any areas that showed white on the sliding mechanism.

I adhered the frame with the Be Creative  Scor Tape (3mm) again, making sure that I only applied it to the corners. For the pull tab I used a regal adhesive tape runner.

I had some left over textured brown card stock from my last project that I applied to the front of my A2 card and then adhered the magic picture changer onto it with some 3M foam tape. Now it is time to add some foliage and critters!

I stamped out the parrot, snake and some of the leaves and bushes from the Critters in the Jungle stamp set from Lawn Fawn. I again used the Black ink from Memento as I did copic colouring. I love these little critters and think they add the jungle feel to the card nicely. I will fussy cut out the images and arrange them around the frame of the picture changer with some liquid adhesive, being careful that they don’t interfere with the sliding mechanism.
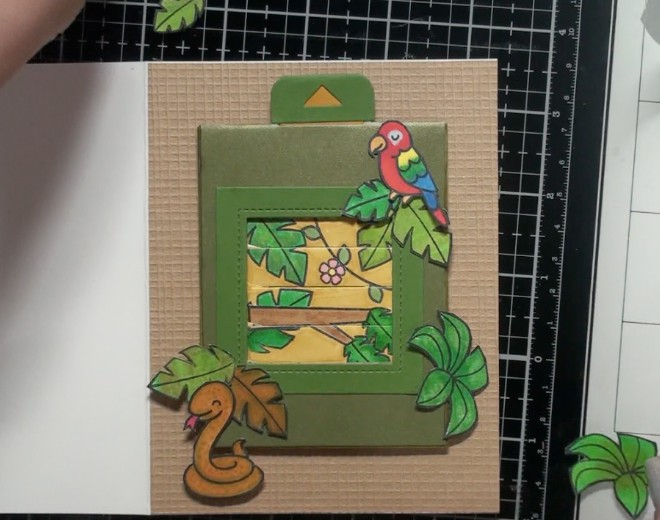
The last thing to do is add a little sparkle to the snake with my clear Wink of Stella and stamp the sentiment “You’re one in a chameleon” on the inside with my new favourite ink for sentiments – Versafine Claire – Nocturne.

I really liked how this card came out and that it can be for a boy or a girl and that it can be used for a variety of occassions.

I hope you enjoyed today’s interactive Picture Changer Card and that it has sparked a creative idea for you to make your own! You can check out the YouTube video here

https://youtu.be/ga-At3ITrw0

Also, remember to check out the current sales and new arrivals by clicking here!

~ Chala

Additional Materials used:

Stamp Perfect, Retractable Tonic Craft Pick, Thermo-web purple tape, EK Success Anti-static powder, Gemini Jr. Craft Companion Die cut machine, Avery Full page removable labels, bone folder, Cutter-bee scissors, Fiskars paper trimmer, green cardstock, metallic green cardstock, Gina K Connect glue, Crafters Tap tape runner, 3M Foam Tape, reverse tweezers

Chameleon Picture Changer Read More »

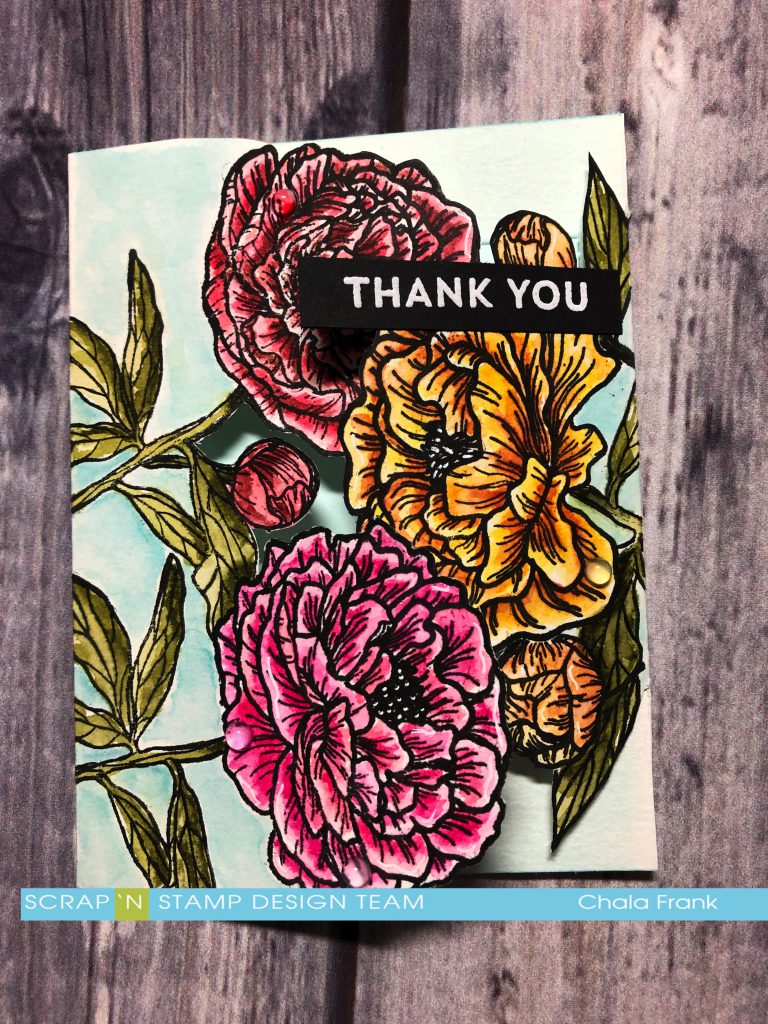
Picket Fence Peony Bouquet Gatefold Watercolour Card

Happy Hump Day! It’s Chala here and today was such a fun day! I got to spend it on a field trip with my daughter at Bar-U Ranch. This ranch has been around since the 1800s and is one of Alberta’s National Historic Sites. I felt right at home and it made me want to get out in my yard to work, especially since we are finally seeing some of our perennials pop up!

My favourite perennials in my garden are by far my peonies! I love watching the buds come up and all the ants work away to help them open up. Since mine aren’t that far along yet I thought I would pull out this gorgeous stamp set from Picket Fence call Peony Bouquet. Immediately I knew I wanted to layer these flowers and create a gatefold card.

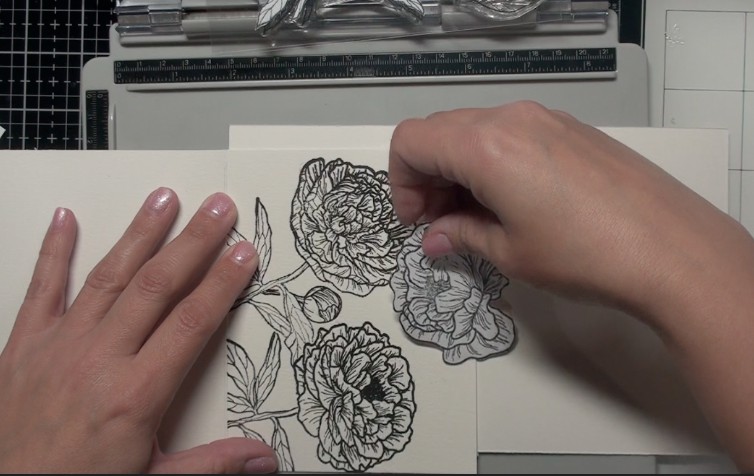
To create this card I will also be using masks and for this I use the Avery full sheet labels, stamp the images I am going to be using and then fussy cut them out. This takes a bit of time but is SO worth it and you can save the masks to use again!

My card bases (there will be two) will be Canson XL cold pressed watercolour paper 140lb. They are standard A2 size. I use my masks to lay out where I want to stamp on each card. The first one I will stamp normally. I am using my Tim Holtz travel stamp platform so that I can multi stamp for a better impression if I need to. I stamp my images with the AMAZING Versafine Clair Nocturne Ink. I say this ink is amazing because it really is. It is my first time using it and the results are spectacular! Great impression with detailed stamps and it is perfect for this project as it is watercolour and water based marker safe. It is my new favourite ink!

The second card I am going to turn it backwards so that it opens from left to right and stamp. I line up the cards so that I can get an idea where to place the flower so that when I cut out the images they will nestle together nicely. This is really hard to explain and I encourage to head over and watch the video for clarification.

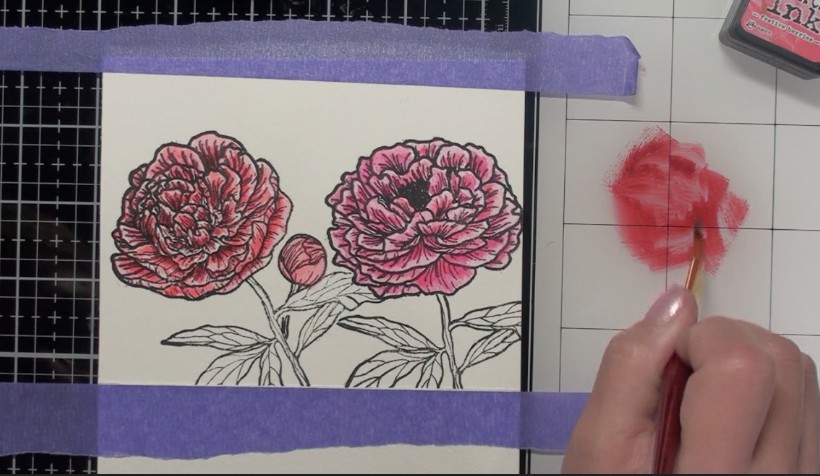
I will be doing some watercoloring with my Distress Inks in the following colours: Picked Raspberry, Worn Lipstick, Abandoned Coral, Festive Berries, Aged Mahogany, Squeezed Lemonade, Wild Honey, Rusty Hinge, Peeled Paint, Forest Moss and Broken China to give a light blue wash to the background and the inside of the card.

I like to tape my card base down with some Therm-o Web removable purple tape to minimize warping from the watercolouring. My watercolour process is to begin with the lightest colour to give me an idea of where I want the darker shading. I start with wet on dry and layer the colours as I go along. I also like to dry my project in between. Again, you can watch all of this go down by clicking the video linked at the end of this blog.

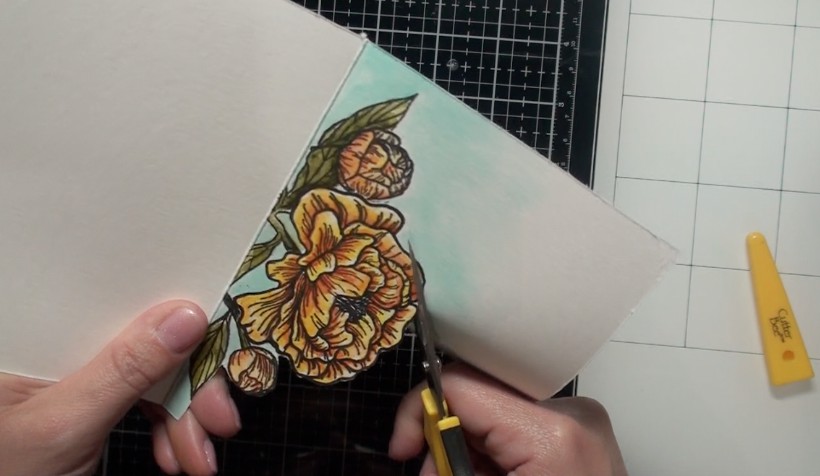
Once I have everything coloured and dry I give a wash of light blue to the panel. At this point I was not sure what I would be cutting out and wanted a cohesive look. Again, I dried the project completely before staring my fussy cutting.

Once I have the images trimmed out I place the two cards together to ensure everything works. I did have to trim a VERY small amount of on edge of my card in order for the cards to close and lay nice.

Now it is time to adhere the cards together. I am want to use a strong adhesive to make sure the to cards don’t come apart. My go to strong adhesive for this job is the Be creative scoring-tape. I only remove a portion of the backing so that when I am lining up the cards they don’t stick together when and where I don’t want them to. Once everything is line up nicely and I can then remove the backing completely. To see this trick in action….check out the video! 😉

My card was popping up…so, I thought I would run it through my Gemini Jr. to flatten it a bit. It worked…however, it did leave an impression of the flowers on the inside of my card….this didn’t bother me as I added a light blue piece of cardstock to the inside as a guide to where to write the sentiment and it covered most of it up.

I like to go back to my images with a black pen/marker (I am using a Copic multiliner) to darken the images and edges so that it looks neater.

I want the flowers to be the main focal of this card so my sentiment is very simple. I am stamping the Thank you sentiment from the Concord &9th Blooms Fill in set with Versamark Ink and heat emboss with white embossing powder. I will then adhere it with some liquid adhesive on the right flap portion of the card. I think it works perfectly for this card and it was nice and handy from my last blog post! LOL!

The last thing I did was added some highlights with my white gel pen and some Sparkletz water droplets.

Here is a look at the finished card. I am very happy with how this turned out! I think maybe next time I might want to add some twine to wrap around it and tie a bow in front? 🤔 Or maybe not? Let me know your thoughts and what you would change or do differently.

Thank you so much for stopping by. As promised here is the video link!

https://youtu.be/GGcoX2Tj5zU

Have a fantastic day!

~ Chala

Picket Fence Peony Bouquet Gatefold Watercolour Card Read More »

Blooms Fill In – Concord & 9th

Hey there and happy Saturday! It’s Chala and I am back for another “Floral Frenzy” themed card.

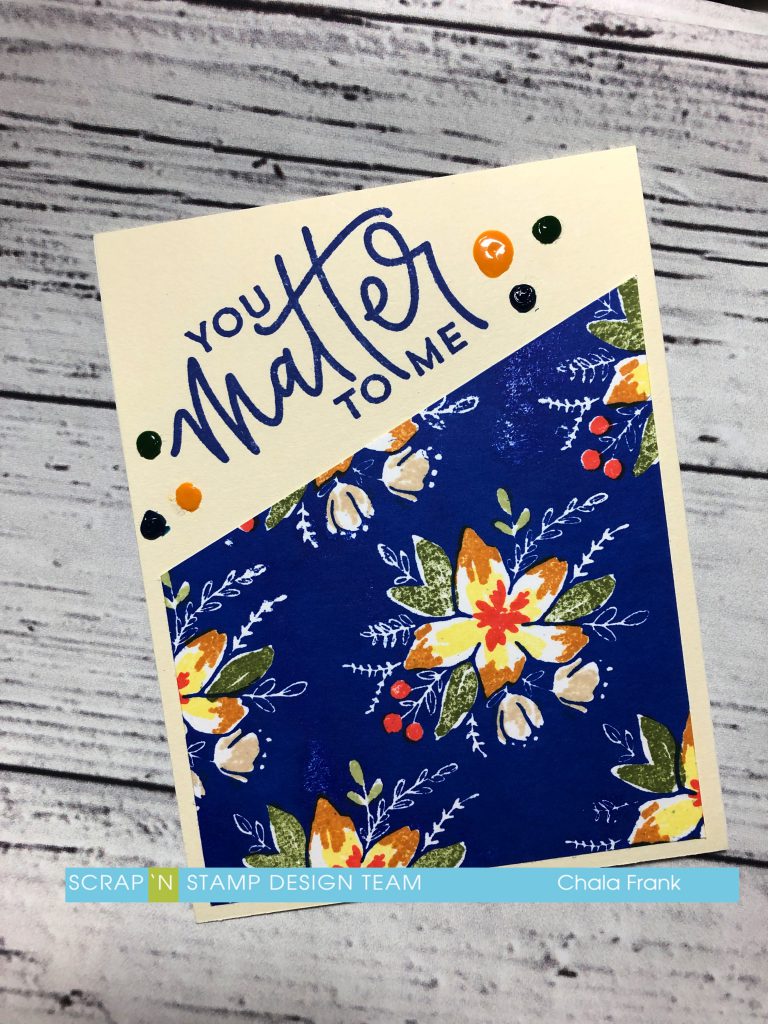
I am going to be using the Concord & 9th Blooms Fill-in stamps. This is an older set but it is one of my favourite floral stamp sets. There are so many different themes you can use this stamp for: Birthday, Mother’s Day, Thank-you, Christmas, Wedding, etc. There are also coordinating dies, however, I will just be using the stamps today for which I created three cards.

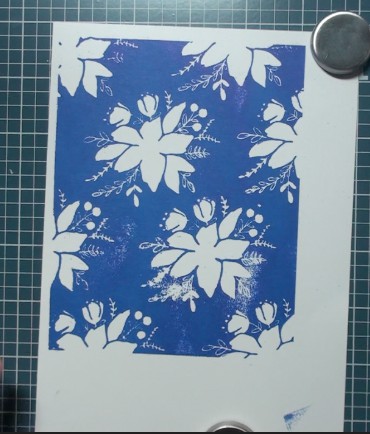
For the first card I used Blue Print Sketch Distress Ink and my Tonic Travel Stamp Platform to create the background with the largest of the stamps. I highly recommend using some type of stamp platform as you will need to stamp this background multiple times to get a good coverage and you will need to apply a bit of “CPR” type pressure. This large stamp measures just a bit larger than a standard A2 size card.

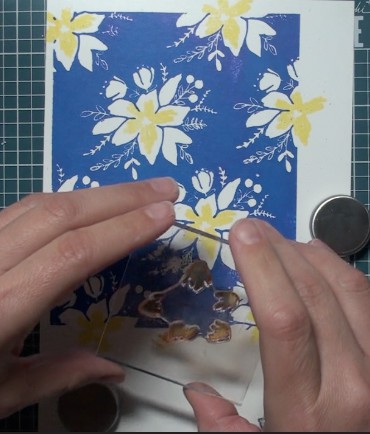
The next step is layering on the flower and leaves. I am able to do this with an acrylic block along with the help of my Wendy Vecchi Make Art Stay-tion. The metal platform and the large magnets keeps everything in place so your project does not shift or accidentally disappear from your work surface. (It is also great if you are in the midst of a hot flash and need to have a fan on, or if you have small children and/or fur-babies who like to hover while you work….)

The Distress Inks I used for the flowers and leaves are as follows: Squeezed Lemonade, Wild Honey, Ripe Persimmon, Peeled Paint, Shabby Shutters, Antique Linen and Weathered Wood. I do drop my stamp and get ink where I do not want it…but that is okay! I used the Tombow Mono Sand Eraser and it removes that ink blotch just fine!

I cut the panel in half on an angle and trimmed of an 1/8″ of each side. This will allow me to create two cards. I adhere one of the pieces onto a piece of cards stock that was complimentary to the colours of ink used. The sentiment is from the same set and I used the “You Matter to Me” phrase. This was stamped with the Blue Print Sketch Distress Ink. To finish off this card I added some Nuvo Drops in the following colours. Midnight Blue, Woodland Green, English Mustard. Disclaimer: I need to practice using mine more! I admittedly have not used these particular colours and I should have shaken them and tested them on a piece of paper prior to applying them…..So they are a bit gloppy. I will likely remove them with a craft knife and try again! 😬 I wanted to show you the original as it is important to know we all make mistakes!

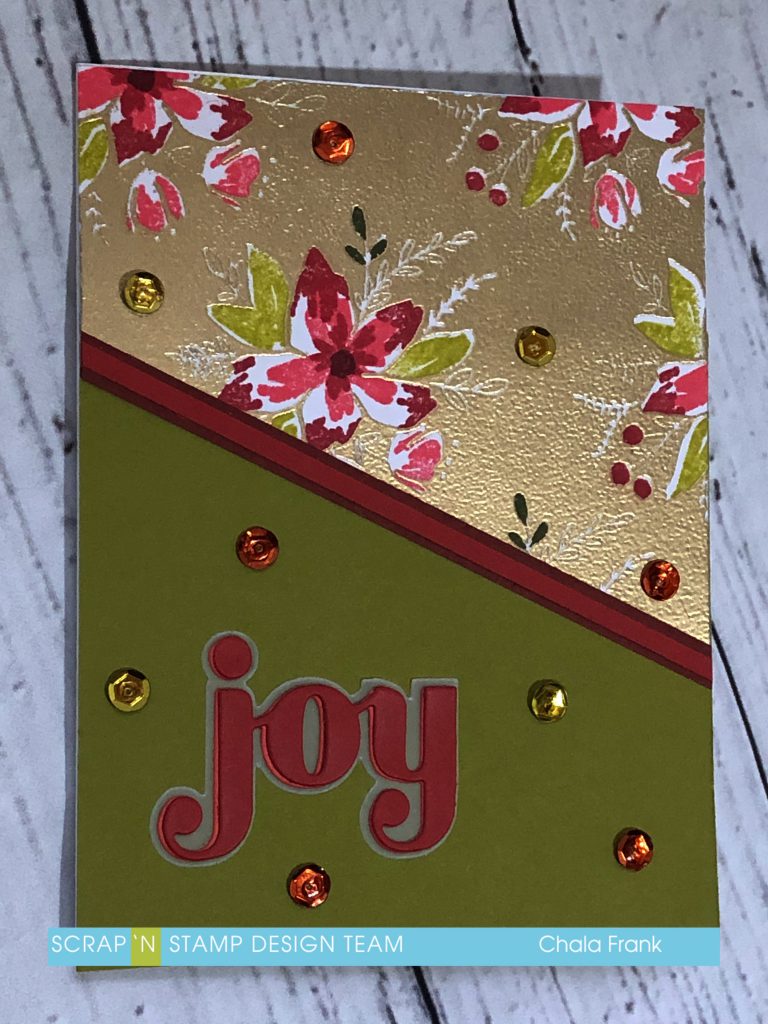
I really like that this stamp can have a Spring/Summer look as well as a Christmas look. So, the next card I created I followed the same steps, however, this time I created the background by stamping in Versamark Ink and Gold embossing powder. I then stamped the flowers and leaves in the following Distress Inks: Abandoned Coral, Fired Brick, Crushed Olive, Forest Moss and Aged Mahogany. I again cut the panel on an angle so that I could create an additional card. I adhered a piece of cardstock similar to the crushed olive colour to my card base and then adhered the stamped panel. I used two thin strips of cardstock over top of where the two pieces joined. I then used the Birch Press Designs – Joy – Sugar Script Die for the sentiment. This die is a beautiful script font and it gives you the shadow layer to go behind it.  I die cut two of the script dies from two different colours and layered them together to give more interest to the card. Finally, I added some sequins to give the card a bit of sparkle.

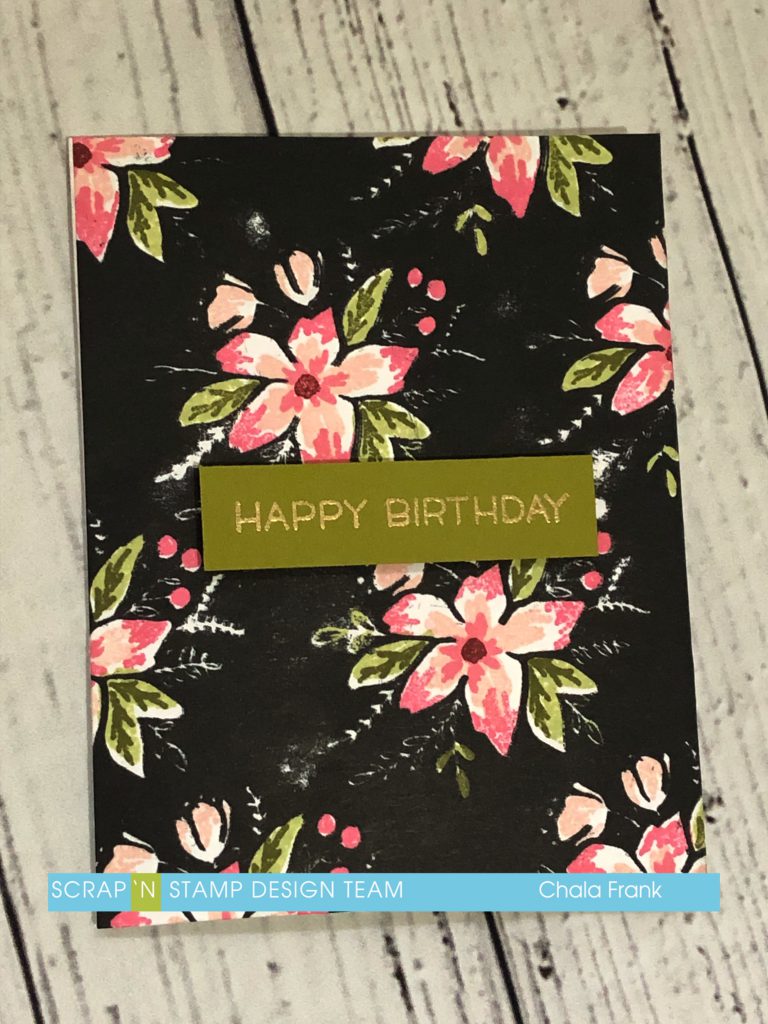
The third and final card is more of a summer look. I kept the panel whole this time. Stamping the background in Versafine Black Ink and the following Distress Inks for the flowers and leaves: Tattered Rose, Worn Lipstick, Shabby Shutters, Forest Moss andAged Mahogany. I used the same green cardstock as before to create a sentiment banner and stamped “Happy Birthday” from the Lawn Fawn – Hay There stamp set with Versamark ink and gold embossing pohttps://www.scrapnstamp.ca/store/pc/Lawn-Fawn-Embossing-Powder-Gold-825p22850.htm?idaffiliate=24wder.

Thank you for stopping by and I hope you enjoyed today’s cards.

You can watch the quick video of how the first two cards came together here:

https://youtu.be/nvCZ9UiOV58

Share a photo of your Floral Frenzy card on the Scrap’N Stamp Challenge Facebook wall and get your name entered to win a $50 gift certificate to Scrap’n Stamp! You’ve got until May 31st to post. Make sure to hashtag it for another chance to win #SNSfloralfrenzy.

Stay Crafty Friends!

~Chala

Blooms Fill In – Concord & 9th Read More »

Free Shipping Anywhere In Canada