Scratch-N-Stamp
Search

Checkout

Keep up with Sales, New Products and other events at Scrap `n Stamp. Sign up for our newsletter now!

What's New

Hot Deals


Nuvo

Mixed Media Christmas Tags

Hello and Happy Saturday,

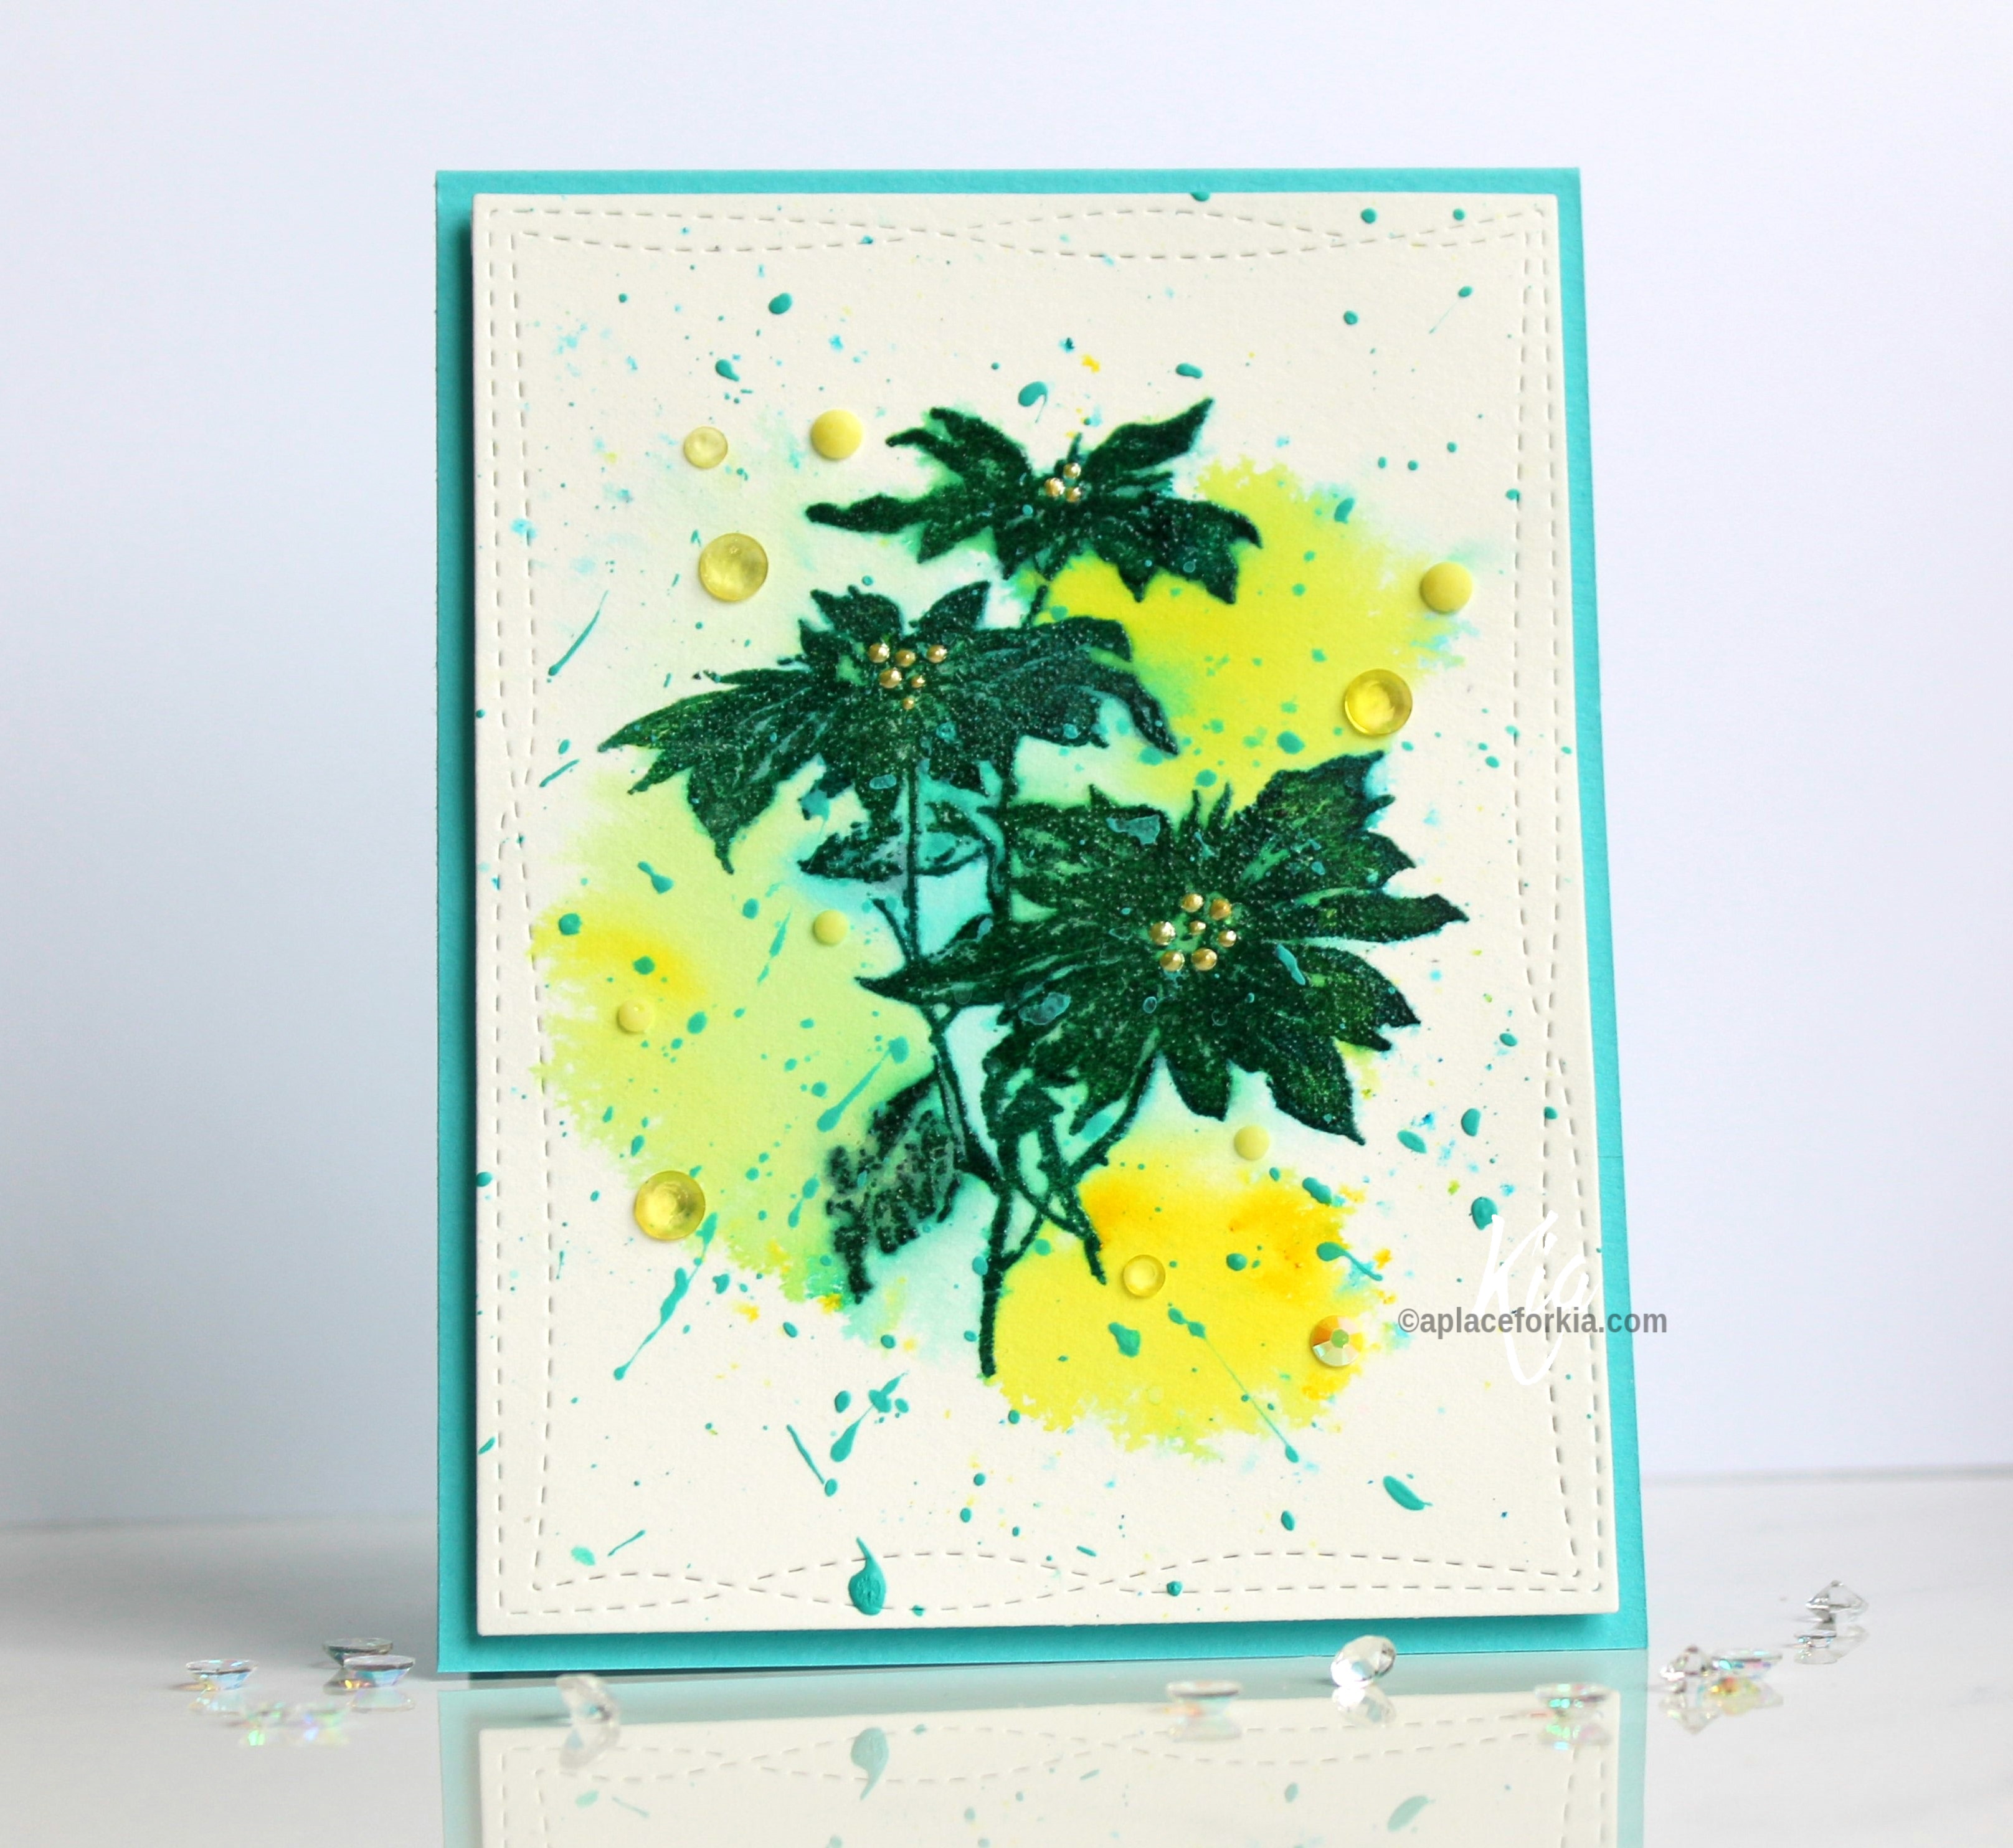
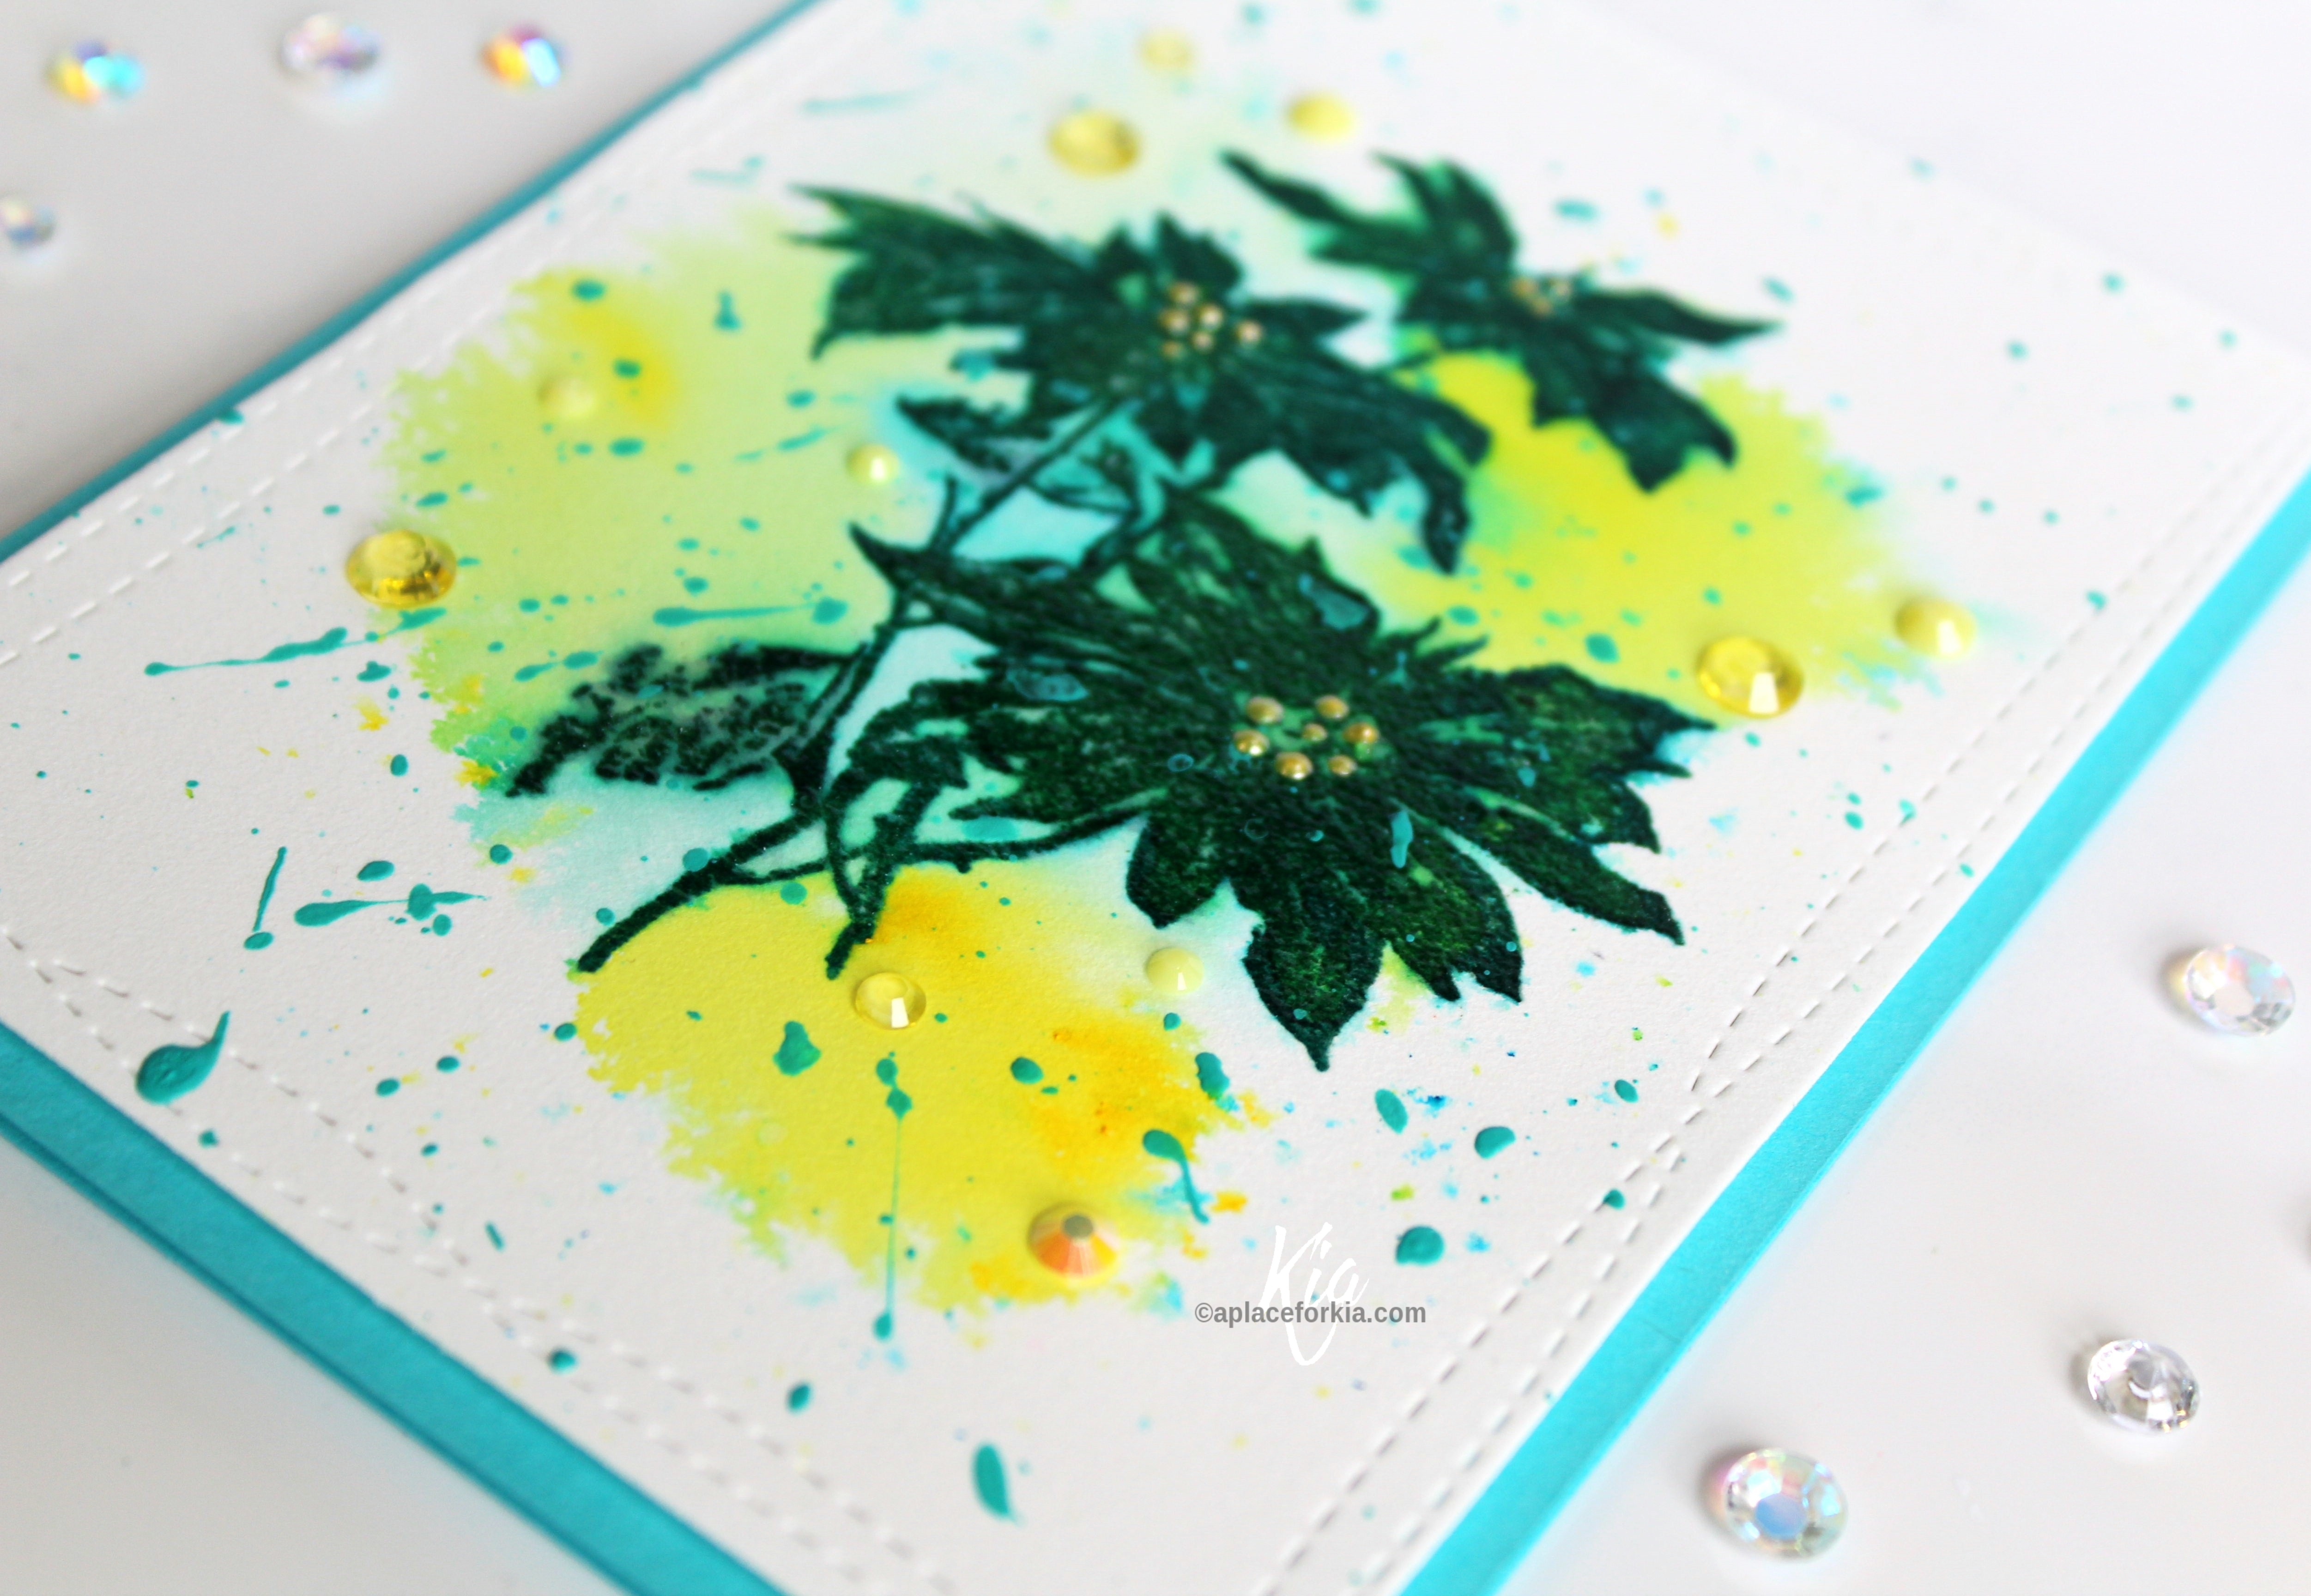
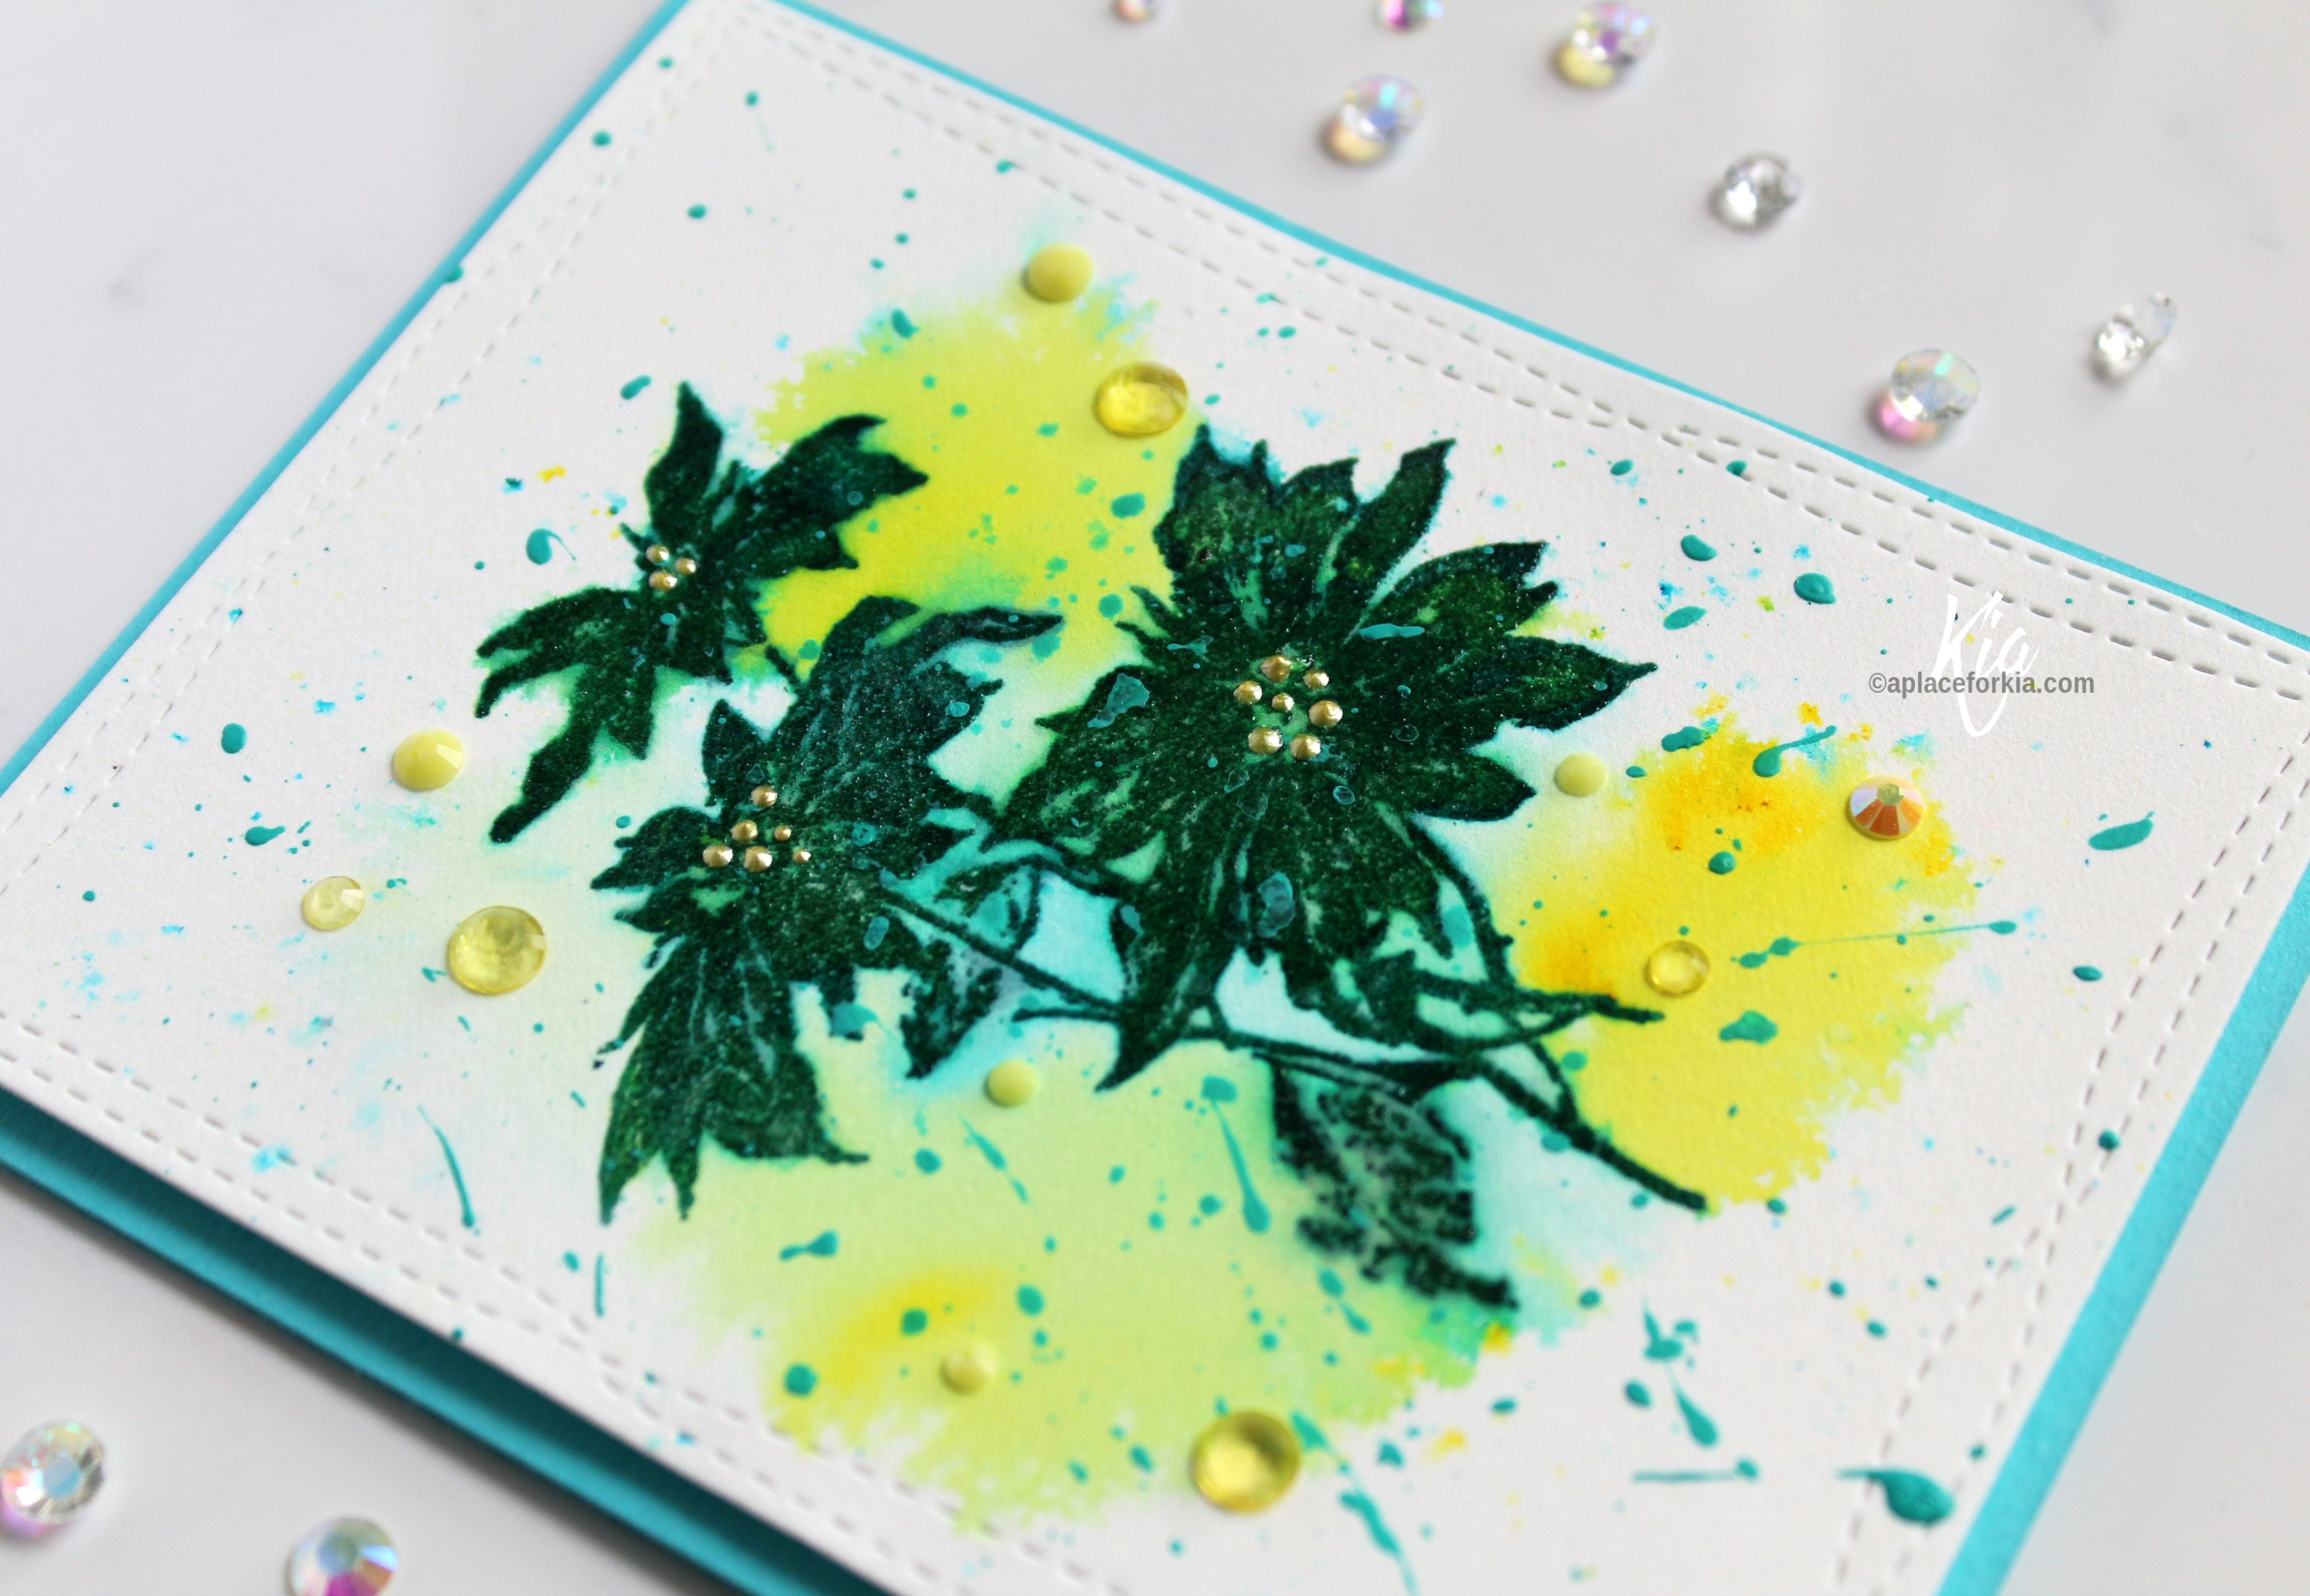
I am back on the blog today with two mixed media Christmas Tags.

I had a lot of fun just getting inky and seeing where it all took me.


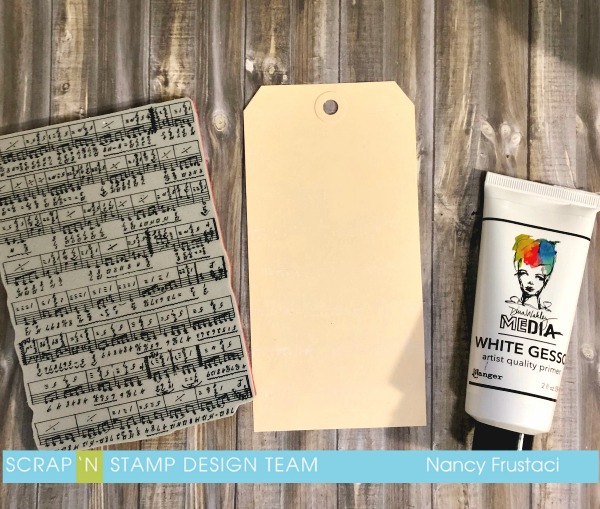
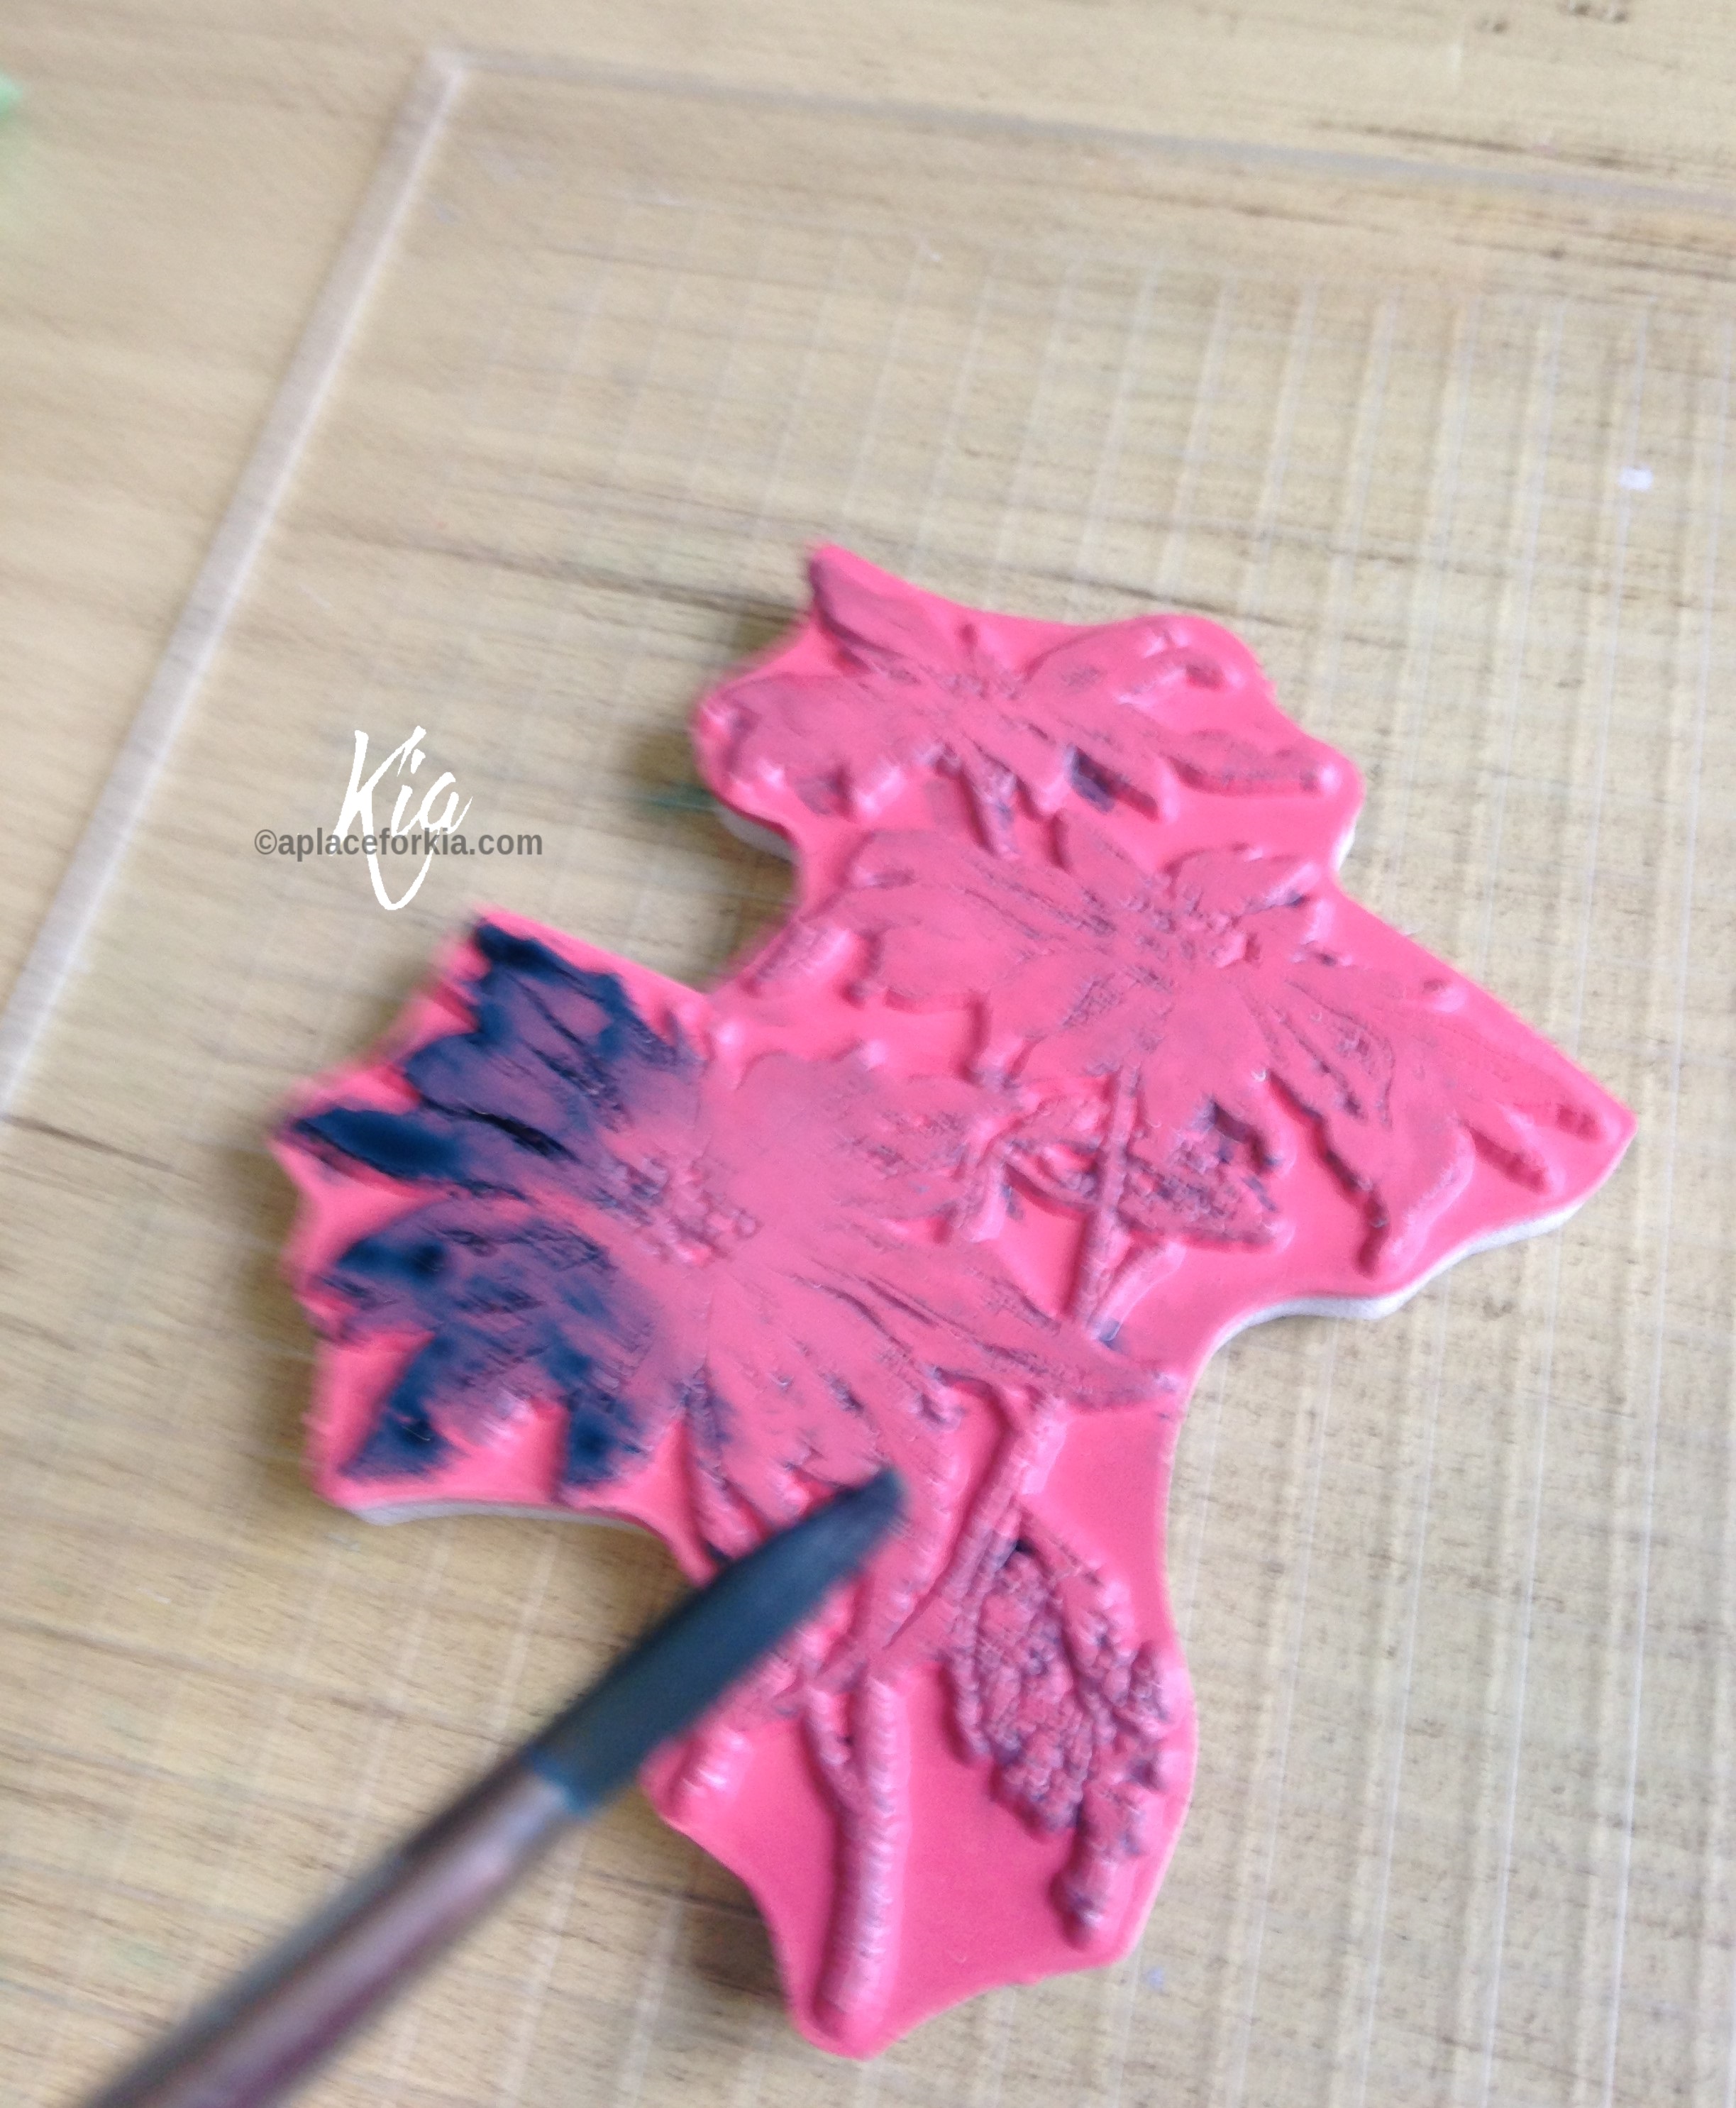
I started with Tim Holtz Manila tags, white gesso and the Stampers Anoymous  Music and Advert stamps set

I had never used gesso up until recently and wow its a game changer.  I inked up the  the music stamps  with the gesso and pressed it on to the tags, set it  aside to dry for a few minutes and went back in and inked with distress oxides.


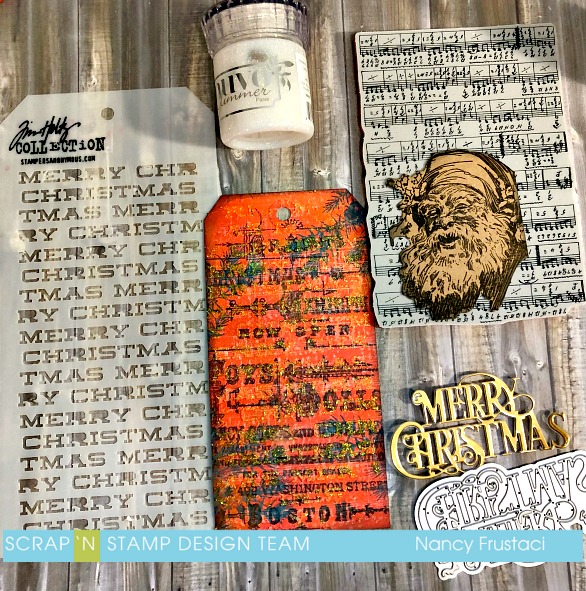
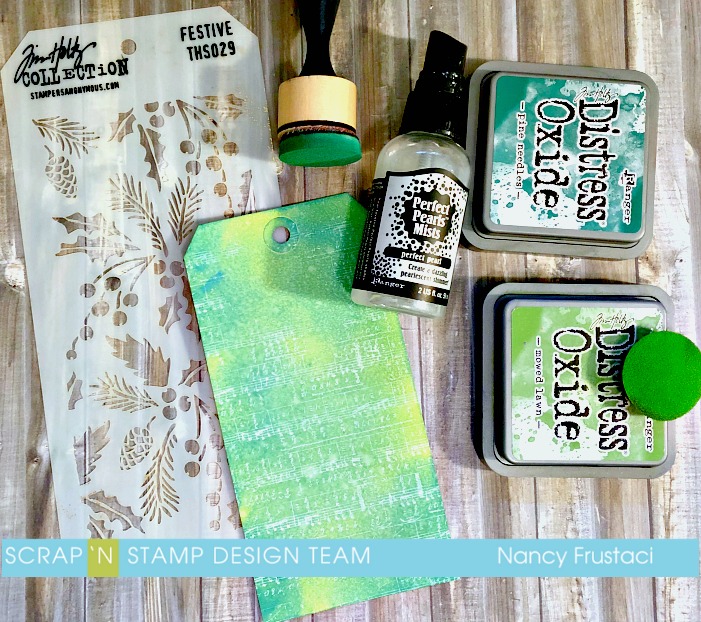
I used candied apple, barn door and festive berries for the background of one tag, and mowed lawn, pine needles and lucky clover for the second tag.  I absolutely love how they turned out.

I went back in with walnut stain and stamped the another background stamp, and then added glitter paste to the tags (Further details on my blog  Nancy Grace Creations).

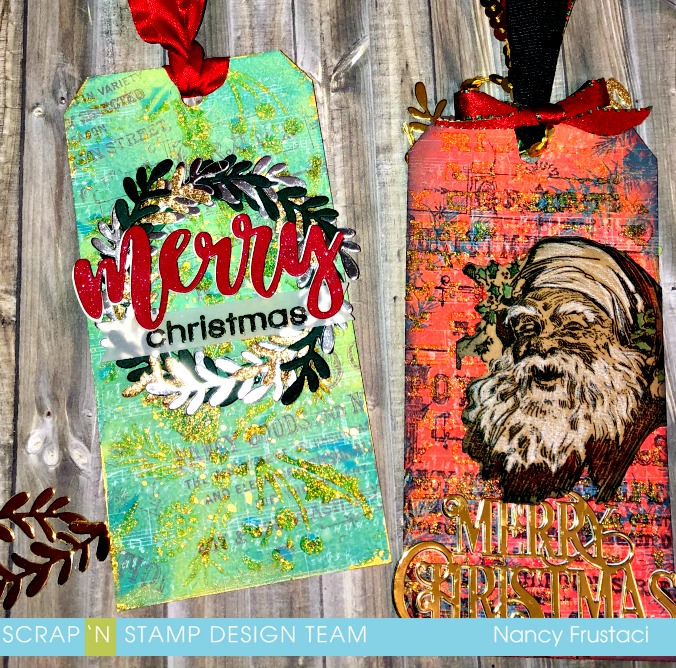
I stamped out the Santa from the Classic Christmas set,  on to some Kraft cardstock and cut him out.

I added some detail with my Prisma colour pencils.  For the wreath I used the lawn fawn large wreath die, and cut out numerous  branches from gold, silver and green cardstock.

You can find the full details on my blog, Nancy Grace Creations with a lot more pictures as well.

Scrap’n Stamp Canada also has 25% off Ranger products, so if you feel inspired by my tags you can stock up on some supplies  🙂


]

Mixed Media Christmas Tags Read More »

Poinsetta Christmas

Hello fellow stampers, Kia here with you today to share this Poinsettia card.

To start this card and using watercolour paper I first die cut my panel using My Favorite Things Wonky Rectangle STAX.

I thought I would do something a bit different today, by painting my stamp with Color Burst Powders. Some time ago I was trying to ink up a background stamp with Color Burst powders, and the colour was something less than desirable. I needed something to give the paint something to grip to, and of course what came to mind is Versamark embossing ink. It worked perfectly, so I have done this every time I want to use a different kind of colour medium with my stamps. Excuse my shaky picture, I was taking it with my phone and only one hand available. lol

You can see how the colour attaches easily to the stamp. This is the second color I was using for this card, being Phthalo Green. I started by mixing up Turquoise Color Burst with a few spritzes of water, inking the stamp with the Versamark and painting on the colour. I then cleaned the stamp and did a second colour using Phthalo Green, using the same process. Once everything was dry, I inked up the stamp again with Ranger Paradise Teal and Library Green inks, then directly on top of the inks I used the Versamark embossing ink, and heat embossed with Nuvo embossing powder, which gave the flower back some definition. And yes, I get a bit of contamination in my Versamark, but I keep and use an older ink pad for when I do this, keeping a clean pad for my daily use.

Once my panel was dry I then placed it back in the container with new saran, and sprinkled on Lemon Yellow Color Burst, again using water sparingly. As I spritzed, the colours from the previous stamp also migrated out to join the new colours. Love it! I tend to let my paints dry naturally as I think heating deadens the vibrancy of the colours, and it warps the watercolour paper. So, once the panel was dry, I attached fun foam to the back using Be Creative Tape and attached the panel, I also prepared the other side of the fun foam so I could attach the panel to my card base once I was done with the next step, which was to splatter with acrylic paint in turquoise. I used a liner brush to do this splatter, I like the differences in the splatters I get with it. I then attached the piece to my card base. Even though it was not dry, I could still finish the card. I then added Liquid Pearls (note to self, get the Dandelion Nuvo Crystal Drops) to the flower centres and a scattering of sequins to finish.

I hope you have enjoyed this card. I have other pictures of my process over on my blog in this post.

Thank you for joining us here at Scrap’n Stamp, I look forward to seeing you next time.


Poinsetta Christmas Read More »

Tuesday with Tara {take 178}

Happy Tuesday!

I’ve been holding out for a bit to play with this sweet “Winter Aviary” stamp set by Flora & Fauna and today I’m finally sharing my first creation with you using it.  I was admiring the variety of greens and noticed the curve of one of the branches would work perfectly to create a wreath, so I traced a circle onto my card front and inked up the branch with Iced Spruce Distress Oxide and I was delighted when it was a perfect fit!  Since the first step went so well, I decided to continue on… I added some berries and holly leaves, stamped in shades of red (Candied Apple) & green (Lucky Clover).

I decided I wanted a bit more dimension, so I stamped the holly leaves onto a light green cardstock (the same as my card base would be) in the same Lucky Clover Ink.  After I cut them out, I added a bit of shading using my ink applicator tool with blending foams.   I added a bit of red Stickles to the berries and some lime Nuvo Crystal Drops on a few of the leaves, also adding some to the NOEL I stamped in the center of my wreath.  The subtle color really made my Oxide Ink pop!  I finished off my wreath adding a red bow and a small stamped bird from the set.

It’s a simple card, but it was fun to see what I could do with the variety of designs in this stamp set!  It definitely opened my eyes to look at the other Flora & Fauna sets and see what I could do with them… but first I’ve got a bit more creating to do with this one 🙂

Inky hugs,

Tara

Tuesday with Tara {take 178} Read More »

Free Shipping Anywhere In Canada