Scratch-N-Stamp
Search

Checkout

Keep up with Sales, New Products and other events at Scrap `n Stamp. Sign up for our newsletter now!

What's New

Hot Deals


Watercolour

Welcome to Autumn!

Today’s word prompt for the Scrap ‘N Stamp daily challenge is ‘trees’. It’s Deb here, from the Design Team! I chose that word, as I thought it would be the perfect way to say ‘welcome’ to autumn! As far as colours go, it has to be my favourite time of year. Plus, it’s a good excuse to cozy up with sweaters or blankets, especially with a good book.

COLOURS OF AUTUMN

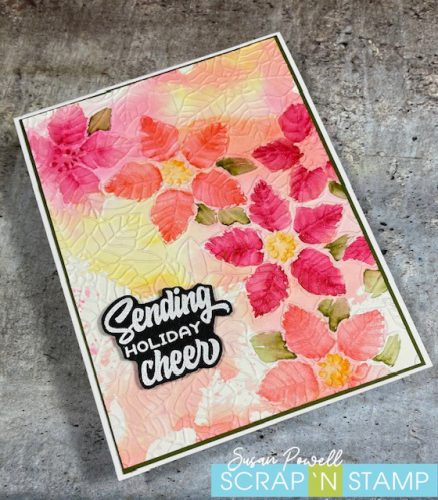
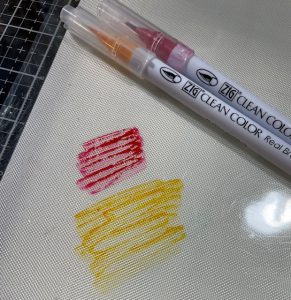
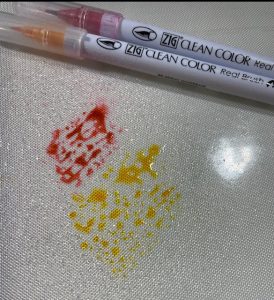
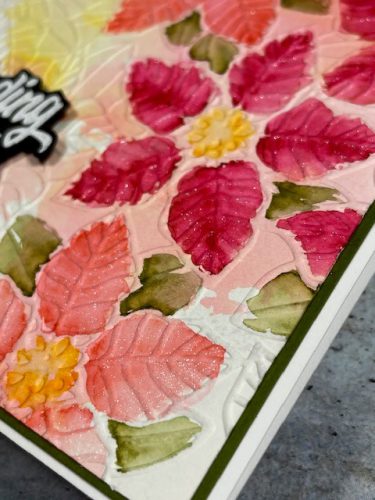
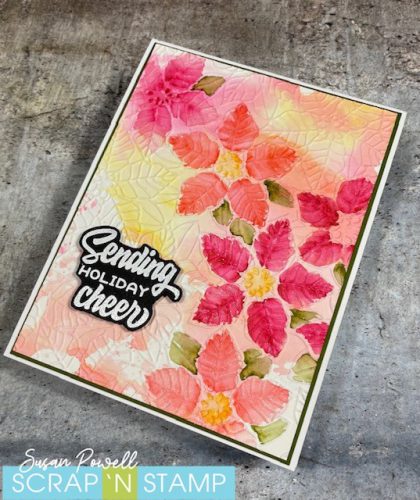
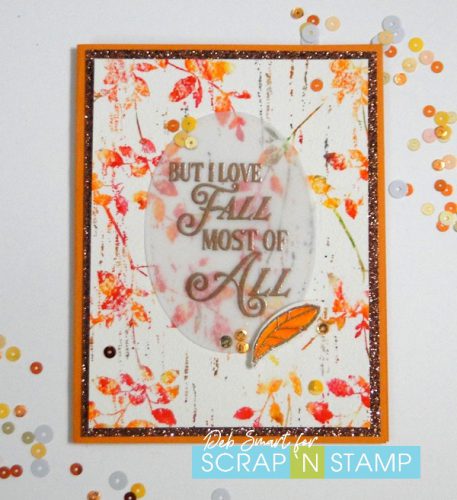
I’ve been waiting to use this new Penny Black stamp, called Enlightened. It’s more about the leaves that the actual tree, but I figured that was close enough! Plus, it gave me a chance to  pull out my Zig Clean Colour Real Brush Markers, for some watercolour.

Welcome to Autumn!

Don’t you just want to grab your favourite hot beverage, and snuggle on the couch? But wait – finish reading my post, first!

CARD DETAILS

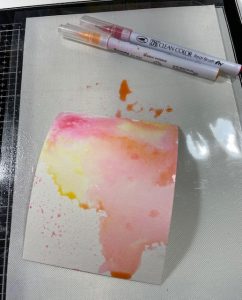
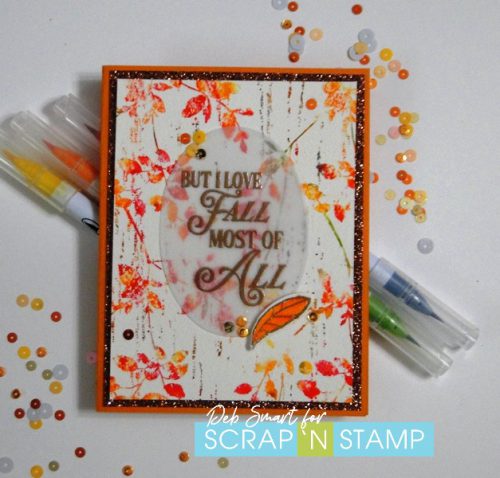
Start with a piece of watercolour paper, set up in your stamp platform. Next, randomly add ink from your Carmine Red, Yellow, and Orange Zig markers, onto the leaves. Lightly spritz with water, and then press firmly onto the paper. Repeat this as many times as you like, until you’re happy with the colours. Next, use the Blue Gray marker for the lines, and the Light Green marker for the stems, and repeat the process.  If you don’t have markers, you could do this process with your Distress Ink pads, as well.

For the sentiment, I chose the Memory Box Harvest Love set. Stamp the sentiment onto vellum paper in Versamark ink. Next, cover the stamping with copper embossing powder, and heat set.  Repeat this with the smallest leaf stamp from this set. Colour the leaf using the same colours you used for the background.  This Harvest Love bundle comes with coordinating dies – use that with your Big Shot to die cut the leaf.  Die cut the sentiment with a stitched oval die, and then glue it onto the watercolour panel.

Layer the front panel onto a piece of copper glimmer paper using foam tape, and then attach these to an orange card base.  Attach the leaf using a foam square, and then glue on some sequins, to finish off your card.

Welcome to Autumn!

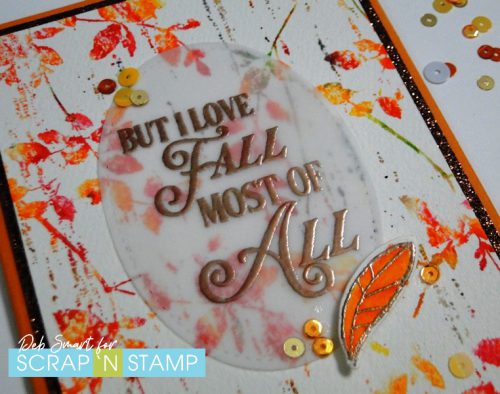
The copper embossing powder is so rich and warm!

COME JOIN US!

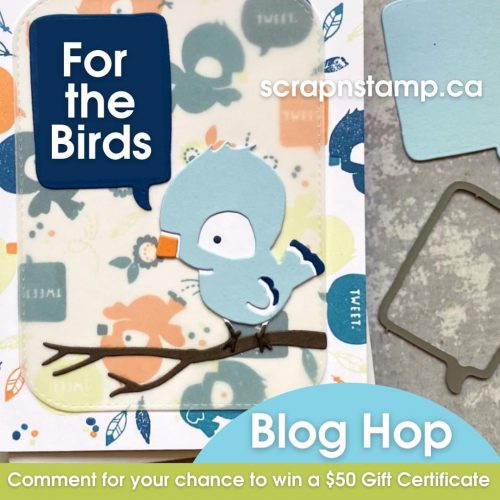
I hope that you’ll welcome fall too, and join in my word prompt challenge of trees! To play along is easy; join the Scrap ‘N Stamp Facebook group HERE. You’ll find a different word prompt  for each day of the month. Play along as many times as you want! Share a photo of your project in the group, with the hashtag #snschallenge.  At the end of the month, one participant’s name is randomly drawn, and awarded a $50 Gift Certificate to shop at Scrap ‘N Stamp! In the meantime, when you shop at Scrap ‘N Stamp be sure to use my Design Team code 10DEB to receive 10% OFF your total purchase! (regular priced items only).

Welcome to Autumn!

Affiliate links for supplies are provided. If you choose to use my links, you help support me in maintaining my blog, at no extra cost to you. Thanks in advance!


Welcome to Autumn! Read More »

For the Birds Blog Hop

Hello & welcome to our September Blog Hop- For the Birds!  I’m a sucker for bird stamps and dies, but when I started to plan my design for this hop I realized it’s been a while since I got a new one.  I’m sure after seeing the cards the rest of the team make I’ll have a big wish list 🙂

As usual, we ask that you leave us some comments along the way as you do the hop- we’ll be selecting one special commenter to win a $50 gift certificate to the SNS online store!  You’ll also find some great savings there this weekend, so be sure to check it out!

For my card, I decided to feature a favorite of mine, the feathered friends dies by Tim Holtz.  It had been a while since I’ve made anything with these, so I started by inking up a bunch of backgrounds so I could cut multiple times and mix & match them.  I wanted to pair with one of the backgrounds I made the other day when I was playing around with my Distress Inks & Floral Outline Stamps, so I chose one of the more neutral colored birds to complement the flowers.

I overwatered the background with water to try to bleed the colors out… which didn’t work quite like I wanted, but still made a nice, soft design.  I spritzed over it with bundled sage Distress Spray Stain to tie it together with the greens in the bird as well.

As you can see, the inky green part has a text pattern and some gold shimmer to it!  I don’t have any of the new Distress Mica Sprays, but I have plenty of shimmery things in my stash to help me improvise 🙂

My little sentiment is from an older Tim Holtz set, Crazy Talk. It’s got a bunch of great sentiments to mix & match AND it’s still available to purchase!

Now it’s time to carry on hopping!  You are here with me, Tara and your next stop is Susan.  Enjoy!  Don’t forget to leave some comments for a chance to win!

Thanks for visiting, and have fun!

Inky hugs,

Tara


For the Birds Blog Hop Read More »

Hot and Cold Embossing

Hi Everyone!

It’s Susan here with day 28 of the Random Acts of Cardness challenges and todays challenge is to use embossing on your projects. I chose to use an embossing folder (cold) and to heat emboss the sentiment (hot).

I started with the Taylored Expressions Peaceful Poinsettia Embossing Folder and a piece of watercolor card stock cut to 4 x 5 1/4″. I grabbed No.024 Wine Red and N0.052 Bright Yellow and scribbled them onto an acetate sheet.

Next I spritzed it with some water.

Then pressed the watercolor card stock into the puddles of ink until it was all covered.

After I covered the whole panel I dried it with my heat gun. I used the peaceful Poinsettia Embossing Folder to emboss the inked panel then set about coloring it in. I used the same two colors I used for the panel and added No.021 Light Carmine and No.043 Olive Green to color in a few of the flowers and leaves. I did this by adding ink directly to the bottom part of the petal that I wanted to color then using a water brush I blended the color to the full petal. Some petals have two colors and some have the same color twice. Letting it dry after the first layer then adding more of the same shade in a smaller area is a great way to stretch your colors into more shades of the same color. I hope that makes sense.

Once I finished coloring the panel I layered it onto a piece of the dark olive card stock from the Hero Arts Sampler Pack than adhered that to a white card base. I used a clear sparkle pen to add some sparkle to the petals of the flowers.

I used a sentiment from Taylored Expressions Beautiful Baubles Add-ons Stamp Set. I embossed it with white embossing powder onto black card stock then fussy cut it out. I added some craft foam to the back and adhered that to the card.


Happy Stampin’
and thanks so much for visiting!
Stay safe everyone!!
Susan


SUPPLIES
If you’re interested in purchasing any of the supplies I’ve used I’ve listed them below. I use compensated affiliate links which means if you make a purchase after clicking one of my links below I will earn a small commission at no additional cost to you.

Thank you! I truly do appreciate your support!


Hot and Cold Embossing Read More »

Free Shipping Anywhere In Canada