Scratch-N-Stamp
Search

Checkout

Keep up with Sales, New Products and other events at Scrap `n Stamp. Sign up for our newsletter now!

What's New

Hot Deals


Design Team

Orange You Sweet

Hey Guys!  Chala here for today’s blog post.  It has been pretty cold where I am and I thought I would brighten things up with some sights and smells of summer.

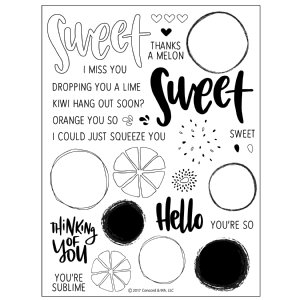
I will be using the Orange You Sweet set from Concord & 9th.

(As of the time of this post it is currently on sale for 30% off)

ccd-10214_1380_general

I am going to be giving this card a twist!  It will be a scratch and sniff card.  This is actually a pretty easy technique with some great results!

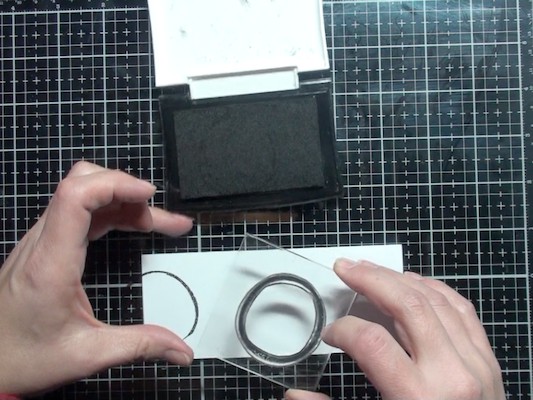
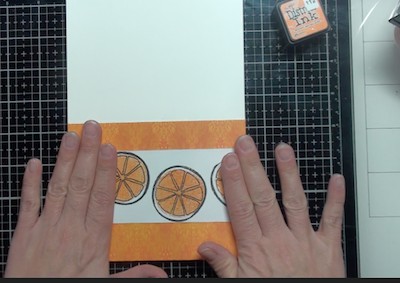
The first thing I will do is prepare a piece of white card stock which measures 2 1/4″ x 5 1/2″ and I stamp out the circle or outside of the orange image across the panel.  My go-to ink for stamping is  Versafine ink. I then stamp the segment portion of the oranges.

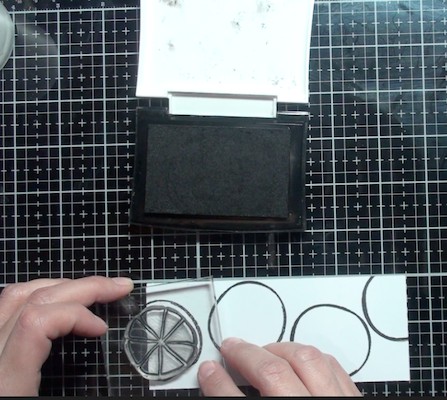
I then will stamp the solid circle overtop of the segments with Distress Oxide ink in Spiced Marmalade.

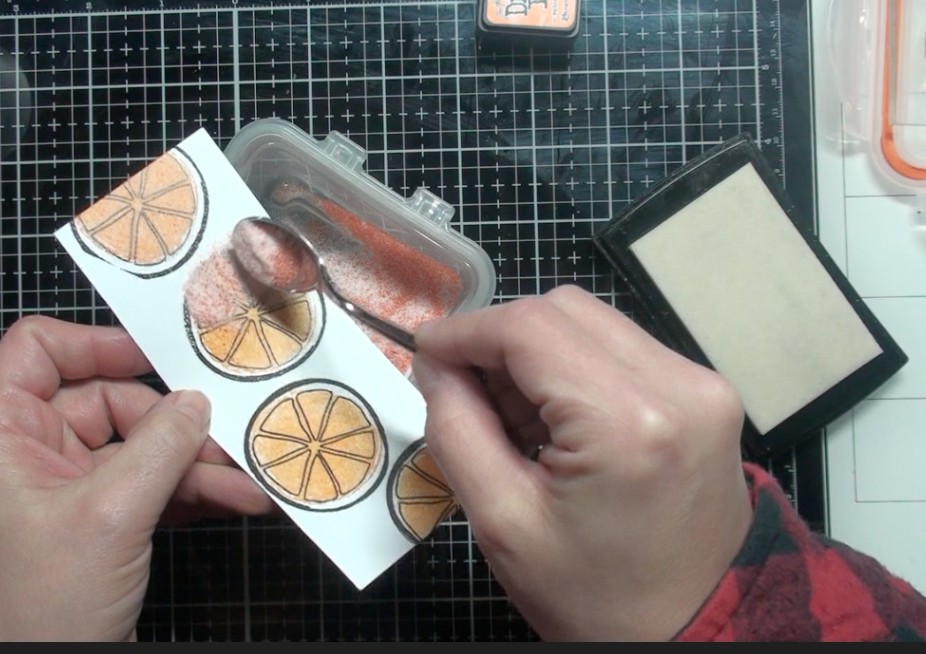
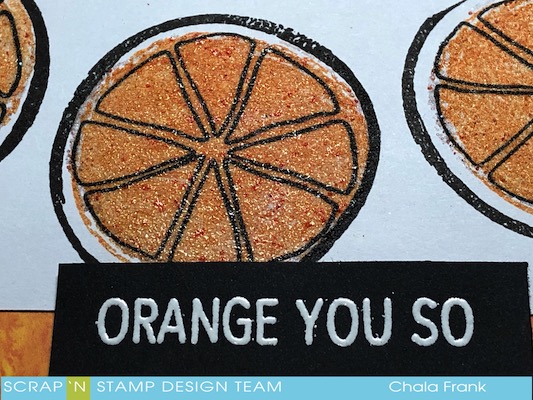
The next steps are where things get fun!  In a container I combine orange Kool-Aid with some clear embossing powder.  The ratio is approximately 1:1.  I will then use the solid circle again and stamp over top of the stamped spiced marmalade with Versamark clear embossing ink.  I then sprinkle the kool-aid/embossing powder mixture overtop of the reined image and then set it with my heat tool.  You want to make sure your heat tool is good and hot and be sure to keep moving it so as not to scorch the kool-aid.

Image result for orange kool aid

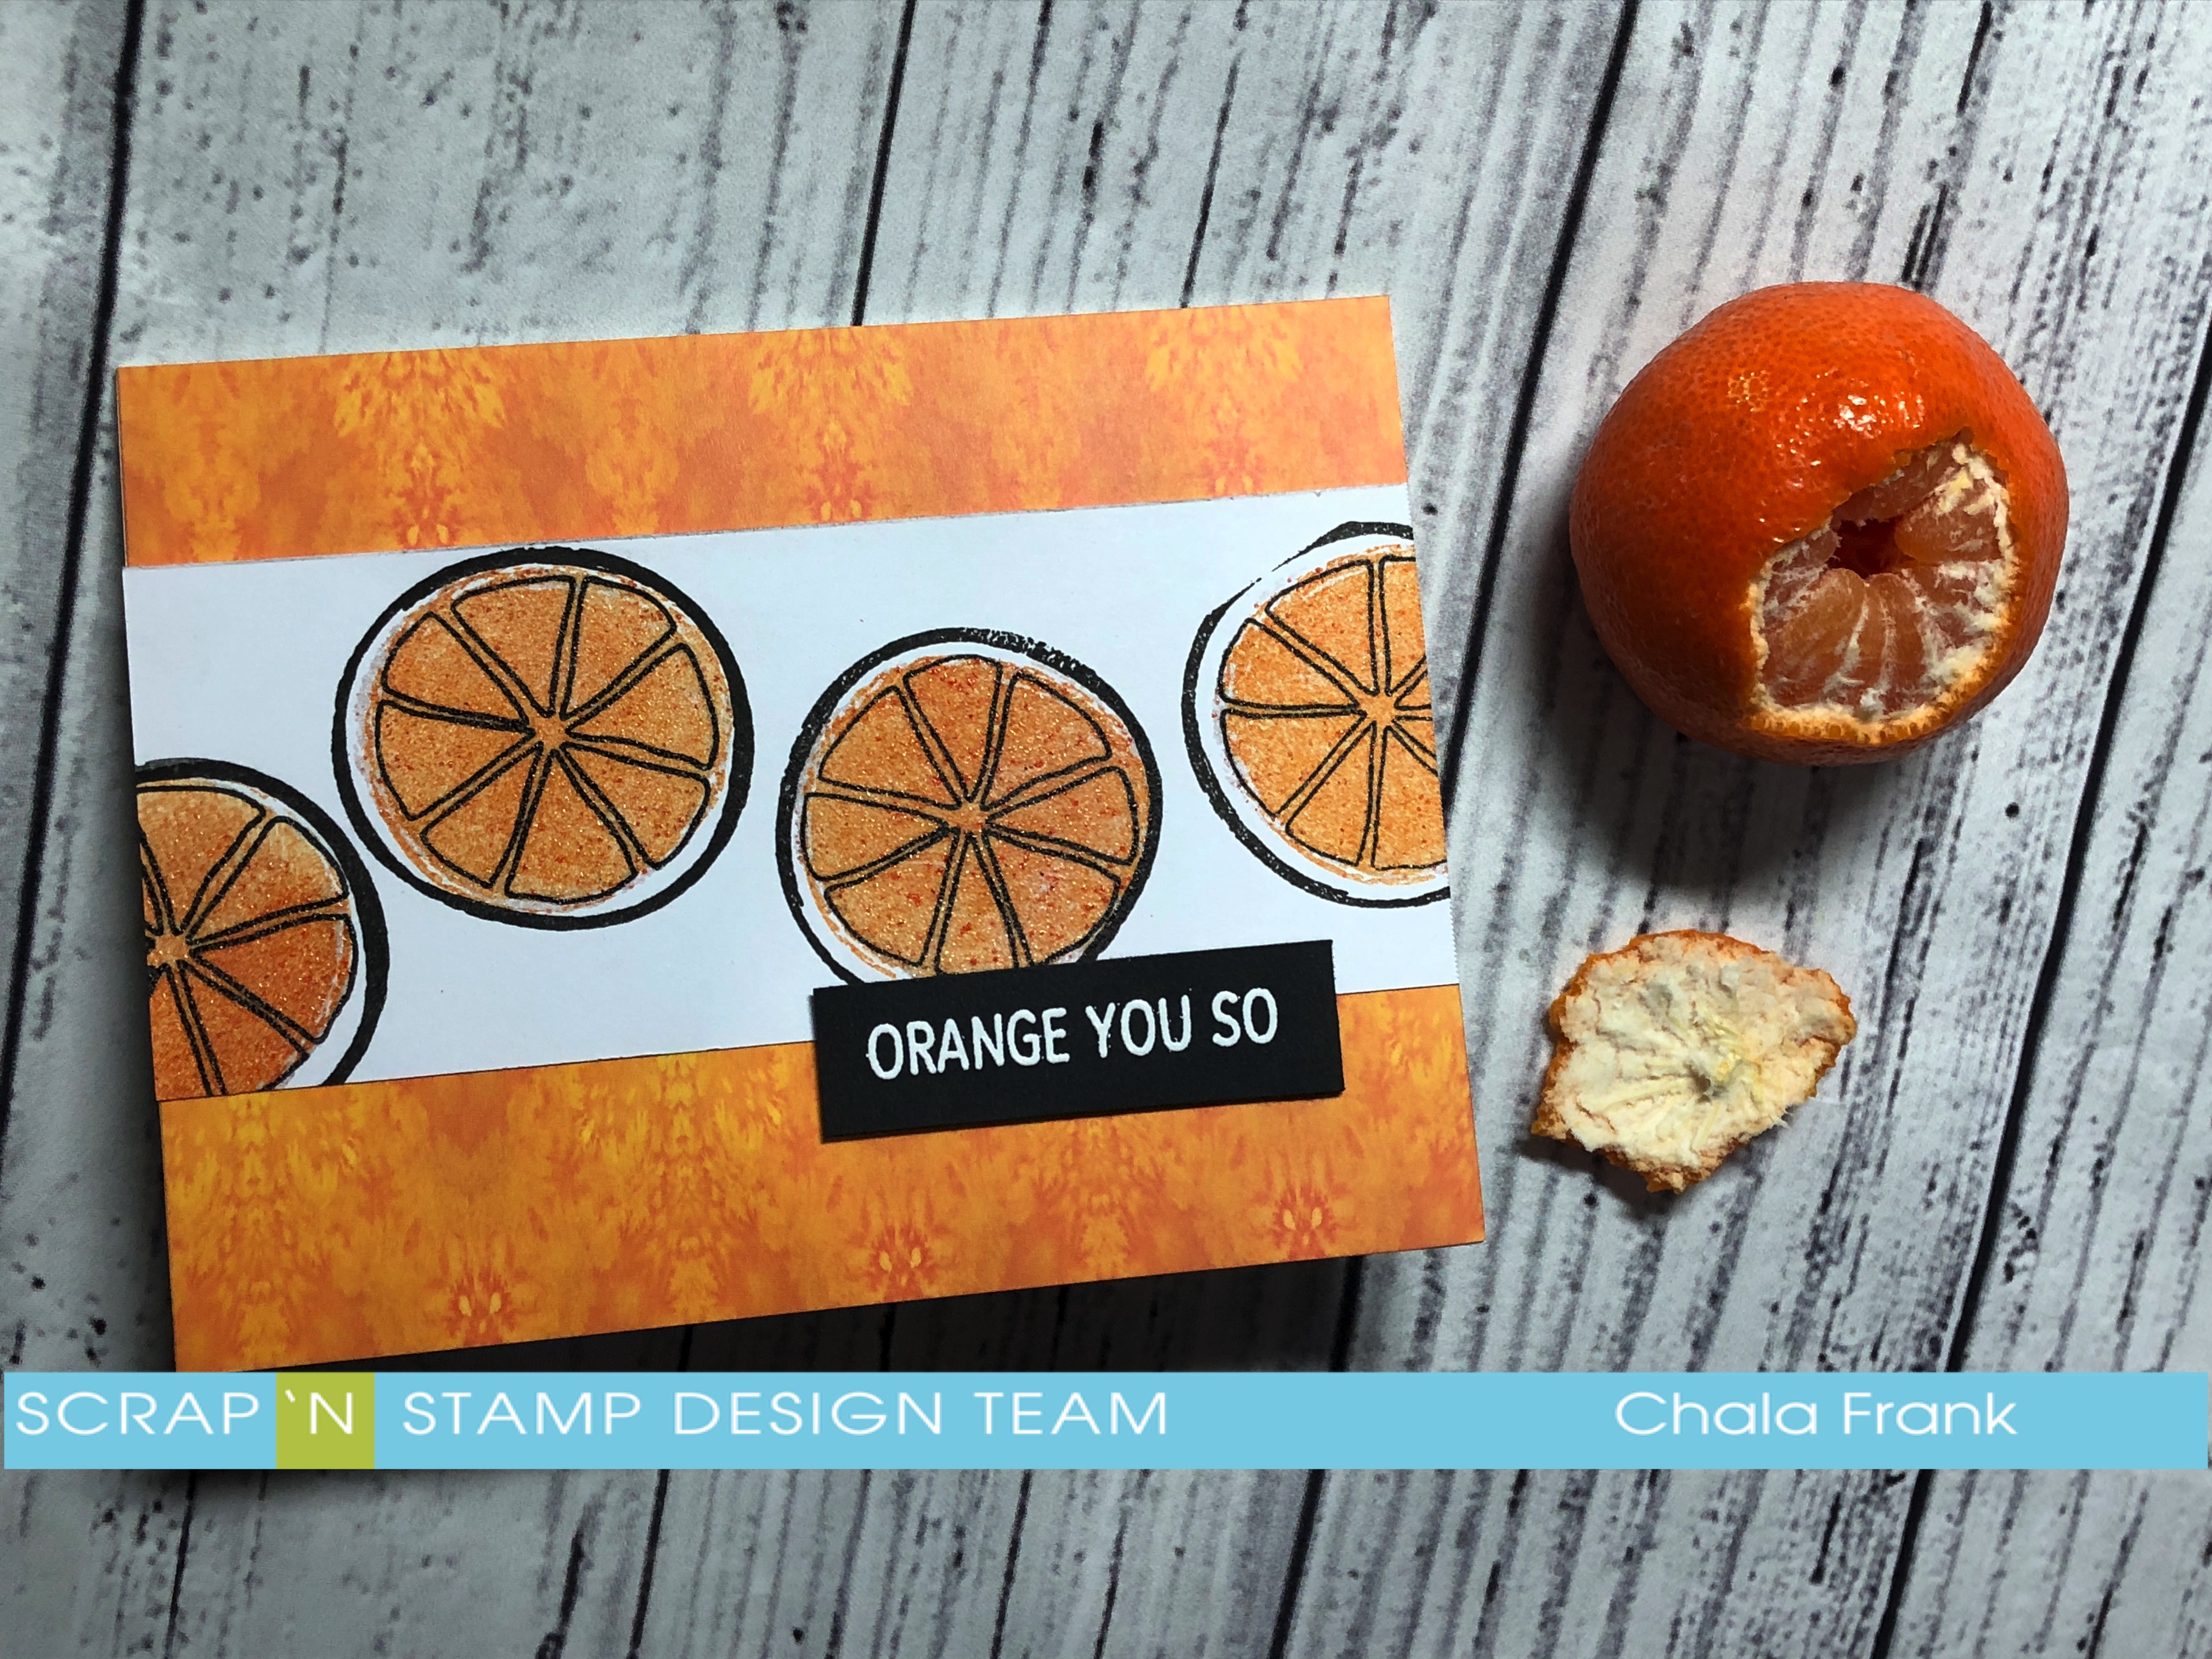
I set that aside to cool.  The next step is to prepare my card base.  It is a standard A2 (5 1/2″ x 4 1/4″) side folding card.  I cut down a panel from some patterned paper and adhere that to the card base and then adhere the orange stamped panel on top.

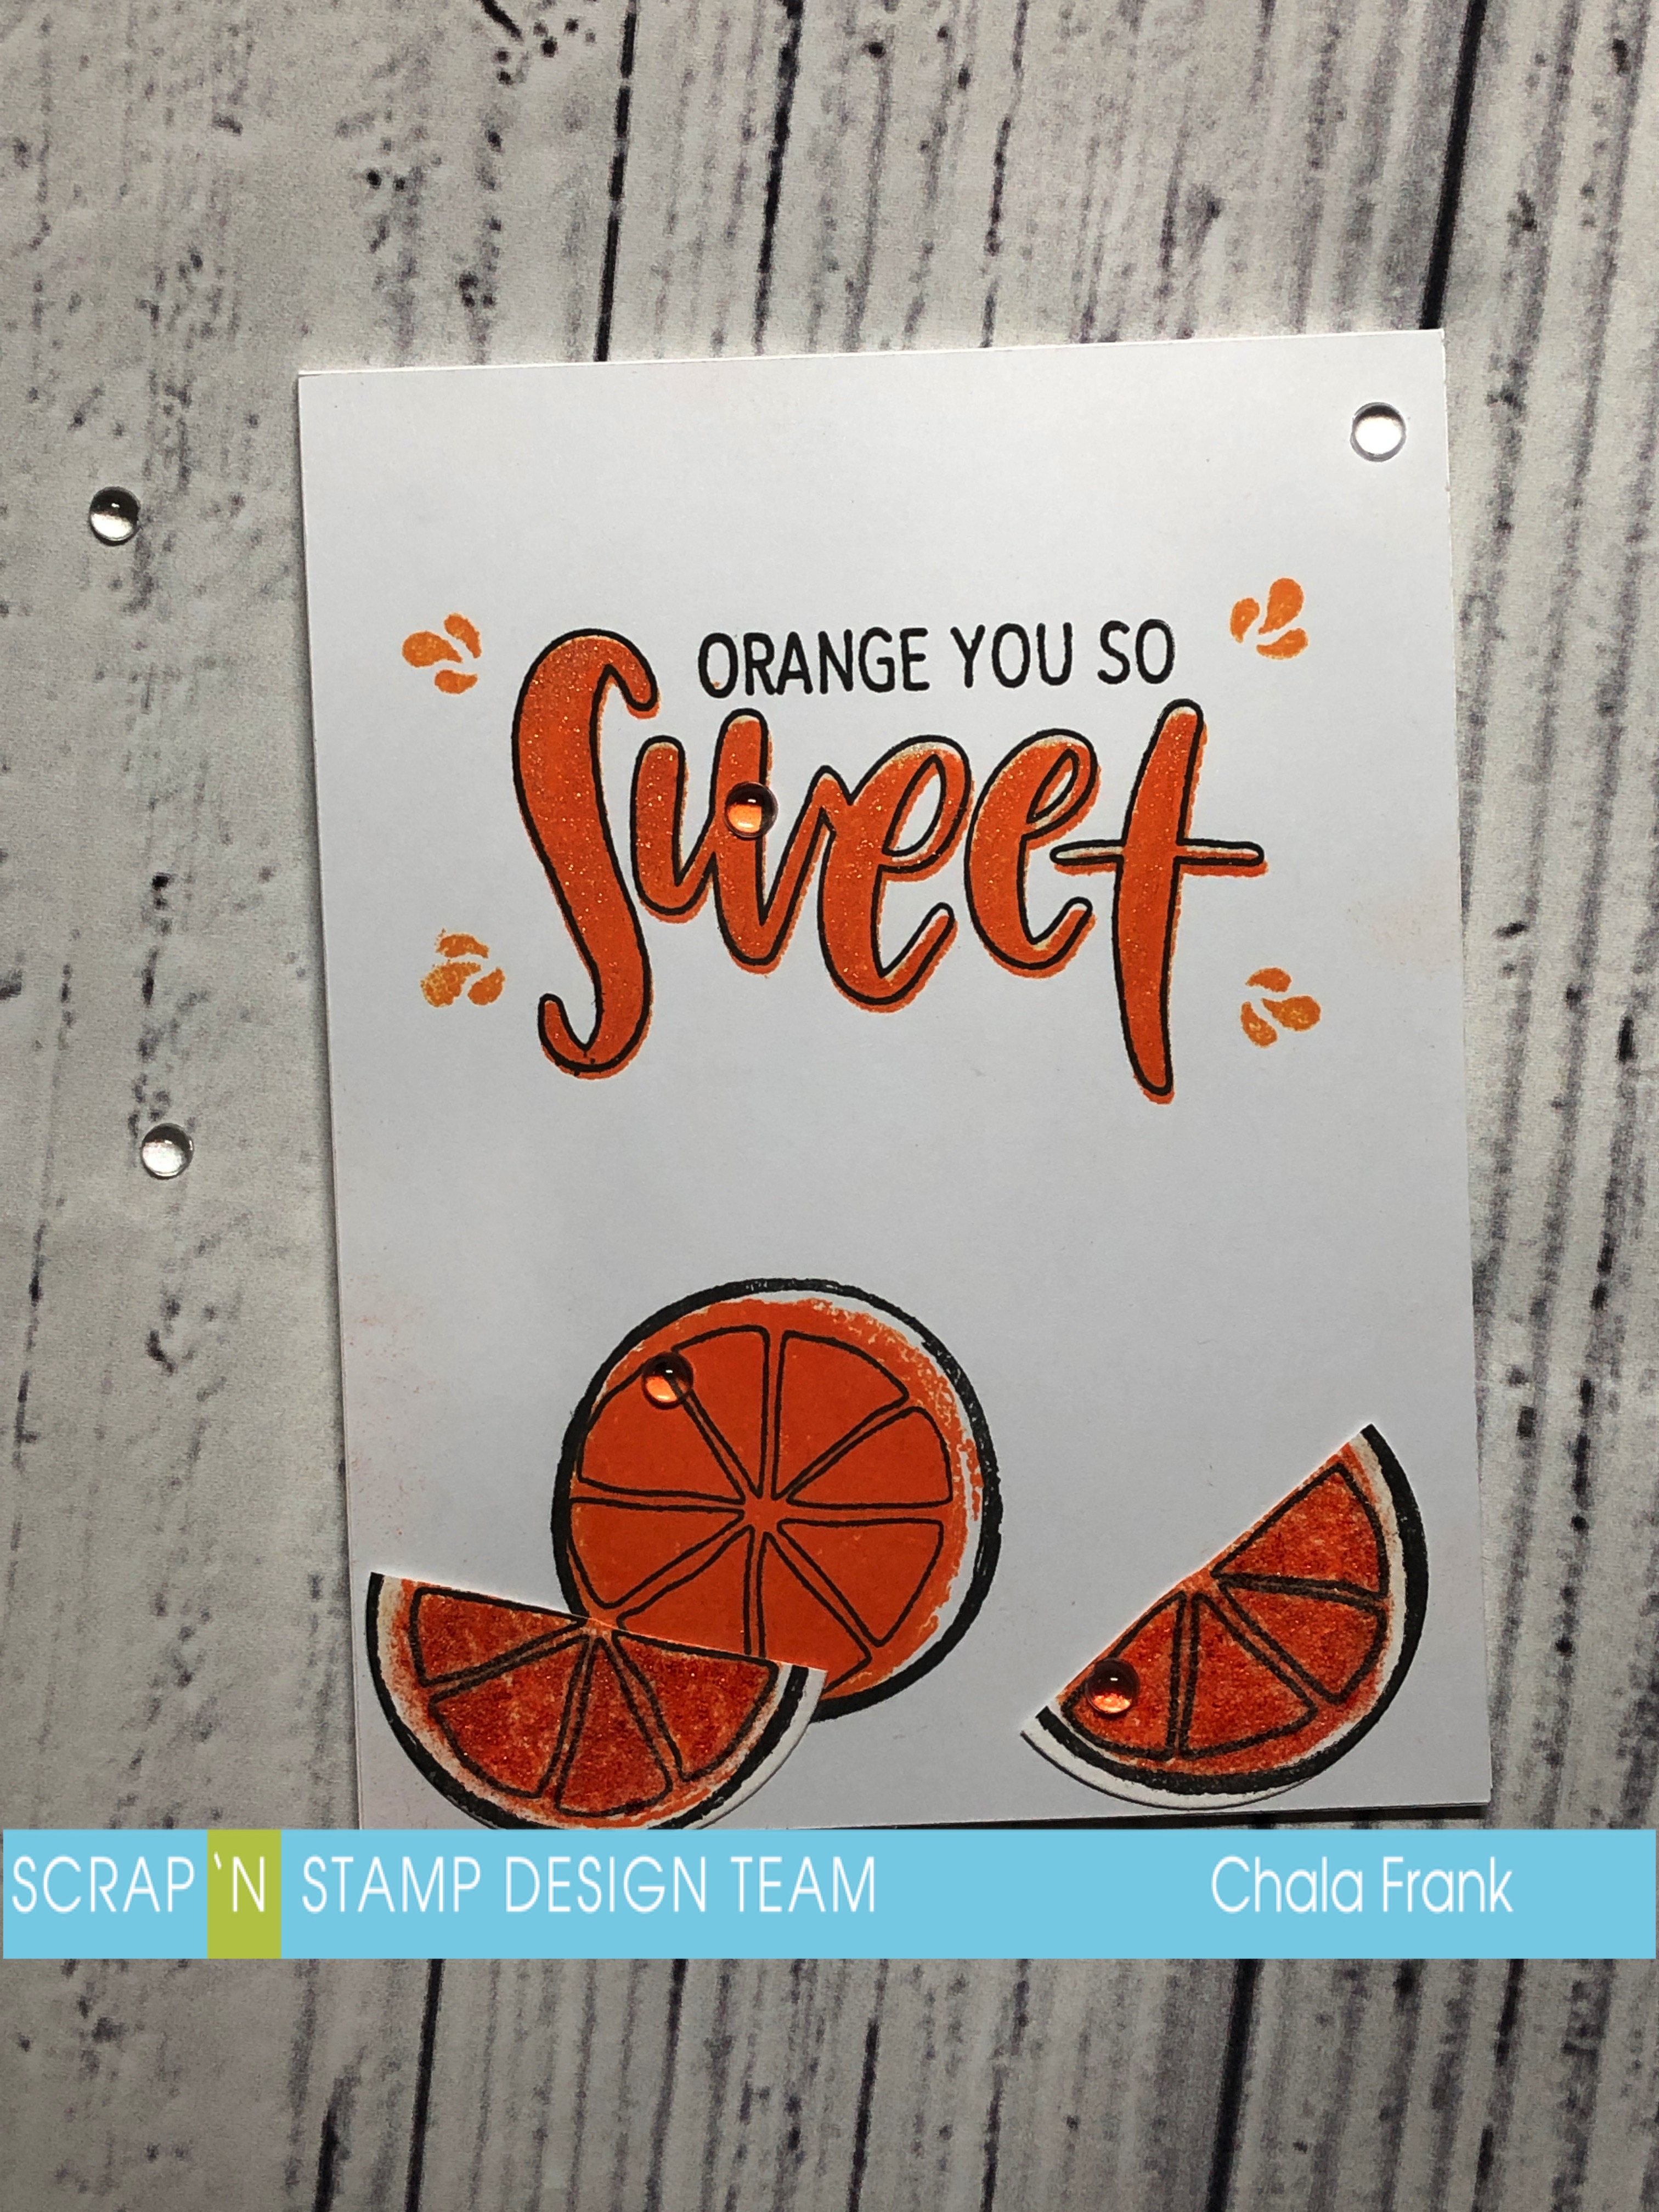
For the sentiment I use some black card stock and treat it with my antistatic powder tool.  I chose the “orange you so” sentiment and stamped it with  Versamark clear embossing ink, apply white embossing powder and heat set.  I will trim the sentiment strip down and apply 3m Foam tape to the back.  Before I adhere the sentiment strip to the front I want to finish off the inside of the card.  I use my stamp platform stamped the outline of the “Sweet” with Versafine ink and the solid “Sweet” with Spiced Marmalade.  To give the inside sentiment a bit more interest I add some clear Wink of Stella to give it some sparkle.

I was a little off with the stamping of the Spiced Marmalade, but I am okay with that.  I also stamped the little splashes in the same orange colour.

I then move back to the front of the card to add the sentiment strip.

That completes the card!  Here is the finished look.

Here’s a look at a second card I created with the same stamp set.


Thank you so much for stopping by today!  If you would like a better idea of how this card came together, you can head on over to my YouTube channel and watch the video.

https://www.youtube.com/watch?v=__zq7DlZzPs

Stay warm and happy crafting!

~Chala

Orange You Sweet Read More »

Strawberry Thanks Card

Dawn here from the little mennonite blog with a strawberry thanks card for you today.  Like many of you I await Spring and Summer and I love strawberries!  Here we go!

Directions:

Die cut the Paper Smooches Thanks Word die (twice) and other pieces of patterned Lawn Fawn paper as shown above.  Although I used older Lawn Fawn paper you can get the same effect by using this Lawn Fawn 6×6 paper pack.

To die cut the blue scalloped edge under the yellow, use the Lawn Fawn Ocean Wave Boarders die, as shown above.

Adhere patterned paper to an A2 card front.  Using the Lawn Fawn stamp set Sweet Friends stamp images and colour as shown.  Be sure the use Memento Tuxedo Black ink for the stamping so your alcohol ink markers won’t make the ink run.  Below is the directions for the strawberry.

Strawberry Thanks Card Read More »

Thinking of You

Hello!

My name is Susan and I’m thrilled to be joining the Scrap’n Stamp design team. I grew up less than an hours drive from Vancouver where the store is located and now I’m about 4 hours away in a small town with no crafting stores but it still feels like I’m close enough to call it local. By day I work as an Education Assistant at our local high school. When I’m not there you can usually find me in my craft room. I love ALL styles of card making but I tend to gravitate to clean & simple although that wasn’t always the case. My style has changed over the years and I’m sure it will continue to change. I also enjoy scrapbooking and making mini scrapbook albums. If I’m not at work or in my craft room I’m probably out exploring somewhere with my husband and our dog.

You can find me at Creating with Susan

I have a quick and easy card to share with you today using the Lily Stamp set from Concord & 9th. I used a MISTI to keep all my layers lined up but I share a tip with you below that will work if you don’t have a MISTI or other stamp positioning tool.

Start by cutting your card base to 4 1/4 x 11″ and scoring it 5 1/2″.  Next I used two stitched rectangle dies to cut the two panels.  If you don’t have any dies that’s okay, cut one piece to 3 3/4 x 5″ and another piece to 2 3/4 x 4″. In the picture below you’ll see the card base was in there too but I changed my mind and put the panels onto a colored piece which you’ll see in a bit.

I layered up the pieces using a little bit of tape runner to hold them together. I placed the stamp where I wanted it and then picked it up with the lid of the MISTI, inked it up and stamped it. Be sure to press down all over for better coverage around the edges. You can see that the stamping on the bottom layer has a tiny gap between the stamping on the middle layer. To fix this I removed the top two layers, inked up the stamp again without removing it from the lid and then pressed down. The stamp and the paper are in the same spot so it will line up perfectly every time.

If you don’t have a MISTI, that’s okay. Layer up the panels the same way and using a large block, stamp your image being sure to press down well. For the edges that have gaps between layers, use a marker to draw in the lines.  It’s that simple.

I used my MISTI to stamp the center of the flower. It’s not necessary but since I had it out…


Next I added the dots and the sentiment using stamps from the same set. I put the top two layers back into my MISTI, positioned the YOU portion of the sentiment and stamped it with the same ink as the flower center. I removed the top layer and then stamped the sentiment again. (Sorry, I forgot to take pics of that)

As I was adhering the top two panels together I decided I didn’t want a white card base. Instead I wanted the base to be the same color as the center of the flower. I don’t have any coordinating card stock so I dragged the ink pad along the outside edges of the front of the card base. No need to cover the whole thing since we only see a little bit of it.

I added the stamped panels to the card base with craft foam for some dimension.

You could change out the color and the sentiment to make a nice set of cards for someone.

Happy Stampin’

and thanks so much for visiting!

Shopping list:

Click on the picture below to be taken to where you can order the product. I use affiliate links when possible which means I will get a small commission if you purchase through my links. There is no additional cost to you and helps with the running of my blog. I appreciate your support.


Thinking of You Read More »

Free Shipping Anywhere In Canada