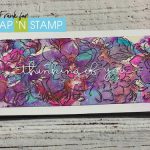
Scratch-N-Stamp
Search

Checkout

Keep up with Sales, New Products and other events at Scrap `n Stamp. Sign up for our newsletter now!

What's New

Hot Deals


Alcohol Inks

Hello Friend

Kia back with you today to share my card for our Random Act of Cardness challenges. Today’s prompt is “Acetate”. Be sure to join the challenge here.

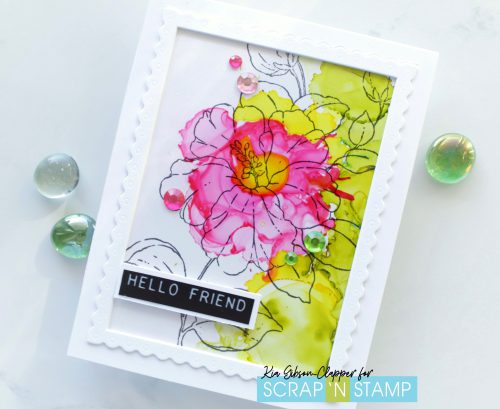
I used acetate to add colour to the stamped image that shows in the background.

The alcohol inks were added to what would be the backside of my piece of acetate, so I had to think in terms of “opposites”. i.e. the inks had to be applied to the left side of the acetate, etc.

I used very little of the blending solution, using only to lighten the colours as I wanted the image to show through the inks. Once I was finished with the inks and had given ample time for the inks to dry I attached the acetate to my stamped card base using glue in the 4 corners.

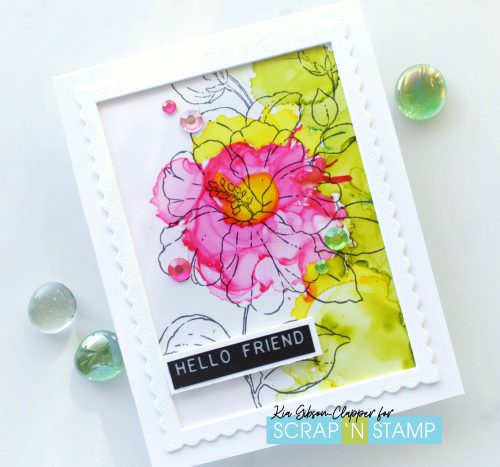
I then die cut the frame 3 times centering it on a piece of A2 Hammermill card, which is 100lb. I then glued the 3 pieces together and glued the frame to the card base. I then die cut 4 pieces of Neenah 120lb card for the inside frame, gluing all together and attaching to the inside of the outer frame.

This made this frame stand higher than the outer frame which I think looks much better than the frames being flush.

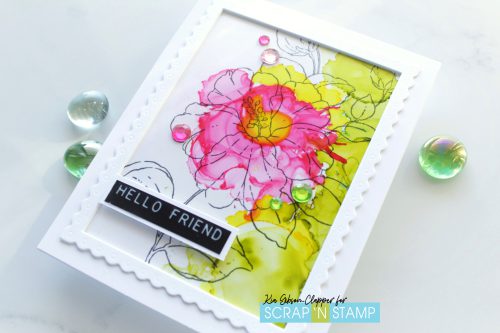
I added the sticker sentiment to a piece of Neenah card and trimmed the piece, then added to my card using foam squares. To finish I added a few rhinestone gems to the card using the same colours.

I am very pleased with how this turned out, and I hope you will give it a try.

Following are Affiliate links for the products I have used for this card, at no extra expense to you.

Hello Friend Read More »

A Whittle Winter Snowman

Happy Friday! One week today… Christmas Eve! Are you ready? I’ve got a card for today’s Random Acts of Cardness prompt, WINTER – and apart from a little drying time, it was quick and easy to make, perfect for this time of year.


This card also gave me a chance to use three new-to-me supplies – the Photoplay falling snow coverplate for my background, my whittle friendly snowman die and distress mica spray for the scarf and hat band. For my winter sky, I tried a technique Jennifer McGuire recently showcased. On Yupo paper, I added a generous amount of blender solution before adding blue alcohol pearl ink, and then smooshed a second sheet of Yupo paper on top. This definitely solves my tendency to add too much ink! I like the wind-blown look the smooshing added, as well.

For my whittle snowman (who is obviously not so “whittle’), I cut his head and body out of white cardstock, his hat and eyes from a scrap of black and his nose from an orange scrap. The hat band and scarf are from a scrap of white that I sprayed with holly branch mica spray – I’m impressed with how evenly it coats the paper and leaves a velvety shimmer. The sentiment is from a Lawn Fawn tag set – I chose it as it fit perfectly on a circle the same size as my snowman’s head. 😀   It’s popped up on a circle of fun foam for a little dimension.


If you make a wintry card, I hope you’ll link it up for a chance to win a $50 gift certificate to the store! Have a great weekend.


A Whittle Winter Snowman Read More »

Slimline Alcohol Ink Gel Prints

Happy Sunday Funday!

Chala here and I am sharing some fun slimline cards using the Alcohol Ink Gel Print technique.

Today I pulled out several products to play around with including the Lavinia Boblong Printing Press, which is perfect for slimline gel prints, the Lavinia Leaf Mask, Mandala stencil, various Alcohol Inks, Pink Fresh Studio Heartfelt Thanks Stamp Set and various sentiment dies, acrylic white paint and brayers.

This technique is easier to watch than explain, so I have created a video of today’s cards.  Go ahead and click HERE to watch and see how I created 6 fun cards!

If you are not into watching the video, I will do my best to explain.  You want to drip some alcohol inks onto the gel print and use the brayer to move the ink along the surface.  Be mindful of what colours you choose as you do not want to create mud.  The important thing to remember is to let the alcohol inks dry between the layers.

Once the ink has dried you can now use a stencil and lay it on top of the gel plate.  I like to use my brayer to help lay the stencil flat on the plate.  Next add a few more drops of alcohol ink and again, you can use your brayer to help blend the colours.  The more ink you use the longer you will have to wait for it to dry before proceeding with the next step.  After the ink has dried again, you can now remove the stencil.  To clean my stencils I use hand sanitizer, you can also use isopropyl alcohol or ink blending solution.

The next step is to use a small amount of white paint (although you can use other colours and eve add in perfect pearls to add shimmer) and brayer a thin layer overtop of the alcohol inks.  Then lay your carstock on top.  I like to use an old gift card to smooth over the back of the cardstock to ensure I am lifting as much of the image as possible.  Then slowly pull the cardstock back to reveal your masterpiece.

I continued this process with several backgrounds and even used Alcohol Ink Pearls to add a beautiful shimmer to the background.

I trimmed the backgrounds down to fit onto a 4″ x 8.5″ slimline card base and adhered with some Art Glitter Glue.

You can finish the backgrounds off by adding stamping or simple die cut sentiments or even fun Tim Holtz Paper dolls. The possibilities are endless!  For my die cut sentiments I heat embossed with either gold or clear embossing powder to help the sentiments stand out.

Here is a look at the finished cards.

I hope you enjoyed todays slimline cards and technique and that it has inspired you to give this technique a try!

Thanks for stopping by and enjoy the rest of your day!

~Chala

Slimline Alcohol Ink Gel Prints Read More »

Free Shipping Anywhere In Canada